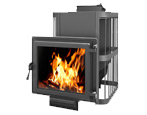
Stove for a bath from a pipe: the subtleties of manufacturing
Among lovers of outdoor recreation or fans of a healthy lifestyle, there is hardly anyone who does not like to take a steam bath. Today, many summer residents strive to acquire their own bathhouse. Recently, the independent creation of a sauna stove from a cylinder or pipe has been gaining momentum. Building a solid brick stove requires certain skills and abilities, among other things, such a stove takes up more space, and you can buy it at a hardware store, but it costs a certain amount of money. While a metal furnace is a more economical option and it is much easier to make it yourself, not to mention the fact that you can entrust this work to a welder.
The stove, made independently, taking into account safety precautions, does not pose a threat to human life and health, since its sealed body does not emit carbon monoxide during operation.
Features: pros and cons
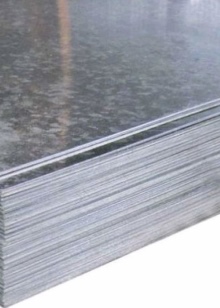
The starting material for a metal bath stove can be not only a pipe or a cylinder, it also uses sheet steel.
Sheets are usually made of a body in the form of a rectangular parallelepiped, but this shape has its own characteristics:
- sheets must first be cut, cut and joined together with a welding machine;
- as a result, such an oven will cost more;
- a cylindrical firebox conducts heat better;
- based on the trajectory of the flue gases, a circular cross section is more preferable;
- flat walls are more susceptible to burnout than pipes made of exactly the same material.
What are the advantages of metal furnaces:
- the cylinder is only slightly inferior to the spherical shape in terms of thermal conductivity;
- the thickness of the walls of water or gas pipes makes it possible to achieve high rates of thermal conductivity;
- the oven can be moved, it is durable;
- the cost of manufacturing such a furnace is very low, since pipe cuttings are often sold at low prices;
- detailed manufacturing instructions indicating pipe sizes and diameters will reduce the labor intensity of the process and save time;
- many factory products of this kind are made from exactly the same pipes, in the image and likeness of which it is easy to recreate the product in a handicraft way;
- in addition, such devices are heat-resistant, corrosion-resistant, durable and easily tolerate temperature extremes.
Of course, such furnaces have their drawbacks - processing a thick metal pipe requires both the application of physical force and tools for a certain type of work.
Types and characteristics
By location in the space, furnaces made of pipes are divided into the following types:
- vertical;
- horizontal.
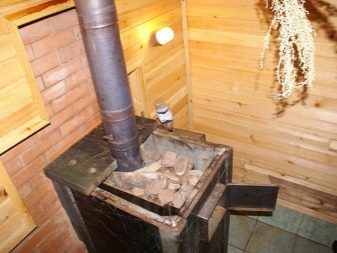
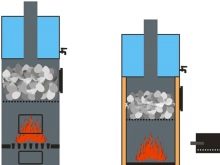
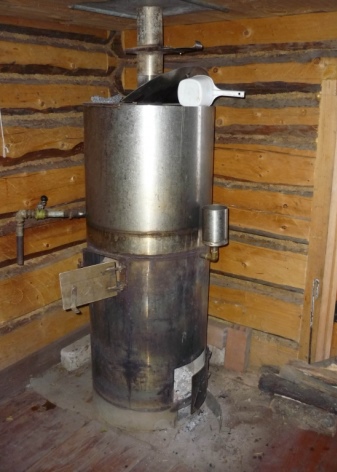
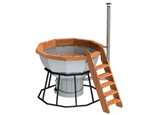
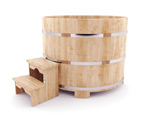
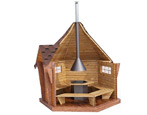
The vertical stove looks like a potbelly stove, but it has differences - an additional container for stones and a container for water.
Vertical homemade oven takes up less space, which is of great importance for the small dimensions of the steam room, however, for the same reason, it is inferior to a horizontal furnace in terms of burning time and intensity of heat transfer. In the process of fuel combustion, heat goes up, the side walls do not have time to warm up very much. In a horizontal furnace, the process goes differently - since the heated air on the way to the chimney simultaneously heats the vault of the body. Based on this, it is clear that the efficiency of a horizontal furnace will be higher than that of a vertical one.The main disadvantage of this design is considered to be the location of the blower and firebox doors directly in the steam room.
Fuel in a vertical pipe will burn faster if the ash pan door is not closed, thereby stopping the access of oxygen to the fire. In such a pipe, the fire interacts at once with the entire volume of firewood, while in a horizontal pipe the fuel is consumed gradually, which is more logical for the heating of a bath. Also, in the horizontal form of the stove, the coverage of heating stones is greater and the convection of hot air is higher, in addition, the doors of the blower and furnace, which are located at the very end of the pipe, make it possible to take them out of the steam room. Both the first and the second type can be made by hand.
Preparation
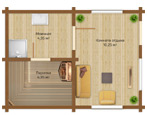
Of course, a hand-made stove will not have an exquisite appearance or originality, but it performs its function no worse than a factory one and perfectly heats a steam room with an area of up to 20 m2.
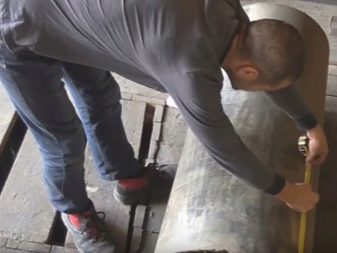
First of all, the pipe must provide its main functions., namely, evenly absorb and generate heat and at the same time have thick enough walls so that the stove is not afraid of high temperatures and lasts a long time. Speaking about the basic characteristics of pipes, it is necessary to take into account not only the cross-sectional diameter and wall thickness, but also the steel grade. It is clear that when using scraps, such information is not always available.

Speaking about a standard bath, the following sizes are considered to be optimal:
- section diameter - 0.5-0.55 m;
- wall thickness - 8-12 mm.

It should be noted that the larger the diameter, the higher the firewood consumption will be.
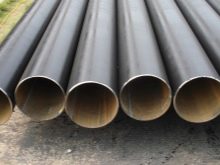
Pay close attention to the quality of the material: for the manufacture of a furnace in a bath, only steel pipes are suitable, and steel is not needed high-carbon. It is not suitable for profile work, because its seams can easily lose shape or even come apart. You can identify high-carbon steel by the sparks that appear when the metal and the emery ring interact - white sparks will scatter in all directions. Low-carbon steel, in turn, gives sparks of a yellowish tint, which have a rectilinear trajectory, and stainless steel parts will not work. The best option is steel with a carbon content of about 2%. Also, when choosing a metal, it is better to avoid alloy steel - it is also easy to calculate using an emery machine: sparks from interaction with the metal will be orange, red or bright white.
In no case should cast iron be used, since it deteriorates when it comes into contact with water.
Other advantages of steel pipes:
- resistance to mechanical damage, high heat transfer and low coefficient of expansion when heated;
- preservation of heat even after complete combustion of firewood.
The pipes have their own characteristics according to the specification. Let's consider this information in more detail.
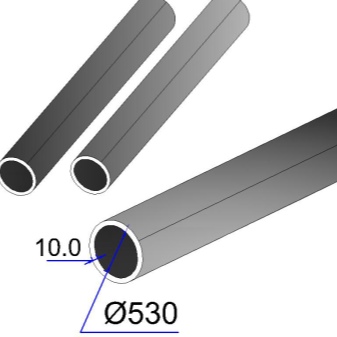
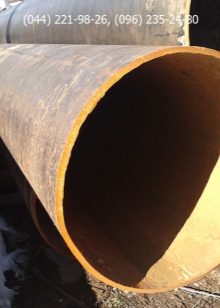
Round pipes are classified according to the size of their inner diameter. The second number indicates the thickness of the walls, the subsequent ones provide information about its type and other characteristics. It is customary to take a millimeter as a unit of measurement. If the pipes are profiled, the first two characters indicate the maximum cross-sectional size, the third number — the wall thickness. The indications "530 by 10" mean that the pipe diameter along the inner wall is 530 mm, the thickness is 10 mm, the outer diameter is 550 mm with an error of +/- 5 mm, taking into account the lateral tolerance, which is 10%. The predominantly flow rate tolerance is applied to ellipticity.
The thickness of the pipe wall will also vary.
Water pipes are divided into the following subspecies:
- lightweight;
- ordinary;
- fortified.
One way or another, the most popular pipes have a cross-sectional diameter of 530 mm, their thickness is 6-12 mm, and the nominal value is 6, 8 or 10 mm.
This information is needed in order to immediately correctly prepare materials for the future stove.The best option for a pipe diameter is 0.5 m, which implies both good heat capacity and comfortable work. Pipes with a nominal value of 500 mm and more have a pitch of 10 mm and are usually classified as large diameter pipes. It is much easier to immediately pick up pipes that match each other in cross-sectional diameter and wall thickness in order to make it easier for yourself to draw up a concentric structure and reduce the gaps between them.
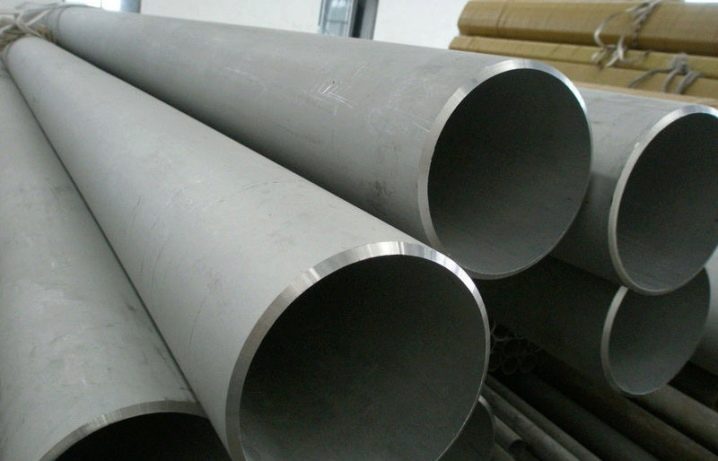
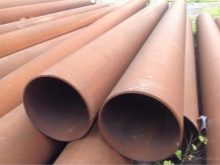
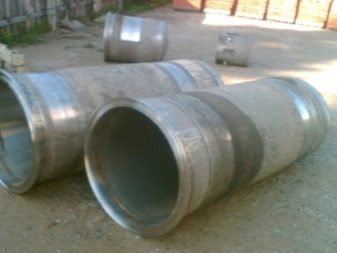
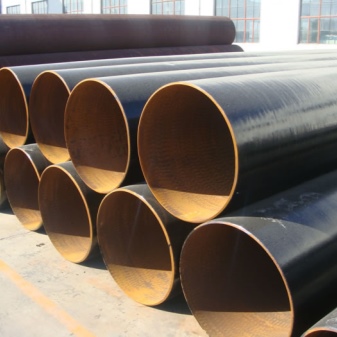
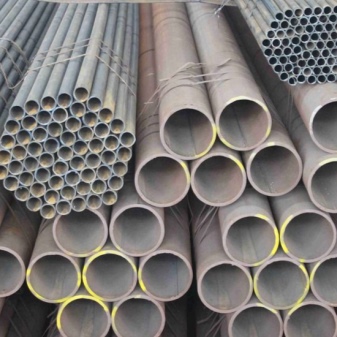
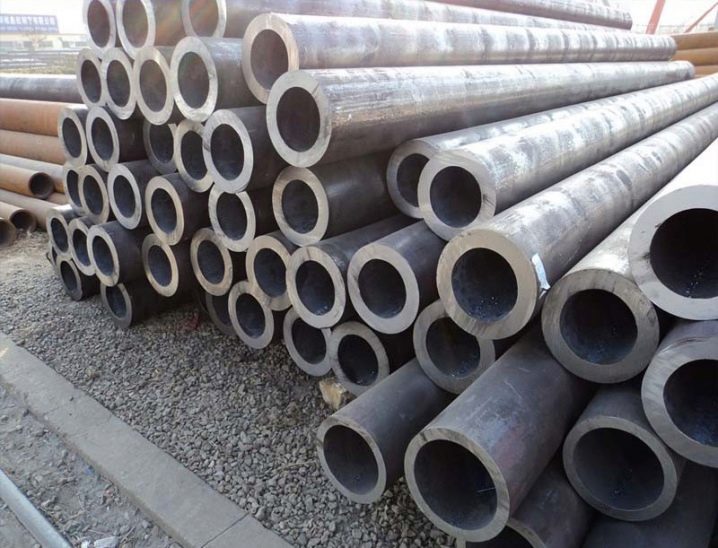
Pipes are one of the most frequently requested products., so it doesn't make any sense to regulate them too scrupulously. Pipes ranging from 250 to 400 mm have a wide selection range. If possible, for the manufacture of a sauna stove, give preference to scraps of spiral pipes (their designation is GOST 20295 85). Comparing them with longitudinal welded pipes (GOST 10704-91), they have lower ellipticity values, are more accurate and sell them at the same price as scrap metal. Solid cast pipes without seams are an even better option, but are only suitable for making small parts, since their diameter is no more than 250 mm.
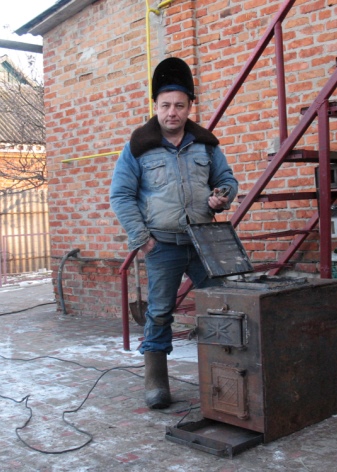
When preparing for work, equip yourself a workplace - this can be either a garage or a home workshop.

Materials (edit)
To carry out the work, the following materials are required:
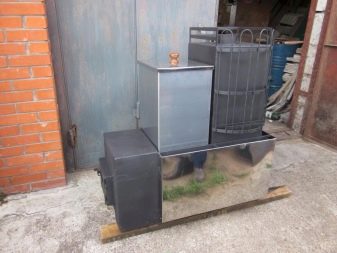
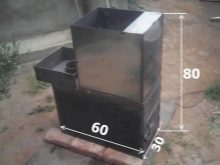
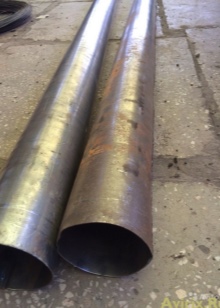
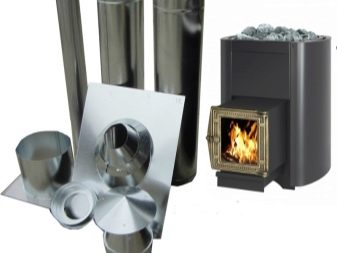
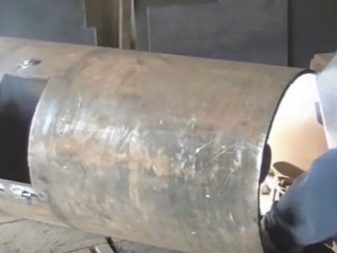
- the pipe itself, which will be needed to create a firebox and a water tank, its diameter should be from 500 to 600 mm (530 mm is considered optimal), wall thickness - from 8 to 16 mm, length - from 1.2 to 1.5 m;
- a pipe that will become a receptacle for stones afterwards - its diameter is about 400 mm;
- chimney - diameter 120-150 mm, thickness 2-4 mm;
- sheets of metal in the amount of several pieces, dimensions about 600 by 800 mm, thickness about 8-12 mm;
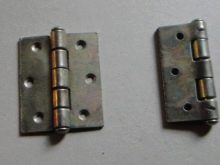
- hinged metal hinges;
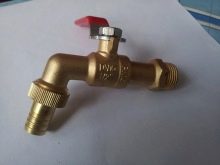
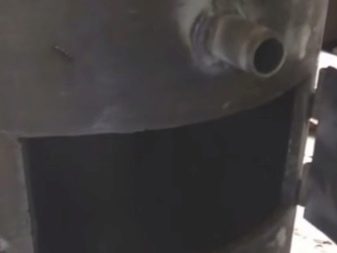
- a small part of a threaded water pipe, diameter 1 / 2-3 / 4 inches, length 50-80 mm and a water tap with a thread inside the same diameter;
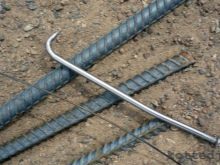
- segments of rods from reinforcement - length about 500 mm, diameter from 12 to 18 mm, ready-made cast iron grates for solid fuels are suitable;
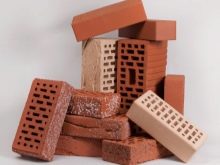
- cement composition;
- bricks;
- sand.
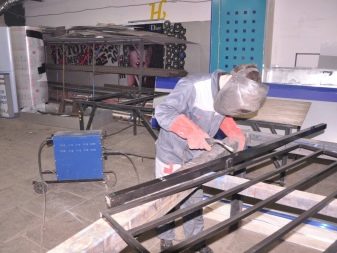
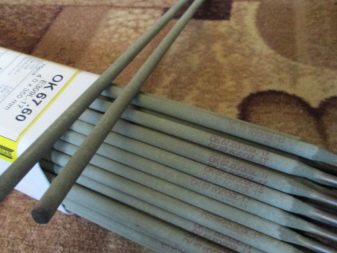
Please note that it is advisable to make the fuel compartment, chimney and boiler not from ferrous metal, but from stainless steel. Although this is associated with some difficulties, since their welding will require electrodes from the same stainless steel or a special wire for welding.
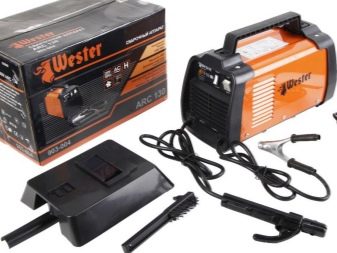
Required tools:
- device for welding elements;
- any strong metal carver;
- electrodes;
- mortise crane;
- rolled metal for legs;
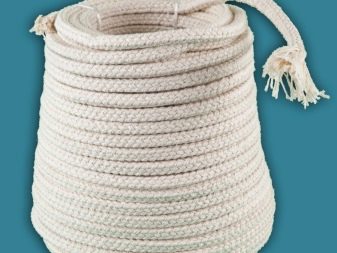
- asbestos cord;
- door handles.
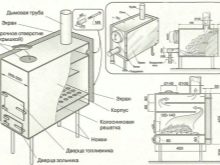
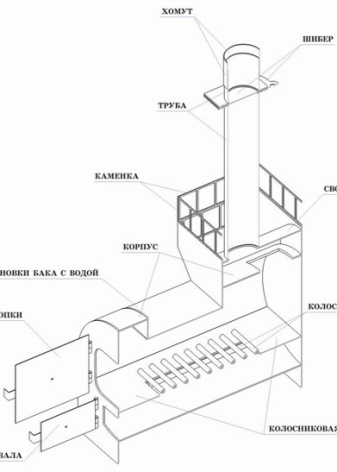
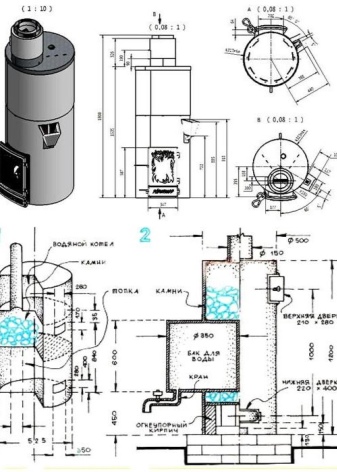
Schemes and drawings
Before starting work, you need to decide which type of oven - vertical or horizontal, will be preferred. Then create a working drawing taking into account all parameters - device dimensions, configuration of its components, dimensions.
If this is the first experience of self-manufacturing a stove, it is more logical to refer to ready-made drawings and diagrams for the manufacture of a typical model of the device, this will help to avoid errors and further incorrect operation of the unit. Moreover, an improperly assembled stove can threaten human life and health!
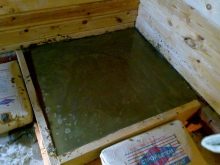
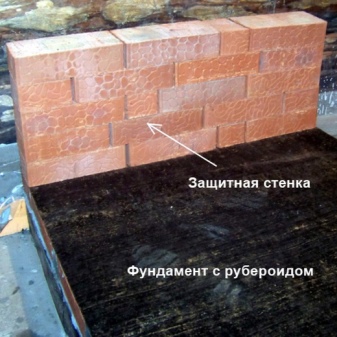
It is necessary to prepare the foundation on which the oven will be installed:
- In the area where the installation of the device is planned, a pit with dimensions of 50 x 70 x 70 cm is dug.
- The bottom of the pit is covered with fine gravel. Please note that the layer thickness should be at least 30 cm. Next, you need to tamp this layer as tightly as possible.
- Next, you need to prepare a cement mortar based on the following ratio of components: take 4-5 parts of sand for 1 part of cement, dilute with water until a creamy homogeneous mixture is obtained. Fill in a layer of rubble and allow to harden - this process usually takes 24 hours.
- In order to create waterproofing, roofing material is laid on the hardened cement layer in several layers.
- A layer of roofing material is finally poured with a concrete composition: where 1 part of the cement mixture accounts for 2 parts of sand, 4-5 parts of gravel and water. After that, you need to smooth the resulting layer.
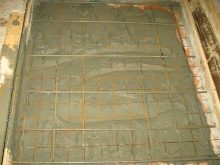
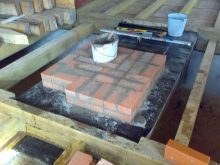
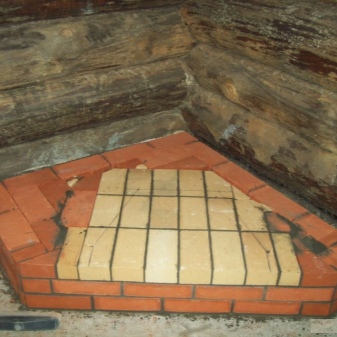
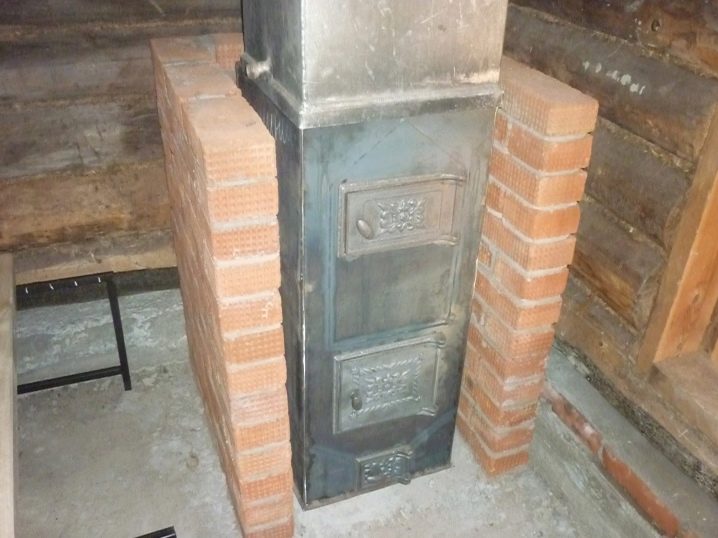
After the foundation dries up, a clay platform is equipped, on which bricks are subsequently laid in the same dimensions - 0.7 m by 0.7 m.As a result, the brick platform should be about 15-20 cm high.In order to protect the walls from overheating in place, designed for the location of the furnace, a protective screen of bricks is laid out, which are laid with an edge and fastened with a clay composition. The best length for this structure is 120 cm, while the stove is located at least 20 cm from it.
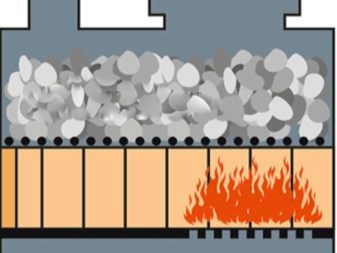
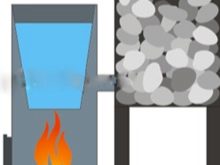
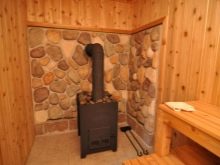
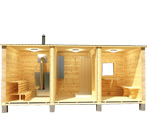
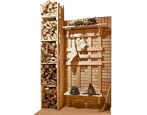
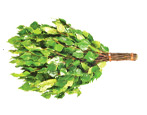
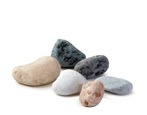
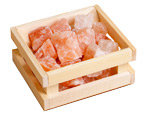
It doesn't matter what kind of stove the future bath will be equipped with - horizontal or vertical - in any case, it will be equipped with a heater. In this article, we will not touch on the topic of choosing stones (most recommend using river pebbles, balsat, quartzite, talcum chloride or gabbrodiabase), all the same, the heat capacity depends on the heater. You cannot simply fill up the stove with stones, since in this case the bath will not warm up and all the heat will settle into the pipe in the form of soot.
First you need to decide whether the heater will be flowing or open. In the first case, the stones will be washed by flue gases, setting the mode in this case is quite simple - it is enough to select and place various stones over several stages until the desired effect is achieved. There are nuances - in this case, you can steam only when using the highest quality wood fuel and add steam only when using water. In the case of an open stove, these requirements are not, but its creation is more difficult to implement.
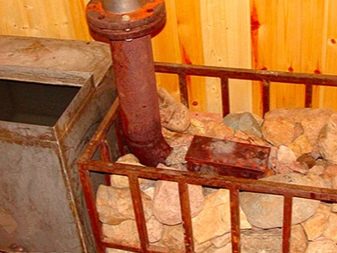
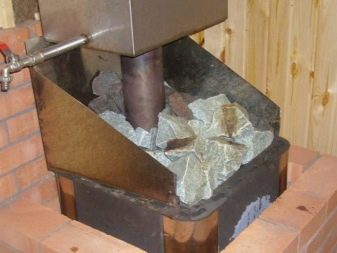
The simplest type of open stove is a tray mounted on the firebox. Such a device is only suitable for a horizontal view of the stove. But there are difficulties - preliminary calculations, as well as the study of prototypes, since the contact area between the stones and the walls of the furnace must be exactly observed. A different type of heater requires less accuracy, in which heating occurs by means of flue gases, but such a device is more difficult to make.
Without proper experience, it is best to give preference to a vertical oven - in it, the heater and the water vat are heated sequentially. For more experienced people, it is better to make a parallel oven, the water heats up faster in this case. The most difficult to manufacture is the bell-type stove, in which the stove is also open.
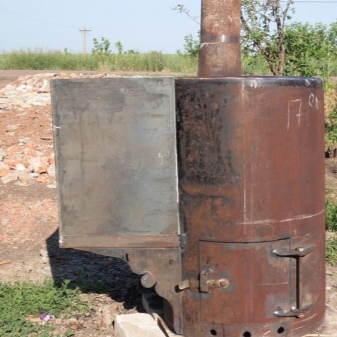
Manufacturing and installation
We must not forget that interaction with the stove directly correlates with the risks of both possible burns and fire hazard, therefore, in order to avoid possible consequences, it is necessary to apply certain rules for installing the stove and take into account the peculiarities of its operation. It will not necessarily be round in shape - there are other options. Different species have approximately the same properties, it is not so difficult to make them. Regardless of the fact that the top-mounted oven itself is lightweight, the heat exchanger must be installed at an elevation of at least 20 cm in relation to the floor. The foundation can be either reinforced concrete or brick, or it can be assembled from concrete blocks.

A prerequisite is also the presence of a metal sheet with dimensions of 0.5 by 0.7 m in front of the firebox and blower door. The doors must certainly swing open inside the dressing room or steam room.
The smallest distance between the chimney, as well as other heated metal parts of the stove, chimney and wood paneling of the walls and ceiling is 1 meter.
It is best to fill the tank with water before kindling the bath - moisture getting into a hot dry metal container is fraught with burns from a steam shock.
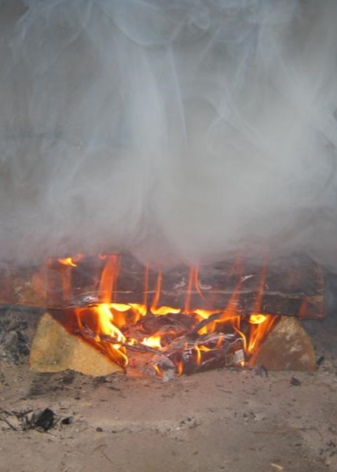
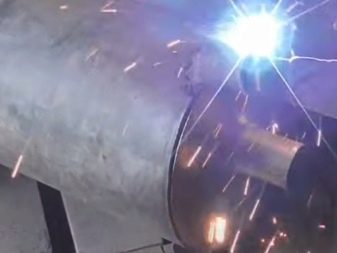
Inspect all details carefully.Before weld them together, when the installation is finished, do not forget to check its characteristics with a trial firing: efficiency, coil operation. Go to the steam room, stay inside - appreciate the heating of the air around you.

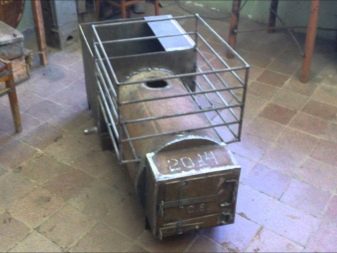
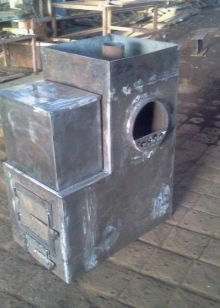
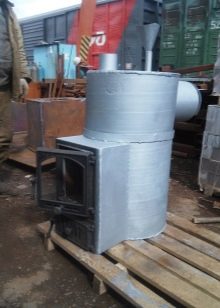
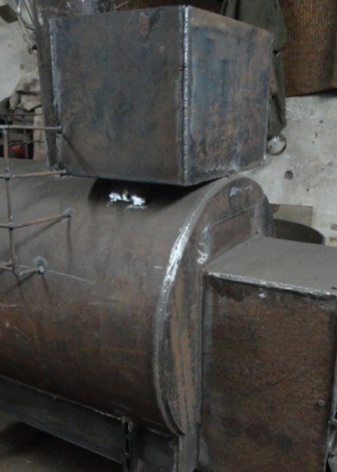
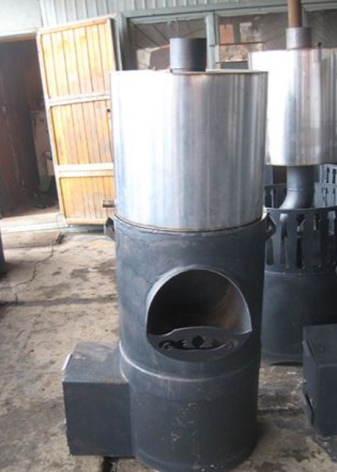
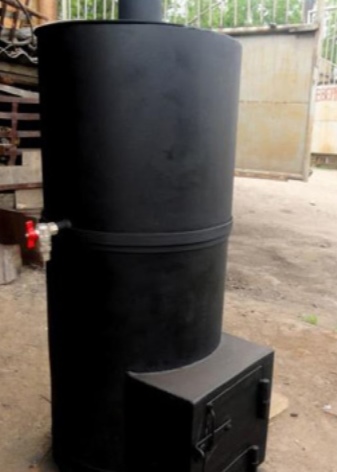
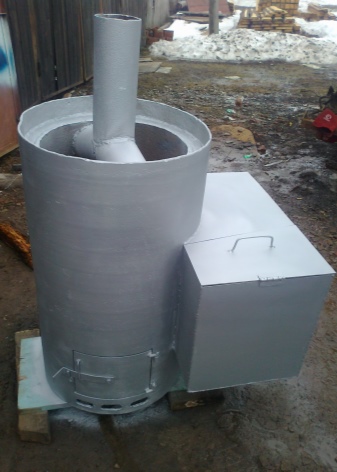
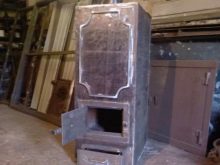
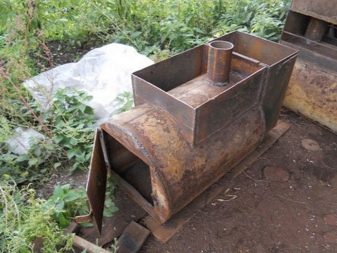
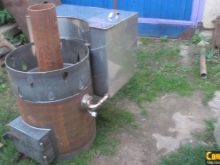
Horizontal oven
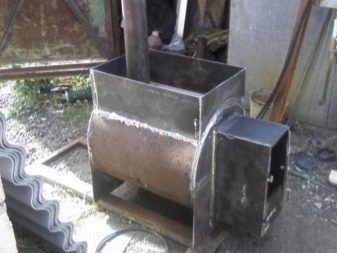
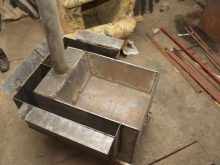
When making a horizontal oven with your own hands, the procedure will be as follows:
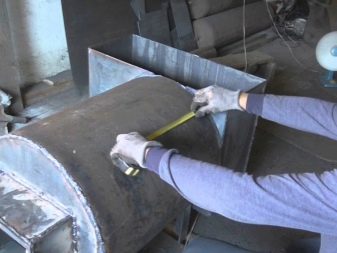
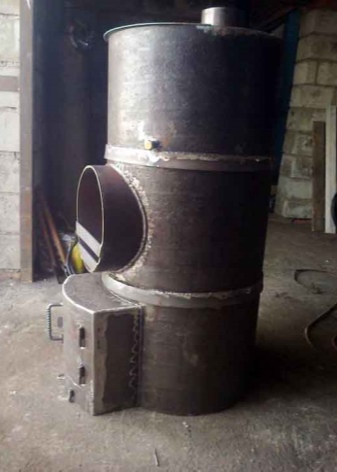
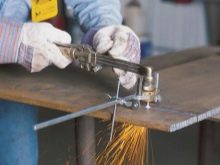
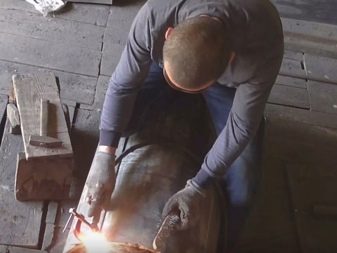
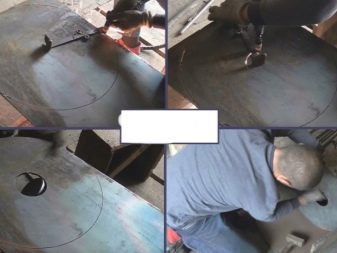
- Cutting the firebox with a grinder is part of a pipe of the required format (in strict accordance with the diagram). As a rule, this pipe will be from 0.7 to 0.9 m in length.
- Manufacturing of grate bars from metal frames, as well as reinforcement rods parallel to the frame, the distance between which should be about 50 cm.
- The grates are reinforced inside the firebox. In the case of using ready-made metal structures, they are folded onto metal corners, previously welded inside.
- A hole is cut out from above, which will further serve as a chimney, its size is from 15 to 20 cm.It is best to indent from the back wall by 15 cm so that the hot air also takes part in heat exchange, and not just is removed as soon as possible.
Some insist on cutting a hole directly in the very rear wall of the pipe, but it is not recommended to do this, since due to such manipulations, the efficiency of the furnace subsequently decreases, and fuel consumption increases.
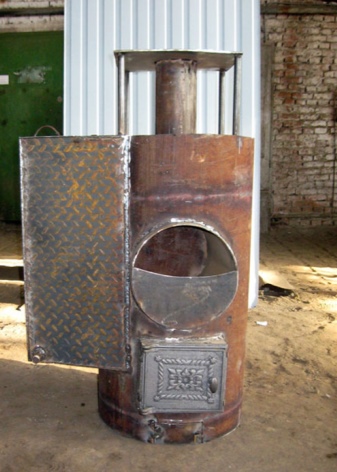
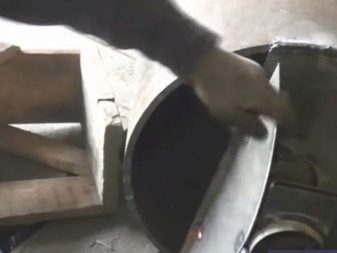
The next step is to cut a sheet of metal with a size corresponding to the back wall and weld to it. If the diagram indicates the presence of a stove, then the sheet belonging to the back wall of the stove must be larger so that it creates a container for stones with its upper part. A groove is cut out in the front wall, which will subsequently become an ash pan and a firebox.
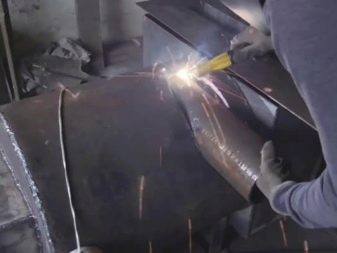
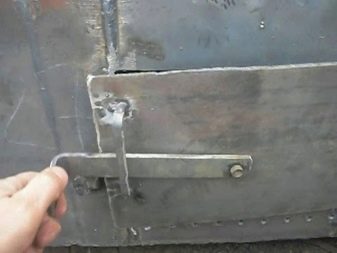
The facade is attached by welding and the doors are finally hung - they are usually either made independently or purchased from a specialized store.
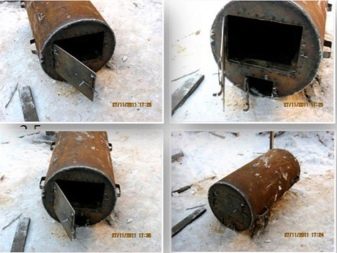

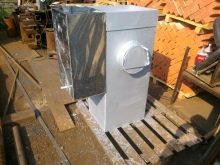
That's all - the sauna stove is ready. Before use, the metal must be treated against corrosion and possible deposits, after all the manipulations, the capabilities of the unit must be tested by conducting the first control furnace.
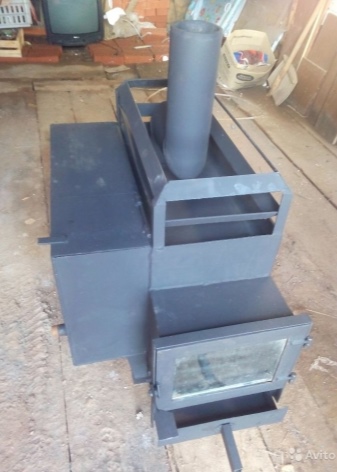
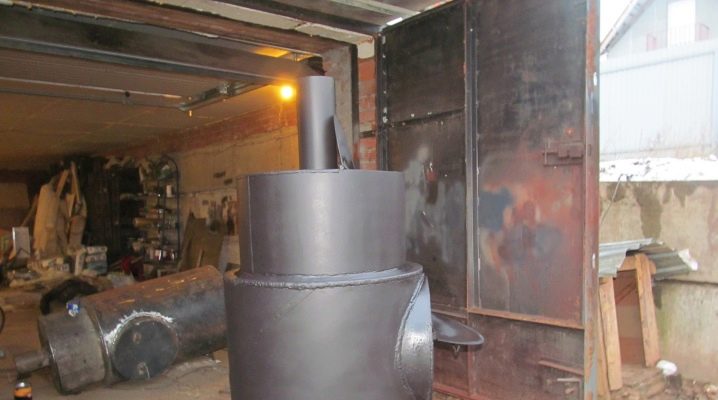
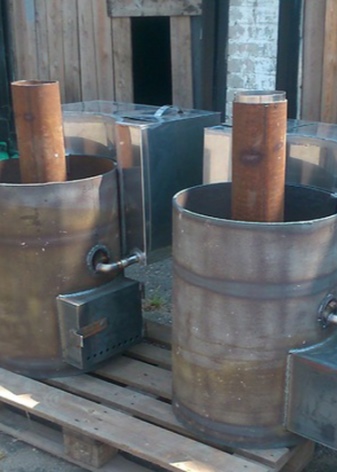
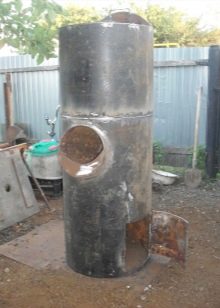
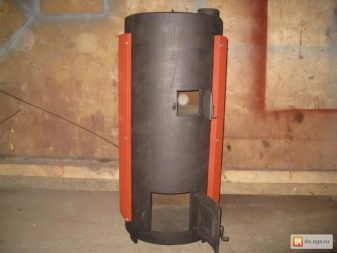
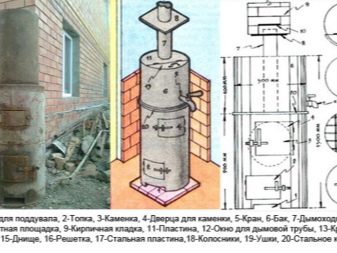
Vertical
Designing a vertical oven is absolutely identical to creating a horizontal oven, except for a few points. A distinctive feature is the direct position of the pipe in space, when both ends form not the back and front surfaces, but the upper and lower, respectively. In such furnaces, the section for the arrangement of stones is located directly in the furnace chamber, as a result, the manufacture of such a unit will be somewhat more complicated in execution, but the heated air will also be more saturated.
Manufacturing stages.
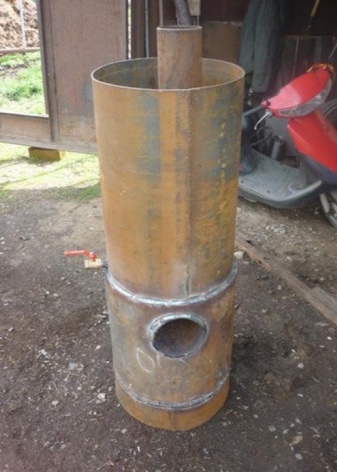
- First, it is necessary to cut a window in the pipe, which will serve as a blower groove for the supply of oxygen to the burning fuel, and will also collect the fuel decay product - ash. Move 40 mm away from the bottom edge of the pipe and cut a parallelepiped groove with a grinder or a hacksaw, which will subsequently be approximately 80 by 240 mm in size.
- In the same axis, you need to cut out another groove for storing fuel in it - move away from the upper edge of the blowing hole from 180 to 200 mm. The cutting procedure must be done very carefully and as carefully as possible, since these cut off segments will subsequently serve as the door of the firebox and blower.
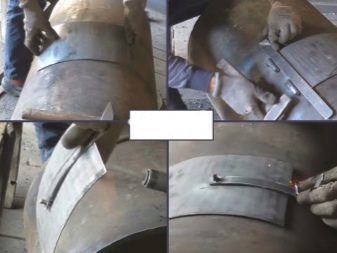
- Above the level of the firebox there is a tray for storing stones. Measure from the front edge of the firebox from 120 to 180 mm, cut a groove in the shape of a circle with a diameter of about 350 mm. Note that this groove must be offset 90 degrees in relation to the circumference of the pipe.
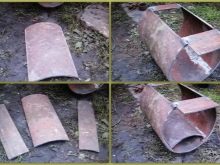
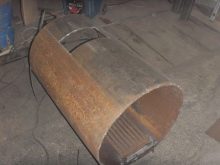
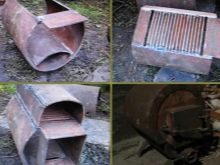
- The next pipe is cut to a length equivalent to the outside diameter of the larger pipe. Next, you need to cut off the apical part by three quarters to give the material the shape of a scoop.
- A blank wall is welded to the rear part with a groove, to the front part, in turn, a plug with a movable door in the shape of a semicircle is attached, which will subsequently be used as a container for stones and add liquid to stones during the steam bath.
- This cut is inserted into the base pipe in such a way that its outer indent is from 20 to 30 mm with free space around it. Next, the hole is carefully scalded around the perimeter. As required, it is fixed from the inside with the help of reinforcing rods.
- A circular disc is cut from a sheet of metal, which is equal in diameter to the main pipe in terms of the inner diameter. A rectangle is cut out in the center of the disc - in size it should easily accommodate the cast iron grates. If they are not there, reinforcement rods are welded at the bottom, which form a grate of grates.
- To the base of the fuel tank, use a welding machine to attach the base pipe 20 cm above the blower.
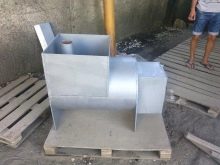
- Cut out the base for the blower from a sheet of steel. From below, the oven is placed on small legs.
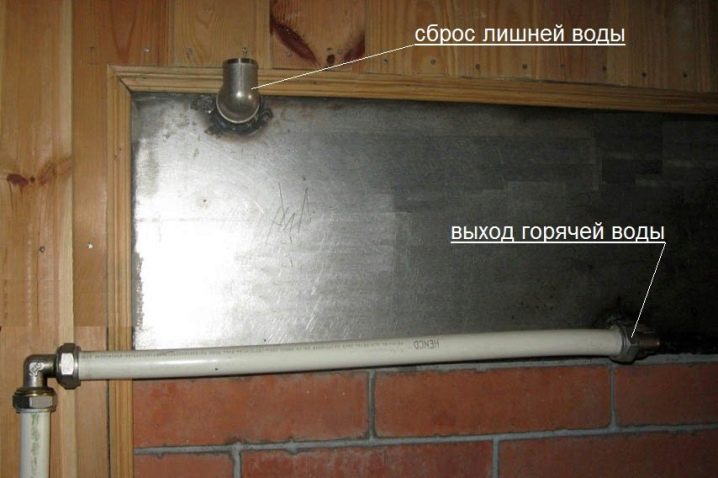
- The next step is to make a vat for water, while the chimney should go right through it. The main pipe is used as the side walls, the bottom is at the same time the upper arch of the firebox.
- The bottom is cut from a sheet of steel in accordance with the diameter of the inner part of the pipe, then a hole in the form of a circle with a diameter of 30 to 50 mm is cut out on it, which will later become a chimney.
- A part of the chimney is inserted into the same hole so that it extends beyond the edges by 100-120 mm.
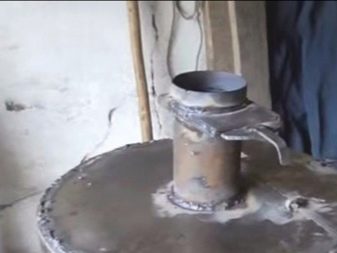
- The bottom of the water tank is inserted into the chimney and welded just above the stone container. The smoke pipe should be on the side of the site in the form of a scoop.
- A vat for water is brewed around the entire perimeter, a hole is made from below, into which a tap is inserted.
- Hinges are welded to install doors to the body. Check for leaks by filling the tank with water. Next, you need to carry out the first test furnace.
Helpful hints
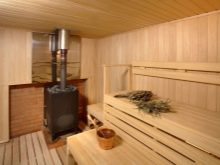
To make the stove not only functional, but also pleasing to the eye, you can paint it with refractory paint - heat-resistant paint will not only give it the desired color, but also help protect the metal from corrosion.
You can also overlay it with a brick, which not only has a decorative function, but also saves from excessive infrared radiation, which is carried by the heated metal. This type of rays does not soar, but burns.
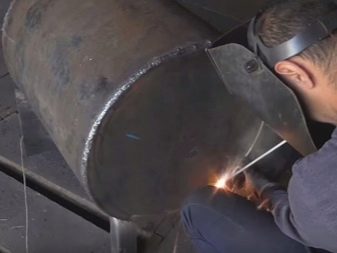
How to weld a stove from a pipe with your own hands, see the video below.


The comment was sent successfully.