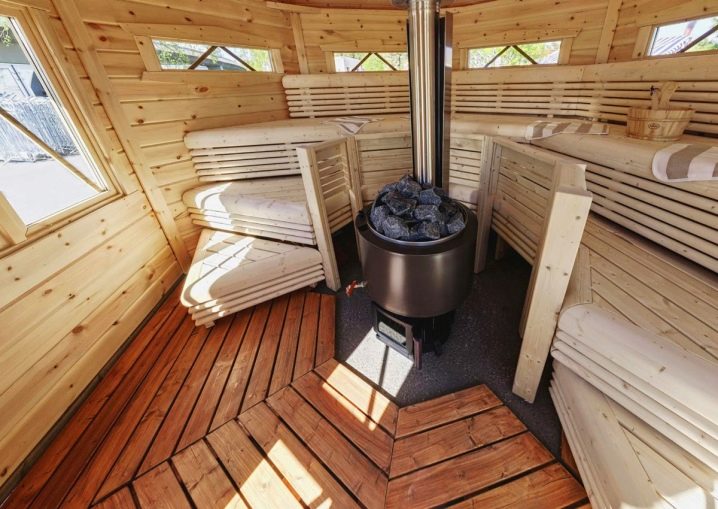
Chimney for a bath: device and installation
The correct design of the smoke exhaust pipe will improve the quality of the bath. Such a device will remove smoke in a timely manner, and will not allow the oven to cool down too quickly. The correct chimney can be constructed with your own hands. Consider the features of the device and its correct installation.
Peculiarities
Work on the arrangement of the chimney cannot be started without knowledge of the design features. For example, each sauna stove manufacturer recommends its own chimney diameter and height. Technical indicators require maximum compliance with certain requirements. The performance of the device will not be better if the thrust is higher than the required standards.
With a strong draft, the hot gases will not have time to heat the stove, they will escape into the chimney. With insufficient draft, little oxygen will be present in the furnace. The room will be smoky, which will lead to an uncomfortable person in the bath and the possibility of carbon monoxide poisoning.

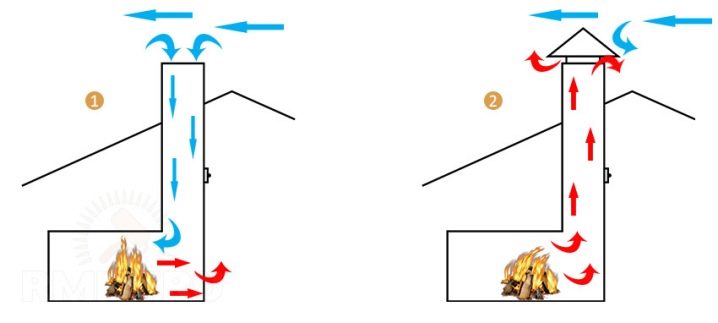
Draft is an important indicator for a chimney, which reflects the movement of smoke inside the structure.
The air in the chimney moves from bottom to top. To check the correct direction of movement, a candle or a lit sheet of paper is used, which must be brought to the furnace. The fire must be drawn inward. With an incorrect chimney arrangement, reverse draft often occurs. The main consequence of this phenomenon is the unpleasant smell of smoke and burning inside the premises. Smoke and fumes are bad for the health of people, wall coverings, ceilings and furniture in the room.
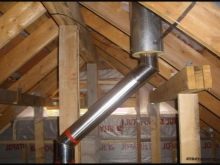
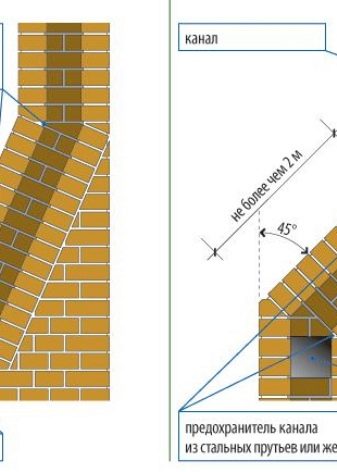
The ideal chimney should be strictly horizontal. However, the construction of such a structure is not always possible. If the chimney requires a change in direction, so-called elbows are used. Modern manufacturers offer a huge selection of devices that differ in the ratio of angles and turns. Elbows in the chimney make it difficult to clean. Therefore, it is recommended to use this option if possible to equip a horizontal structure.
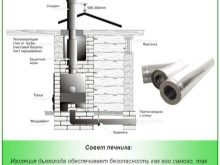
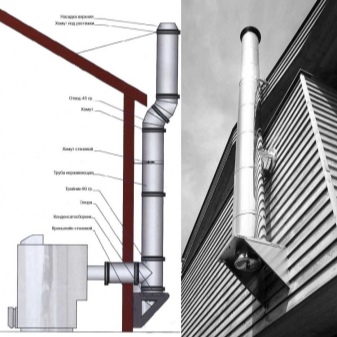
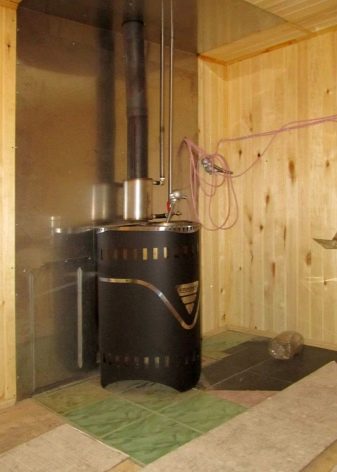
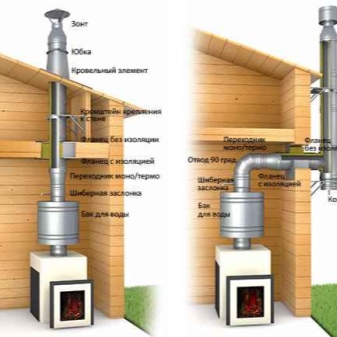
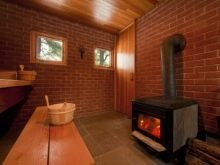
Another feature of the sauna chimney is the ability to install a structure inside and outside the building. Each option has its own merits and demerits. It is believed that the external chimney is less fire hazardous in comparison with the internal structure. It is easier to install, fix and carry out subsequent cleaning. The main disadvantage of an external chimney is large heat losses.
If the chimney is internal, the concept of heat loss is automatically excluded. However, the installation of this structure is more complicated. In addition, this design is not entirely fireproof. The external and internal chimney will have fewer drawbacks if modern materials are used in the work. The characteristics of the raw materials and elements used must correspond to the characteristics of the bath. It is necessary to take into account the temperature in the room, sanitary standards, the structure of the bath itself (preferably the presence of wooden materials).
Views
Chimney design options are selected depending on the material used for the construction of the bath. All elements of the device can be purchased ready-made or built independently. Until recently, the main material of the chimney was brick. It is distinguished by ideal characteristics, durability, fire safety.
For the construction of a brick pipe, special knowledge and skills are required. This option is not suitable for every bath.Without a lack of practical experience in laying a brick pipe, it is almost impossible to build a correct chimney. The structure of the brick has characteristic rough areas, which cause soot to accumulate in the chimney, which leads to rapid clogging of the structure. In addition, soot deposits can lead to sparks when firing up the stove, which is unsafe.
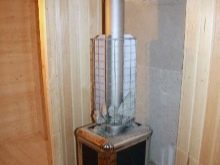
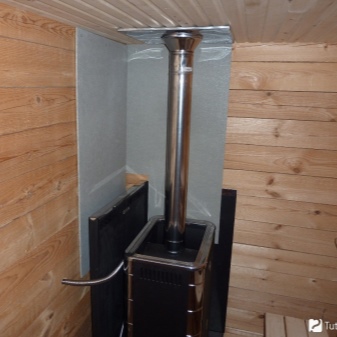
Modern craftsmen more often choose a stainless steel chimney for a sauna stove. The main advantage of such a device is quick installation. In addition, metal chimneys are devoid of problems that may arise in a brick stove structure. Chimneys made of stainless steel are often sandwich structures. The straight iron chimney of the bath is easy to install with your own hands.
The inner part of the steel pipe has a smooth surface. The lack of edges and roughness contributes to better fume extraction from the stove. But with temperature changes, condensation appears on the steel pipe. When the pipe is closed with thermal insulation, this phenomenon does not occur. It is worth remembering this effect when organizing the arrangement of the structure with your own hands.
Another type of chimney for sauna stoves is ceramic. This design is distinguished by its resistance to fire and reliability. Modern ceramic pipes are suitable for solid fuel boilers, as well as devices operating on liquid fuels.
The main differences between these structures from other types:
- universal system (the ability to select different diameters);
- ease of chimney processing, even with a side passage;
- water and vapor tightness (availability for stoves with a heater);
- mechanical strength.
Varieties of ceramic, metal models and brick products imply the mandatory presence in the structures of a base, a tank for accumulating condensate, a tee for cleaning and inspection.
The bases for any chimneys must be perfectly flat and strictly horizontal.
Construction options
Arrangement options require calculations that take into account the amount of air supplied to ensure fuel combustion. There are complex and simplified calculation methods.
For the first calculation, you need the optimal characteristic features of the bath chimney:
- temperature of gases at the outlet of the pipe +120;
- the minimum movement speed is about 2m / s;
- the recommended length is 5 meters;
- combustible fuel with one filling in the furnace - 10 kg / h.
To calculate the diameter of the chimney, there is a formula: D = √ (2 & 4xVr / 3.14x2)
Here D is the pipe diameter and Vr is the amount of air.
The geometry of the section may be involved in calculating the height of the chimney. A graph is drawn up for this calculation. The graphical calculation involves the area of the furnace and the area of the pipe. Divide the first value by the second and determine the percentage.
With a section equal to 10%, the minimum chimney height will be:
- 7 m - with a round pipe;
- 9 m - with a square pipe;
- 11 m - with a rectangular pipe.
All values are valid for the construction of a direct chimney. In most cases, chimneys require pivoting structures that reduce the pulling force. To prevent this, when calculating a chimney with curvatures, the resulting diameter can be slightly increased. If the stove for the bath is purchased, the stage with calculating the diameter of the chimney can be skipped altogether. All the necessary parameters for chimneys are usually indicated by the manufacturer in the instructions for a particular model.
The internal values of the pipe are calculated taking into account the power of the stove. The standard bath pipe is 150-200 mm. It is worth considering that with an increased size of the structure, the heat in the furnace will not linger. With a small cross-section, there will be no required thrust. When constructing a prefabricated structure, it should be borne in mind that the diameter of the pipe sections should not be less than that of the outlet part of the stove.
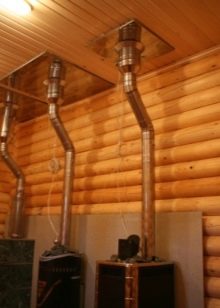
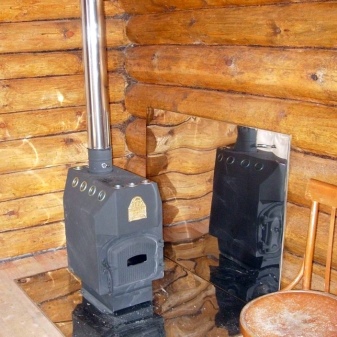
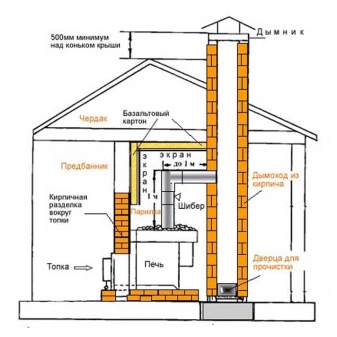
The exact value of the pipe height is interrelated with the location of the structure on the roof. If the pipe is in the middle of the slope, the structure must be raised above the ridge to a half-meter height. This parameter is closely related to the location of the oven inside. If there is more than one stove in the bath, each of them must be equipped with its own chimney system. Otherwise, it will not be possible to achieve normal tractive force.
Experts recommend equipping the dissection system in extreme cases. For her, there are special parameters that require maximum compliance.
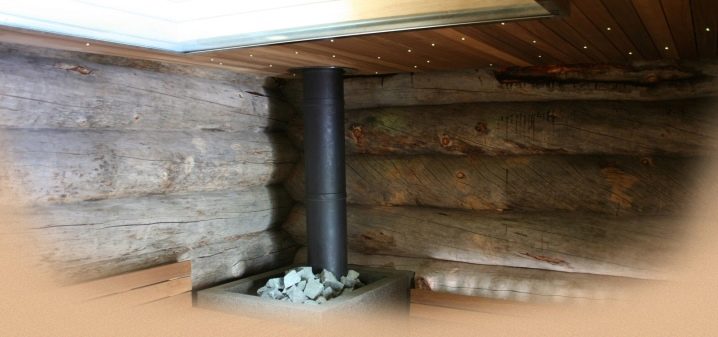
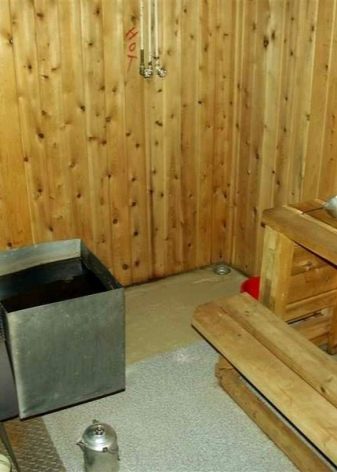
To maintain heat in the steam room, the chimney must be placed closer to the inner wall. This is where traction will be most effective. In the absence of such an opportunity, the walls must be solid and solid. With thin walls of the bath, you can never wait for heat inside.
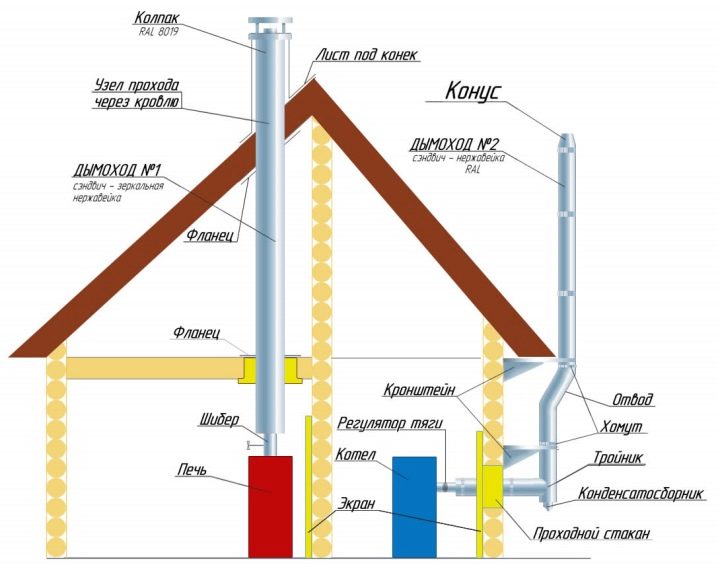
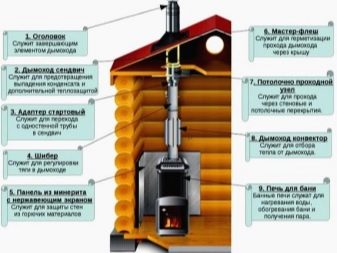
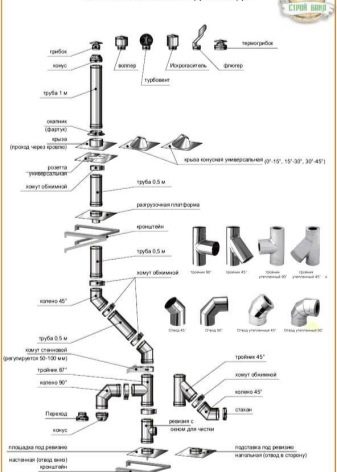
Chimney system elements
Standard kits include:
- cylindrical pipes or panels;
- adapters;
- tees;
- fastening elements (brackets and clamps);
- branch pipes;
- end pieces of various shapes;
- branch elements.
In some cases, additional components are applicable. When assembling any chimney, it is important to be guided by building regulations and fire safety requirements. All pipe components that come into contact with flames or exhaust gases must be made of sheet steel with refractory characteristics. Equivalent similar materials are acceptable for use.
In production, the elements of the chimney structure are usually divided into two groups. The first one includes double pipes, sandwich panels. Elements include an outer and inner tube with different diameters. Between themselves they are insulated with thermal insulation with non-combustible characteristics. This design provides faster and better heating. This causes the temperature to rise in a short time above the dew point, which reduces the amount of condensate, which is often the cause of corrosion.
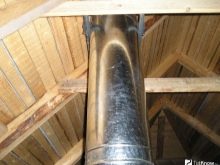
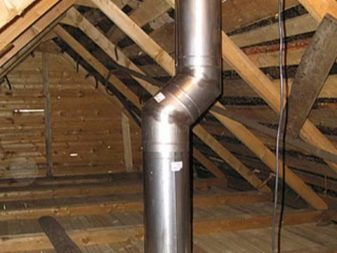
Elements of the first group are used in the construction of ventilation and smoke ducts that pass through unheated parts of the bath (for example, through the attic). This design is applicable for the external arrangement of the chimney. Verticals of the second order, which are not in contact with flames and gases, are permissible from a galvanized base or stainless steel. The second group of chimney elements is usually single-circuit, it has a diameter of 80 to 400 mm.
Usually, stainless steel is acceptable for chimney devices in the absence of insulation. It has a smooth surface to the touch.
Special elements allow you to assemble structures that are unlimited in height, place and method of installation, these include:
- wall supports;
- installation sites;
- gates;
- bends;
- telescopic brackets;
- clamps, spark arrestor, heat exchanger.
During installation, double pipes must not be used as an initial structural element.
The initial part, installed on the outlet of the stove, should be a single pipe with an allowable length of up to a meter and a metal thickness of 1.0 mm. An exception may be a stove with a container for water. To switch from one type of element to another, start sandwiches are used.
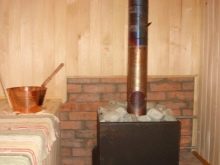
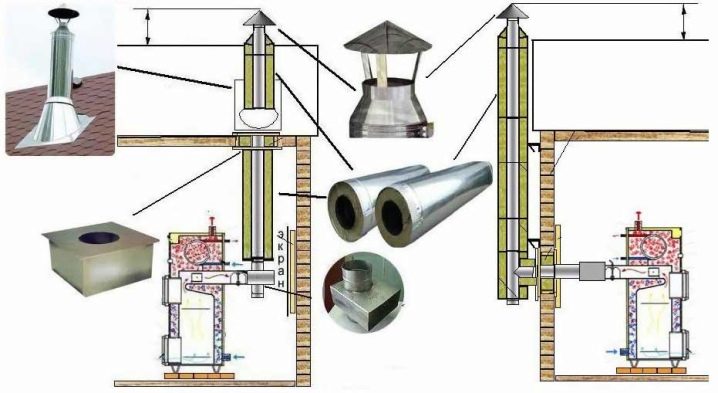
How to install?
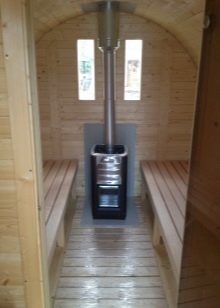
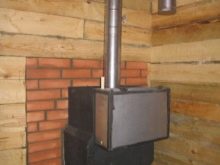
For arranging a chimney with your own hands, metal pipes are the ideal material option. They reduce construction costs as well as labor costs. The installation of the chimney begins towards the oven already installed in the bath. An ordinary iron pipe is installed up to the first knee. Correct fastening will be ensured by special structures with fireproof characteristics.
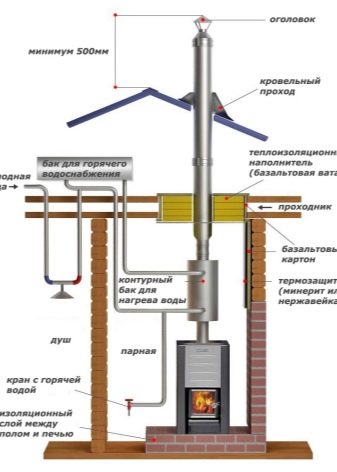
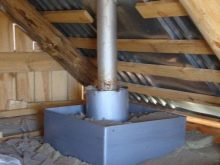
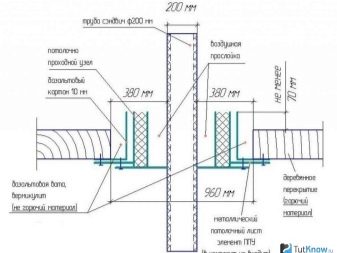
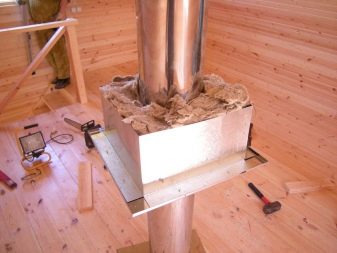
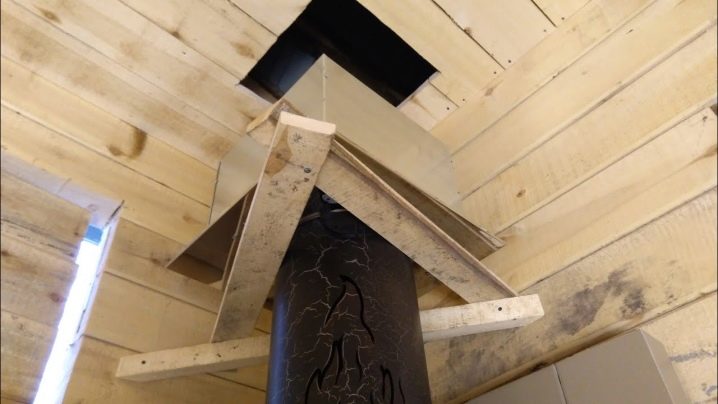
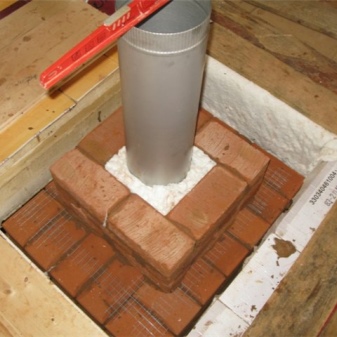
The initial part is connected to the oven nozzle. They immediately install a gate - a gate valve that will allow you to add or subtract traction force. Then a hole is made in the roof, which can be square. Next, a metal box is assembled with a through hole corresponding to the size of the structure. Through it, the chimney will be led to the attic.The height of the box should be greater than the materials for finishing the ceiling.
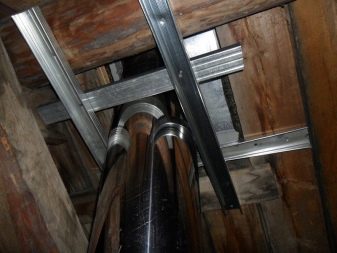
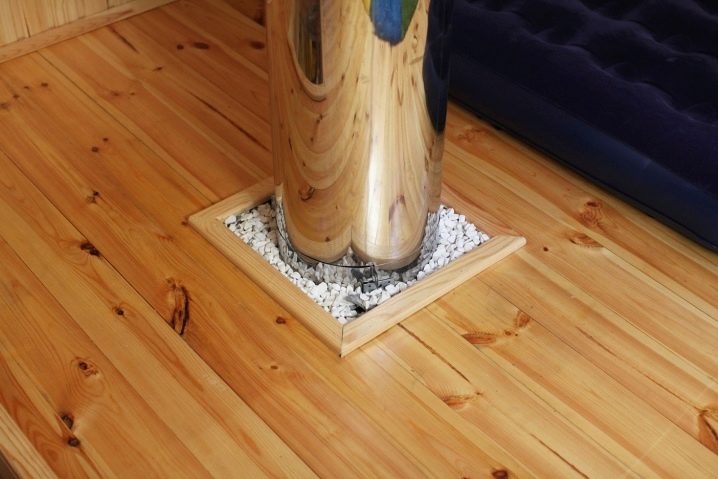
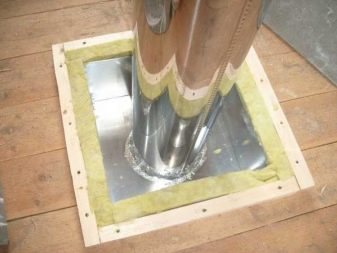
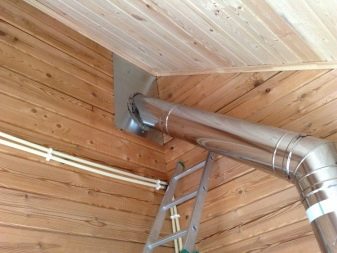
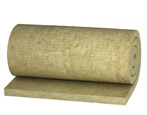
The box is securely fixed in the ceiling. The free space of the box is filled with mineral wool or expanded clay. In the attic, the structure is closed with a lid with a hole for the pipe. At the point of passage of the chimney, a sheet of heat-resistant material is fixed. The upper pipe is protected with sheets of mineral wool or asbestos. A special waterproof cuff is used as thermal insulation. Gaps can be sealed with sealant.
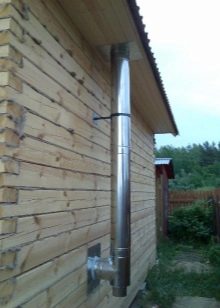
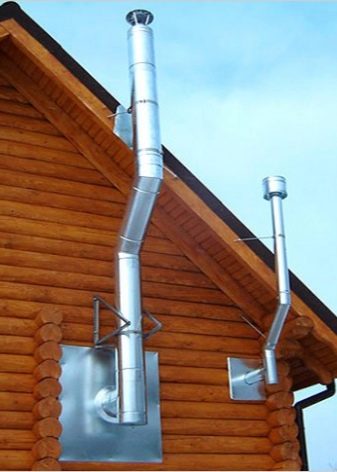
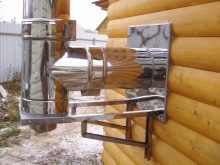
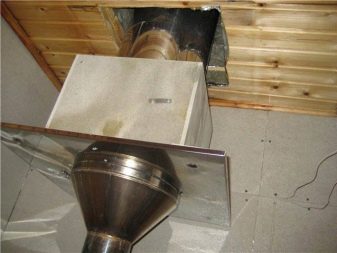
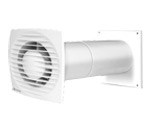
The installation of an external metal chimney will require even less labor. The device assumes a suitable hole in the wall (not in the roof). To turn the pipe from the furnace, they acquire a special elbow. Bends are different, choose the option you need.
The branch is installed on the stove pipe. Then a tee is placed on the outside. From it, the chimney is laid up along the wall, if necessary, down. It is correct to use a similar metal box filled with non-combustible bulk material as wall insulation.
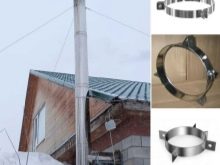
Outside the building, the chimney must be fixed along its entire length. For this, special holders are used. They can be made from available non-combustible materials.
When arranging an outdoor structure, it is important that it rises 50-60 cm above the ridge: such an installation will guarantee good traction. To protect the chimney from small debris and rain, a special umbrella is put on top.
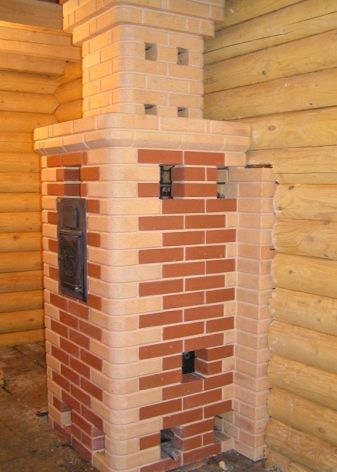
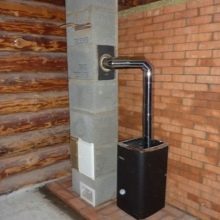
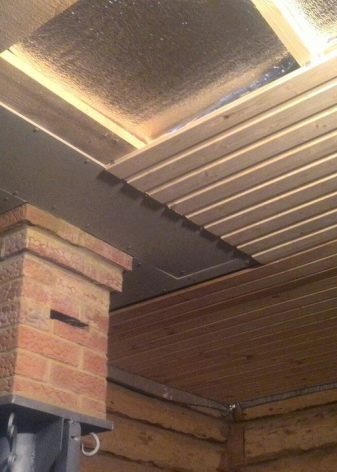
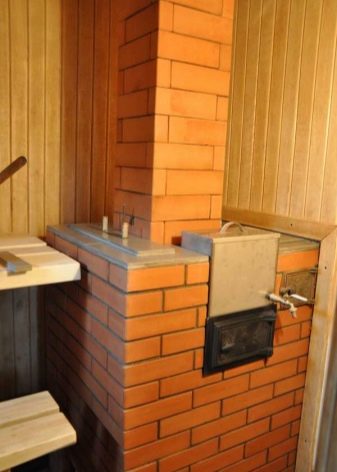
Brick chimneys can be indigenous or mounted. The best option for sauna stoves is indigenous. If the stove is made of brick, then a structure from the same material is attached. If the stove is made of metal, the brick chimney is connected to the branch pipe with a special pipe.
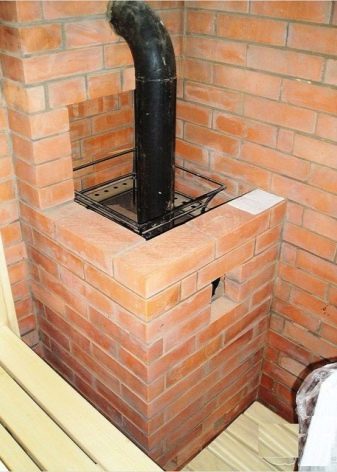

A brick chimney is arranged in the form of a square pillar, which is equipped with a well-shaped section. The size of the section is related to the power of the sauna stove; it can be half a brick, a brick or two bricks. The basis for a brick structure is a foundation of the same thickness with a sauna stove, making up a single whole with it. The pipe is raised to the desired height, where the valve is installed.
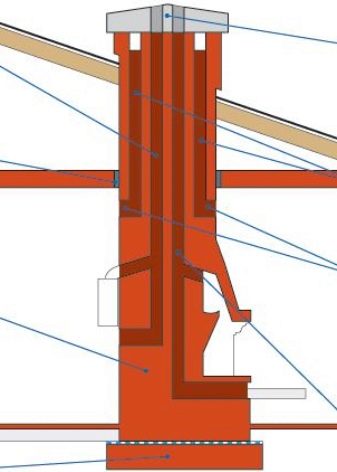
Immediately mark the space for the structure on the ceiling and in the roof. Use a level to maintain strict verticals. Start the work with the laying of the overhead part, for which there is already a point on the stove. Make the passes of the brick rows evenly: any unevenness will impair the quality of the traction force. Control the position of each row. For control, a stretched thread is suitable between the angle of the initial row and the angle of the hole in the roof.
To protect the ceiling from fire, a fluff is laid. The fluff is the expansion of the outer walls of the pipe, which also ensures the stability of the structure. The widest point of the fluff should be at the level of the ceiling material. After completing the laying of the fluff, the chimney is fixed with edged boards. Further, the fluff is narrowed, the pipe is aligned to the initial value.
The outer perimeter of the chimney is laid out until the roofing material appears. A structure is being built upstairs, which will serve to drain rainwater. It has increased dimensions by about a quarter of a brick. Lay out the structure in a similar way with fluff. Its height is related to the angle of inclination of the roof.
It is worth considering an important nuance: the beginning of the structure should be located from the bottom of the roof and protrude above the top point in several rows.
Next, lay out the neck of the chimney. It is allowed to install a metal cap on top of the structure. It is important to carefully seal the joints between the brick chimney and the roof structure. Choose methods of work and additional elements depending on the type of roofing material. The methods of this work are different, decisions on the application of one method or another are made at the place of installation of the pipe.
It is difficult to correctly install a brick chimney with your own hands. In addition, the design is expensive. Therefore, you should not start masonry if you have seen a brick and a trowel only in the video. Modern materials make it possible to construct simpler and more efficient designs of pipes for a bath.
Cleaning tips
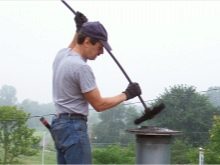
After the construction of the chimney, as well as some time of use, it is important to take care of regular cleaning of the system. The most proven way to clean a chimney is by using power tools. For this, special ruffs, weights, in some cases a crowbar and a sledgehammer are suitable.
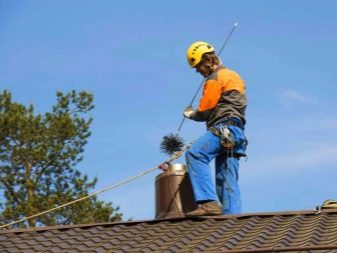
Working as a chimney sweep is a dirty job, because everything is taken out of the bath in advance, the surfaces are covered with newspapers or film:
- The easiest method is to use a special brush that can be used to clean the chimney. It is enough to insert the brush into the pipe, then gently push it upward until the resistance due to accumulated soot runs out. It should not be rotated around the axis, otherwise there is a risk that it will get stuck in the pipe, and it will have to be removed in parts.
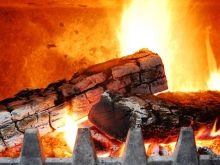
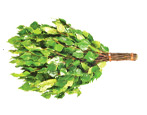
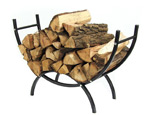
- Another effective method of chimney cleaning is burning aspen wood. The method will help with a small amount of soot on the pipe surface. When burning aspen logs, the best traction force is created, which is able to carry the soot out of the chimney.
- Potato skins have similar properties. But to prepare the required amount of material, you will have to come to grips with cleaning more than one kilogram of vegetables.
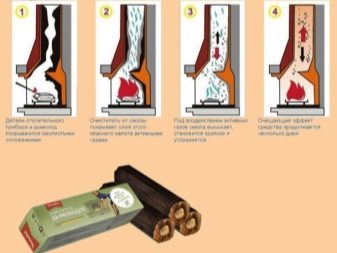
- Modern methods of protecting pipes from soot with the use of chemicals have become frequent in use. Modern preparations include special components that, when burned, carry out soot behind them. The components can act as a soot separator, which will eventually fall off the pipe walls.
It is believed that the best time to clean the chimney is after rain. It is easier to maintain the pipe in a humid environment. Timely pipe cleaning will be the key to high-quality firewood burning. This will keep the sauna warm.
For information on how to make the right chimney for a bath, see the video below.


The comment was sent successfully.