Making a fence out of bricks and corrugated board with your own hands
A beautiful fence and gate is the face of home ownership and an "outpost" of protection and a quiet life of the owners, which is invisible to outsiders. A strong and reliable fence, which also fits perfectly into the surrounding landscape, is the best result of the builders' work. Today, thanks to the technology worked out over the years and modern materials, this task can be successfully solved with your own hands, without resorting to the help of specialists.
Peculiarities
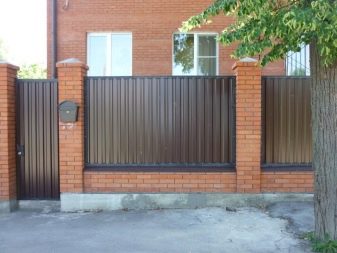
There is a huge variety of fences and fences made of various combinations of textures: monumental stone, light forged, eco-friendly wood. Currently, the practical and durable combination of brick pillars and corrugated panels is deservedly popular.
Advantages:
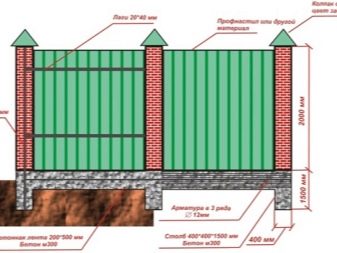
- Such a structure is strong due to the reinforced strip foundation, brick pillars reinforced with a metal pipe, and lighter corrugated panels, which are mounted between the pillars, facilitate the structure, but they are also strong due to stiffening ribs, profiling.
- The service life of such a fence is, as a rule, 25-50 years. All materials are resistant to aggressive environmental influences (precipitation, temperature extremes, sun, mechanical stress), and are also environmentally friendly.
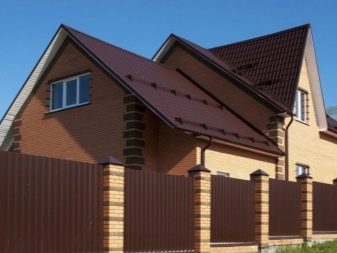
- The materials used look good against the background of brick or stone buildings, the fence looks presentable and solid. The assortment of textures and colors allows you to show your creative imagination and impeccable taste.
- The professional sheet closes the territory of the household from the wind, the noise of passing cars, the curious glances of neighbors and passers-by, from the penetration of other people's animals and people.

- The fence is affordable, it is possible to build it with your own hands, does not require the involvement of construction equipment, if repair is necessary, individual elements can be replaced.
- The fence also reduces the level of noise coming from the street; in especially noisy areas, special noise-reflecting panels and strips are used, which can be attached to the upper part of the profiled sheet.
- You can combine sheets with other materials or use different textures of corrugated board, for example, imitation wood is indistinguishable from natural wooden inserts, but is not subject to decay and deformation.
Constructions
It is important to choose the right design option, draw up a project, a drawing of the location on the ground and a plan for all stages of work, an estimate.
There are building codes that need to be considered:
- The fence must be within the boundaries of the land plot according to the documents.
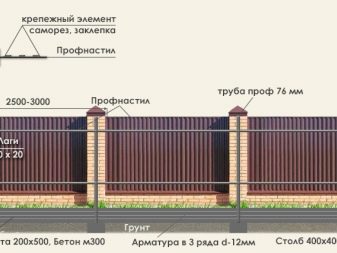
- The distance between brick pillars cannot be more than 3 m.
- In case of height differences, the fence line is divided into sections.
It is necessary to measure the length of the fence, divide it into sections, calculate the number of posts and the universal distance between them. You can take any height of the fence up to 3 meters.
Design options:
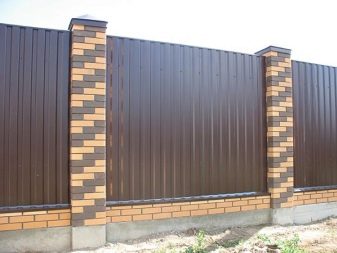
- The pillars can be laid out in one and a half bricks from the front side and in one brick from the sides, they can also be folded into two bricks. Inside, the pillars are reinforced.
- The corrugated board can cover the fence supports, or it can be mounted between them so that the pillars are visible.
- The lower part of the fence can be brick or monolithic concrete with the use of reinforcement, or the foundation is made flush with the surface, then the profiled sheet panel is mounted to the entire height of the fence.
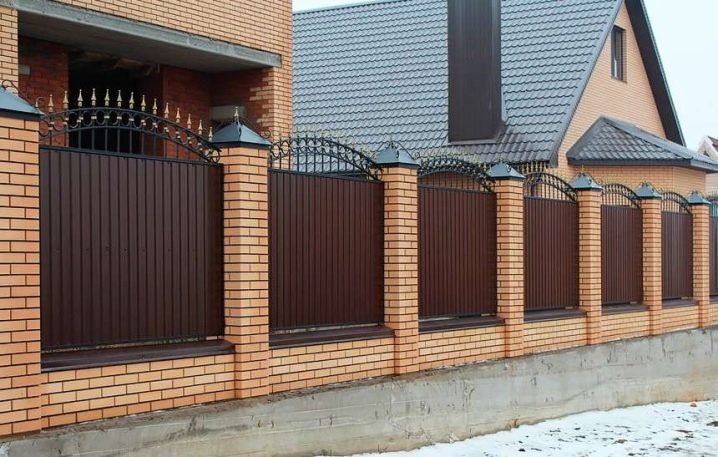
- To protect and increase the service life, the upper surface of the posts is covered with caps. Caps can be metal, concrete or other materials.
Decor
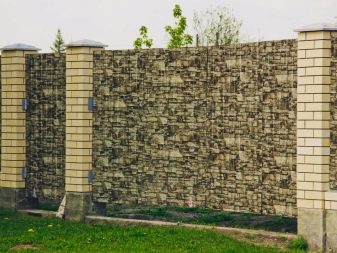
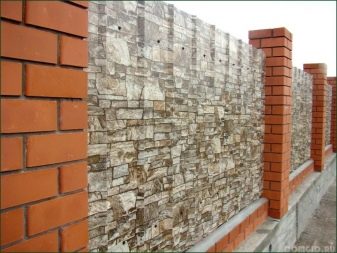
Today's variety of textures and colors of corrugated sheets can satisfy the most demanding client or designer. Smooth or textured surface, with imitation of brick and stone, wood of different species, natural materials, with various patterns, ornaments. You can choose a canvas with a photo print, apply any image, including 3D. The palette of colors and visual effects is also amazing. There are luminous paints and coatings with thermal indication, electrical insulating.
Brick also has a variety of shapes, surface textures and colors. The classic cladding red smooth brick looks austere and fits most houses. Combining several shades of brown or beige will give a more modern look. Figured and embossed bricks give room for imagination and look elegant and unusual.
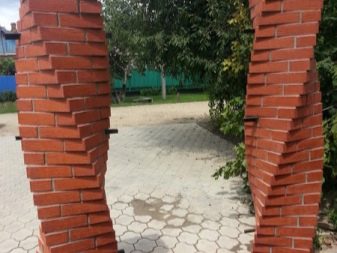
The pillars can be laid out not even, but twisted, of course, this is a task for experienced bricklayers, but the result looks impressive.
The foundation is decorated with bricks, metal in color with the rest of the elements, the caps should also match the color of the entire structure. You can also touch up the seams between the bricks, for example, add soot to the solution and get decorative black seams.
The monolith technology allows making complex configurations of the foundation and basement of the fence: concrete podiums, ledges and niches for ornamental plants and lighting elements. Additional lighting can also be built into the poles. Fences decorated with forged elements, welded along the upper border of the panel with lace strips with pointed tops, look great.
Manufacturing
The project is ready, you can start building.
To do this, you will need the following materials and tools:
- Brick, sand, crushed stone.
- Metal rods for reinforcement with a diameter of 5-6 mm.
- Board for formwork installation.
- Cement of the brand is not less than M300, but better than M400.
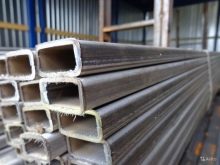
- Pipes or corner for reinforcing the middle of the pillars.
- For the frame, a 40x20x2 mm pipe is needed.
- Level, plumb line, tape measure.
- Hammer, nails, shovel, screwdriver.
- Welder.
- Concrete mixer or drill with mixer attachment.

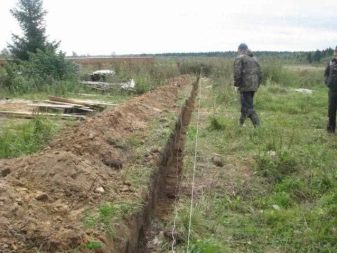
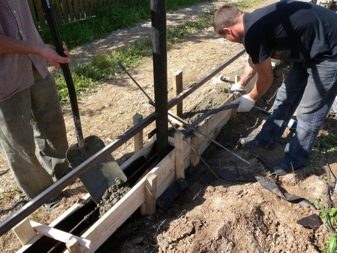
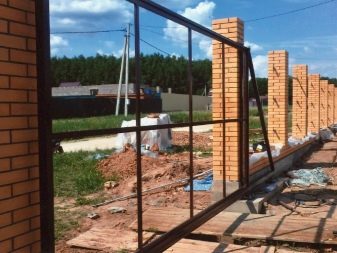
At the corners of the fence, you need to drive in stakes and pull a nylon rope around the perimeter for marking. On the line of the fence, it is necessary to level the surface, mark the places of future pillars and also drive in the pegs, mark the locations of the gates and wickets. Then you need to dig a trench under the strip foundation.
The depth of the trench is the freezing point of the soil. In the regions it will be different, on average 60-80 cm.Under places with corrugated board, the depth can be reduced to 50 cm.The width of the trench is determined by the thickness of the pillars, 20-25 cm is quite enough.
The volume of the excavated land will be approximately 3 m3. It is advisable to separate the fertile layer from the clay, then to pour it out in the garden, increasing the thickness of the fertilized soil. At the bottom of the trench, we tamp a 5-cm layer of sand moistened with water, then 10 cm of crushed stone.
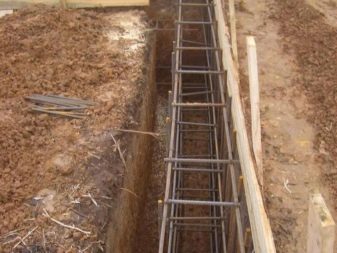
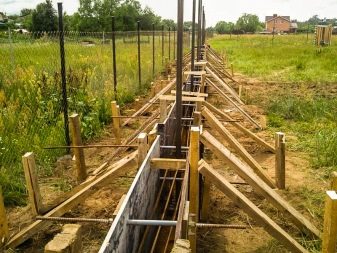
The second stage of the foundation arrangement is the assembly of the formwork. Usually, the formwork is done 10-15 cm below the surface. The formwork is knocked straight into the plank trench, reinforced with lintels and supports to prevent deformation of the formwork under the influence of the pressure of the hardening concrete.
The foundation must be reinforced with steel rods 10 mm thick. In order for the reinforcement to be completely immersed in the thickness of the concrete mortar, vertical rods must be installed every 1.5 m. Horizontal ones are attached with wire or welding to vertical ones every 10 cm in height and no more than 5 cm from the surface of the foundation so that the reinforcement does not stick out and does not rust. Usually, the reinforcement is first fastened, and then the finished one is lowered into the trench.
Further, you can install strictly vertically reinforcing pipes or a corner for brick pillars and fasten them with boards inside the trench. The shape of the foundation is not strictly rectangular, but expanding downward. Then the fence will be able to withstand the loads of heaving of the soil without deforming.
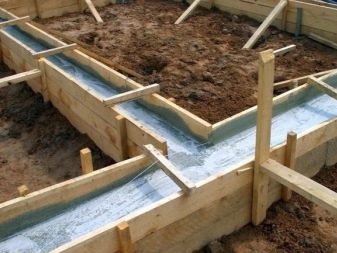
The solution is mixed in the proportion of cement and fine sand 1: 4 or 1: 5, sifting or crushed stone is added, and then water is added until a thick mass is obtained. For the best quality of the solution, it is advisable to add 25-30 g of plasticizer, most often this is the most inexpensive liquid soap or dishwashing detergent. The bottom of the trench is moistened with water, then a mixed solution is poured into the formwork. For a set of strength and proper drying of the foundation, it is moistened every day with water and covered with plastic wrap to avoid cracking.
Complete drying occurs after 2 weeks, but the layer gains half of its strength after 5 days.
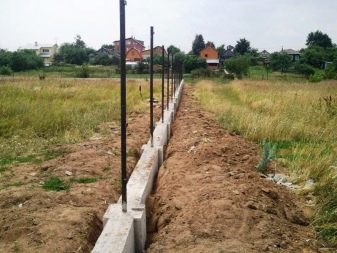
Waterproofing is laid on the finished foundation, most often waterproofing or roofing material, so that the brick does not absorb moisture from the soil and does not collapse longer. The next stage of construction is laying bricks around the reinforcement pipes, the result of the work will be reliable and even pillars. The masonry is made with a banding for reliability of one and a half or two bricks. The standard seam is 8-10 mm.
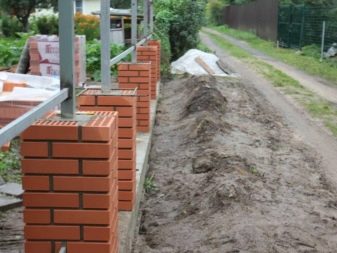
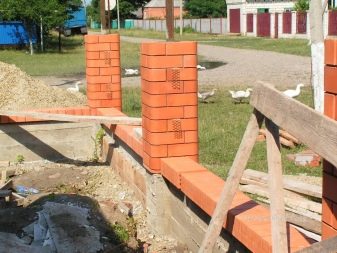
Every second row is additionally reinforced with a steel mesh. At the levels of fastening the profiled sheet to the vertical pipes, embeds are welded for the subsequent installation of the frame and profiled sheet. At the top, in the middle and at the bottom of the pillar.
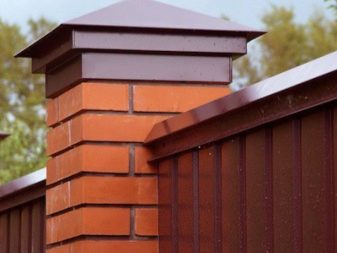
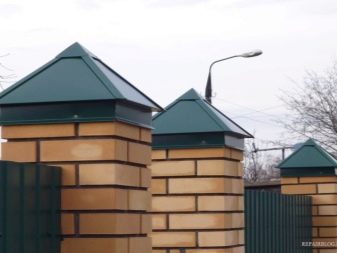
On the lined pillars, special caps made of concrete or metal are mounted on top. They are dyed in various tones with mineral dyes that are resistant to fading, and can have a decorative finish.
The caps perform a protective function, preventing moisture from entering the thickness of the pillars, and also give a complete and decorative look to the fence.
Mounting
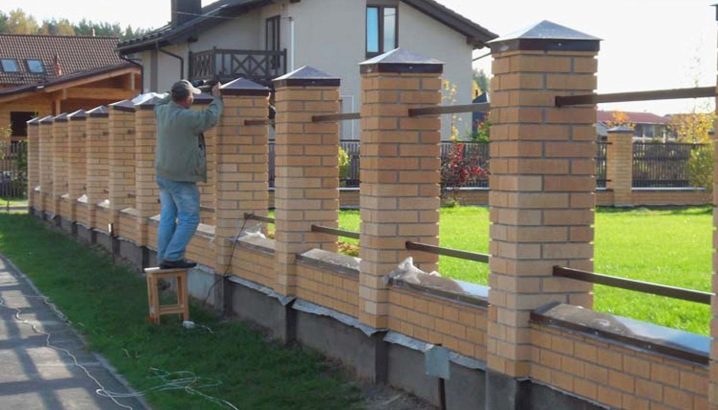
To mount a frame for attaching panels made of corrugated board, at the stage of laying the posts, weld embedded fasteners that will stick out from the sides of the post: at the top, in the middle and at the bottom, then it will be possible to fasten the frame from a profile pipe at these three points.
The pipe must be marked and cut into pieces, the length of which is equal to the length of the span between the pillars, set strictly horizontally using a level, and the ends are arc welded to the embedded fasteners. The result is three guide pipes, which must be coated with alkyd enamel to avoid corrosion.
If the pipes have already been touched by rust, treatment with a liquid converter is necessary.

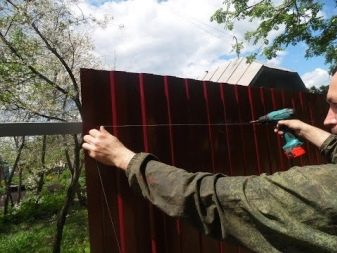
Now you can mount sheets of corrugated board. To do this, you need to buy or cut sheets of the required size, mark with a marker the points of attachment of the corrugated board to the frame, usually at a distance of one wave. Thus, for each meter there are 6 places for fastening, you will need 6 galvanized roofing screws and 6 rubber gaskets for screws.
During installation, the finished foundation is covered with cardboard to prevent peeling of the lower edge of the panel. At low speeds, the drills are fixed with self-tapping screws and the finished panels are laid with rubber bands, connecting the sheets with an overlap if necessary.
The result is a combined fence, reliable and presentable. Subject to the drying time, it takes an average of 2 weeks for all stages of construction, and it will serve its owners faithfully for many years. It is not difficult to take care of the fence, it is enough to wash it with a simple means, pouring water from a hose. The design is such that individual elements can be replaced if necessary.

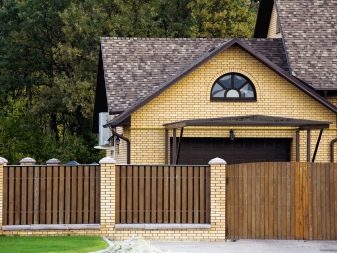
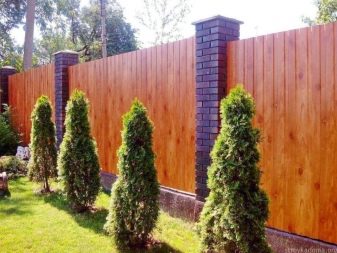
Beautiful examples
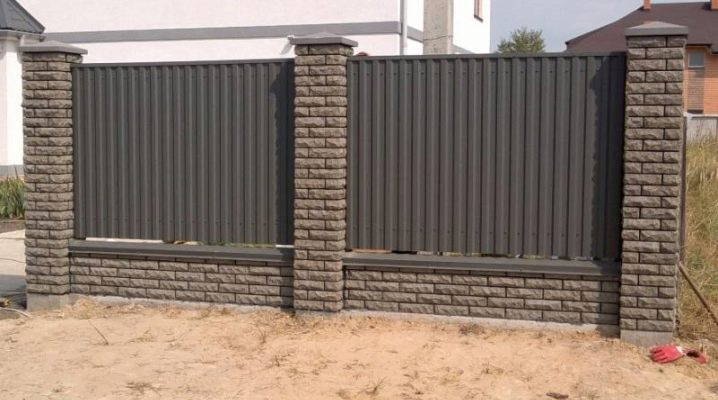
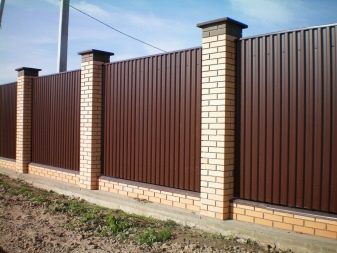
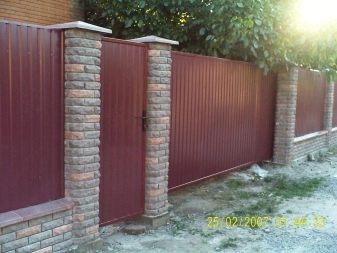
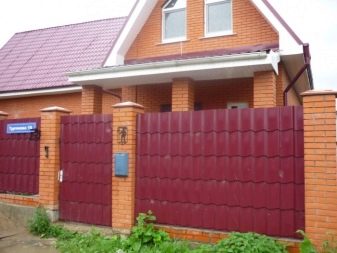
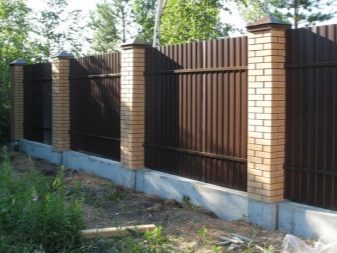
The combination of red brick and a profiled sheet of a maroon shade with a smooth front surface looks very harmonious. The foundation is also lined with bricks and trimmed with burgundy metal. The pillars in this version are visible and form a contrast to the panels, forming a strict and neat structure.
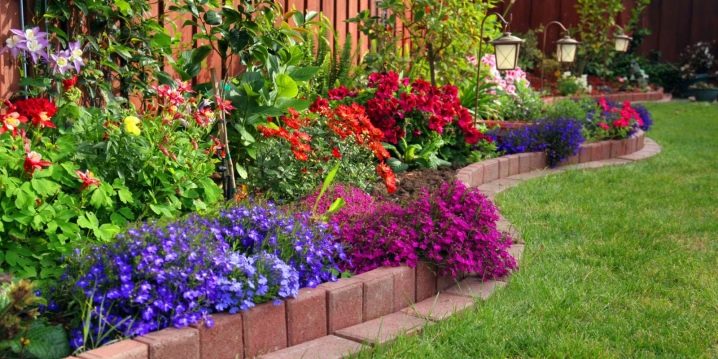
To fit the fence into the surrounding landscape and give additional decorativeness, designers often provide niches and podiums for planting flowers or climbing plants, this is a classic style and a manifestation of the owner's impeccable taste.
The process of building a fence can be seen below.


The comment was sent successfully.