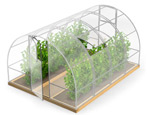
All about 3x6 polycarbonate greenhouses
Growing crops outdoors is a risky idea in the unstable weather conditions in Russia. A polycarbonate greenhouse will protect your crop at any time of the year.
Peculiarities
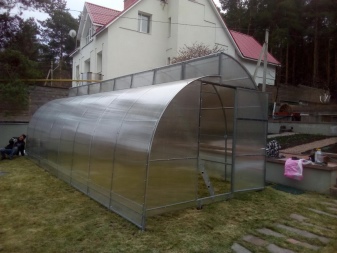
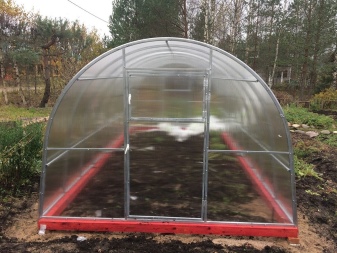
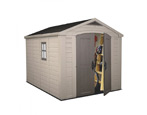
A greenhouse made of polycarbonate 3x6 m can be built independently at a summer cottage. The total area of the occupied surface for the structure is 18 square meters.
The approximate weight of the finished building is 125 kg. Previously, foil or glass was used as cladding for greenhouses, which are not reliable materials.
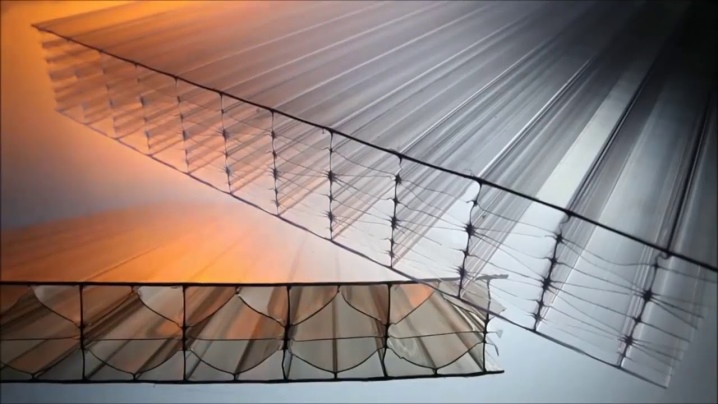
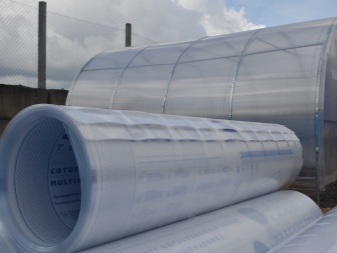
Now experienced summer residents use cellular polycarbonate, which consists of 3 layers, strongly protecting plants from ultraviolet rays, moisture and sudden temperature changes.
Layout
Before building such an object, you should draw up a preparation plan for work. After all, a design with imperfections in the end may turn out to be useless and will bring a small amount of harvest.
Greenhouse design is carried out in several stages.
Seat selection
The ideal option would be a sunny spot near the house, protected from strong gusts of wind. You cannot build a greenhouse on lowlands, as they are prone to frost, and on a hilly surface, because then the greenhouse will not stand level.
Sizing
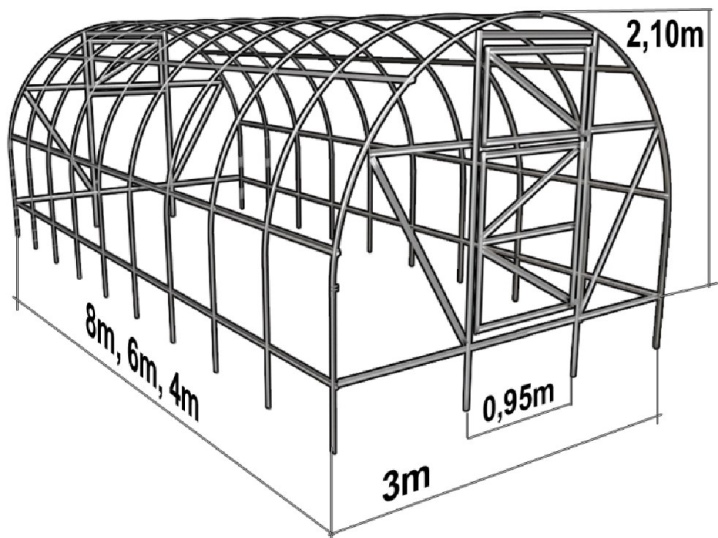
We decided on the dimensions, the greenhouse will be 3 meters wide and 6 meters long. The height of such greenhouses is standardized - 2.1 meters. Further you should mark the selected place using pegs and a thread, pulling it along the outer edge.

Choosing the shape of the greenhouse
The shape directly depends on the type of plants that will be in your beds.
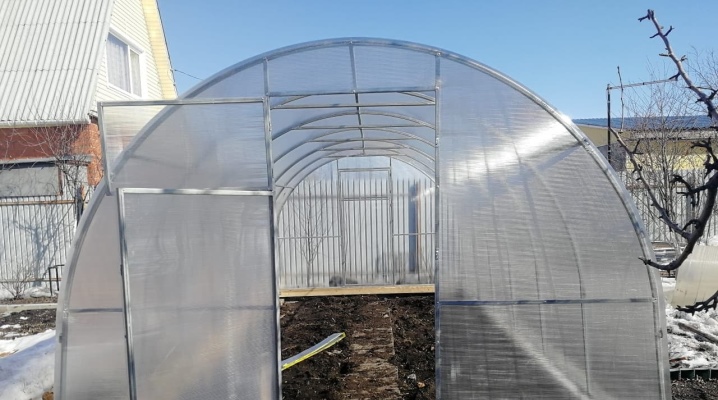
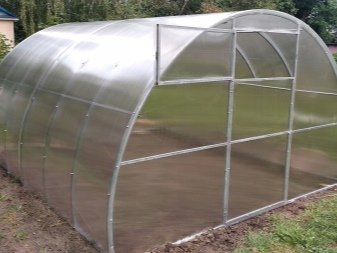
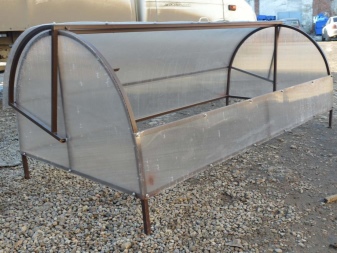
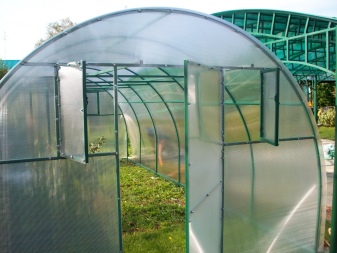
- Arch. The most convenient and economical option. It is she who is suitable for sun-loving crops. Such a complex is easy to install on your own. It is easy to use and does not accumulate snow on it in winter.
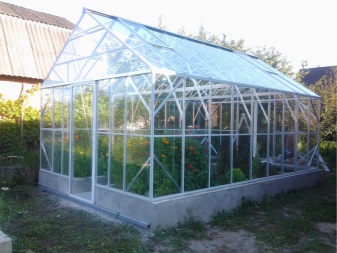
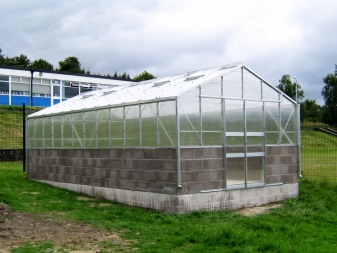
- House. Such a greenhouse is more spacious, but inferior in terms of illumination. Collecting it is already harder.
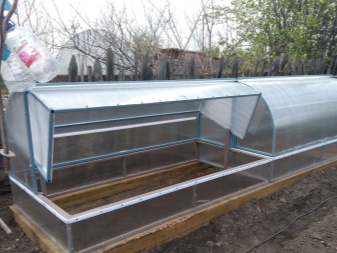
- Bread box. It is presented in the form of a low semicircle greenhouse with a sliding cover. It is convenient for planting low-growing creeping crops.
- Dome. The most beautiful greenhouse, but difficult to install. This design is well lit.

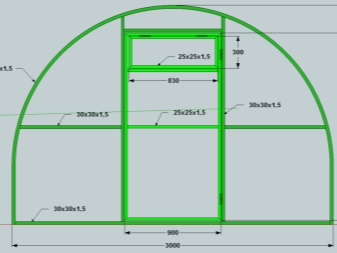
Layout of doors and vents
All plants need fresh air, so the organization of the vents is a must.
They must be placed on opposite sides to avoid drafts. Doors - the entrance to the greenhouse and the temperature regulator inside the frame.
The width of the door should be 1 meter so that it is possible to drive with a trolley and other large tools.
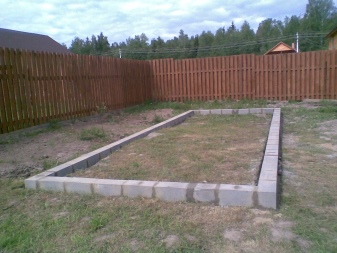
Choosing the type of foundation
The foundation depends on the size of the greenhouse and its mass. Many people prefer to put the greenhouse directly on the soil, but it is this additional layer that will protect the crop from frost, underground animals and insects. The foundation can be wooden, brick, or as-filled. You can calculate the size in a special calculator.

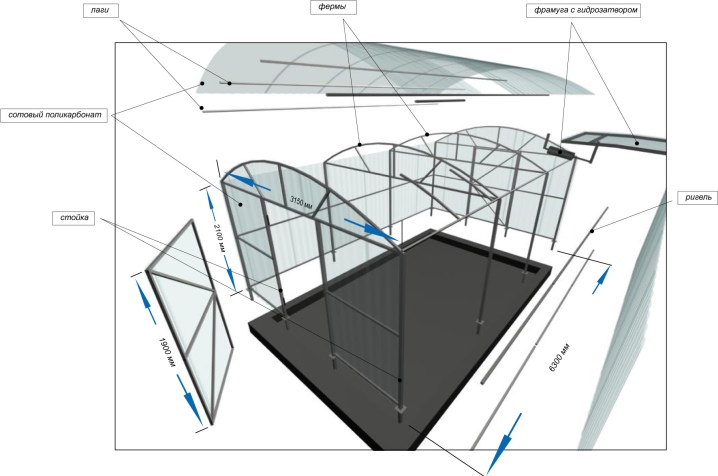
Drawing
This paragraph involves the preparation of the final drawing in two projections: from the side of the end and in length (side view). Its algorithm is simple and universal: know the parameters of the greenhouse, take into account the maximum loads on the frame, take into account the presence of the foundation, doors and vents.
Remember the components of the greenhouse: a poured foundation, a metal frame and a polycarbonate coating.
The drawing will help you understand the shape, dimensions and amount of material required, transforming your ideas into a real painting.

How to calculate the consumption of polycarbonate?
One standard sheet of cellular polycarbonate, regardless of thickness, is 6 meters long. The height of the building is the main characteristic when calculating. For our covered garden with a ceiling height of 2.1 meters and a length of 6, 4 pieces will be required (6 m we divide by 2), three for working on the frame and one more will go to cut the ends. Build all materials from your finished blueprint.
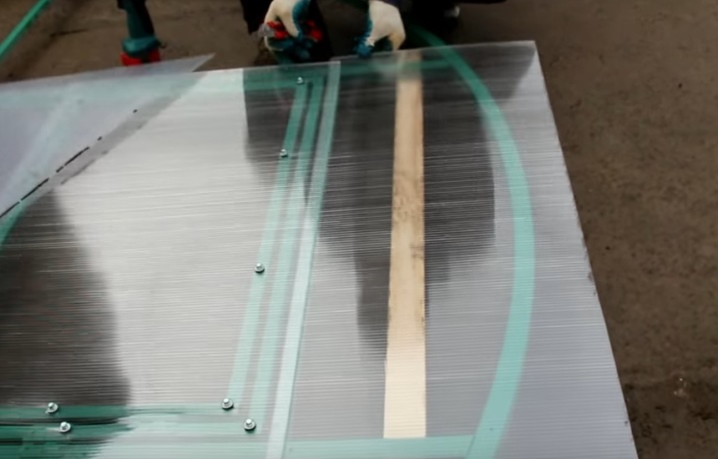
How to make a cut?
In the process of creating a greenhouse, you will need to cut and cut the material into ends in places where there are protrusions and vents with the corresponding shape.
Cutting rules:
- prepare the place for work, having previously cleared the area from sharp and hard objects;
- without removing the protective film, lay out the sheet;
- using the drawing of the finished structure, transfer the stencil of the part with a marker;
- then you can cut the sheets using a special tool, a sharp clerical knife;
- after finishing cutting, clean the finished elements from sawdust and other debris using a vacuum cleaner.
Assembly instructions
Take your time when assembling. Be careful and take care of your personal safety using personal protective equipment.
You will need the following materials and tools:
- polycarbonate sheets;
- roulette;
- building level;
- fasteners;
- drill.

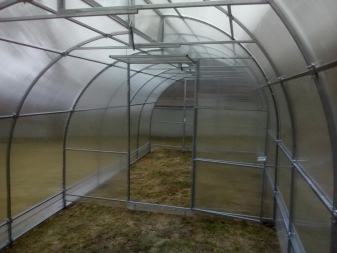
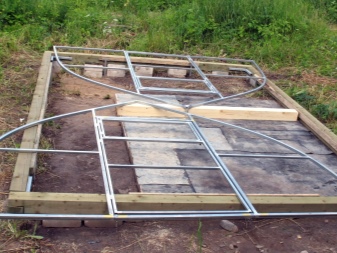
The highest quality and strongest construction is the metal frame.
We begin to install it on the finished foundation with our own hands.
This is the most difficult stage in creating a greenhouse, but thanks to the instructions, everyone will be able to assemble the base.
- We install the lower bases on the edge of the foundation.
- Next, we put arcs in the lower base, forming a frame.
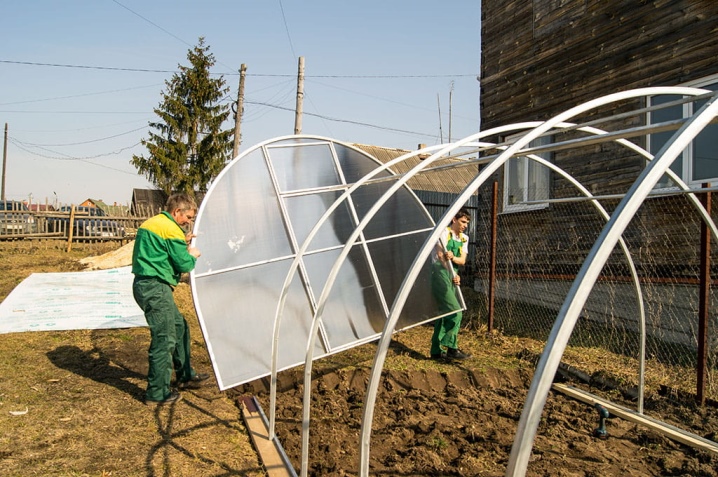
- We collect the end pieces, sheathed with polycarbonate. Installation takes place in the lower base, fixing parts with two central elements.
- We put the fittings: we make holes in polycarbonate and insert handles for doors and vents.
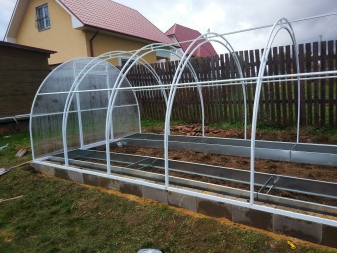
Polycarbonate sheathing step by step
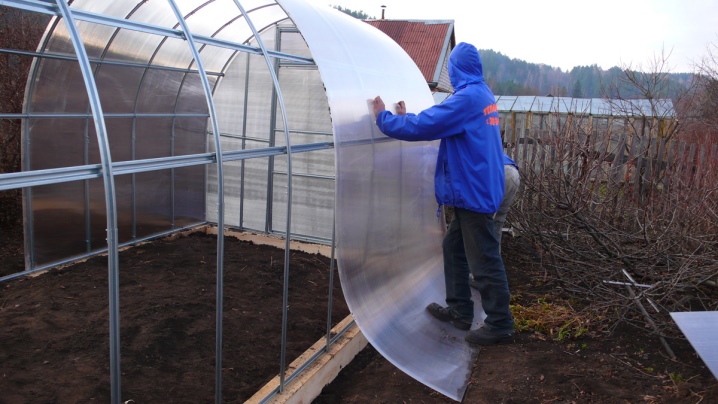
The surface of the polycarbonate is sensitive to mechanical stress. Try to store it in a standing position before starting work. It is necessary to install the coating strictly in a certain direction. It is undesirable to arrange sheets horizontally.
The polycarbonate coating of the structure starts from the edges, regardless of the configuration.
- Lay the polycarbonate face up on the end, before removing the protective film. The material should protrude 50-60 mm above the end.
- The next step is wall covering. Secure the sheet with self-tapping screws on one side of the frame, pull it and secure it on the other. Overlap the sheets by about 10 cm to maintain tightness, preventing moisture from penetrating through the cracks.
Installation of the plastic coating on the arched structures is carried out in the direction of the frame arcs.
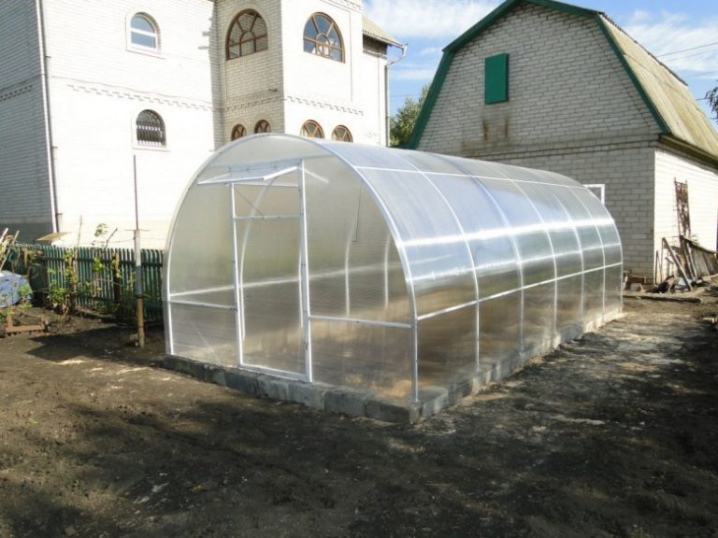
That's it - you managed to build a polycarbonate greenhouse yourself on a land plot without the help of specialists.
How to arrange inside?
The next important step to ensure good crop growth is the organization of the interior space. It is important to make the correct beds before the summer season. Please note that building materials must be moisture resistant, treated with special protective compounds that prevent the appearance of pathogenic bacteria and viruses.
First of all, the location of the ridges should be convenient for the growth of seedlings and their care. The east-west line is an ideal location solution, as the sun will hit the beds throughout the day.
The optimal width of the beds is 70-90 cm, do not forget to leave room for paths. In our case, you can make 3 beds 70 cm wide and 2 tracks 45 cm wide.
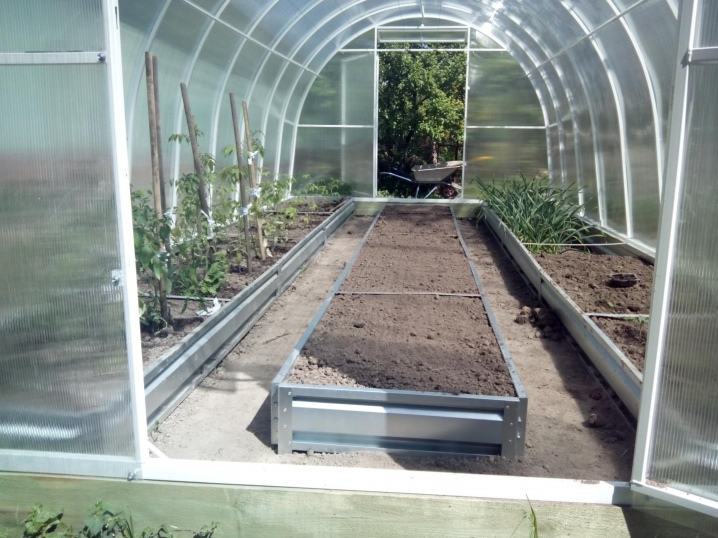
For a large harvest, deep beds are needed (up to 60 cm). To prevent the soil from crumbling, you need a framing.To do this, use boards treated with a special varnish against insects and mold or metal shields. The paths are the decoration of the greenhouse. Cover the trench with gravel, and then with finishing material - paving slabs, bricks, flat stones.
You can also add storage racks, seedling barrels and a thermometer. All this will fit perfectly in a greenhouse of this size.
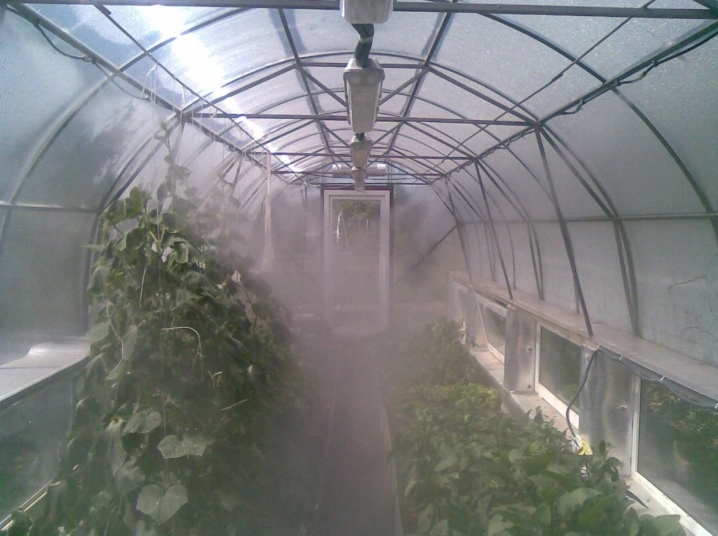
For advanced gardeners, drip irrigation systems, heating and lighting are installed. Then your greenhouse will be the coziest vegetable home.
How to plant crops?
Still, a greenhouse is a limited space, and every meter must be used rationally. Wherein it is necessary to plan how the cultivation of vegetables will be organized, because some plants cannot be neighbors, and for this you will have to demarcate the territory.
There is a simple rule - first you need to deal with the placement of the main culture, and then plant the rest, given their compatibility.
Consider planting schemes for basic seedlings for a warm garden.
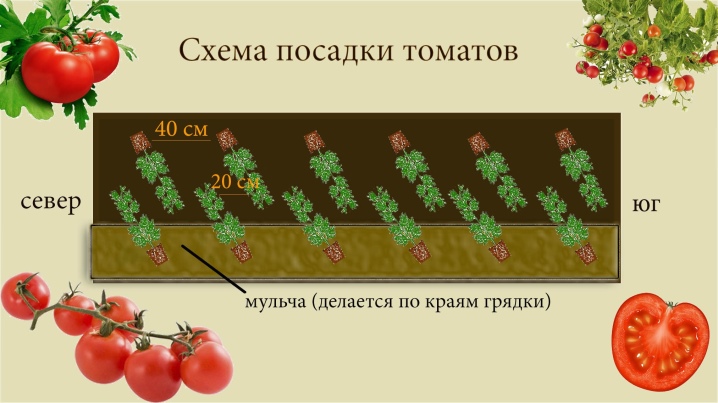
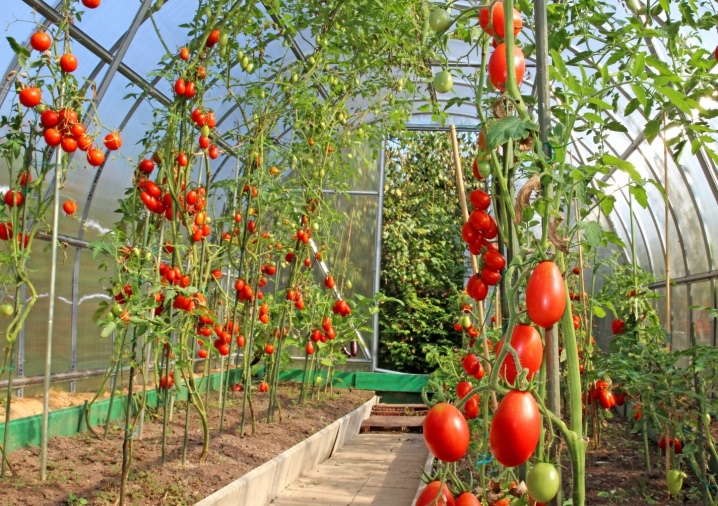
Tomatoes
There is a wide variety of indoor tomato varieties. They are thermophilic, prefer light soil, moderate watering. Tomatoes need ventilation and air circulation. That's why the best place for tomatoes is in the central bed opposite the doors, which are located at the ends. Good neighbors for tomatoes are cabbage, onions, lettuce, radishes.
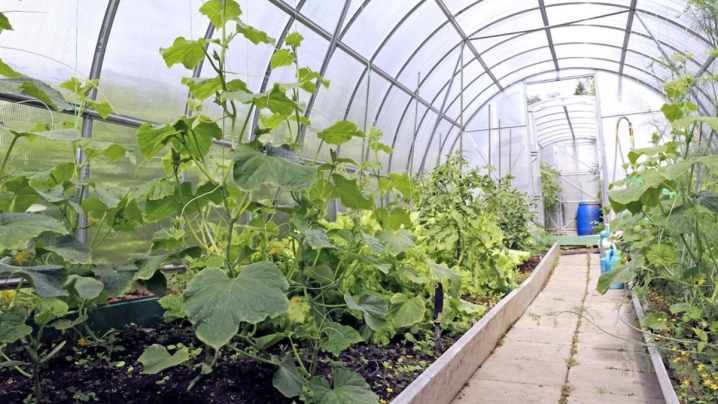
Cucumbers
Cucumbers require abundant watering and moisture. They cannot be planted with tomatoes, so the best option is to cover the plants with plastic. Dill, lettuce, eggplant, parsley, and basil are considered a good neighborhood.
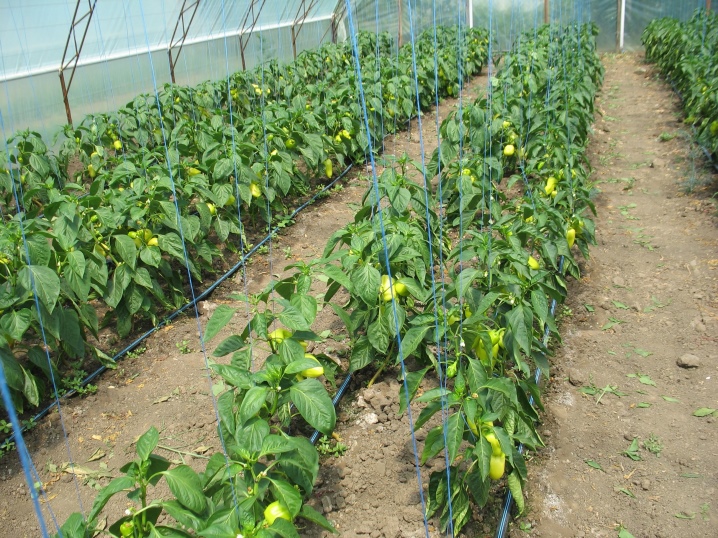
Pepper
Sweet and hot peppers cannot be planted together - they can become mutually pollinated and change their taste. But they grow well next to the base crops.
Other cultures
It is quite possible to plant strawberries and strawberries in a greenhouse, while getting a harvest earlier than from neighbors. It is important to plant plants at a distance of 15-20 cm.
In the spring, pay due attention to the preparation of the soil, it should be very nutritious and loose. The ideal composition is a mixture of soil from your site, peat or humus, and river sand.
You can use the hydrogel before planting moisture-loving crops such as cucumbers and cabbage.
In confined spaces, bacteria and viruses are much more likely to develop. To do this, try to change the soil every year. In the fall, you can fumigate the room with gray (checker).
In the spring, the polycarbonate should be washed both outside and inside. In summer, after planting, you should weed the soil from weeds.

An overview of the 3x6 greenhouse in the video below.


The comment was sent successfully.