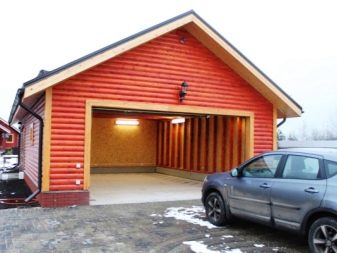
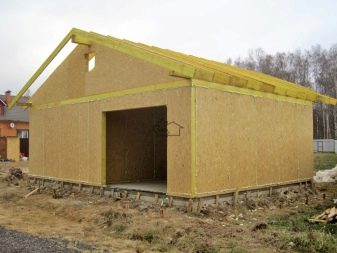
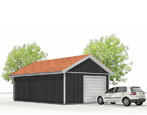
How to build a garage using SIP panels?
Garages made of SIP panels in dense urban areas are very popular. This is explained by the fact that such structures are easy to install, they are light in weight, and at the same time perfectly retain heat. As an example: heating such an object requires two times less energy than a garage made of red or silicate bricks.
To assemble the structure, it is enough to process all joints and cracks well, using polyurethane foam for this. Even a beginner can do this kind of work.
Why SIP panels?
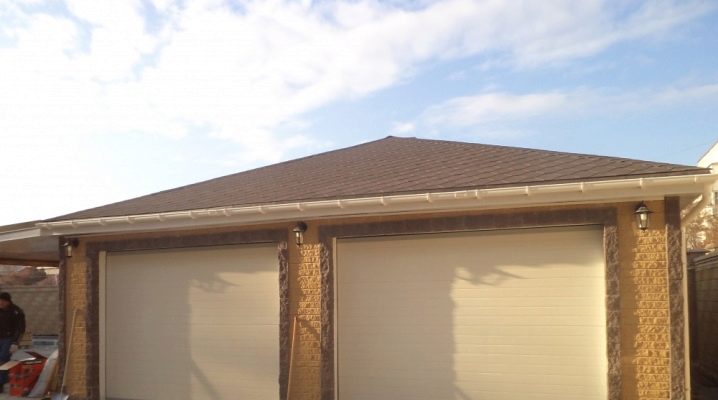
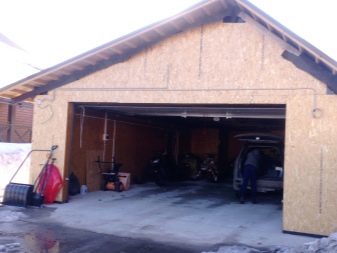
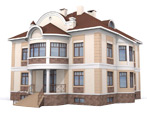
Storing a car in a garage made of SIP panels is a good solution; such an object can be called a reliable structure for an "iron horse".
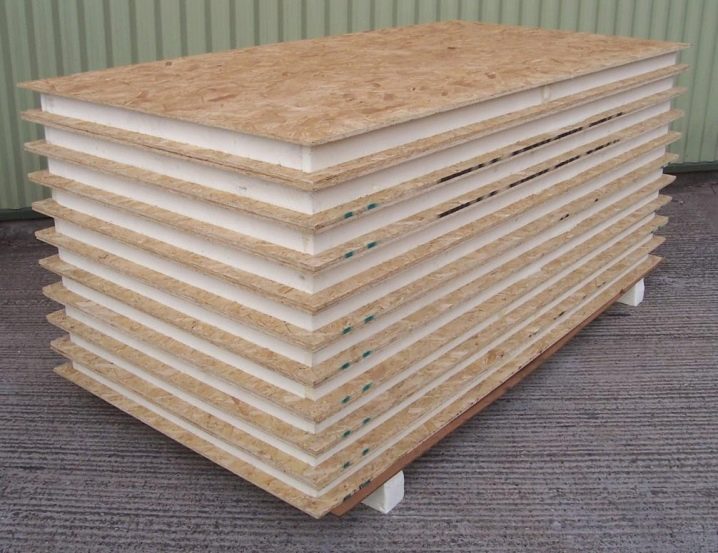
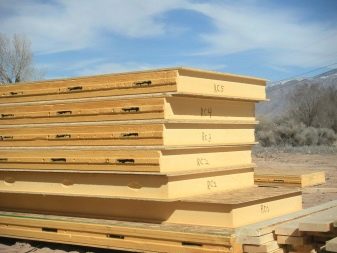
The panels are composed of several layers of PVC insulation or technical wool.
Plates are sheathed with polymeric materials, profiled sheet, OSB.
Such panels have the following advantages:
- easy to clean;
- the material does not interact with aggressive chemical substances;
- if OSB panels are impregnated with special chemicals (fire retardants), the wood will have good resistance to high temperatures.
Plan-diagram
Before starting the installation of the object, it is necessary to draw up a work plan. If everything is designed correctly, then it will be easy to calculate the amount of material that will be required:
- How much cement, gravel and sand will be needed to cast the foundation;
- How much material is required for the roof, and so on.
The formats that have OSB sheets are as follows:
- Width from 1 meter to 1.25 m;
- The length can be 2.5m and 2.8m.
The height of the object will be approximately 2.8 m. The width of the garage is calculated simply: one meter is added to the width of the car, which will be stored in the room, on both sides. For example: the width and length of the car is 4 x 1.8 m. It will be necessary to add 1.8 meters at the front and rear, and it will be enough to add one meter to the sides.
We get the parameter 7.6 x 3.8 meters. Based on the data obtained, you can calculate the number of panels that are needed.
If in the garage there will be additionally various shelves or cabinets, then it is recommended to take this fact into account when designing, adding the necessary areas to the project.
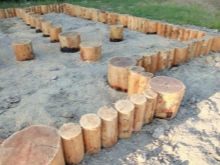
Foundation
The structure of the garage will not have a lot of weight, so there is no need to cast a massive foundation for such an object. It is not difficult to make a foundation of slabs, the thickness of which is about twenty centimeters.
The stove can even be placed on the ground with high humidity:
- Before installation, a special pillow with a height of no more than 35 cm is made of gravel.
- A frame made of reinforcement is mounted on the pillow, formwork is assembled around the perimeter, concrete is poured.
- Such a base will be strong, at the same time it will be the floor in the garage.
- You can also make a foundation on piles or posts.
A garage on screw piles is even easier to make, such structures can be erected even on soils:
- sandy;
- alumina;
- with high humidity.

There is no need to specifically level the site under the pile foundation; quite often the lion's share of the budget is spent on such work. A pile foundation can be made in a confined space, when there are various structures around. A similar phenomenon is common in urban environments. There is no need to use expensive large-sized equipment for the pile foundation.
Piles are made of materials:
- metal;
- wood;
- reinforced concrete.
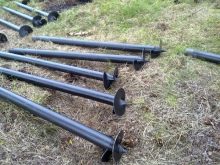

They can be round, square or rectangular in shape.The easiest way to install is with screw piles. These can be purchased from a specialist store. Such structures are good in that they are screwed into the ground according to the principle of a screw.
The advantage of such piles:
- installation can be done even by a beginner;
- no shrinkage time is required, which is necessary for a concrete base;
- piles are cheap;
- piles are durable and strong;
- versatility.
After the installation of the piles, a base from a bar or channel bars is attached to them, to which, in turn, vertical guides are mounted.
The piles can very well withstand loads that far exceed the weight of the garage itself.

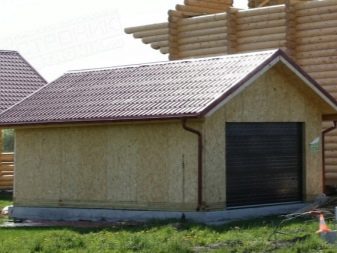
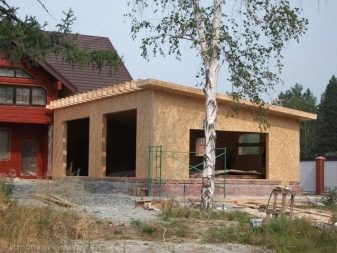
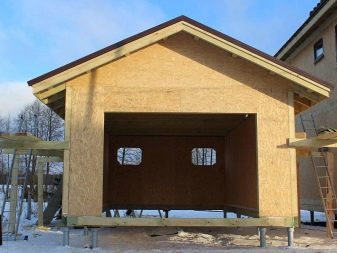
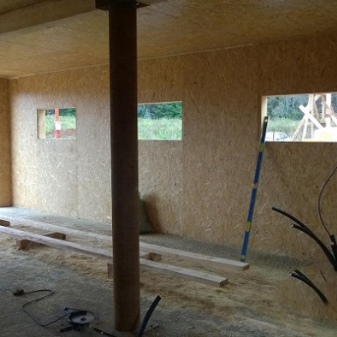
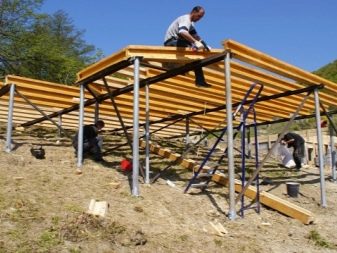
Frame
To build a frame from SIP panels, you will first need beams made of metal or wood. For SIP panels made of corrugated board, metal guides are required, for fixing OSB boards, a beam is needed.
The metal beams are concreted at the moment the concrete slab is poured. Wooden beams are installed in pre-prepared recesses.
If the vertical posts are up to three meters high, then intermediate supports are not required. Racks are installed for each individual block, then the structure will turn out to be quite rigid.
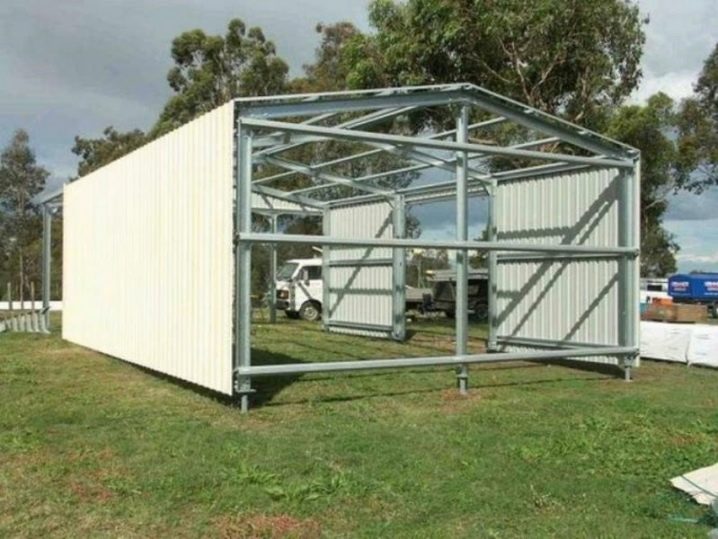
Horizontal beams fasten the frame of the future object, they must be mounted at the upper and lower points, then this will be a guarantee that deformation will not occur.
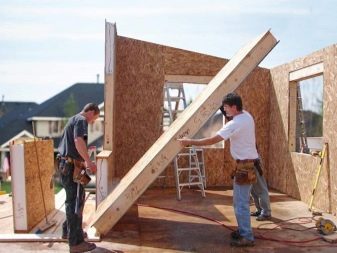
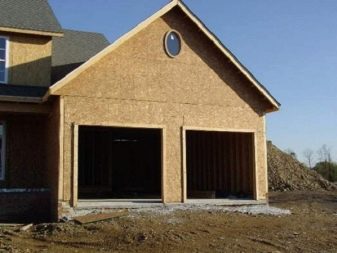
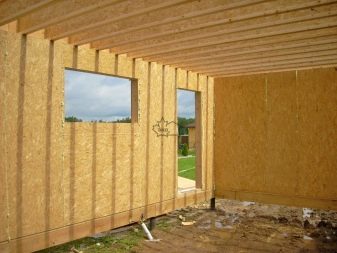
When the frame is ready, you can mount SIP panels, and if everything is done correctly according to a pre-planned plan, then the installation process will be simple.
The assembly of the walls starts from some corner (this does not matter in principle). Using a special docking bar, the corner panel is attached to the vertical and horizontal track. Most often, self-tapping screws are used as fasteners. When one panel is fixed, the following blocks are mounted, while docking locks (gaskets) are used, which must be covered with a sealant so that the seam is tighter.
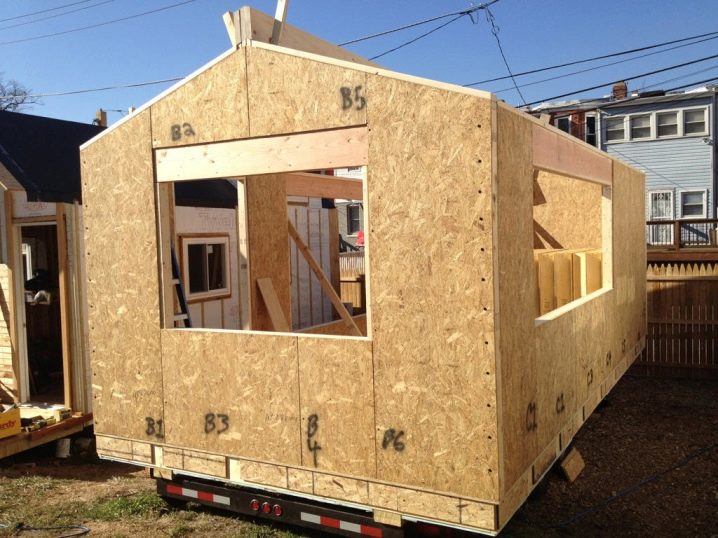
The rest of the set of sandwiches is attached to the guides, which are at the very top and very bottom.
The garage often contains shelves and racks for tools and other useful things. The shelf is usually 15-20 centimeters wide, so this factor should also be taken into account when designing. An important point: the shelves are necessarily attached to the frame, then no deformations will be observed, the load on the walls will be minimal.
The boards themselves can be made of PVC, OSB or foam. Each slab with a size of 60 x 250 cm weighs only no more than ten kilograms. The thickness of the blocks is usually in the order of 110–175 mm.
There is also another (easier) way to mount the frame. A new technology appeared in the USA, called the frameless method of building a garage from SIP panels. This option is appropriate to use in the southern regions, where there are no stormy winds and significant snowfall.

Further work takes place according to a rigid scheme. In one corner, a panel is placed at the junction of the strapping beams. They are leveled under the level, then with hammer blows they put it on the bar. All grooves are certainly coated with sealant and polyurethane foam.
The lock is secured by fastening the chipboard to the harness. A joining beam is inserted into the groove, which is coated with a sealant; the panels are adjusted to each other and to the supporting beam and are tightly fastened. Corner panels end-to-end are fixed to each other using self-tapping screws.
Everything should be taken into account in advance, it is very important to provide that the fasteners are reliable; otherwise, the garage will fold like a house of cards after the first big snowfall.
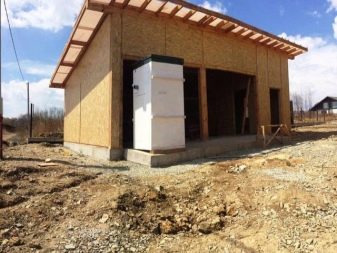
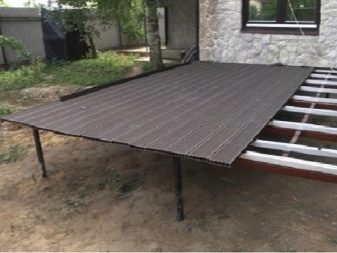
Roof
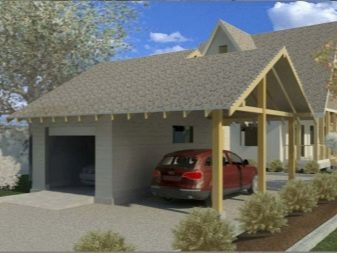
Speaking about the roof, we can state that there is a wide choice here. You can make a roof:
- single-slope;
- gable;
- with an attic.
A gable roof can actually be made if the height is the same along the perimeter of the object. If a pitched roof is being installed, then one wall will be higher than the other, and the angle of inclination must be at least 20 degrees.
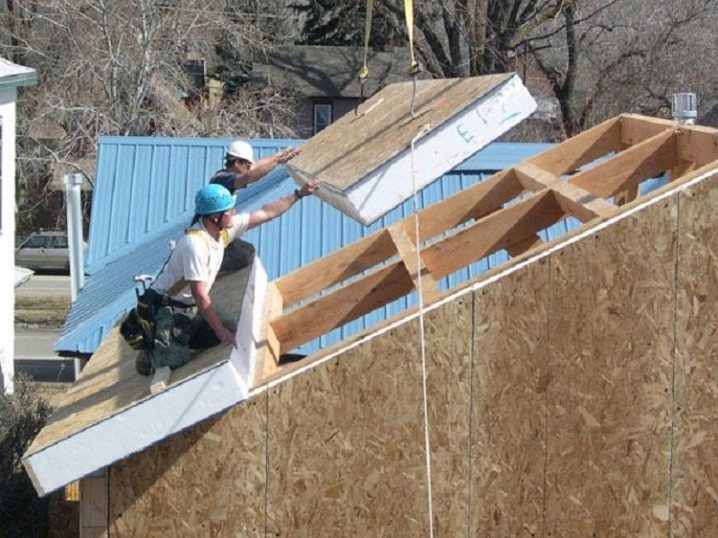
To assemble a gable roof, you will need to supply:
- mauerlat;
- rafters;
- crate.
It is recommended that in the role of one span there is one self-supporting insulated wire panel; under it you can set the frame from such an angle that the node will actually be fastened on both sides.
The roof can also be made from several rows of panels. Installation starts from the corner from the very bottom. The panels are fixed with self-tapping screws (there are no fundamental innovations here), the joints are sealed with a sealant.
There must be ventilation in the garage. A pipe is inserted into the hole, and the joints are sealed with sealant or polyurethane foam.
After the walls and roof are ready, the slopes should be plastered, then well treated with a sealant. Thus, there will be a guarantee that the garage room will be warm in winter.
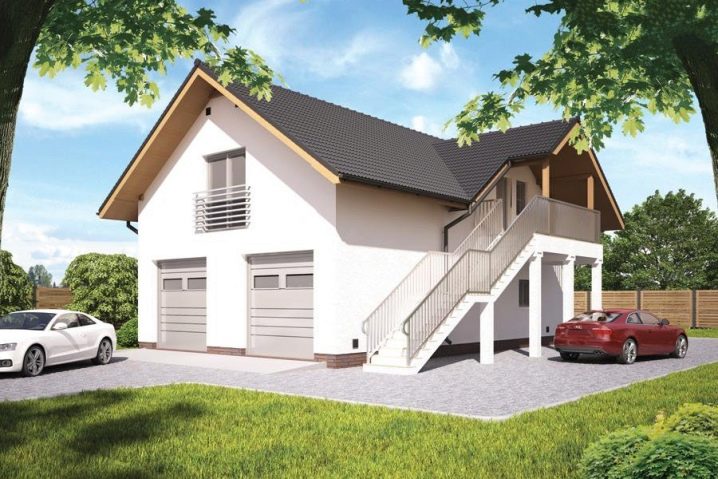
Garages with an attic are very functional, in such an "attic" you can store old things, boards, tools. An attic is an additional square meter that can be used with great efficiency.
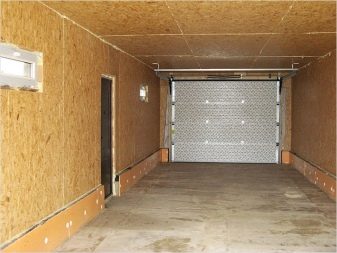
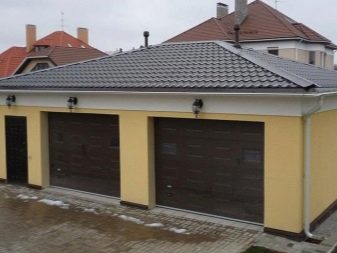
Gates
After that, the gate is placed. This could be a gate:
- sliding;
- vertical;
- hinged.
Roller shutters are very functional, their advantages:
- low price;
- ease of installation;
- reliability.
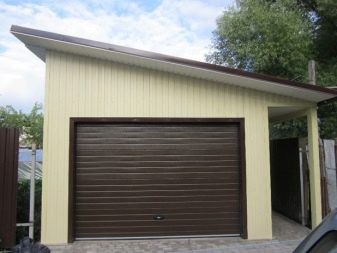
Such devices save a lot of space. Swing gates are gradually fading into the background. They are heavy and difficult to work with in winter, especially during heavy snowfalls. Swing gates require an additional at least 4 square meters of free space in front of the garage, which is also not always comfortable.
It is easy to install automatic equipment to the vertical lifting gates, they are simple in design and reliable.
How to properly install the SIP panel, see the next video.


The comment was sent successfully.