Features of disc hillers for a walk-behind tractor and the subtleties of their creation

A disc hiller for a walk-behind tractor is characterized by individual characteristics. The design is easy for self-manufacturing. Gardeners are showing an interest in homemade products, as they can simplify the hard agricultural work associated with the processing of certain crops.
Description
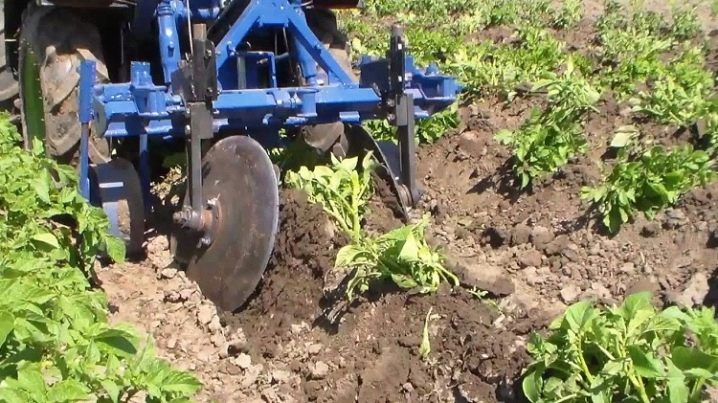
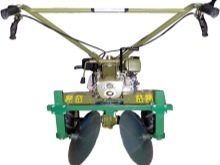
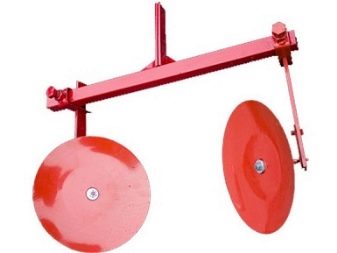
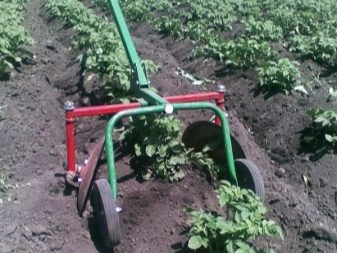
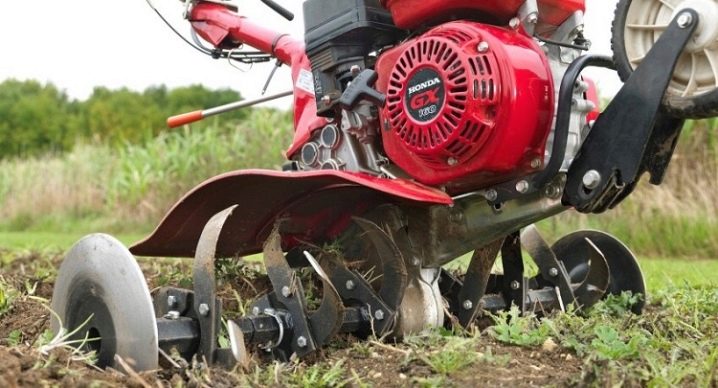
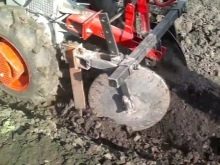
Today the means of small-scale mechanization are widespread. For agricultural work, a disc hiller for a walk-behind tractor is more often used. Outwardly, it looks like a frame on two wheels with disks attached to it. The device allows you to cultivate the soil both before sowing and after harvesting.
During the period of seedling growth, this device is used to process the aisles with plants. Disc ridgers are suitable for garden equipment with two forward gears. The unit is compiled with both a walk-behind tractor and a cultivator. There are also manual options for this garden tool.
The difficulty with a disc hiller is the need to set a gap of the desired size. Between the lower base of the discs, it is equal to the row spacing. In this case, the track width of the wheels of motor vehicles must correspond to the same distance. To create grooves, the discs are installed inclined in relation to the vertical. Disc hillers cope with:
- elimination of weeds;
- arrangement of a ridge of earth, which protects the tubers from the sun's rays (it is known that due to the close location of the vegetable to the surface, its development is inhibited);
- improvement of air exchange in soils, which excludes moisture evaporation.
Device
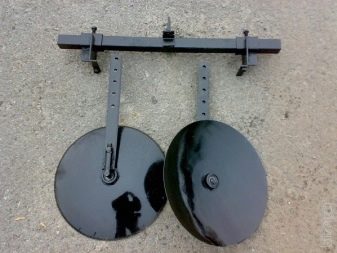
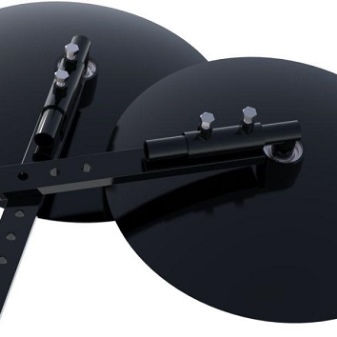
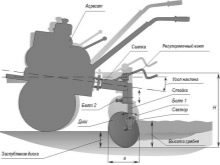
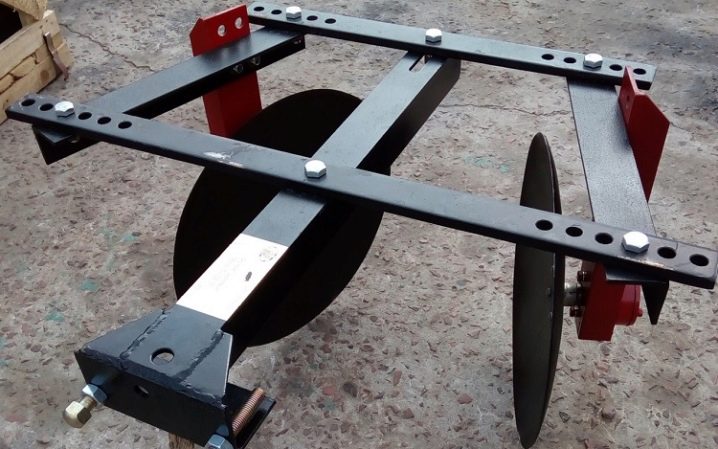
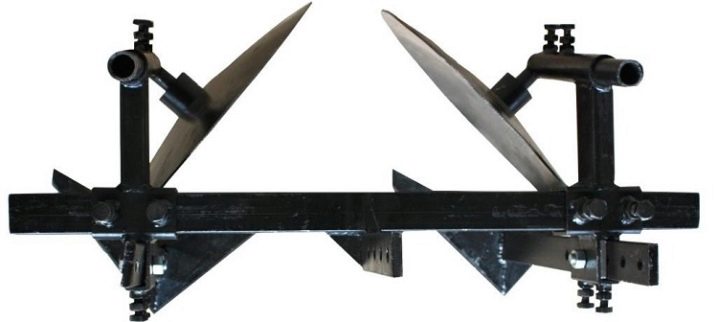
The main components of the device are:
- T-shaped axis;
- screw connections that regulate the angle of inclination of the discs;
- racks in the amount of two pieces;
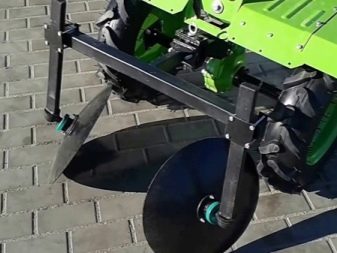
- discs in the amount of two pieces.
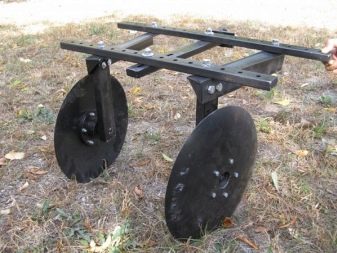
Paired discs should be in the ground at a given depth with little or no resistance. They rotate in the ground, excluding human effort. Thanks to the adjusted angle of inclination and the angle of takeoff, the parts create a ridge. It is customary to set the discs to a value corresponding to the row spacing. Pairs of discs must be of the same diameter and weight. This is the only way to achieve the evenness of the ridge and the smooth running of the device. The desired profile is leveled by the angle adjustment system.

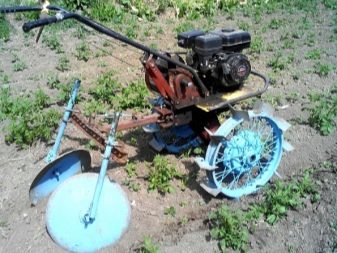
The mounted hiller is not included in the standard set with walk-behind tractors and cultivators. Items are sold separately or manufactured in-house. The high cost of hillers pushes people to self-manufacture. When buying, you should pay attention to the compliance of the hiller with the capacities of the main unit. The cost of the hiller is associated with the variety of materials used in its manufacture.
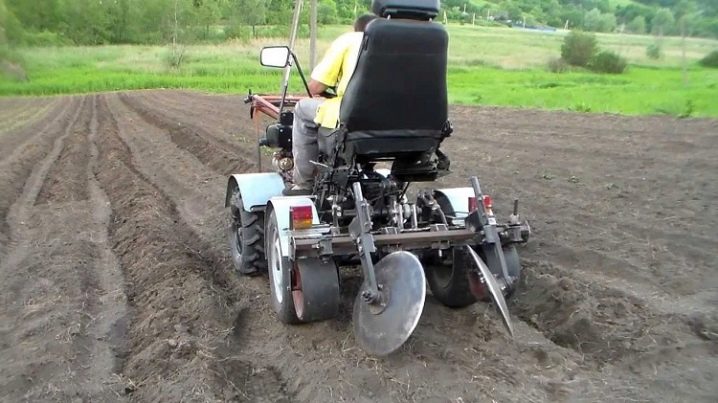
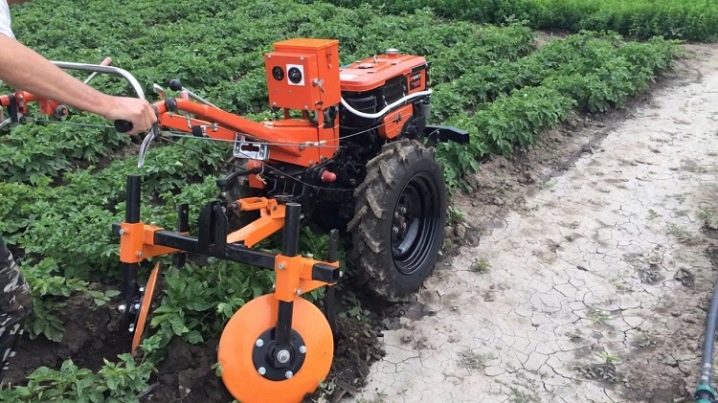
The hiller can be installed on a walk-behind tractor with a two-speed reverse engine and the obligatory presence of a power take-off shaft. It is understood that two gearbox speeds control forward travel. When asking sellers for their availability, be sure to take this factor into account.
Varieties
There are two types of disc hillers on the market. The most widespread are products with a variable width of the processed strip. The device is convenient not only for processing potatoes, but also for other crops, such as strawberries or beans. Thanks to the sliding design, the distance between the discs changes to suit the required furrow width.Such equipment is more often used in conjunction with heavy walk-behind tractors.
Simple machines have a constant working width, which is 20-30 cm as standard. The device of the hiller consists of fasteners with disks located on them. Due to the simplification, the designs are cheaper in cost. They are also lighter, and therefore can be hung on light walk-behind tractors and cultivators.
The device can be improved for processing several rows at the same time. The set of equipment will be called multi-row and is unlikely to be suitable for small areas. The devices are popular with gardeners who have planted fields of a hectare or more.
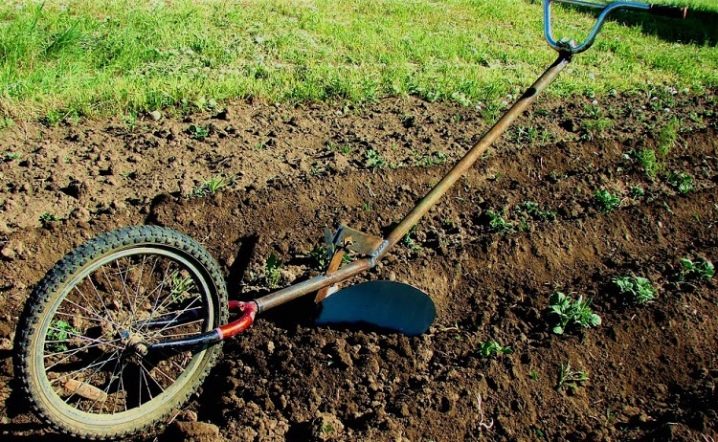
In addition to attachments, there are manual disc hillers. They are also effective in work, and inexpensive in terms of cost. Hand tools are durable and reliable, compact in size, easy to operate. The tool can be used both in small gardens and in the fields. If the device is equipped with a weight and a steering wheel, then control will be available to one operator. Standard manual construction is operated by two people, one pushing the implement and the other pulling.
How to do it yourself?
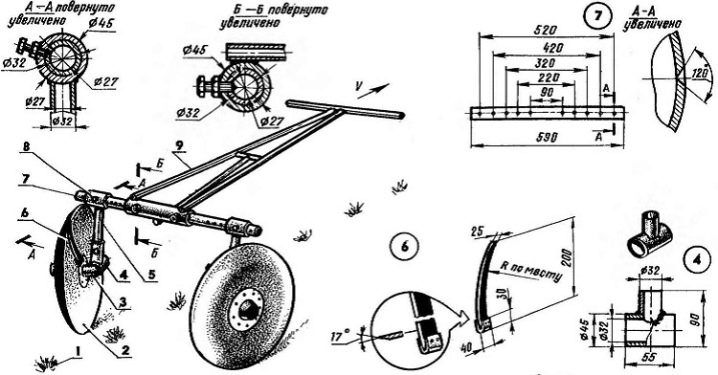
Any equipment is easier to manufacture if there is a corresponding drawing with specified dimensions. The tool making algorithm is required first:
- draw drawings on paper;
- make a template in full size, which will then be used to cut out steel parts;
- bend the blanks of the discs along the level until the parallel lines of the radius are reached;
- organize welding work, with an apparatus with the appropriate power for the metal used;
- clean the welding edges with emery;
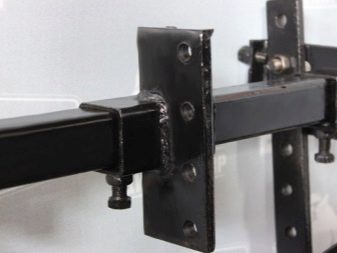
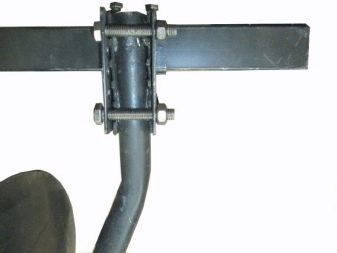
- fasten the racks and turnbuckles with bolts;
- weld structural elements;
- adjust the position of the discs.
The required steel thickness for the discs is 2-3 mm. The distance between the elements can vary from 35 to 70 cm. The racks and brackets are made of ordinary water pipes with a diameter of up to 20 mm and a steel thickness of about 2 mm.
Required materials and tools
As discs, it is allowed to use ordinary lids from kitchen utensils with a diameter of 40 to 60 cm. These parameters are selected experimentally and are associated with the power traction of the walk-behind tractor. Too heavy a device, the unit may simply not be pulled. The elements of the connectors will be replaced by a hollow pipe with a diameter of at least an inch, with a meter size.
The pulling force is assigned by a 3⁄4-inch hollow pipe. For the leash, you need to choose T-shaped steel products. Adjustable adapters are useful for clutching disc elements. Bolts will play the role of fasteners. The elements are fastened with welded seams, bent with a turbo bend or with a gas lamp. If the structure is made for a walk-behind tractor, a bracket should be provided. Hand tools need comfortable grips.
Manufacturing
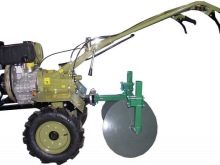
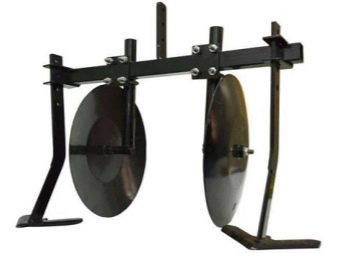
It is possible to make a hiller for the popular motor-blocks "Ugra", "Belarus 09N-02", "Motor Sich" according to the same principle. The main axles on which the disks are hung are adjusted to the parameters of the walk-behind tractor. Parts are connected by welding. The main condition for the disks is a symmetrical arrangement. Both elements are mounted at an angle, and the best connection option would be an adjustable one with an adapter. The holder elements are bent with a turbo bender and then welded to the axis. The reliability of the fasteners must be checked, and the edges of the welding must be cleaned.
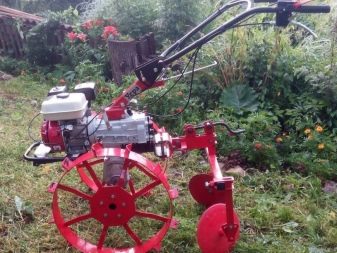
The elements are attached to the axis with the letter T. The assembled structure is installed to the walk-behind tractor using a bracket. The stopper can be inserted into the profile tube and pressed firmly. The hiller is finalized before planting potatoes. This will allow you to eliminate shortcomings in a timely manner and not spoil the harvest.
It is advisable to carry out trial work on an empty area.So it is more convenient to check the profile of the resulting ridge, to estimate the width of the capture, the parameters of the burial of the mechanisms.
In the process of work, you can set the optimal speed that will match the power of your walk-behind tractor. Hand-made mechanisms allow not only to save on attachments for the walk-behind tractor, but also to facilitate manual labor. Even if there is no unit with a power device on the farm. A self-made manual disc hiller will be a good helper, besides, it will save money on the purchase of equipment.
Assembly
The basic elements of the manual disc tiller remain the same. The assembly of the product is easier, since the two disks of the tiller are connected to each other by a conventional sleeve or by welding through a pipe, which will act as a jumper. Manual models do not imply adjustment of the connection angle, therefore, work with them is possible along row spacings with a standard distance. The free rotation of the discs around the axis will be assisted by the hub. Due to the rotation, the tool will easily enter even in heavy, dense soil.
Elements with discs are connected to a beam, for the connection of which a welding machine is useful. Anchor bolts can be selected as connectors. Such fasteners make it easy to disassemble the garden tool.
A handle is useful to control the device. As which you can choose a handlebar from an old bicycle or other similar inventory. It is fixed on the beam and aligned with the height of the person who will control the hiller.
By the way, wheels from an old bicycle can be adapted to a manual tiller. Attached to the frame at the front will significantly reduce operator stress. Some craftsmen also use a bicycle frame in the assembly, installing hiller discs instead of pedals. The steering wheel and one wheel remain in the design.
Recommendations for use
The order of work, fixed in the technical passport of the factory device, presupposes a mandatory check of the connections of the rotating elements and the fixation of the axles. There should be no foreign objects in the treated area. It is important to be careful when maneuvering the machine. To avoid injury from sharp corners, it is important to maintain a safe distance. Special gloves will help protect your hands from accidental cuts.
The adjustment of the hiller is made depending on the properties of the soil. If it is dry, it is recommended to slightly increase the value between the discs. If the ground is wet, the distance decreases. If the parameters are incorrectly set, there is a risk of damage to the tops and tubers.


Hilling is recommended in the morning or evening hours. The weeds cut by the discs are usually left in the aisles. It will protect the soil from drying out in the heat, maintain an optimal microclimate.
To use attachments in combination with a walk-behind tractor, some skills are also required. For example, to install a homemade hiller, you need to use a bracket in a hitch to the device, but without a beam. A hand-made home-made device may be too heavy for a walk-behind tractor, therefore, the wheels must be paired during the hilling process, otherwise the unit will slip. For the best efficiency of the tool, it is necessary to plant the potatoes in the correct rows, with equal distances.
For how to make a do-it-yourself disk hiller for a walk-behind tractor, see the next video.


The comment was sent successfully.