Description of TISE drills
The description of TISE drills will be very useful for anyone interested in independent drilling. You need to pay attention to the drawings for making a manual drill with your own hands and to the instructions for assembling a homemade drill. And if you do not want to do them yourself, you need to take a closer look at the TISE FM 250 drill and other models.
Features and device
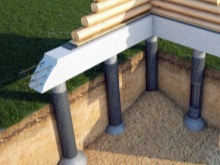
Bur TISE is well known to specialists for quite a long time. It is perfect if you need to equip a pile foundation without excavation. Thanks to such a device, it is possible to abandon both trenches and foundation pits. It is quite economical both in creation and in application. The TISE unit works excellently, even if the simplest materials and designs were used for it.
The name is simply deciphered - the technology of individual construction and ecology. The development was presented at the very end of the twentieth century, when private housing construction increased sharply, and cheap foundation technologies were absent. Practice has shown that, in comparison with other methods, it is possible to reduce the costs of arranging a pillar foundation up to 5 times. When digging holes, the bottom extension is used.
This format also makes it possible to provide an exceptionally high load-bearing capacity of structures, so savings here are not achieved at the expense of quality.
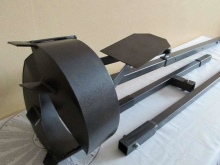
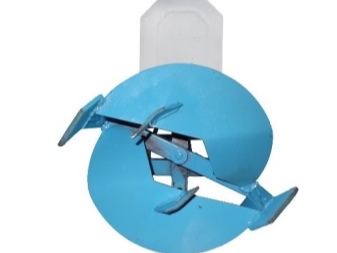
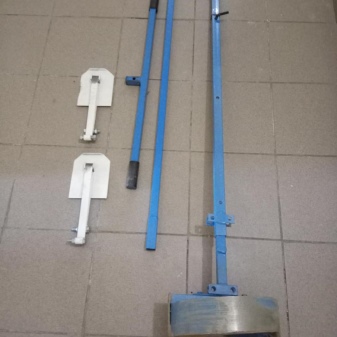
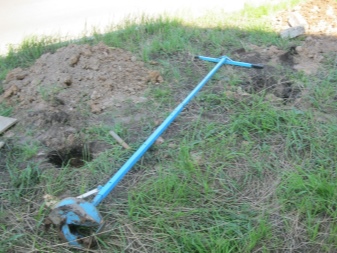
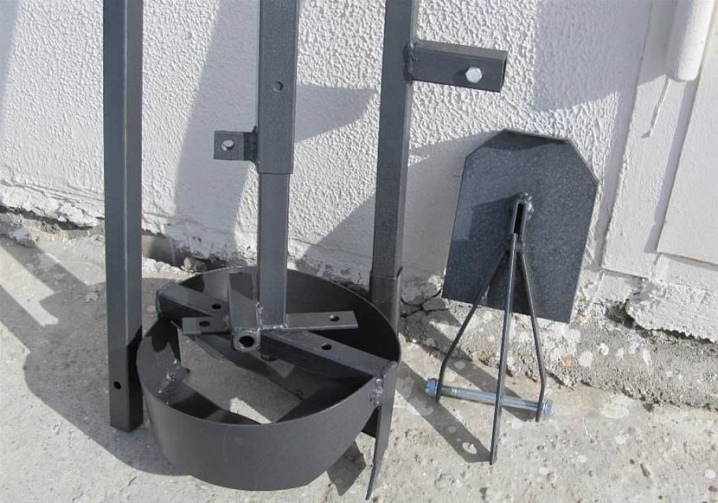
The main components of the drill are:
-
expandable bar;
-
soil accumulator;
-
folding plow;
-
a cord with which you can control the plow itself.
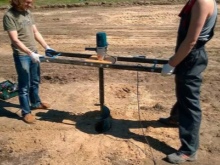
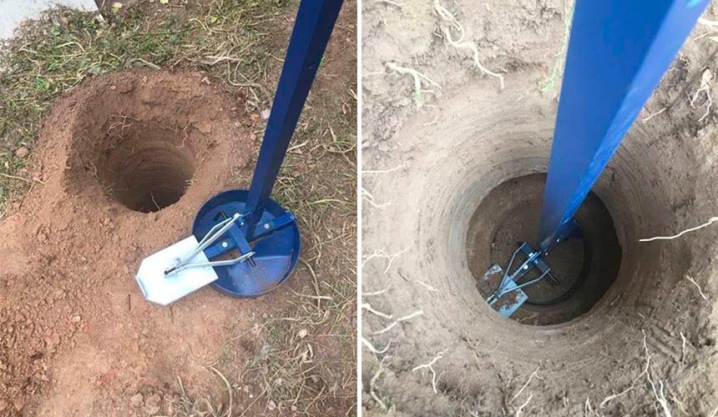
When TISE is folded, its length is 1.35-1.4 m. When put into working condition, it increases to 2.3 m. The lower expansion is provided by about 60 cm. But it is important to understand that the design is constantly being modernized and improved. Therefore, each time you should clarify the final linear parameters before buying. Specialized cutters are the difference from many other models. Thanks to them, plowing the land is much easier.
Model overview
TISE FM 250 is an excellent hand drill for poles. This product is equipped with a pair of high quality blades. The description notes that the control of the expansion mechanism has been brought to perfection. One of the plows is placed on the side. As a result, the drilling process is accompanied by the appearance of asymmetric loads.
The side walls of the storage device largely compensate for this pressure. The second blade of the expander appeared, however, only after the modernization in 2011.
The innovation was the addition of a special barbell. To drill into the ground, you must press the handle.
The technical parameters of the 250th version are as follows:
-
passage with expansion up to 2200 mm;
-
passage without expansion up to 3000 mm;
-
own weight 9.5 kg;
-
section 250 mm (hence the name);
-
handle width 700 mm;
-
the option of independent plow rotation (independence in relation to the movement of the head is most effective when driving with an extension of the lower zone);
-
increased productivity;
-
the ability to lay holes for the fence and under the piles for the house, even where there are pebbles with a cross section of up to 50 mm;
-
manufacturing of blade rods with the expectation of the least resistance during drilling;
-
suitability for drilling operations for pole and pole-strip foundations, regardless of the degree of load that the built house will have;
-
suitability for the Far North and areas that are unfavorable in seismic terms.

In many cases, TISE FM 200 is used. Its intended purpose is drilling using the technology with the expansion of holes in the ground for tape-and-pole and clean post foundations. Standard dimensions are 1.34x0.2 m. The weight of the product is 9 kg.
The design is optimal for holes in the ground during the construction of light structures, but it would be unreasonable to build powerful houses from heavy materials of high hardness; but you can work safely on any soil.
For the most serious work, it is more correct to choose a reinforced TISE FM 300 drill. He will cope, even if you have to prepare the foundation for a stone or brick private house with concrete floors. The well itself is traversed strictly with the plow removed. The expansion in the lower part of the canal is provided with the same powerful and high quality, regardless of the type of land on the site. The depth of the excavations reaches 3 meters.
But not only builders need drills for earthwork. Such tools are also very valuable in garden plots, as no other tool allows you to prepare wells as well. It will be possible to successfully:
-
put up a strong and solid fence;
-
prepare for planting a bush or tree;
-
feed tall plants;
-
prepare drainage complexes for work.
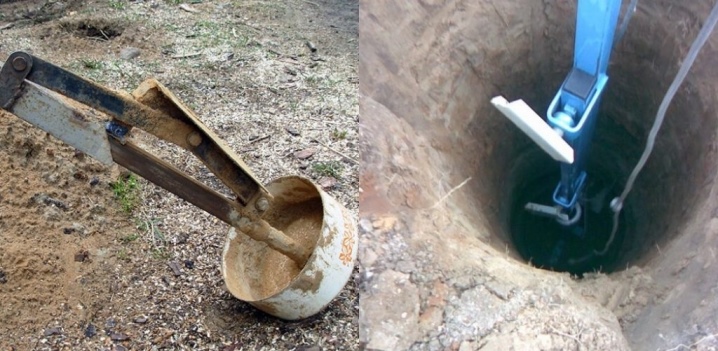
In theory, you can take other brands of drilling tools. However, TISE has a clear advantage over them - it does not cut through, but delicately plows the soil. A special cup simplifies the extraction of the crushed soil mass. It also significantly increases the stability of the tool.
It will not be pulled to the side as much as is usually the case with two-blade drilling devices.
How to do it yourself?
The need to make your own manual homemade drill according to the instructions is quite obvious. After all, original products can only be supplied by RN Yakovlev's company, which owns a patent and a number of trade secrets. The cost of such a product ranges from 4200 to 5600 rubles, and for the vast majority of people this is not such an amount that can be ignored. And for organizations, savings will definitely not be superfluous.
Blueprints
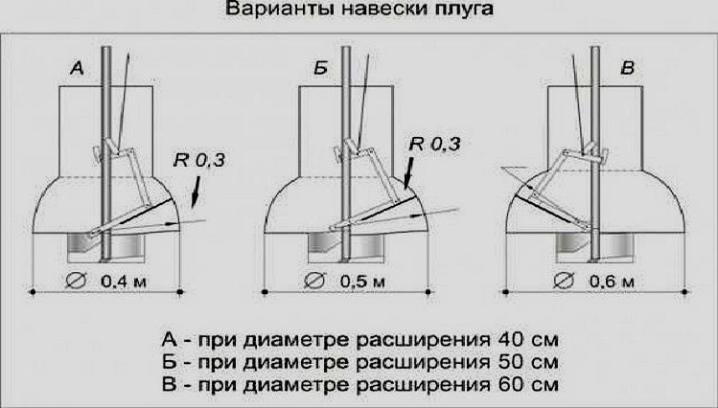
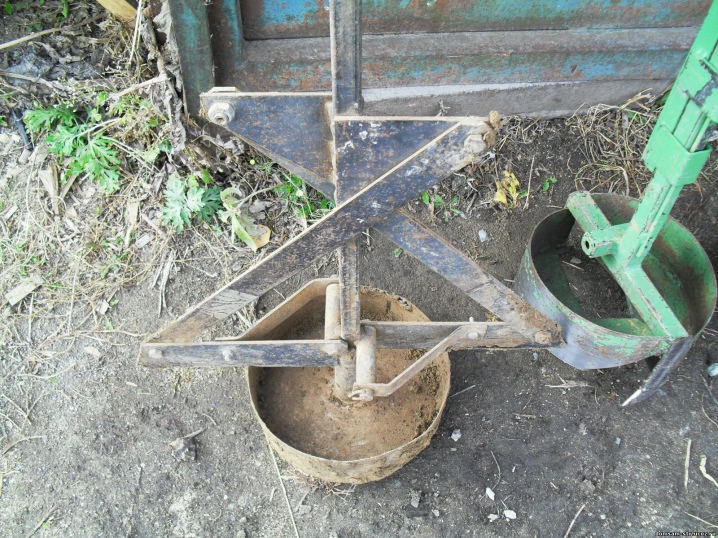
Alas, it is also almost impossible to find dimensional drawings for manufacturing - the company diligently protects its proceeds. But this is how the optimal, proven in practice, methods of mounting the plow look like.
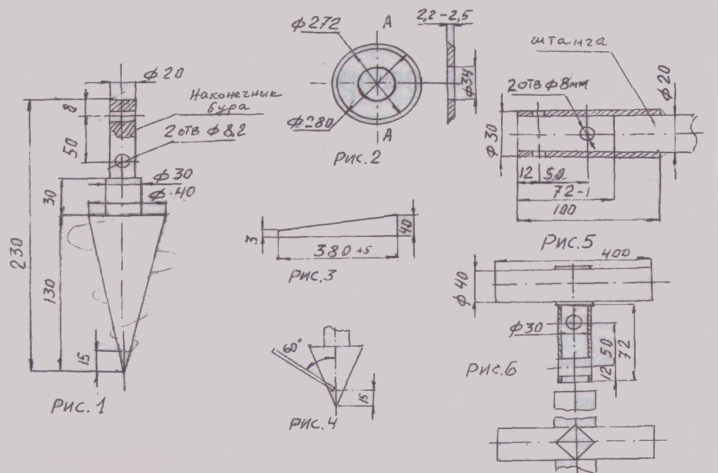
And here is the necessary information about the dimensions and performance of individual parts of the drill. You can find out the nuances of working with both the barbell and the tip - however, most likely, such information was worked out by individual enthusiasts.
Tools and materials
In the overwhelming majority of cases, in order to simplify the manufacture of a hole drill, they refuse to expand, or rather, to independently rotate the plow when the face expands. But you can still try to implement this function if you have the necessary engineering experience and certain training. The decision must be made before selecting the necessary tools and materials. In most cases, they use:
-
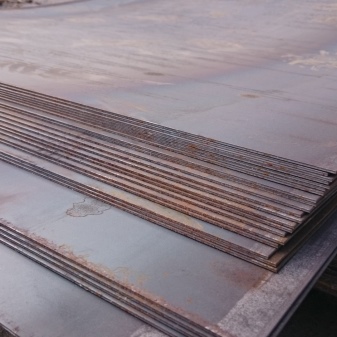
for rims - sheet steel or pipes of suitable cross-sections;
-
for the frame - a horizontal bar obtained from a tubular profile measuring 25x25 mm in standard and with a wall thickness of 1.5 mm in lightweight versions;
-
sidewall racks welded onto the rim - they are obtained from sheet ferrous or stainless steel, and the cutting edge is additionally sharpened;
-
for blades - discs divided in two from hand-held circular saws with an inclination of 20-30 degrees in relation to the horizontal or metal sheets with an edge bend down by 20 mm.
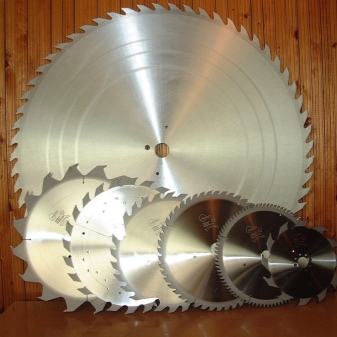
The cutting edges on the inserts are oriented so that clockwise rotation occurs.
This option is optimal for most consumers. When creating a drill with your own hands, steel pipes with a cross section of 250-300 mm are also often taken.They are selected in accordance with the diameter of the wells being laid. Additionally, you may need:
-
steel bar;
-
devices for securing parts of the bar;
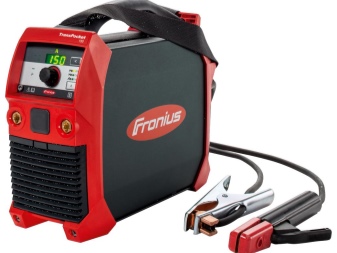
-
electric arc welding equipment;
-
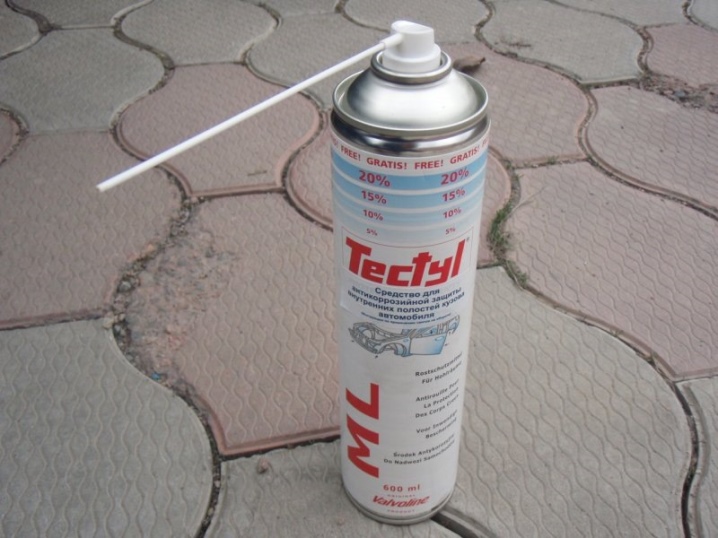
special preparations that exclude premature metal corrosion.

Assembly
It is necessary to clearly define how long the bar should be. For wells deeper than 1.5 m, an auxiliary pipe section will be required. It is joined by connecting blocks to the main boom. Cutting edges, as already mentioned, are usually obtained by sawing into 2 parts of a saw blade. Further:
-
weld on everything obtained near the end of the metal rod at an angle of 15-25 degrees;
-
a piece of pipe is welded on above the working edges to create a soil accumulator;
-
remove dirt;
-
degrease the surface;
-
apply paint with anti-corrosion properties;
-
provide strong fixation of vertical canines (2-4 of these canines is quite enough for simple soils);
-
mount the expander.
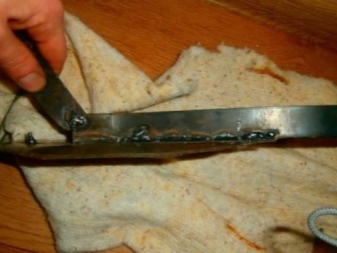
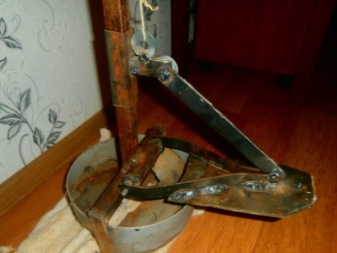
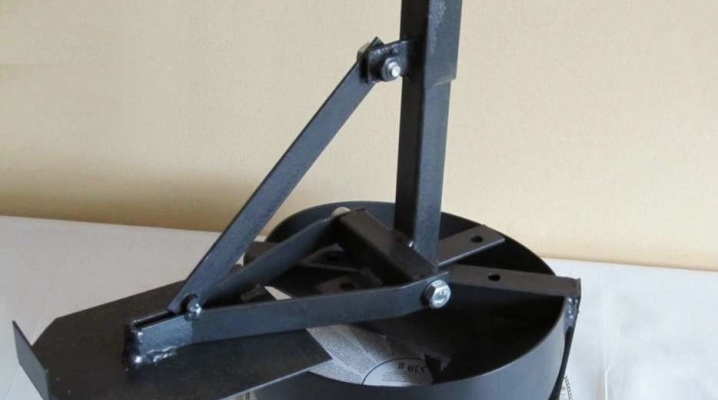
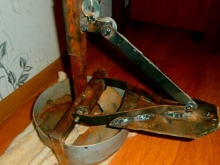
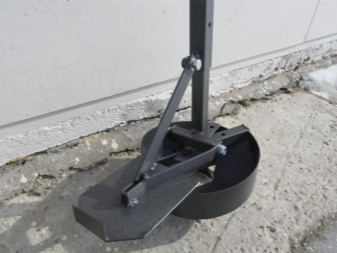
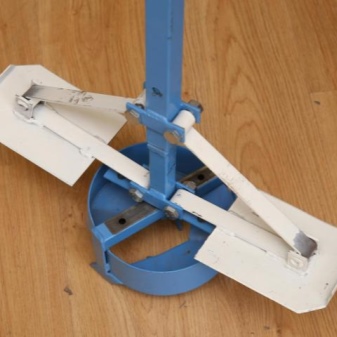
The expander should be given special attention. Begin by bending a strip of metal in a specific way. Metal loops are attached to this strip and to the bar. These hinges, as well as a rod mounted on the end of the plate, will provide a reciprocating movement. The section of the lower cavity is variable.
To influence it, the height of the plate attachment is changed. Next, you will need to go through all the welds with an abrasive. It's a good idea to do the same with the anchor points. Finally, an anti-corrosion mixture is applied.
That's it, after that the TISE drill is ready for immediate work.
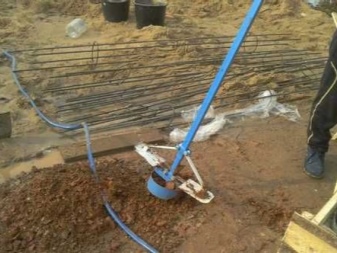
How to use it correctly?
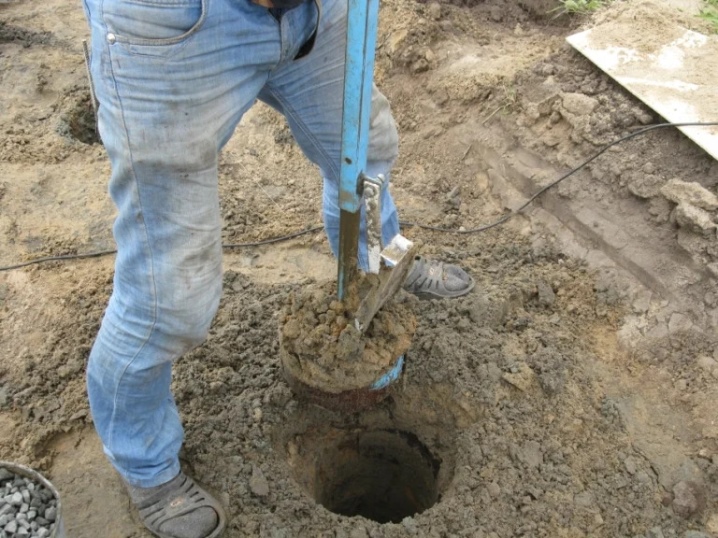
But it is also important how the drilling itself should be carried out: it is errors in this process that often cause complaints about a good, in general, tool. It should be understood that TISE, for all its merits, is a hand drill. That is, driving, by definition, will require a lot of physical strength. How much depends on the hardness of the soil. You need to be prepared for the fact that even with great skill in a week in moderately hard ground, it will turn out to make about 30 broadenings - sometimes a little more, but this is extremely tiring.
It is not necessary to extend the handle lever. If this is done, then when stopping on a hard layer, stone or something else like that, there is a great risk of collapsing the rack. Then it will have to be repaired additionally. In such a case, repeated sharp advances with the plow, intense blows with it are more effective. Such manipulations are easiest to do “in one hand” (the partner will only interfere).
Very hard and dense soil is easier to pass if you add a little water. But you should not get carried away with this. One more nuance: a standard TISE drill makes 80-100 widening, after which it breaks. It is necessary to strengthen it additionally for the prevention of frequent repairs. Such drills work well on clay soil.
Even without straining or accelerating, you can make a hole with an extension in 2 hours. Half of the time is spent on the sinking itself, the other half on extensions. With a particularly favorable soil, it turns out even a little faster.
Usually, the cutting part goes easily and freely up to the freezing depth. Deeper water begins to flow abundantly.
Recommendations
-
to drill in May or June, until the ground is petrified, or in early autumn, but not in a drought;
-
dry or slightly damp clay is easily shaken to extract, and if the clay is wet, it is better not to get down to business, or use powerful machines instead of a manual apparatus;
-
it is useful to immediately drill to the required level and immediately draw up extensions;
-
remember that after the completion of drilling, the hole decreases in depth by 50-70 mm.
How to make a TISE drill with your own hands is shown in the next video.


The comment was sent successfully.