Racks for a motor-drill
Racks for a motor-drill are quite a popular thing in everyday life. It is extremely useful to know how to make a stand for a manual gas drill with your own hands. Another important point is competent drawings of a homemade device.
Characteristic
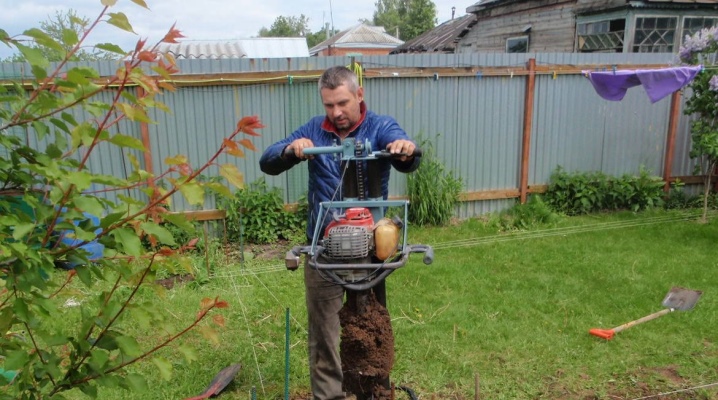
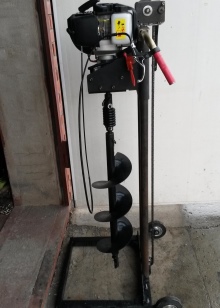
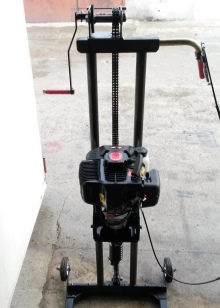
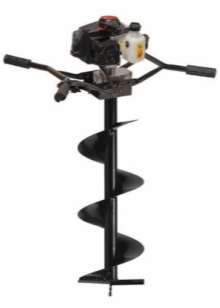
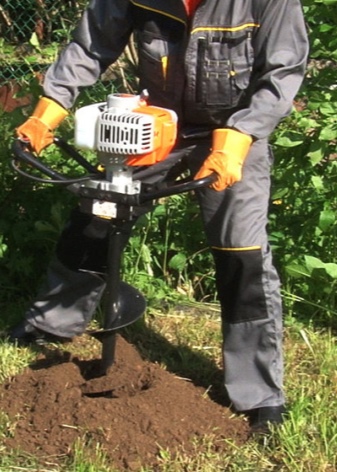
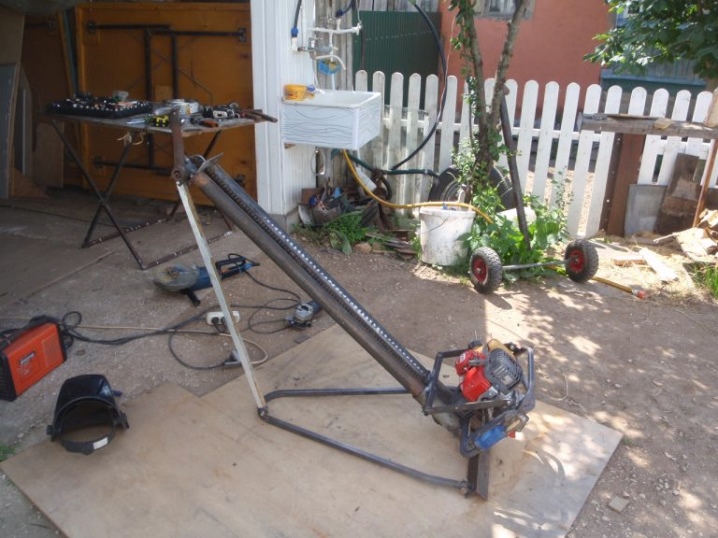
Hand-held drilling equipment has gained very solid popularity. But using it "in its pure form" is very difficult and laborious. A stand for a motor-drill allows you to significantly simplify many jobs. This structure is made from a pair of metal pipes. A carriage is attached to the stationary part, which moves the drilling element.
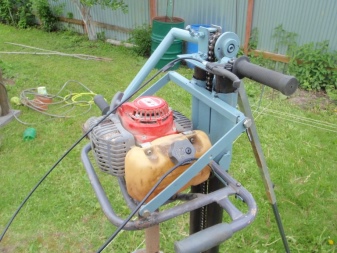
To make the carriage move, a chain is attached to it. And this chain, respectively, is connected to a shaft equipped with an asterisk. When working, twist the handle up and down. Thus, the stand for the gas drill allows you to pull up and down the main drilling part. At the same time, and importantly, the reliability and stability of manipulation is ensured, and not only the unloading of the operator's muscles.
Adjustment of the structure is required. After all, the soil can be different, and there simply cannot be a single standard of penetration.
Moving on the ground will be greatly simplified if you equip the device with wheels.

Appointment
A manual drill for drilling holes in the ground is very useful when you need to prepare a hole for a pile or fence support. But no matter how experienced the users are, no matter how they try to do everything right, a blow to the hand will still occur. Little of, if the earth drilling attachment goes deep into the formation, over the entire auger, its extraction becomes very difficult. Homemade simplest rack effectively solves all these problems. Ascent and descent is made easier even if thick lumps of dense clay stick to the auger, all that is required is the addition of a winch to the stand.

Terms of use
Having brought the stand to the right place, you should immediately set it to the exact height by adjusting the backgauge and front legs. The tilt of the tines can be flexibly adjusted in both directions, which makes it easier to rake the soil. The first step in the work is to raise the rack, after which the drill is placed. Everything needs to be set at the hydraulic level, and then they begin to work. If the height of the rack is 2 m, then using the nozzles, you can immediately drill 1.6 m into the ground.
If you use another nozzle on the second run, you can add 60 cm of depth. A similar proportion of the depth of the first pass (80%) applies for other heights of the stanchions. You can disconnect and shake out a clogged tip without even turning off the motor. The deeper you drill, the more difficult it is to remove the tip - you just have to be prepared for this turn of events. There are no more special "tricks".
For the features of using a stand for a motor-drill, see the video below.
How to do it yourself?
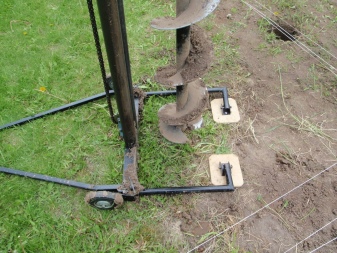
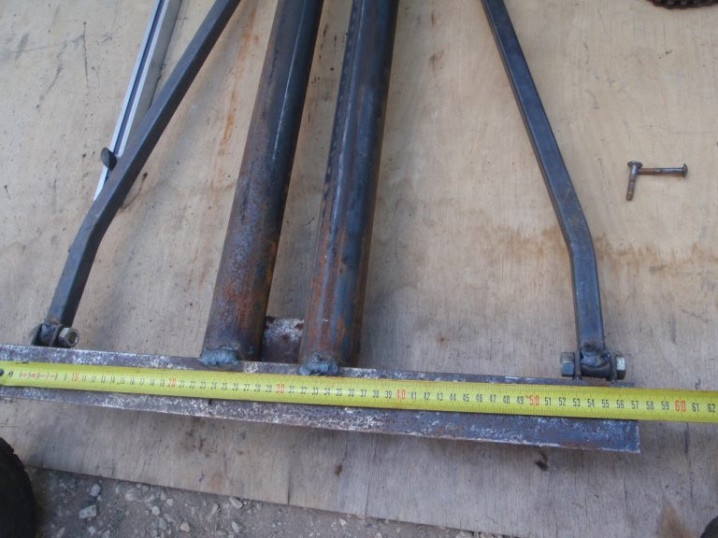
The device is so simple that a special drawing is not needed for any trained people. The guiding elements are pipes with thin walls with a cross section of 5 cm. The length of such pipes is 1.3 m.A steel corner is suitable as a base for a home-made rack, the length of which is 0.57 m, and the size of the shelf should be 5 cm.The carriage is prepared on the basis of two-inch pipes, their length is 0.25 m ...
Important: the carriage must slide freely along the guide elements. A motorized drill for drilling wells is attached to both the upper and lower segments of the carriage.In the first case, a fragment of a 20/20 profile is used, and in the second, a ¾ inch pipe cut in the longitudinal plane is used. On a square piece of rolled metal, braces obtained from a strip of steel are attached from above. This allows you to firmly fix the frame: one edge is held by a bed made of a piece of pipe and bolts, and the diagonal elements provide a grip in two additional places - also with bolts.
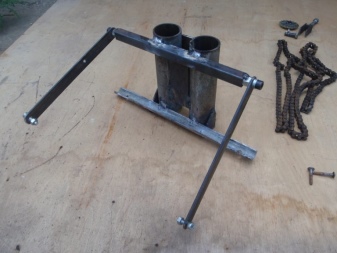
We can say that the carriage is put on a chain. However, the chain itself is also fixed firmly. At the point of installation, the plates are additionally tightened with M8 bolts. The first plate is welded onto the back of the carriage. The second is used to press down the chain there.
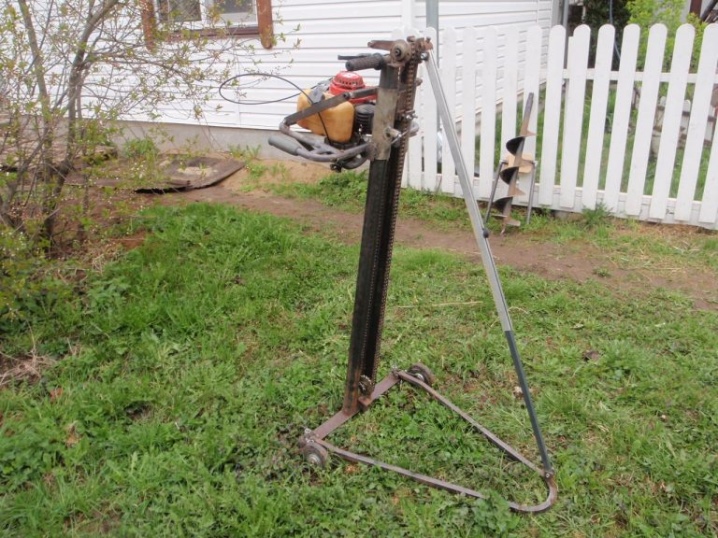
It is worth taking care of correcting the tilt of the instrument. For this purpose, two profiles are taken and a jib is formed. The angle of deflection of the rack is determined by the length of the jib. As a result, even a deviated borehole can be drilled. Moreover, to facilitate transportation, carrying the tool.
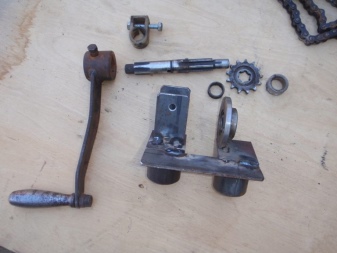
The movement of the sprocket, and then the drive shaft, is provided by a special handle. How to do it, any master can easily figure it out himself. The drive shaft can be taken from the engines of domestic motorcycles (together with the splines). A motorcycle chain can also be used, but usually it has to be lengthened to 2.5 m. A driven sprocket is placed on the bottom of the rack, supplemented by a bracket and an adjustment bolt. A pair of removable paws will prevent rolling over.


The comment was sent successfully.