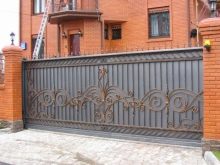
How to make a sliding gate with your own hands?
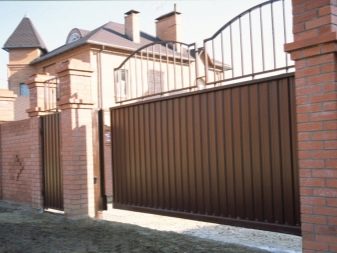
Sliding gates, which until recently were a luxury item and cost a lot of money, are gradually entering the market for the average consumer. The ease of use and space savings are well worth the investment. There are a huge number of offers of ready-made structures from various domestic and foreign manufacturers. Many companies provide services for the manufacture and installation of such gates.
But if you have even a little experience with a welding machine and minimal skills in construction, then it will not be difficult to make such a structure with your own hands, thereby saving a decent amount of money.
Peculiarities
Sliding gates have been actively used more than 50 years ago. At first, they could be seen mainly at the entrance to large industrial and warehouse areas. Over time, the design and fittings have improved and become more affordable and easier to install. Gradually, various options for sliding gates began to be installed in private territories, and today they are not uncommon for a summer cottage.
In contrast to the structures of the lifting and swing type, sliding gates have much more advantages:
- Compactness. This is especially true in cases where travel between adjacent sites and space in the yard are limited. Also, sliding gates virtually eliminate the possibility of damage to the car by the doors.
- Wear resistance. The main disadvantage of swing gates is the presence of hinges, which are susceptible to sagging under the weight of the shutters. Sliding gates do not have such problems due to the even distribution of the weight of the structure over the roller bearings.
- Burglary resistance. A well-designed and manufactured system can withstand a ramming of heavy vehicles.
- Sail protection. Even heavy gusts of wind do not damage such structures.
- Availability of automatic drives. The motor and accessories for automatic sliding gates are cheaper than equipment that is installed on swing and lifting structures.
- In winter, snow clearing is not required before opening the sash.
Despite all the listed advantages, before proceeding with the manufacture and installation of the gate, many other factors must be taken into account.
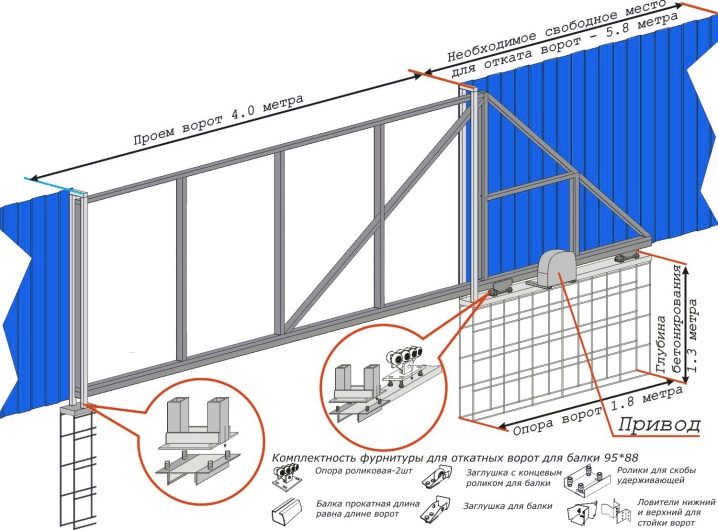
First, you need to calculate the width of the span for the vehicle to enter. Usually, for the private sector, an opening of 4 meters is recommended: both cars and trucks can freely enter it. If necessary, the width of the driveway can be reduced to 3 or increased to 6 meters or more.
The free space along the fence on the side of the sash rollback must correspond to:
- for suspended and wheeled types of structures - web width,
- for cantilever gates - 40-50% more than the leaf width.
Deep into the site at a distance of 40-50 cm from the fence, the space must be left free. The relief of the soil should be as even as possible, without strong drops, so that there are no obstacles in the direction of movement of the lower beam.
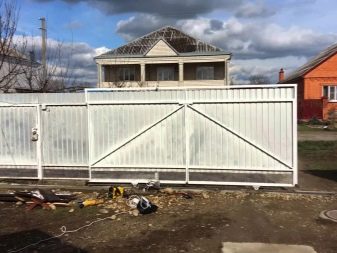
If you study the instructions in detail, prepare high-quality materials and tools, you can make strong and beautiful gates with an individual design in a short time.
Types of structures
The main difference between the types of sliding structures is in the way the rollers move when opening and closing the gate. In each of the varieties, special roller mechanisms are used, but they are installed in different ways.
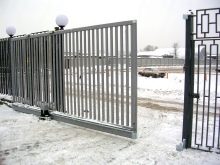
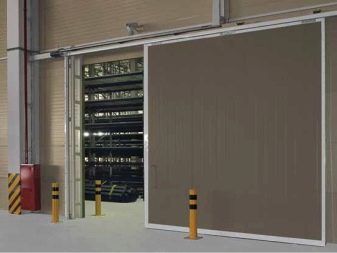
Suspended type of construction
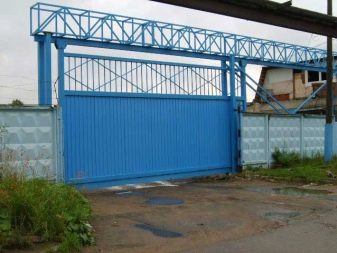
The gate leaf moves on roller carriages located on a support beam, which is mounted on pillars in the upper part of the passage. This is the most durable and wear resistant option. The beam can withstand a fairly large weight, so any materials can be used for facing the gate, and the leaf width is practically unlimited. The disadvantage is that the passage of a tall vehicle can be limited by the supporting beam.
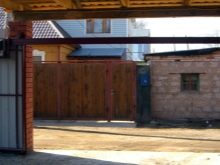
Suspended structures are most often installed in production areas. To increase the space for the passage, the beam is mounted on high support pillars. This greatly increases the metal consumption and cost of the entire structure, so this option is rarely considered for the private sector.
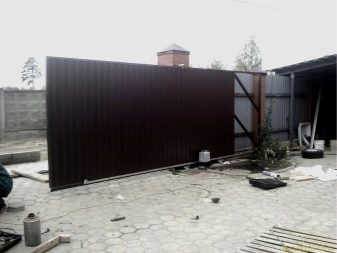
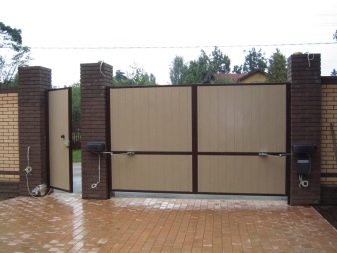
The photo shows an example of a suspended sliding gate at the entrance to a production facility.
But if the height of the entrance to the territory of a private house is initially limited by decorative or other structural elements, hanging gates will do just fine.
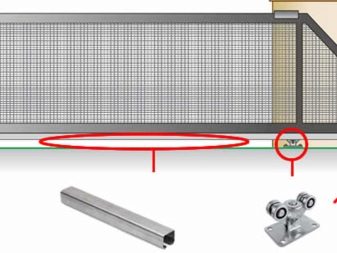
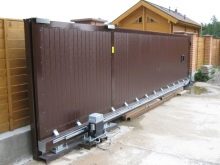
Rail type construction
This type of sliding gate is the easiest to manufacture and install. The supporting part is the so-called rail, along which the sash moves on a special roller. A rail is installed along the line of movement of the gate at the same level with the roadbed so as not to interfere with the passage of vehicles. The maximum span between the fence posts can be 6 meters.
It is not recommended to install rail structures in regions with frequent snow drifts.
Snow can clog into the rail and ice can form, preventing the entire structure from working properly. In addition, it requires constant cleaning from sand and dirt.
The foundation holding the main rail must be stable, without chips or cracks, otherwise the gate may deform and quickly become unusable. Rail-type gates are usually used in summer cottages and houses that are visited only in the summer.
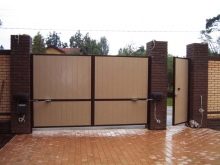
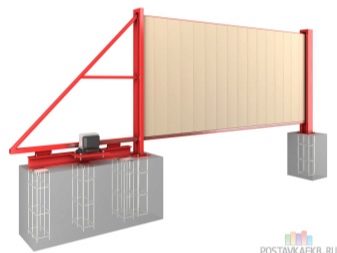
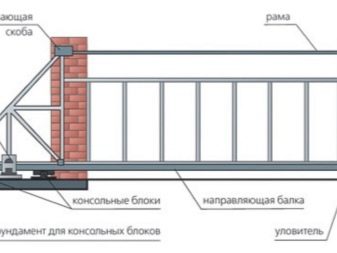
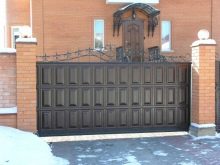
Cantilever type of construction
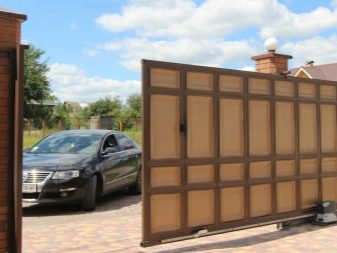
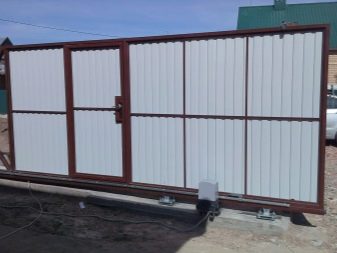
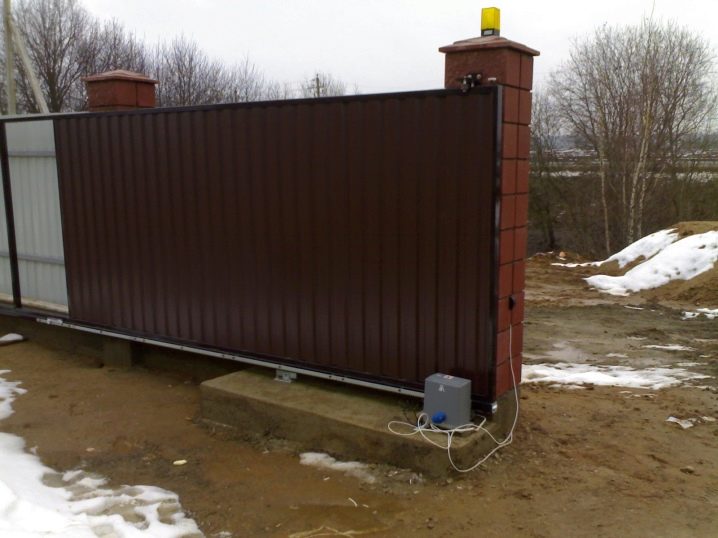
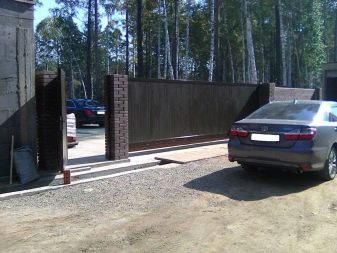
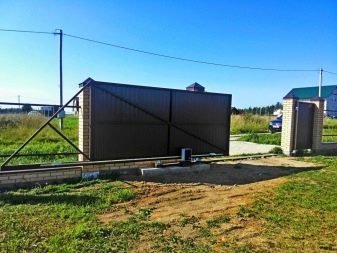
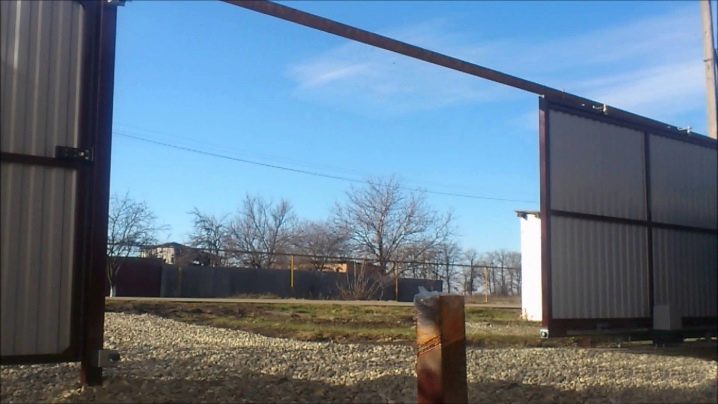
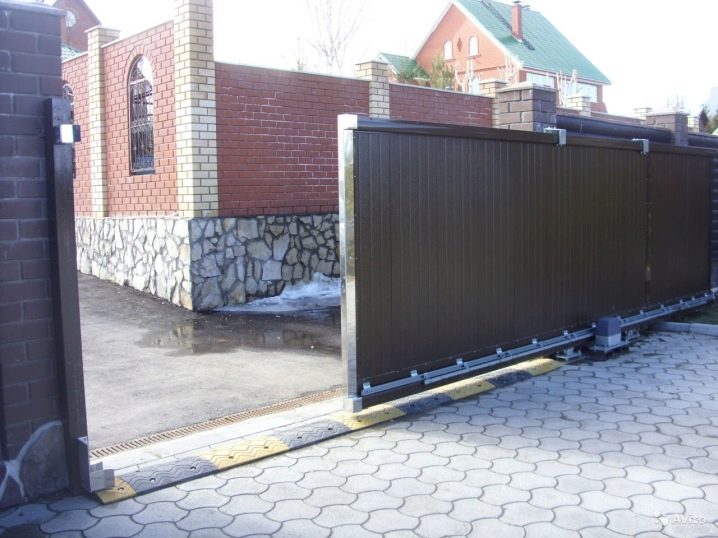
This type is the most common version of sliding gates, which is a sash with a counterweight mounted on console blocks. The absence of contact of the lower load-bearing beam with the roadway is the main advantage of this design. Thanks to this, problems due to bad weather are almost completely eliminated.
Among the shortcomings, one can single out the long process of pouring the foundation for the mortgage and the complexity of installing the console. The total length of the structure is 50% longer than the gate leaf, which makes it impossible to install it with a large opening and insufficient width of the section.
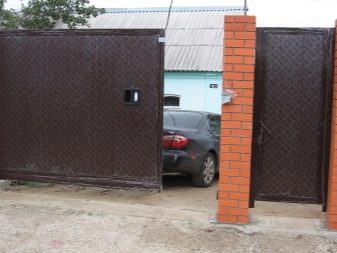
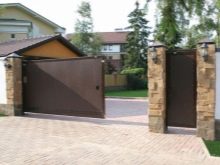
Such gates can be made with a built-in wicket, but this is not always convenient. Since the canvas is raised from the ground by about 8-10 cm, the sill of such a gate can be difficult for the passage of small children and the elderly.

It will be more convenient to use and more aesthetically pleasing in appearance to be a separate wicket, which is installed close to the gate - in a place where the sash rollback is not provided.
All three types of roll-out structures can be made mechanical or automatic. Mechanical gates are opened and closed manually, while automatic gates are controlled by a remote control and set in motion using a special motor. Automation, if desired, can be installed a little later, during the operation period, using the services of specialists.
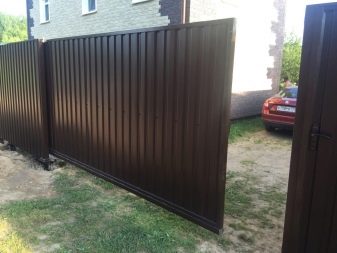
The main labor costs are for the manufacture and installation of the door leaf. Sheathing can be one-sided and two-sided. The appearance from the side of the entrance is no different.
Principle of operation
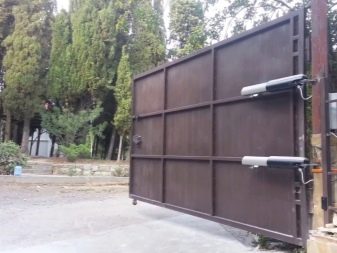
Cantilever doors are best suited for regions with changing weather conditions.Their production, installation and maintenance do not require unnecessary financial costs. For self-production of a structure, first of all, you need to figure out on what principle it works.
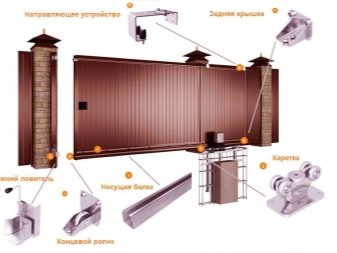
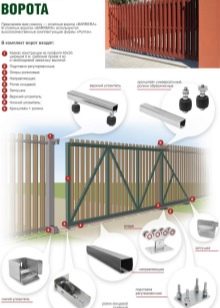
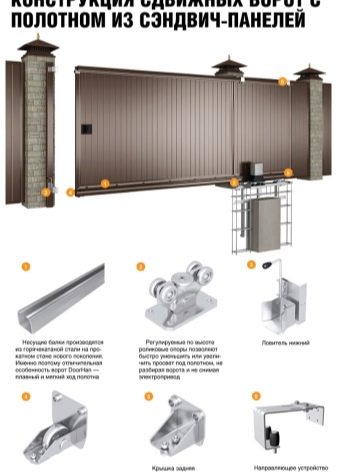
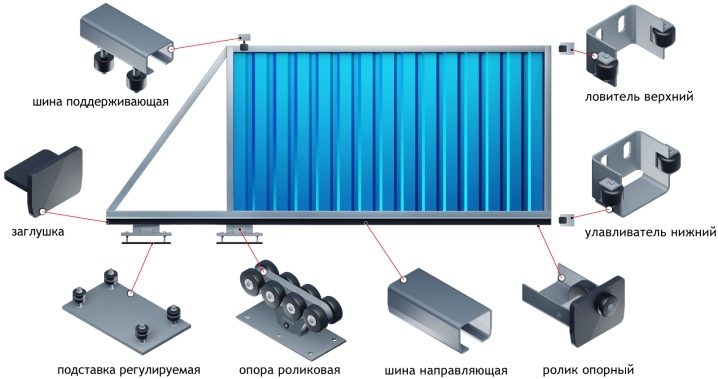
The device of a cantilever sliding gate is quite simple:
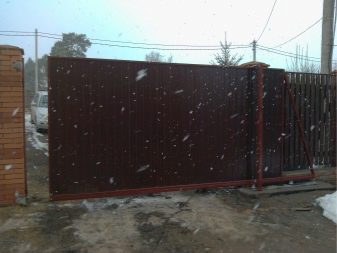
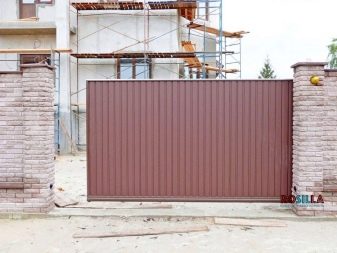
- Gate leaf. The main frame with an internal frame welded to it and the counterweight are mounted on a supporting bottom beam. Fence cladding, which is most often done using corrugated sheets, is fixed to the frame from one or both sides.
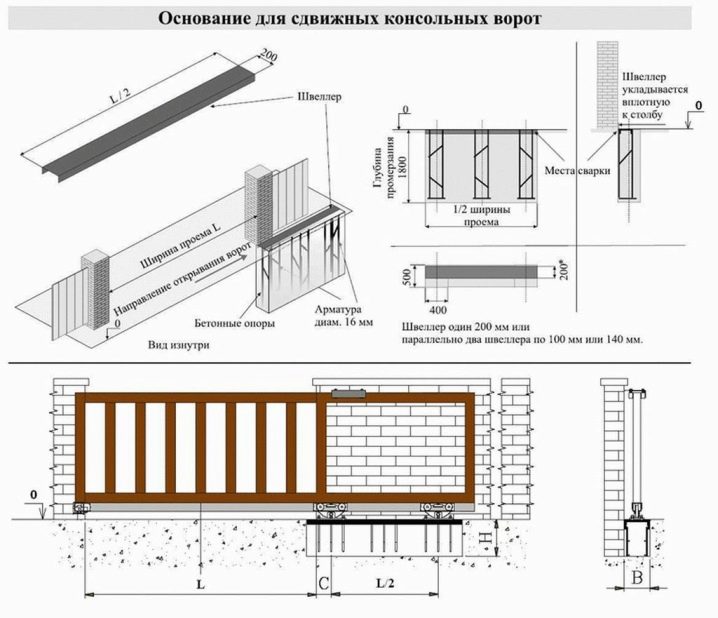
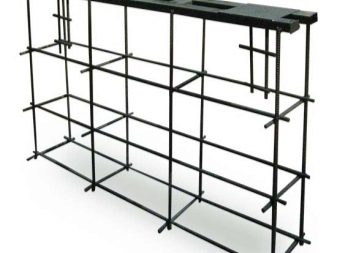
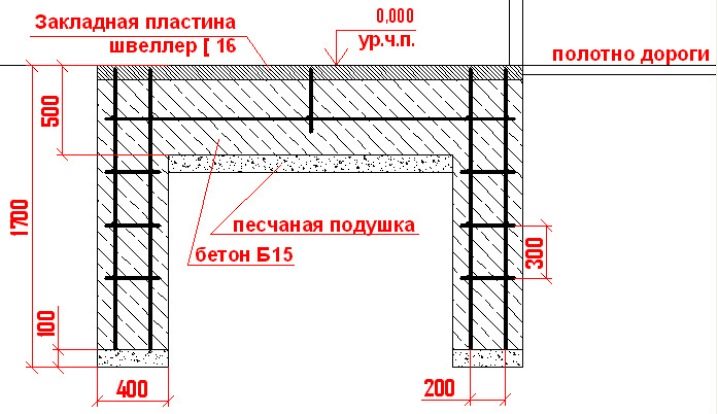
- Mortgage. Channel, tightly welded with a reinforcing cage and filled with a foundation at ground level. This is one of the most important parts of the structure on which cantilever units and automation are installed. The durability of the entire structure of the fence depends on the quality of the foundation.
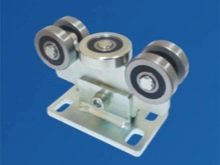
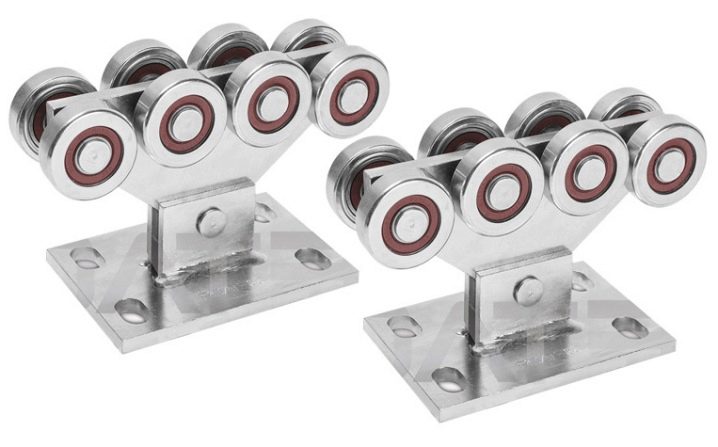
- Console blocks. Special roller support mechanisms, which are welded to the channel and installed in the supporting bottom beam. The cantilever part is the main component of the entire structure, which carries all the loads. It depends on it how smoothly and freely the canvas will move, therefore, you need to approach the console blocks very carefully.
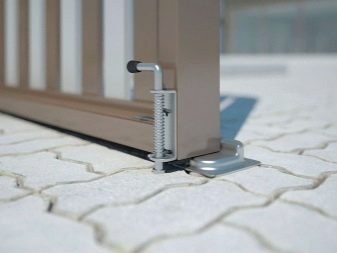
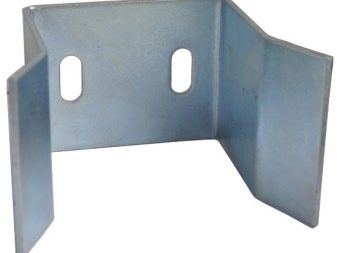
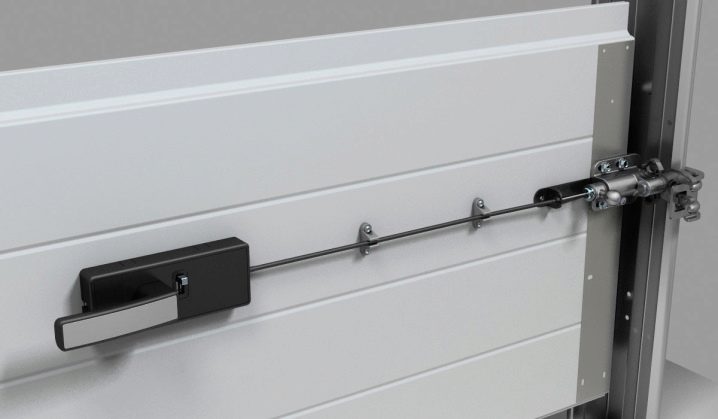
- Catchers. The lower and upper catchers are mounted on a support post located opposite the foundation for roller bearings. When the gate is closed, the end roller drives into the lower catcher, which is located at the end of the supporting beam. The blade is lifted by 5 mm, thereby relieving the load on the cantilever blocks. The upper catcher is needed in order to firmly fix the gate and prevent windage - swinging of the gate in a strong wind.
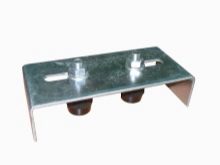
- Upper fixing holder with rollers. Installed on a support post above the cantilever blocks and prevents swinging and skewing of the gate during movement.
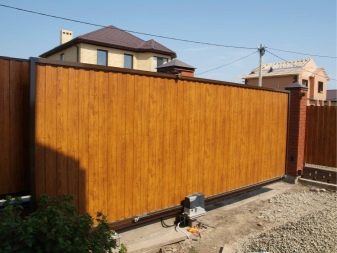
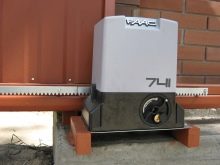
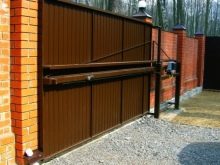
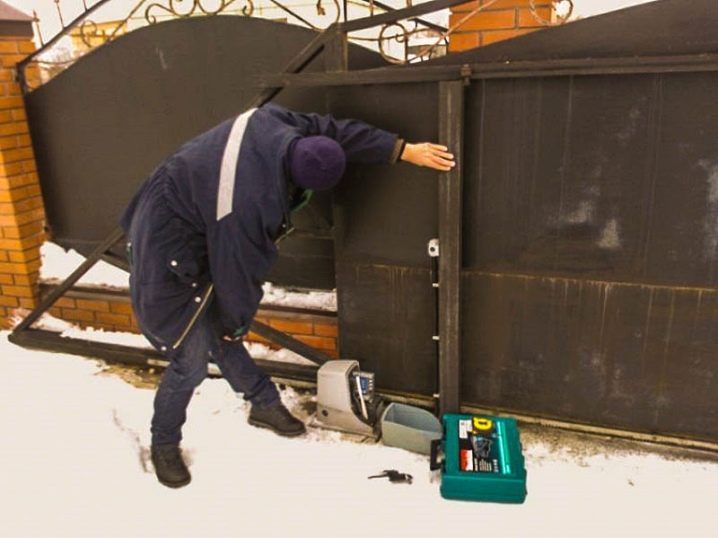
- Automatic drive. The choice of drive depends mainly on the weight of the structure and the weather conditions in the region. Installation is carried out according to the instructions that come with the equipment.


Automation
The sliding structure is already convenient in itself, but if you equip it with an electric drive, there is no need to leave the car yourself every time to open or close the gate. Experts advise installing special drives, but at your own peril and risk, such a mechanism can be done independently.
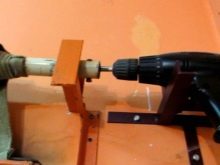
To do this, use a motor and gearbox of a suitable power. There are precedents when a screwdriver was used as a motor. Also, if the weight of the leaf is small, it is possible to install a cheaper drive for garage doors.
Special drives must be selected based primarily on the weight of the structure:
- For gates weighing 250-300 kg, a 200-250 W drive is suitable.
- For a weight of 500-600 kg, a suitable power is 350-400 W.
- For 800-1000 kg - 500-600 W.
When choosing automation, you always need to take a small power reserve. And in regions with harsh winters, it must be increased by at least 20-30% so that the engine works without interruptions during sudden temperature changes. The drive can be installed only when all the work on the manufacture and installation of the structure has been completed. The gate leaf should move easily, without bouncing or swinging. An incorrectly installed blade can damage and ruin the automation.
Automatic drives can be selected from a variety of offers from domestic and foreign manufacturers. Pay attention to details such as gears in the gearbox.
They can be plastic or metal. Metal gears are more expensive, but much more durable, so they are best preferred.
It is also worth considering carefully the selection of the limit switch. Its magnetic version costs a little more, but unlike the metal version in winter, it does not jam and works smoothly.For ease of use, there are various additional functions: temperature control of the electric drive, adjustment of the sash movement speed, backup power, photocells for entry and exit, wicket mode.
Among the manufacturers of drives for withdrawable structures are the following: Russian Doorhan, Belarusian An-Motors, Italian BFT, Faac and Nice, French Came, Chinese PS-IZ and Miller, as well as other manufacturers. Their line of proposals is quite large, all that remains is to select the necessary equipment and you can proceed with the installation.
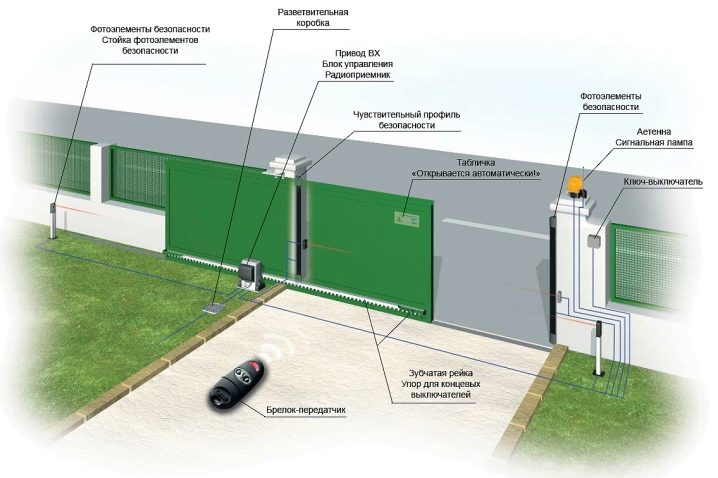
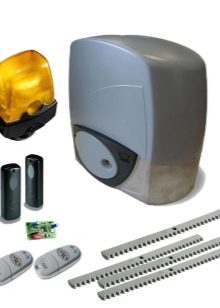
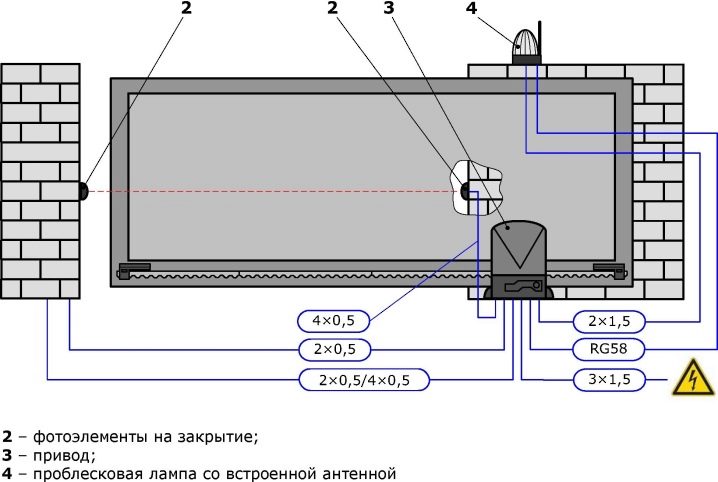
Consider a set of automation using the example of the diagram above:
- drive unit;
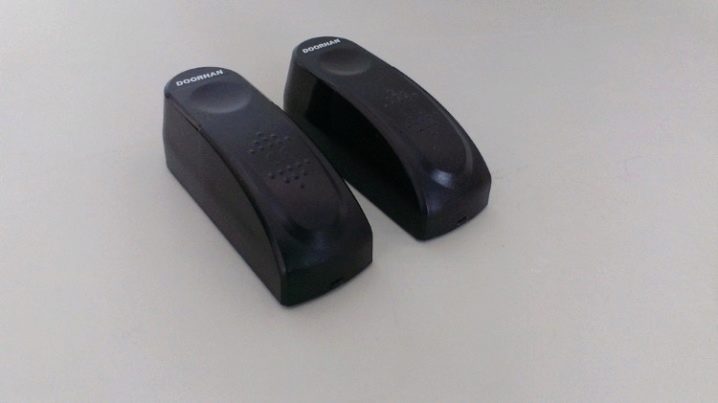
- photocells for departure;
- photocells for entry;
- signal lamp;
- radio control antenna;
- key button;
- rail;
- limit switch plates;
- remote control.
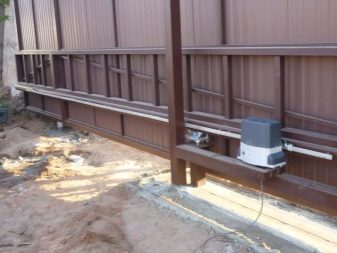
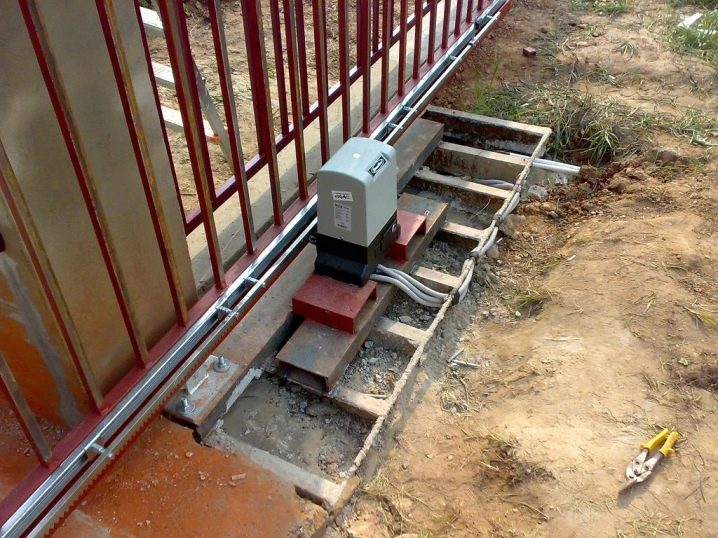
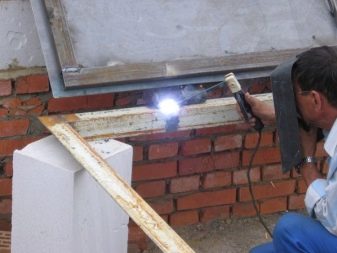
For work, you will need an inverter welding machine with electrodes and a drill with drills for metal. Initially, on the channel between the carriages, you need to prepare and mark the area for attaching the electric drive. The equipment is attached to the base, which comes with the automation, and a rack is installed in the center of the motor gear.
After the working position has been recreated, you need to weld the base to the channel. If the electric drive needs to be lifted, then a profile pipe of a suitable size can be additionally welded between the base and the channel.
After the drive is bolted to the base, you need to reinstall the toothed rack on the motor gear, mark its correct position on the profile or beam with a marker and carefully weld it. Before completely weld the seam between the rail and the beam, you need to check again that it is installed correctly.
The gate must be fully open when working with the welding machine. At the end of all actions, the limit switches are screwed to the rail using bolts and nuts with collars. Further, according to the instructions, the photocells, signal lamp, antenna and key-button are installed.
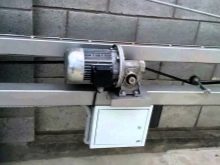
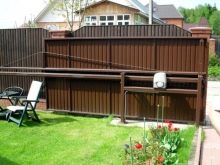
The electric drive can be installed not only at the bottom, but also in the middle or at the top of the gate.
This method of summing up the automation is somewhat more complicated, but in cases of heavy snowfall, it will not be necessary to clean the foundation area from precipitation every day.
In this case, it will be necessary to adjust the drawing for the desired design.
The profile to which the toothed rack will be attached will be located on the middle or upper level of the sliding gate, respectively. To mount the automation, it will be necessary to build on an additional structure from a metal profile of a rectangular section of 60x40 mm.
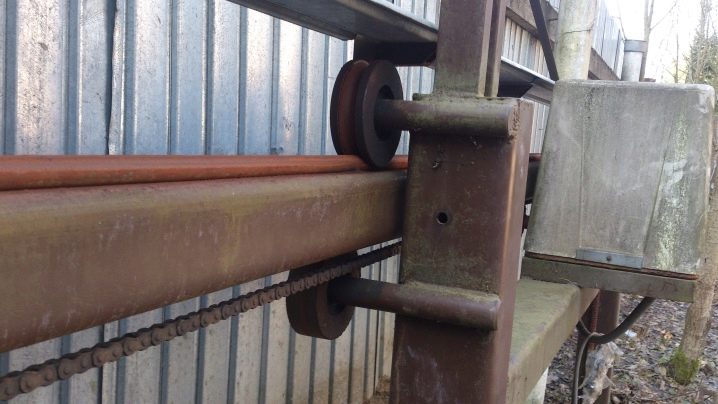
Instead of a special electric drive, you can install a homemade drive from scrap materials. Taking into account the mains voltage, a three-phase or single-phase motor is installed on the site. The three-phase drive is more powerful and practically eliminates problems when starting the movement. In accordance with the weight of the door leaf, a motor with a power of 1.5 to 2.5 kW is required. At the same time, a low engine speed gives less load on the drive shaft.
It is better to choose a 12-pole drive with a speed of 500 rpm or a 6-pole drive with a speed of 1000 rpm. The drive can be purchased in specialized stores, or you can use spare parts from an old car or washing machine.
The input torque of the gearbox must match the speed of the drive. The frequency of the output torque of the drive wheel should be between 80-100 rpm. It will be more convenient to use a single-stage gearbox. It is connected to the motor shaft using a rigid or semi-rigid coupling.
Features of calculations
Before proceeding with the design of the drawing, you need to do all the necessary calculations. First of all, the height and width of the gate are calculated.If the height of the fence on the site is known, then the height of the future roadway can be determined as follows: the upper part should be the same level with the fence, and the lower part should be 8-10 cm above the roadbed. The door width is equal to the distance between the support beams, the recommended value is 4 meters.
It is also quite simple to calculate the counterweight - its length should be equal to 50% of the opening length. This value can be reduced to 40% only in cases where there is not enough space for the fence to fully open the sash and the canvas is sheathed with lightweight materials.
The length of the counterweight profile connecting the top of the web and the edge of the lower profile should be sufficient to form a triangle.
The value is calculated according to the dimensions using the following formula:
sqrt {func a ^ {2} + func b ^ {2}}
Or in a more familiar form, familiar from school
Where a is the length of the counterweight, b is the height of the web, c is the desired length.
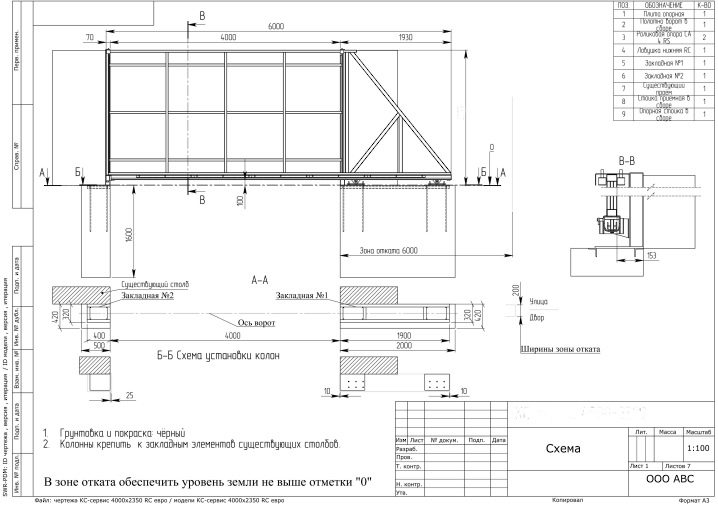
Calculation of the weight of the structure is needed for the correct selection of the guide beam, fittings and automation. Basically, the weight depends on the material with which the sheathing will be made, on the weight of the frame, frame and supporting beam, and on the wind load.
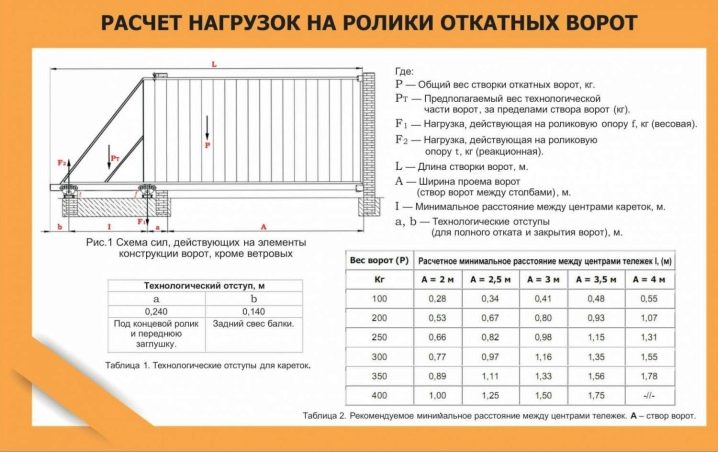
If 1 sq. m of profile sheet weighs 4 kg, then a 2 mm thick steel sheet weighs 17 kg. The weight of forged, wooden and other cladding is calculated individually. On average, a door with a 4x2 m curtain, sheathed with a profile, will weigh about 200 kg.
For gates weighing up to 300 kg, a supporting beam with dimensions of 9x5 cm and a metal thickness of 3.5 mm is suitable. The hardware must be able to support the full weight of the structure. It can be purchased as a ready-made kit, or you can purchase all components separately. When buying, it is advisable to have a drawing with all the calculations with you so that you can consult with a specialist.
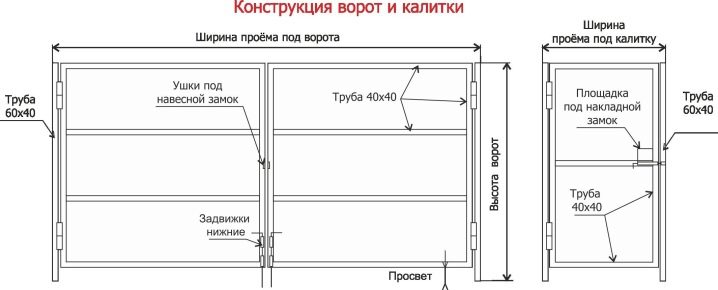
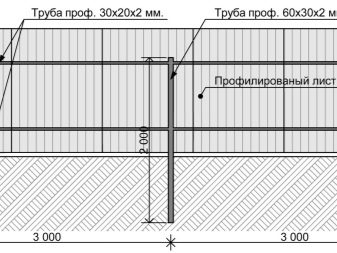
Drawing design
A diagram or drawing of a sliding gate is done after all measurements have been taken. A drawing with all calculations is ordered from specialized firms. You can find ready-made sketches on the Internet, make them yourself, or use the ones below. For structures with a span of 4 meters, you can choose one of the two presented drawings.

In the first case, the load-bearing frame is 10% larger than the opening, which increases the consumption of the facing material. At the same time, the cost of the entire structure does not increase much, however, there is most often no expediency in such an increase in spending. Therefore, we will consider the second drawing, all calculations will be made based on it.
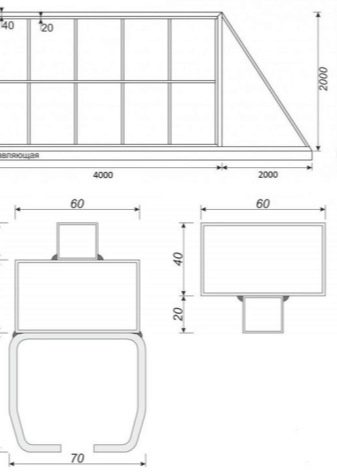
The drawing must clearly indicate all dimensions, welding points and fasteners. The toothed rack can be attached both to the carrier beam and to the lower frame profile.
For light gates sheathed with a profile 4 meters wide and 2 meters high you will need:
- Carrying beam, which is a rail, the upper part of which is solid, and in the lower part there is a longitudinal cut. It is better to choose a cold rolled steel structure. The beam is installed on cantilever blocks and moves on carrying rollers. The size of the rail in this case is 60x70 mm, the required length is 6 meters.
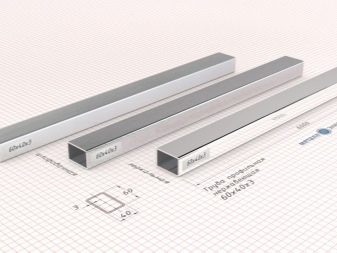
- For the power frame, you need a rectangular profile of 60x40 mm and a metal thickness of 2 mm in segments:

- 1 segment 4 meters long;
- 1 segment - 6 meters;
- 2 sections - about 2 meters each;
- 1 segment is about 2.8 meters.
In total, you will need almost 17 meters of such a profile.
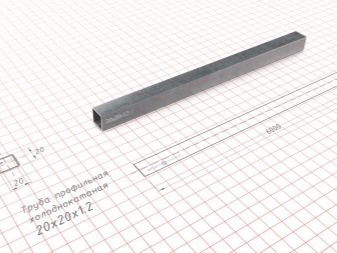
- For the frame, a rectangular profile of 20x20 mm or 30x20 mm with a metal thickness of 2 mm is suitable. In total, you need about 24 meters of profile.
- For the mortgage, you will need a channel 20-40 cm wide and a length equal to ½ of the gate opening: in this case, 2 meters. The thickness of the metal must be at least 3 mm. Cantilever blocks and an electric drive mechanism will be installed on the channel, fastened by welding.
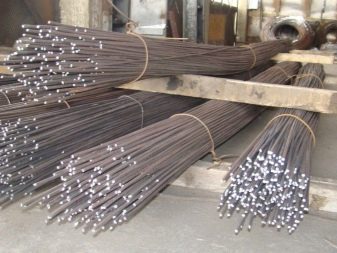
- For the foundation frame, at least 15-20 meters of reinforcement with a cross section of 12-16 mm is required.
The thickness and dimensions of each part of the drawing directly depend on the material that will be used for sheathing the sash.
If the cladding is made with profiled sheet or polycarbonate, the components indicated above are sufficient.
If sheathing with steel sheets or forging is planned, then more durable elements will be needed. After preparing the drawing and calculating the exact dimensions of all its components, you can proceed to the purchase of materials and the manufacture of the gate.
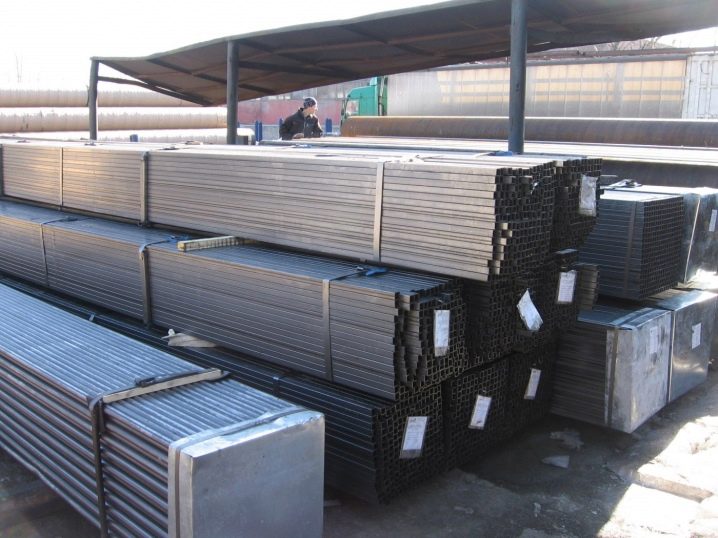
Materials (edit)
To make a simple gate with a size of 4x2 meters with a cladding from corrugated board, you must purchase the following materials:
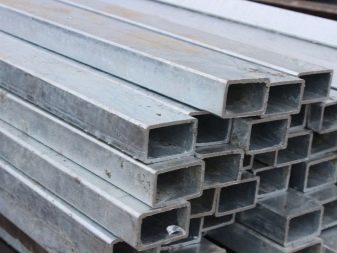
- rectangular profile 60x40 mm for the load-bearing frame and 20x20 or 30x20 mm for the frame;
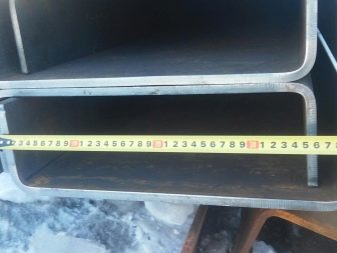
- guide beam 60x70 mm;
- corrugated board 8-10 sq. m;
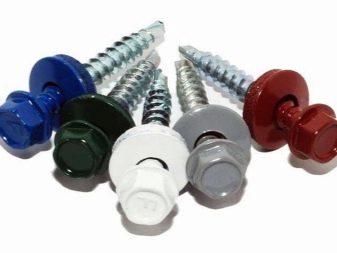
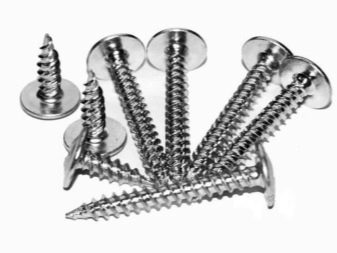
- rivets or self-tapping screws for fastening the sheathing in an amount of about 200 pieces;
- channel 40x200 cm;
- reinforcing rods 15 meters.
The forged elements themselves constitute the inner frame of the door and are attached to the load-bearing frame by welding. Such gates do not require additional cladding, except as a design solution.
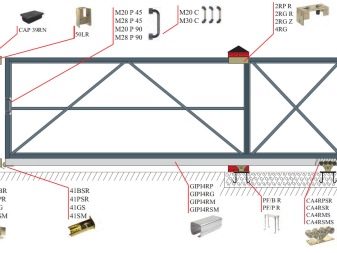
The fittings can be purchased either separately or in a special ready-made kit. The following manufacturers of sliding gate fittings have proven themselves well:
- Italian - Combi Arialdo and Flatelli Comunello;
- Russian - Roltek and Doorhan;
- Belosusky Alutech.

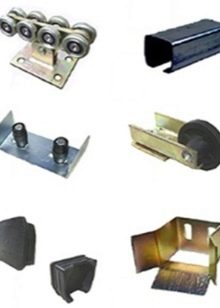
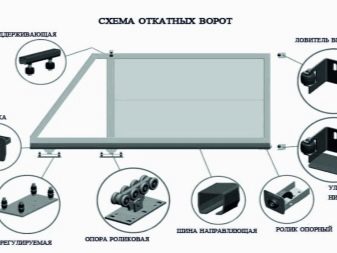
Self-production of roller components is impractical, as it requires special skills and tools. For the installation of console-type doors, the following fittings will be required:
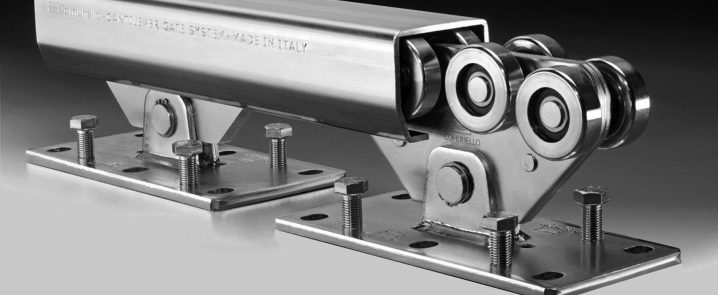
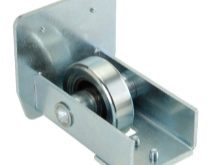
- Roller supports - 2 pcs. They are also called cantilever blocks or carriages. Bearing designs are recommended.
- Upper catcher - 1 pc. It is better to use catchers with guide wheels. It is possible to manufacture homemade catchers.
- Lower catcher - 1 pc.
- Upper clip - 1-2 pcs.
- End roller - 1 pc.
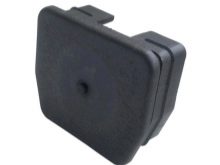
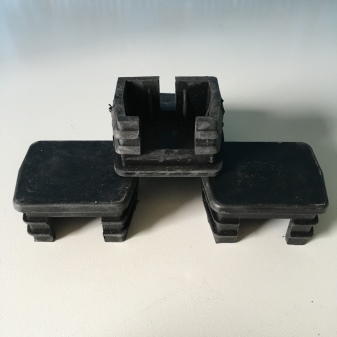
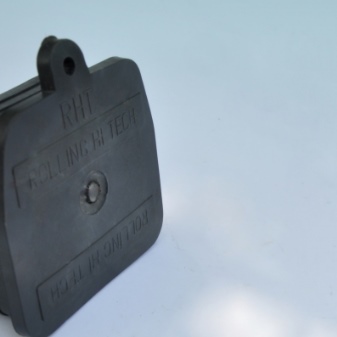
- Carrying beam plugs - 2 pcs.
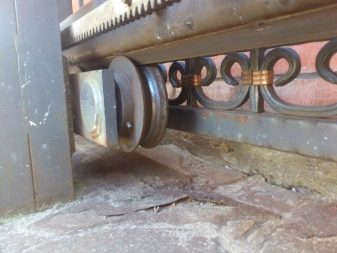
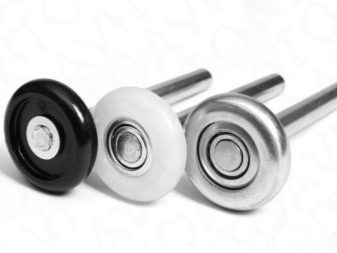
The castors in the support and end rollers can be either metal or plastic. At the same time, the metal parts are more durable, but they make noise when the door leaf moves. Plastic will last a little less, and with correct operation, the same amount, but such gates will move quietly.
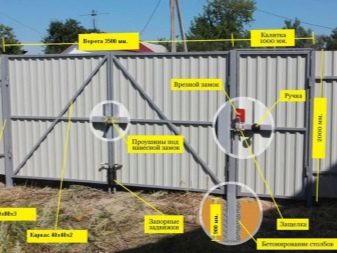
For fixing the catchers and the upper retainer, metal posts from a rectangular profile of 60x40 mm are needed. They are installed on a foundation reinforced with reinforcement to a depth greater than freezing of the soil.
If fastening is carried out on brick or reinforced concrete supports, then their size should be at least 20x20 cm.
Metal embedments are attached to the posts with anchor bolts, to which the upper retainer and a counter post from a profile pipe with a section of 30x20 mm will be welded. Instead of anchors, you can remove reinforcing rods from the posts and attach mortgages to them.
Mounting of photocells at the entrance is carried out on pipes of rectangular or circular cross-section with a minimum diameter of 30 mm. The height of the pipes should not exceed 1 meter. They must also be installed on the foundation, but without reinforcement with reinforcement. The exit photocells are installed on the support pillars.
Manufacturing
In order to make a sliding gate with your own hands the following tools are required:
- inverter welding machine and electrodes;
- riveter or screwdriver;
- grinder with replaceable discs for cutting and grinding;
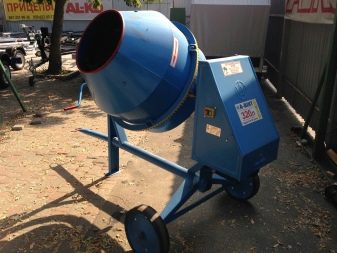
- concrete mixer, shovel or rod for concrete piercing;
- marker, tape measure, hammer, pliers, drill, construction or laser level;
- spray gun or air compressor for applying primer and paint. You can use brushes and rollers, but then the layer will turn out to be thicker and more heterogeneous;
- protective devices for eyes, respiratory tract and hands.
You will also need an anti-corrosion primer, acetone or another solvent, alkyd or acrylic paint for outdoor use.

The step-by-step instructions for the manufacture and installation of roll-out gates provide information on how to do all the work with your own hands:
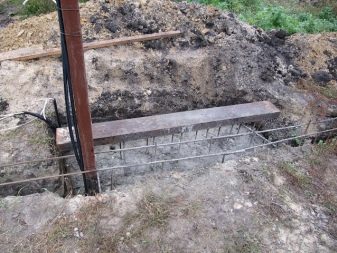
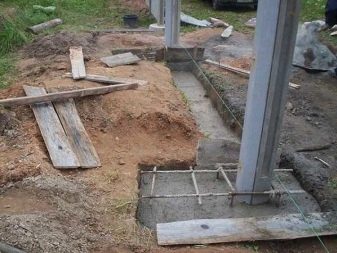
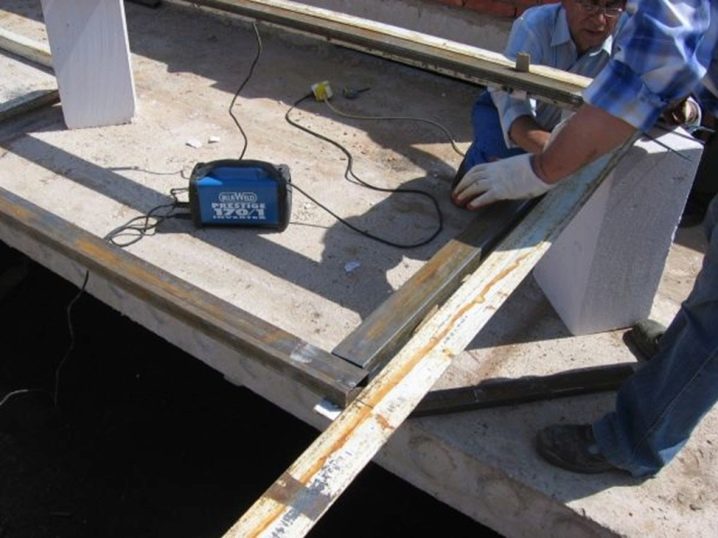
At the initial stage, a foundation should be made for the mortgage and, if necessary, for the support pillars. A hole is marked and dug under the mortgage to the depth of soil freezing. Depending on the region, it can be - from 1 to 2 m. The length of the foundation is equal to ½ of the width of the opening, in this case - 2 meters. The width of the pit is 40-50 cm. Depending on the depth of the pit, it is necessary to fill in crushed stone and sand in layers of 10-30 cm and carefully tamp each layer.
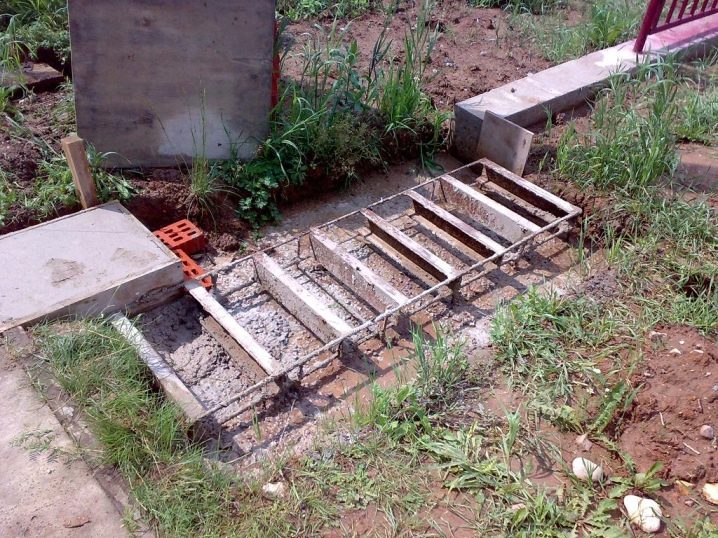
The reinforcement frame is made by welding the rods together, and then the channel is welded to the finished frame. The resulting structure is installed in the pit exactly along the ground line close to the fence post. Horizontalness must be checked with a laser or building level. If you plan to install an automatic gate, before pouring the foundation, it is necessary to conduct wiring to the channel in a plastic or metal pipe with a diameter of at least 2.5 cm.
Foundation concrete is mixed in a concrete mixer in the ratio:
- 1 part of cement M400 or M500;
- 3 pieces of sand;
- 3 parts of crushed stone.
For a pit 1 meter high, 2 meters long and 50 cm wide, you will need about 1 cubic meter. m of concrete. In the process of pouring, the solution must be periodically pierced with a shovel or a rod of reinforcement in order to release excess air.
The first 3-7 days, the poured foundation must be watered with water to prevent the formation of cracks and chips.
A pit 50x50 cm in size is needed for the foundation for the support post. It is better to install the support post from the inside of the site so as not to reduce the gate opening. The preparation of the pit, mortar and reinforcement cage is carried out according to the example of the mortgage. The counter post and channel can also be installed on screw piles, but such a structure, depending on the soil, may be less durable.
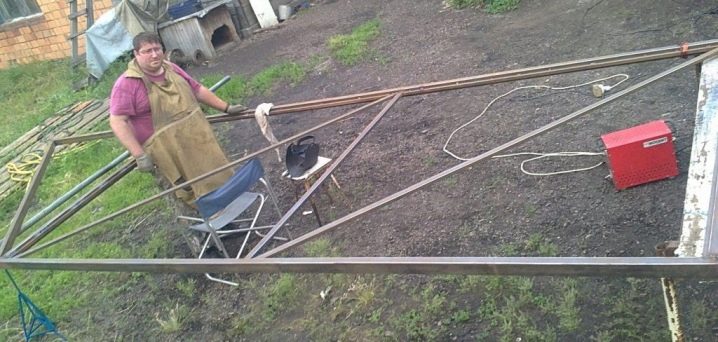
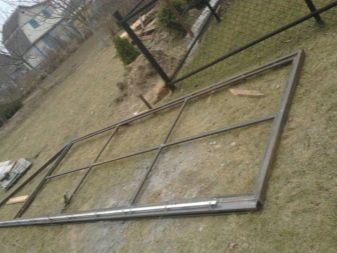
The next stage is the manufacture of the door leaf. The metal profile for the frame and frame is cut with a grinder according to the dimensions indicated in the drawing. On a special stand, which should be larger than the finished structure, the components of the power frame are laid out and, if necessary, adjusted to size.
The joints must first be tacked with spot welding, and then all the seams must be welded completely. To exclude the possibility of water or snow getting into the construction of the canvas, all holes must be welded.
The seams are carefully sanded with a grinder or sandpaper to an acceptable appearance. The inside of the frame, which will be in contact with the frame, must be degreased with a solvent and covered with two coats of anti-corrosion primer.
The second primer coat can only be applied after the first coat is completely dry. At this stage, priming the inside of the frame is done because after being connected to the frame, processing the closed surface will no longer be possible.
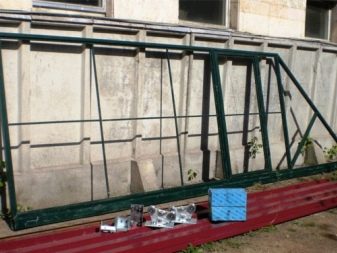
After the power frame is ready, the frame must be welded in the same way. Seam treatment and surface priming are performed according to the same principle, but the outer side of the frame is primed, which will be in contact with the load frame. After the coating has dried, the frame is installed inside the frame.

The centering of the inner frame relative to the frame is carried out depending on the method of door trim. If the cladding is made only from the outside, then the frame is welded close to the outside of the frame. With double-sided cladding, the frame is installed exactly in the middle.
Welding of the frame with the frame is carried out very carefully so that the structure does not skew due to overheating of the metal.
First, the fastening is done with small welding points at a distance of 50 cm from each other. Then the joints are welded in small sections of 1-2 cm from different sides, and only the remaining sections of 5-10 cm can be boiled immediately. Work must be done on both sides of the canvas. The carrier beam is welded to the frame in the same way.
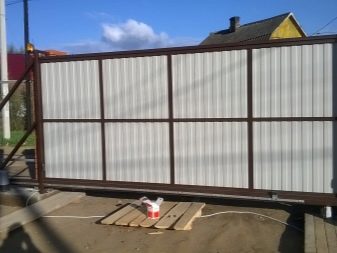
At the final stage of fabric production, the welded seams are ground, the surface is degreased with a solvent, primed and painted. It is better to prime and paint in two or three layers, while the second layer is applied only after the first one has completely dried. It is necessary to apply the coatings evenly so that there are no drips and irregularities. For this, it is better to use a special compressor.
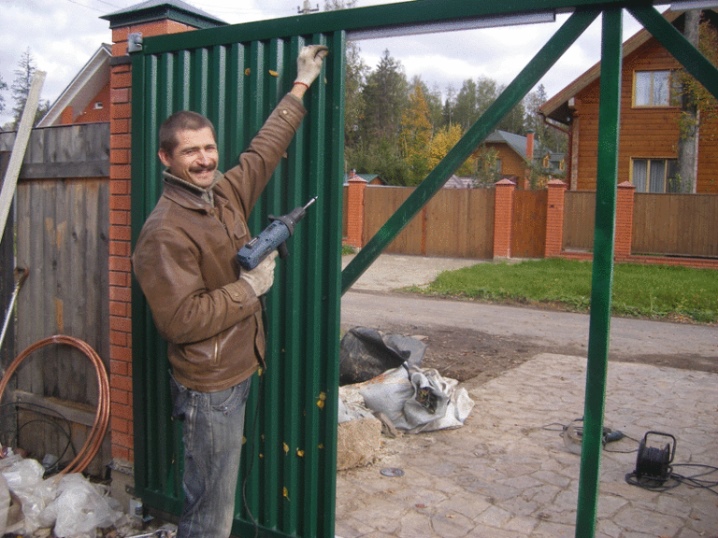
The corrugated board is attached to the frame with self-tapping screws using a screwdriver or rivets using a special riveter. The first fastenings are made at the corners of the canvas, and then along the entire perimeter at a distance of 15-20 cm from each other. If one profiled sheet is not enough, then each next sheet is overlapped on the previous one.
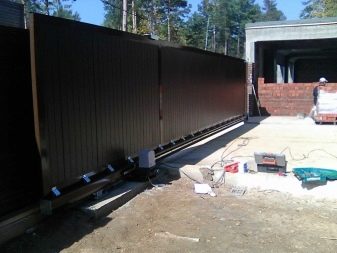
Mounting
The installation of the door leaf occurs only after the foundation has completely solidified, which is possible 10-28 days after pouring. Drying speed depends on the composition of the solution, temperature and humidity of the environment.
First, with the help of a laser level or a cord, the trajectory of the gate leaf is traced. At the maximum distance from each other, roller supports are installed on the channel.

Sliding gates are placed with a guide rail on the carriages so that the rollers are inside the supporting beam. During installation, it is necessary to constantly support the structure sheet vertically, for this you will need the help of one or two people.
It is important to correctly adjust the position of the cantilever blocks and check the horizontalness of the lower beam with a building level.
The block, which is closer to the opening, is located so that in the open state of the gate the distance from the span to the roller is 15-20 cm. The second carriage with the gate closed should be at a distance of 5-10 cm from the end of the rail. In this position, the roller mechanisms are lightly welded to the channel, the whole structure is checked once again for the ease of movement of the canvas on the rollers.
If all mechanisms work correctly, the canvas must be removed from the console blocks, the carriages from the lower platforms, and the platforms themselves must be completely welded to the channel.
Do not attach the platforms to the channel using the bolts that come with the kit. If it turns out that even a small error occurred during installation, it will no longer be possible to unscrew such bolts. To reinstall, you will have to cut them off and do all the steps again.
The roller carriages are again fixed on the platforms, the canvas is put on them and with the gate closed, the final adjustment is made using a wrench. The upper fixing roller is attached by welding to a metal post or embedded in a brick post, which is located above the foundation.
The counter post must be installed on the foundation or fixed by welding on the mortgages on the brick post. The length of the post should be equal to the height of the gate wing or slightly higher. The lower and upper catchers are welded to the counter post. The lower one is fixed at 5 mm. above the run-in level of the end roller: this reduces the load on the support cantilever blocks when the door is closed. The upper catcher must be fixed 5 cm below the upper part of the gate leaf.
The end roller must be installed inside the guide bar and tightened with bolts. For greater strength, the roller can be welded into the guide rail. And finally, plugs are attached to the supporting beam on both sides, which are necessary so that snow and dirt do not get into the rail, which interferes with the work of the structure. Rubber plugs are simply inserted into the rail, and metal plugs are attached by welding.
Decor
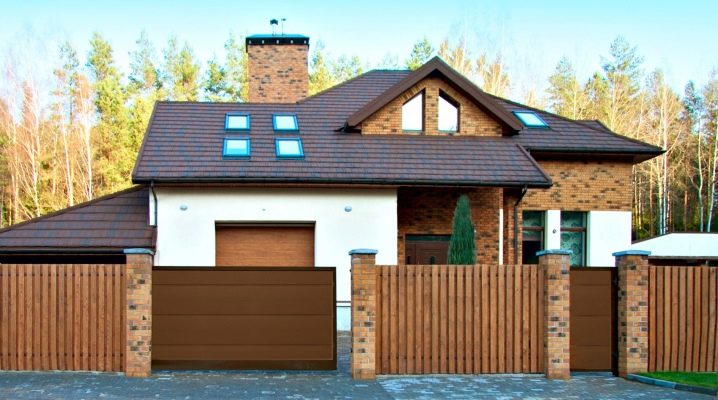
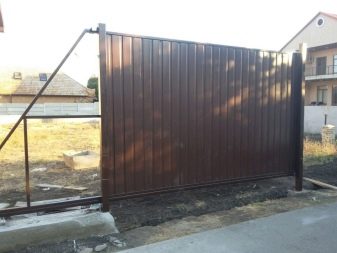
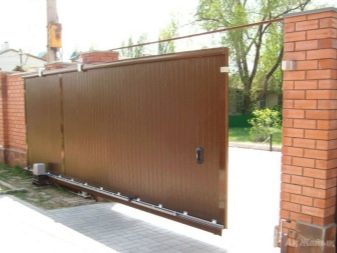
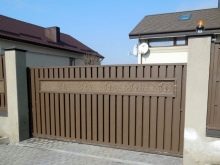
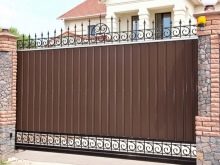
Decorating sliding gates is possible in a wide variety of ways. The decoration itself can be the door trim itself, which can be made from a variety of materials.
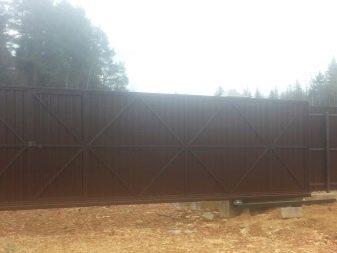
Additional cladding with metal strips makes the gate more strict and massive in appearance.

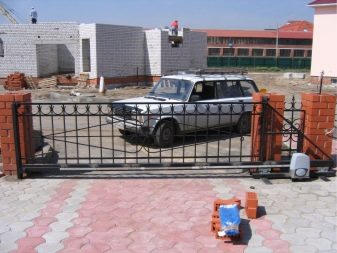
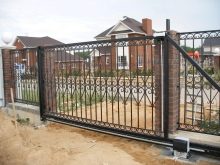
Quite often, forged elements are attached to wooden and metal gates.
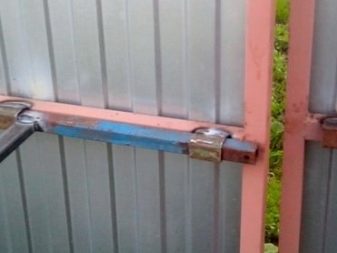
Installation of a lock on an automatic gate is usually not required, since they are set in motion using a remote control or a button. It is simply impossible to open such a gate with your hands. But on mechanical structures, locking elements and locks are required without fail. Most often, simple constipation is installed, which can hardly be called decorative.
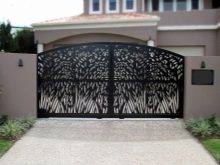
Beautiful examples
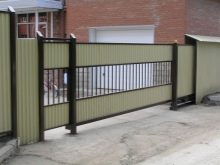
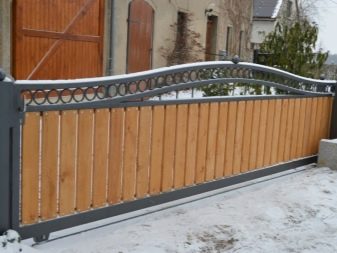
The vertical crate on the fence looks laconic and strict.
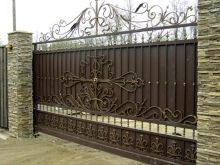
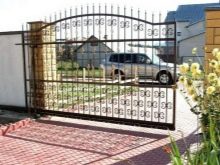
It is possible to combine corrugated board with a crate.
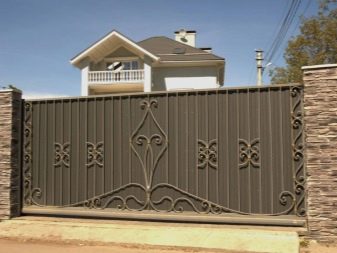
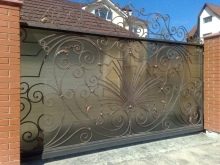
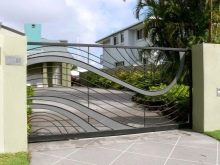
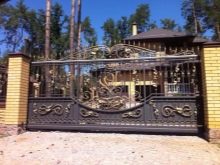
Combined cladding with forging elements will always look expensive and presentable.
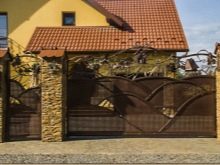
Doors made of wood or sandwich panels are also often decorated with wrought iron products.
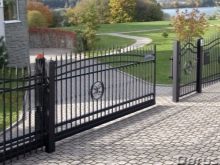
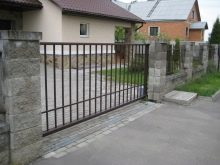
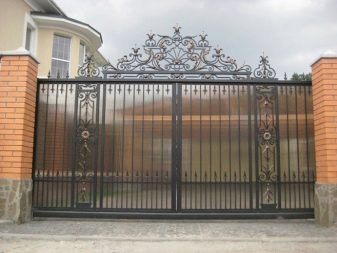
Forged structures are often used without additional cladding.
Forged gates with additional sheathing in transparent polycarbonate look pretty good.
For cladding, you can use tempered glass, which can be left transparent, darkened with tint, or tried in combination with metal.
For information on how to correctly make a sliding gate with your own hands, see the next video.


The comment was sent successfully.