How to propagate a room rose at home?
One of the most popular indoor plants today is the rose. Caring for her is not difficult. But, perhaps, reproduction is considered the most crucial moment. We will talk about the basic methods and rules in the article.
What is necessary?
The first step to carrying out the workflow is to prepare the inventory and soil. Experts advise to opt for spacious ceramic pots. When reusing containers, we recommend thoroughly treating them with bleach and soda ash.
We check the tools: they must be sharp, treated with a solution of potassium permanganate or alcohol.
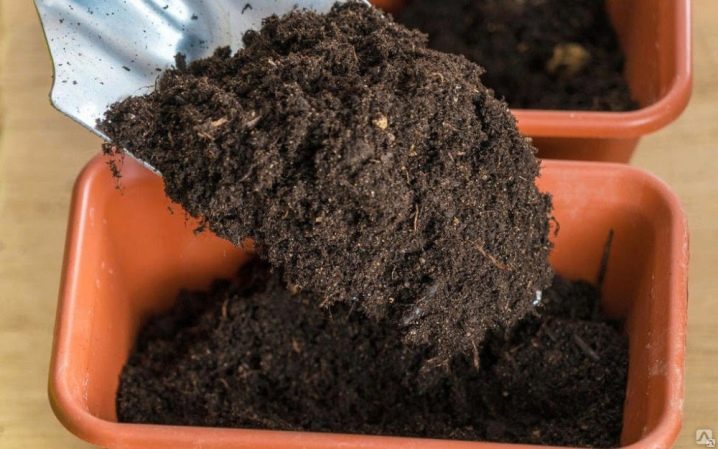
An important role is given to soil preparation. The main requirements for the soil are nutritional value, looseness, neutrality, moisture and air permeability. You can take a store substrate or prepare it yourself. When self-cooking, we use turf soil, river sand and humus in proportions of 4: 1: 4. Some use the following composition: humus, peat, sand in proportions of 2: 2: 1.
The finished mixture is kept in an oven at a temperature of 90 degrees within an hour. This is a great way to keep out pests and diseases. After that, ash or a part of charcoal is added to the prepared calcined soil. Before planting, drainage washed in boiling water (expanded clay, pebbles, broken brick) is added to the container, then half of the pot is filled with soil.
Cuttings
Vegetative breeding methods at home allow you to rejuvenate the plant while preserving all varietal characteristics, as well as get new specimens. Among such methods, we note the division of the bush, propagation by layering, cuttings.
The easiest way to propagate indoor roses at home is by cuttings. There are many techniques with which you can root cuttings: by the Burrito and Trannois method, in a bag, soil, water, sand.
You can even cuttings in potatoes. It is convenient to plant a flower of the house in sphagnum, paper, earthen mixtures of various composition.
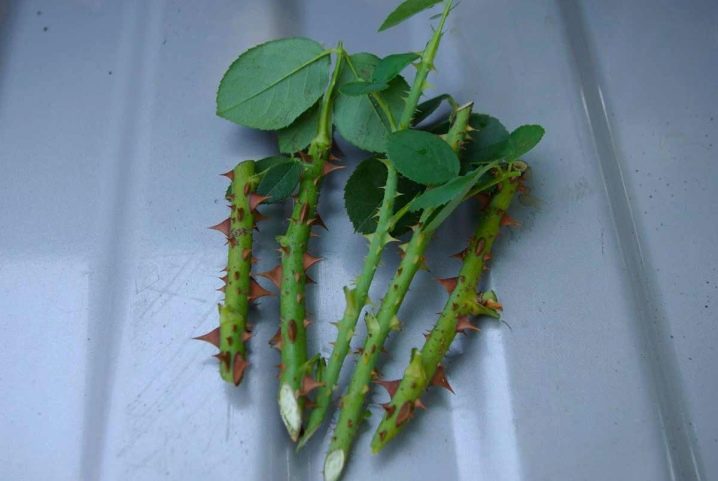
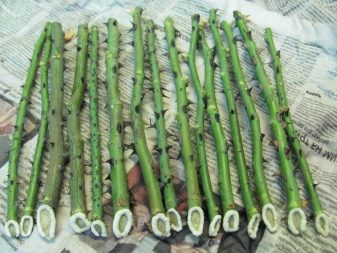
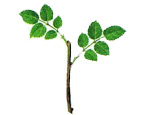
The results of cuttings depend on many factors, including the competent preparation of the planting material. If, for example, a tea rose in a pot is weakened, then you should not expect healthy offspring from it. When preparing, you need to pay attention to the elasticity and density of the stems. In addition, the bushes should be lignified, with flawless bark, but with a characteristic shine.
It is worth paying attention to the fact that the plant at this moment should be preparing for flowering or already to bloom. The optimal material for rooting will be a thin, faded shoot in the middle part. It is this material that takes root faster when planting. You can understand that the plant is ready for grafting as follows: with light pressure, the thorns fall off freely.
It is recommended to propagate a flower plant by cuttings from the second year of its life. It is at this moment that the required number of strong shoots ripens. As a rule, all the work is done in the summer. It is convenient to germinate cuttings at home from mature shoots in the lower or middle part of the stem. The selected material should contain up to 4 ripe buds.
Preparation
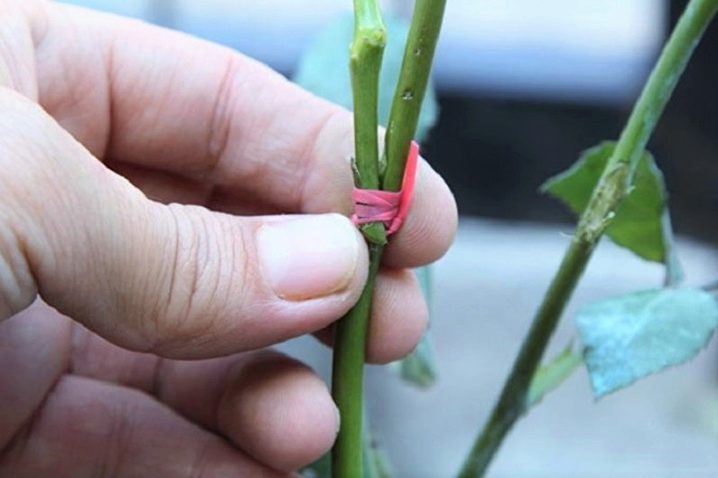
It is necessary to divide the stem into segments up to 15 centimeters long, cut them from the bottom, at an angle of 45 degrees, but 1 centimeter below the healthy kidney. And the upper cut is allowed to be made 0.5 cm higher than the upper kidney.Thus, at least three living leaf plates and from 2 to 4 functional buds should remain on all cut parts.
After that, the lower leaf plates are removed, and the remaining plates and thorns are shortened by 1/2 of the length. The finished material is sent to the root growth stimulator "Kornevin" or "Heteroauxin". The duration of the content is determined by the instructions.
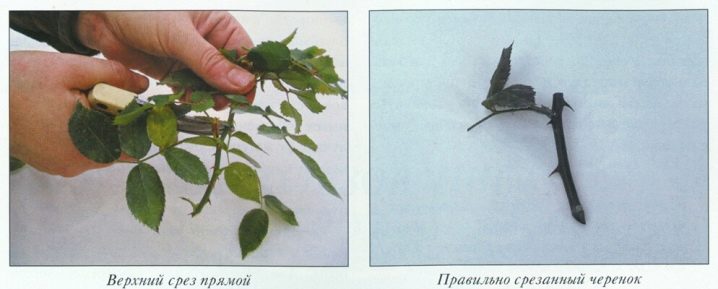
It is not recommended to dry the sections: they immediately need a moist environment.
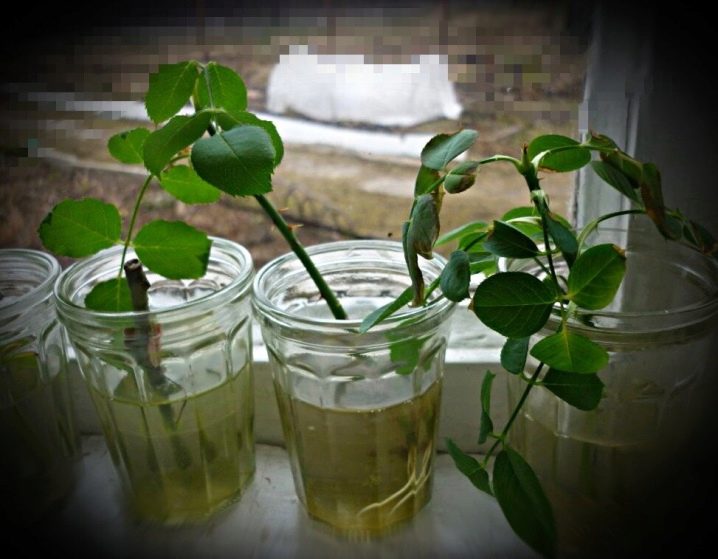
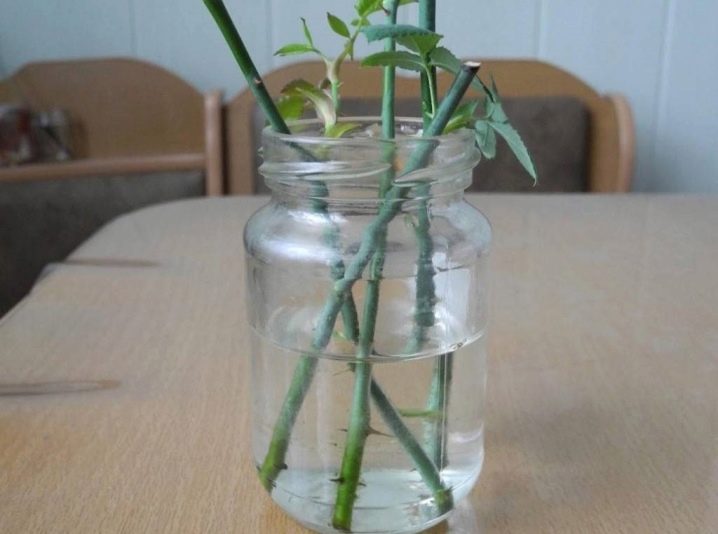
In water
For rooting using water, experts advise using various containers, the main thing is that they are opaque. Before use, the water must settle, warm up, or you can first boil it and cool it to room temperature.
The cups where the cuttings "sit" are best left in a well-lit place. Indeed, the rooting process requires 15 hours of daylight hours. With a lack of lighting, a phytolamp is used. After a couple of weeks, the first roots may appear. But you need to wait for their lengthening and branching up to 1-1.5 centimeters.
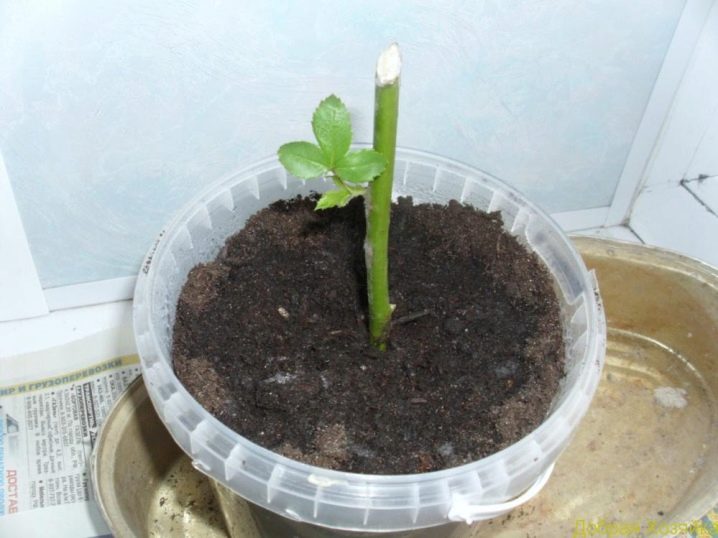
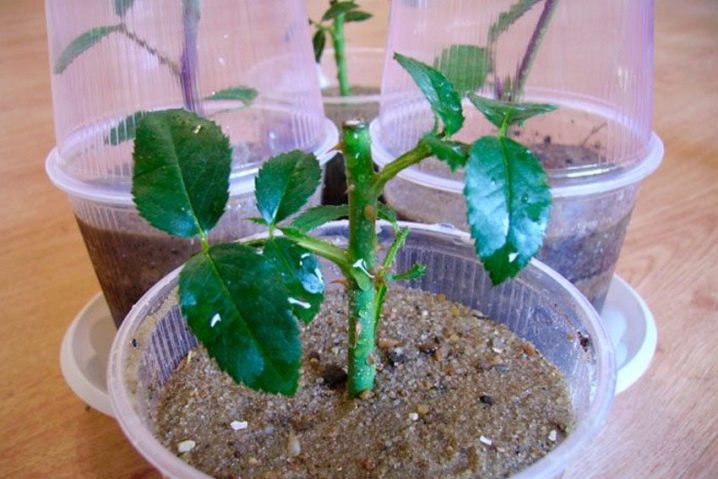
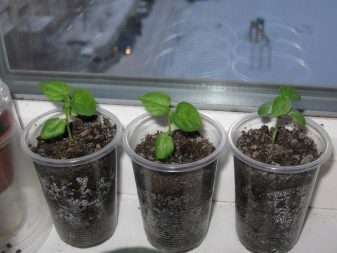
In the ground
The convenience of this method is that the planting material is immediately placed in that container with soil, where it will further root and grow. But it is rather difficult to understand how actively rooting and engraftment of the cuttings are. For planting in the ground, you need to prepare in advance a container of a convenient diameter, drainage and soil mixture, and the cutting itself must already be processed in a growth stimulator.
After that, the finished material is planted 1/2 of the length at an angle of 45 degrees, and the soil is tamped and irrigated gently with water. For better engraftment, it is recommended to create a greenhouse effect by covering the container with a transparent container or polyethylene. If the pot is relatively large in diameter, then several cuttings can be planted at once, keeping a distance of 5 centimeters between them. It will be possible to speak about the results of rooting not earlier than in three weeks.
In sand
The material processed for planting can be placed in a sand mixture, deepening no more than 1 centimeter. The correct fit is determined by the position of the first bud relative to the surface of the sand: it should protrude slightly. After that, they act by analogy with ordinary soil: they are lightly rammed, carefully watered, covered with polyethylene. A month later, young greens appear - this is a signal of successful rooting of cuttings.
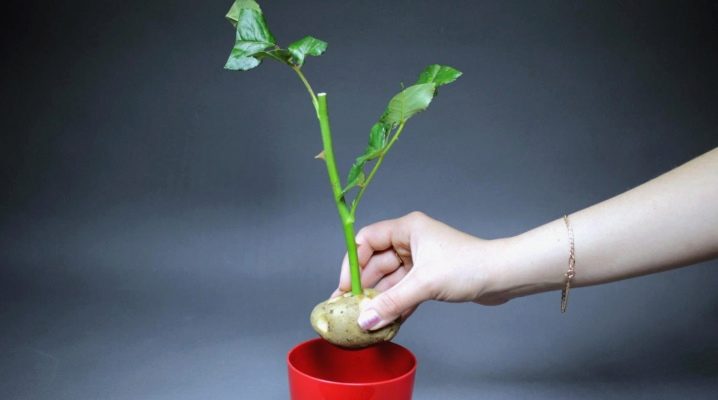
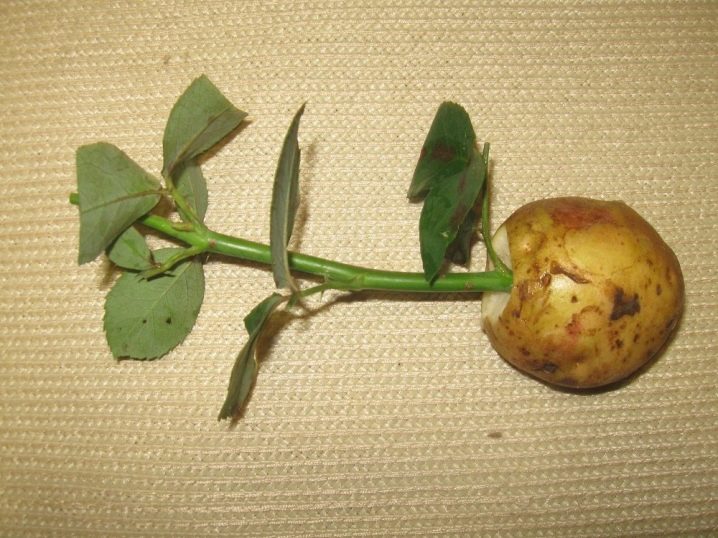
In potatoes
This method is proven and very simple. And the availability is explained by the fact that everyone has potato tubers at home. A healthy, medium-sized specimen should be selected. Then cut off all the eyes and make a cut in the central part equal in diameter to the thickness of the stem. The stalk is fixed in the cut, and the tuber is then inserted into the ground. The earthen mixture should be moistened, and the seedlings should be covered with polyethylene.
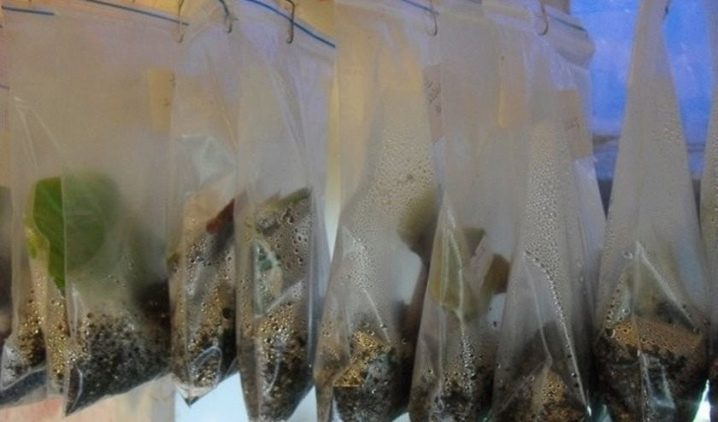
In the package
With this express method, the roots appear two weeks after planting. Before planting, it is recommended to pre-prepare aloe, moss. After a solution is prepared from fresh aloe juice and water in a ratio of 1: 9, moss is sent to it. The stalk is wrapped in moss and a plastic bag. The bag is slightly inflated and in this state is suspended in a warm place. After the shoots appear, the cutting is transplanted into the prepared soil.
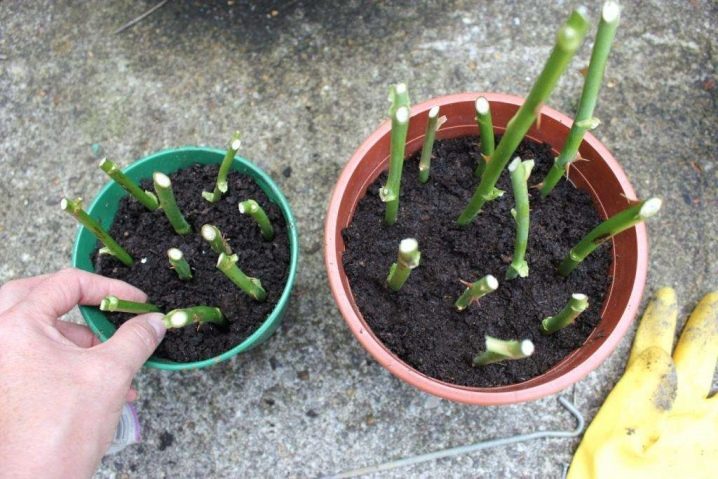
Trannois method
The technique is interesting in that many cuttings are rooted in large-diameter pots at the same time. Advantage of the method: you can observe the process and choose healthy material. Before starting work, prepare material for planting up to 20 centimeters long, cut off all sheet plates, and then determine it in a previously prepared container with soil. The earth is slightly moistened, covered with polyethylene.
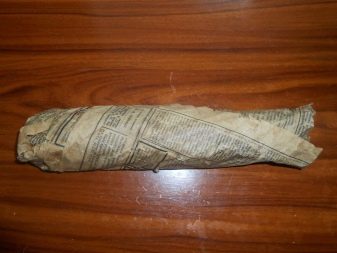
Burrito method
This method is also simple, but there is no definite guarantee of rooting. After cutting the material, it is placed in a root stimulator. After a day, the soaked cuttings are carefully wrapped in damp newspaper or paper. All contents are sent to heat with mandatory humidity control.
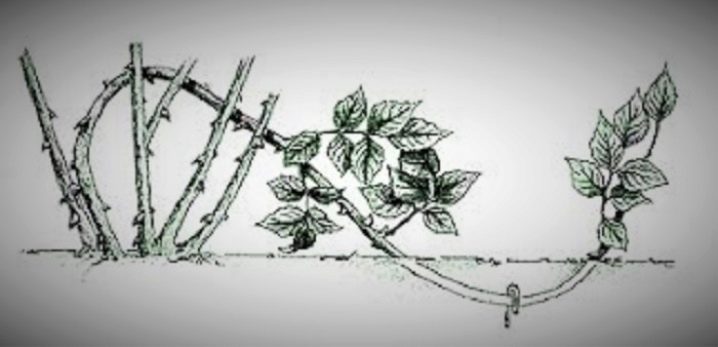
Reproduction by layering
Plants with long shoots are usually propagated by layering. From the bottom of the flowering bush, you need to take a shoot. To do this, in a certain place, the leaf plates are cut off and a sprout is obtained with the help of a longitudinal notch. Then the finished material is added to the ground or covered with a plastic bag. The first roots may appear after a month.
Dividing the bush
This method works well at the end of summer. The plant is preparing for rest, it is at this moment that you can plant it. Leaves, buds, flowers are cut from the selected shoots, and shortened pruning is done. It is recommended to moisten the soil in a flower pot well.
The plant is removed from the old container, and the root system is completely placed in warm water, the roots are gently washed, removing old soil and damaged roots. After all the procedures, the bushes with roots are divided into several parts. Young bushes are sorted into containers. The soil is well moistened, and the planting material is placed in a dark place.

It is necessary to control the level of humidity in the pot, it is dangerous to dry out the soil. Bushes bounce back with proper care for a month.
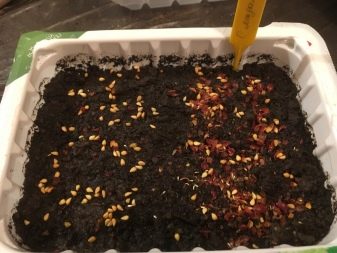
How to plant with seeds?
This is the most difficult, time consuming and ineffective method. Experienced flower growers or breeders mainly take it into work. But before ripe seeds appear, you need to wait for the plant to bloom, pollinate it or wait for pollination by bees, and then time must pass before ripening.
As they ripen, the seed pods are carefully removed, opened, sent to a solution of hydrogen peroxide, and slightly dried. Then they send it to a plastic bag and determine its place in the refrigerator. Stratification takes at least two months. Only then are the seeds distributed in the pots with the nutrient mixture.
There is also a method of reproduction by vaccination. It is convenient to use it in warm spring and summer. The artificial method of growing cuttings is practiced with plants similar in species characteristics.


The comment was sent successfully.