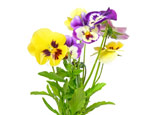
How to propagate clematis?
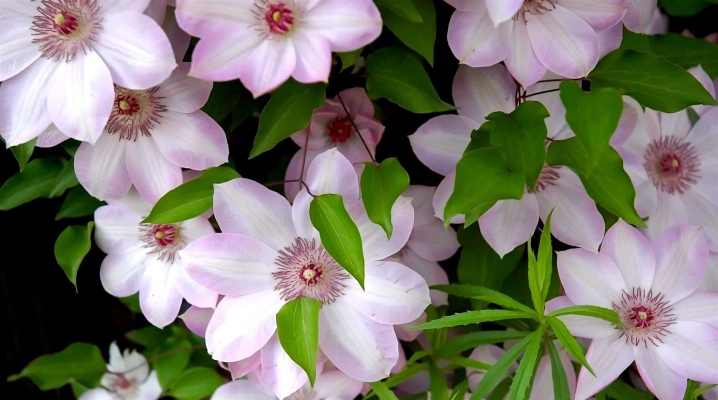
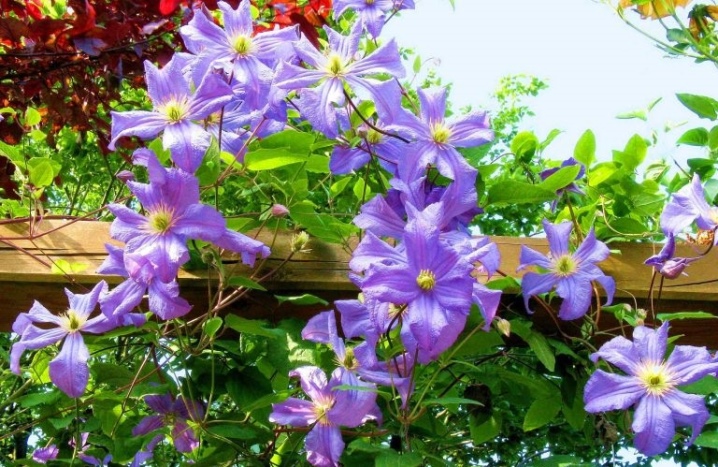
The dazzling beauty of flowering clematis is one of the reasons that encourage gardeners to breed these amazing perennials. Despite the fact that the reproduction of such demanding plants is often accompanied by a substantial investment of time and effort, even a novice florist can get excellent results with a competent approach. In what ways can clematis be propagated, what recommendations and conditions should be followed? We will talk about all this in this article.
Basic breeding rules
Reproduction of these flowering vines is carried out in several ways, using:
- seeds;
- cuttings;
- layering;
- parts of the mother bush (delenki).
Another popular method is propagation of plants by grafting. It is often used by breeders when breeding rare varietal lianas.
Breeding method of clematis seeds is the least popular among florists. This is due to the fact that varietal plants do not transmit their qualities to the offspring through seeds, due to which the results of the work carried out by the florist may not at all meet expectations.

The seed propagation method is applicable only to species (wild) plants.
The simplest and most effective are considered vegetative breeding methods for clematis, in particular cuttings and rooting of cuttings. These methods have the highest efficiency and make it possible to obtain young healthy plants with all the varietal characteristics of the parent bush.
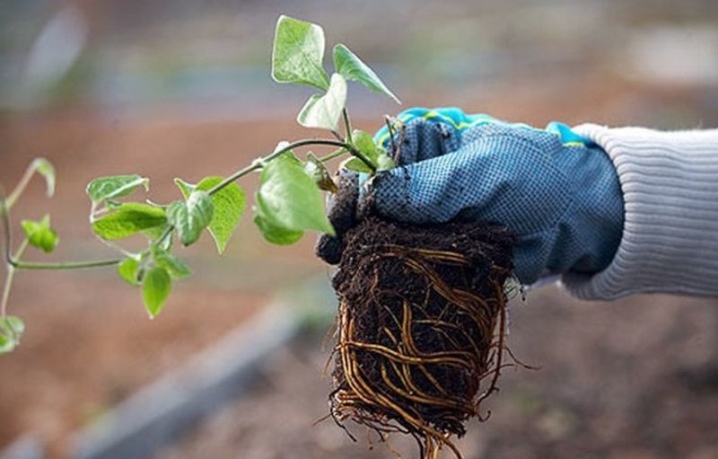
Reproduction of clematis by dividing the mother bush - a method used only by experienced growers. An incorrectly performed procedure not only seriously injures the plant, but also often leads to its death.
When breeding clematis in one way or another you should take into account the current season and the recommended timing of the procedure. So, the sowing of the seeds of these flowering plants is carried out in spring and autumn, the layers begin to take root in the summer, and they begin to divide the bushes either in the fall or in early spring (in the middle lane). Clematis cuttings are usually harvested in late spring or early summer (the best time is late May or early June).
Another condition that must be taken into account when starting to reproduce clematis is climatic features of their region. The timing of the planned procedures depends on this factor, as well as the choice of the most suitable varieties. So, thermophilic and whimsical varieties of clematis are best not planted or bred in regions with a harsh climate, for example, in the Urals or Siberia. For these regions, frost-resistant zoned varieties are recommended that are able to take root and bloom in unfavorable conditions ("Gypsy Queen", "Bella"). Planting and reproduction of clematis in regions with a harsh climate begins at the time recommended for a particular variety.
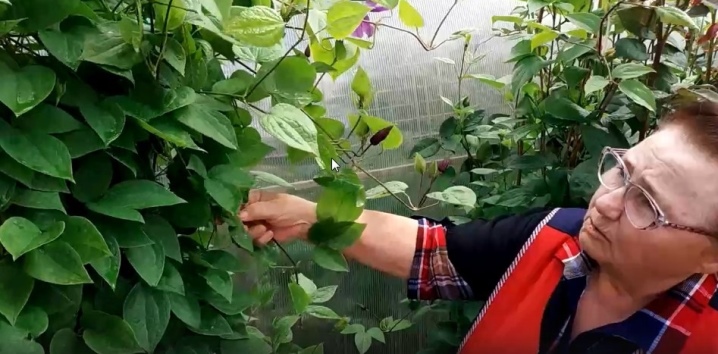
To obtain vegetative planting material (cuttings, cuttings), strong, well-developed, sufficiently mature and healthy bushes should be used. Clematis that are too young (less than 3 years old), weakened, flowering, diseased or damaged clematis cannot be used as mother plants.Damage arising during the harvesting of planting material can dramatically worsen the health of these flowering vines and even cause their death.
How to dilute by cuttings?
Cutting is one of the most effective breeding methods for clematis, which is successfully used by both experienced and novice growers. This method involves breeding plants using green and lignified cuttings.
Breeding with green cuttings
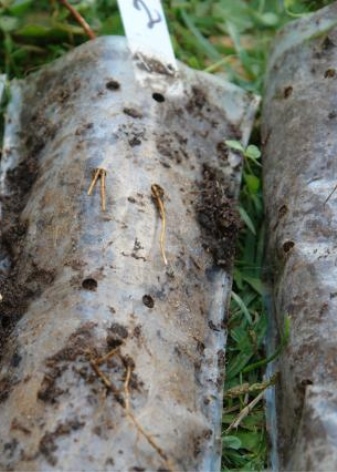
The propagation of these garden vines by green cuttings is considered the most effective method, providing almost 95% survival rate of planting material... Cuttings are harvested from late May to early June - at a time when plants begin to actively form buds.
Experienced flower growers recommend harvesting cuttings in the evening hours, when solar activity is declining.
It is also allowed to harvest planting material in cloudy weather. Compliance with these recommendations will help prevent dehydration of the cut cuttings.
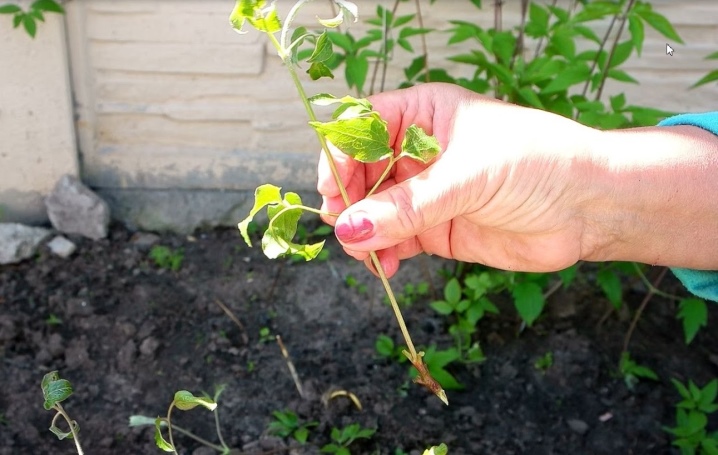
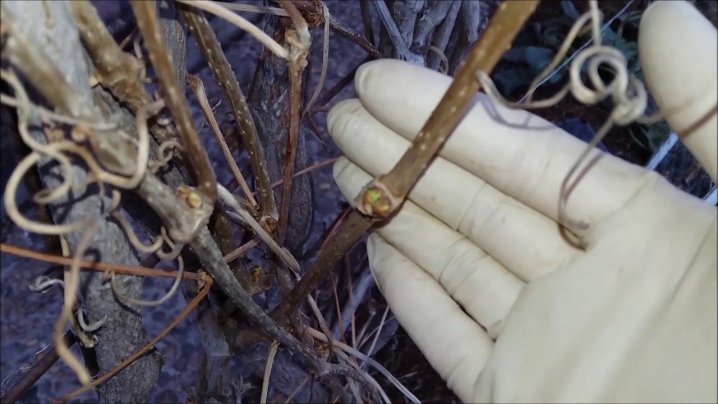
Before harvesting, it is necessary to determine the strongest and most well-developed shoot on the mother bush and cut it off above the first or second leaf (counting from the surface of the earth). For cutting cuttings, only the central (middle) part of the shoot should be used. The top of the shoot is not used for harvesting planting material.
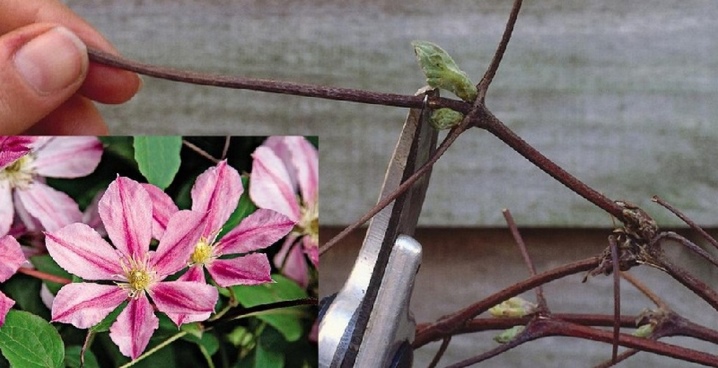
The cut shoot is divided into several parts with a sharp, clean knife or pruner, observing the following conditions:
- on each part there should be at least one well-developed bud (the best option is 2 buds and 2 not very large leaves);
- the upper cut (straight) is performed above the kidney at a distance of 2-3 centimeters;
- the lower cut (oblique) is performed under the kidney at a distance of 3-6 centimeters.
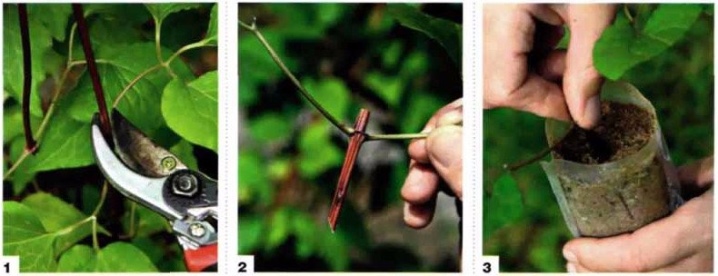
Leaves should not be completely removed from cuttings, but excess foliage should be cut off. It is advisable to shorten very large leaves with scissors in half. This measure will preserve the strength of the cuttings required for rooting and protect it from dehydration.
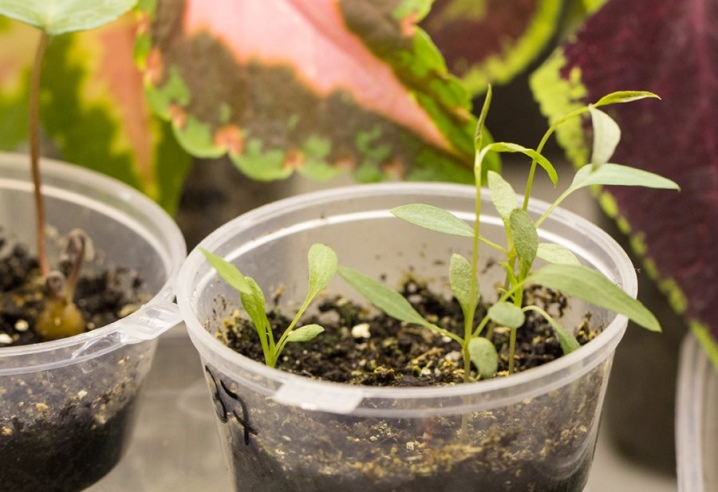
Prepared cuttings are rooted in cups, boxes or containers filled with breathable and light soil mixture. A mixture made from sand and deciduous humus is optimal, taken in a ratio of 1: 2, respectively.
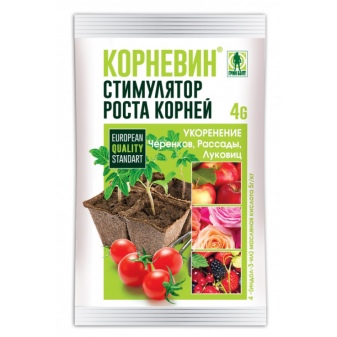
Before planting cuttings it is strongly recommended to soak in a solution of the corn stimulant ("Kornevin") for about 10-11 hours. You can bypass this procedure by simply dipping the bottom of the cutting into the root stimulant powder just before planting. Cuttings are planted at an angle, burying them in the ground to the lower node.
Above the container with the planted cuttings, it is necessary to build an impromptu greenhouse. It can be equipped with cut plastic bottles or plastic wrap fixed to a frame support.
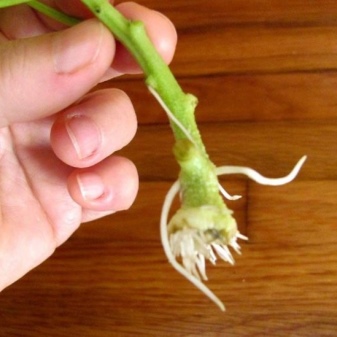
It is allowed to root the planting material in water. For this, the cuttings are placed in a transparent container with a wide neck. Next, water is poured into the container - so that it covers only the lower part of the cuttings, not reaching the buds and leaves. After that, the container is wrapped in paper (light cloth) and placed in a room with soft and diffused light.
Caring for established cuttings is pretty simple. It consists in daily spraying and maintaining a stable room temperature at 25-26 ° C... The average time for root formation is usually 30-50 days.
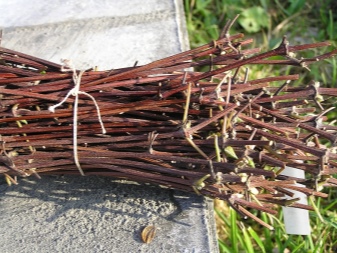
Breeding with lignified cuttings
Gardeners use this method of breeding clematis less often, since it is characterized by low productivity. Experienced florists claim that lignified planting material takes root worse, therefore it is usually used when it is not possible to prepare green cuttings.
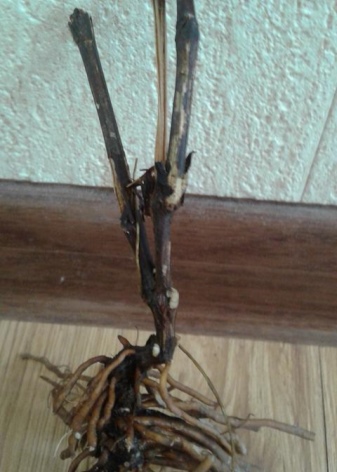
For harvesting planting material, mature lignified branches are used, which are cut into pieces.Each piece (stalk) should have 2 to 4 knots. The top cut should be straight, the bottom cut oblique.
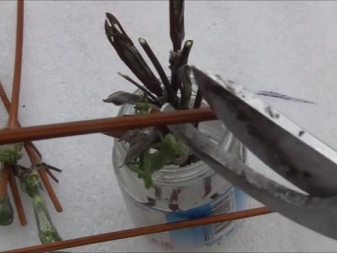
Further, the harvested planting material is placed in a container with a solution of a root formation stimulator for 15-20 hours. After processing, the cuttings are planted in boxes with a loose soil mixture consisting of peat and sand (2: 1). The cuttings are planted at an angle, deepening their lower node into the ground by about 1 centimeter. After disembarkation, the boxes are covered with a plastic cap or cut plastic container.
As in the previous case, the engraft cuttings are provided with proper care, maintaining high humidity in the greenhouse and a constant air temperature at 25-26 ° C.. In this case, the greenhouses should be placed in a room with diffused light. The rooting time in this case can reach 2 or more months.
Until spring, the cuttings should be in greenhouses. For the winter, they are tightened with an opaque film and removed to a cool place. With the arrival of warm spring weather, the rooted planting material is grown first in greenhouses, and then on ridges in the open field.
Separation features
Dividing a bush is a very time-consuming and technically difficult way of breeding clematis, which requires a certain experience and skills from the gardener. It is known that healthy adult bushes of these vines have a powerful and strong root system, which is very difficult to properly divide. As a result of illiterate actions, both the mother plant and the cuttings themselves are severely injured.
It is recommended to divide the bushes in spring or late summerwhen the plant is still in full strength and is not preparing for wintering.
Only adults and strong clematis aged 5-6 years are suitable for the procedure.
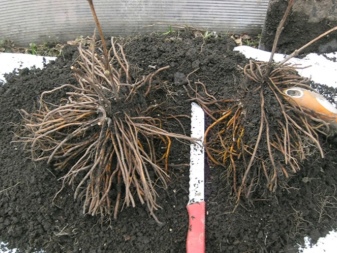
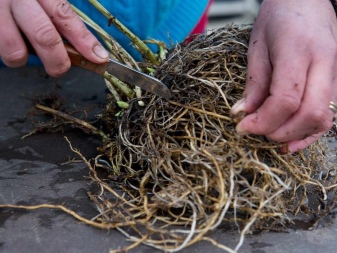
The selected plant is carefully dug out of the ground, after which it is washed and its roots are slightly dried. Then, using a sharp tool, the bush is divided into several parts. You can divide the bush with an ordinary pruner, a hacksaw, an ax or a sharp bayonet shovel. The division is carried out so that each part of the bush has its own root ball and several shoots. After the procedure, each section is examined, the places of the cuts on the roots are treated with charcoal powder.
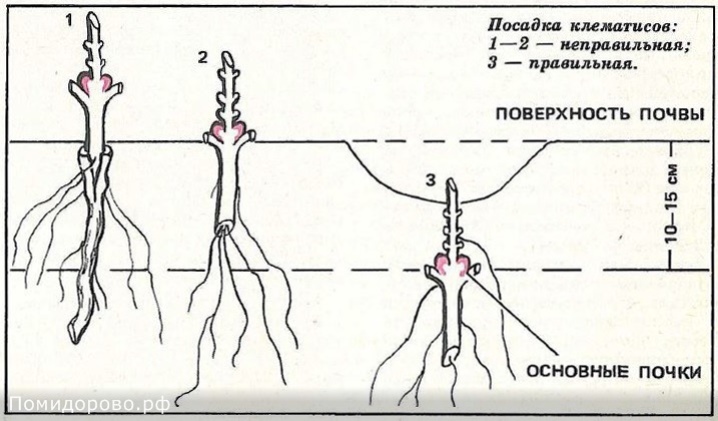
Prepared delenki are placed in planting pits, deepening them just below the level to which the mother bush was buried. After disembarkation, the surface of the earth around the cuttings is sprinkled with mulch. Watering is carried out as the land around the plants dries up.
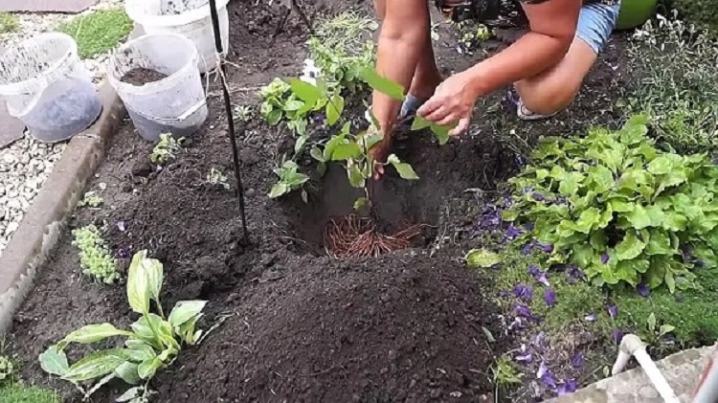
It is important to note that delenki should take root in conditions that are comfortable for them. So, young plants should be reliably protected from direct sunlight, drafts and gusts of wind. When planting delenok, you should use a loose, well-drained soil mixture, which will provide water and air access to the roots.
How to sow seeds correctly?
This method is often used by gardeners when breeding wild forms of clematis. In this case, young seedlings receive all the characteristics that the parent plant possesses (the one from which the seeds are obtained).
Practice shows that small seeds of clematis germinate the fastest (1.5 to 3 centimeters in size). In this case, seedlings appear within 3-4 weeks. Medium seeds (about 4-5 centimeters) usually germinate within a few months. Very large seeds (more than 6 centimeters) begin to germinate only six months later.
Before sowing, the planting material must be stratified. This procedure has a positive effect on seed germination. When stratification is carried out at home, the planting material is soaked in water for several days, after which it is mixed with wet sand and sent to storage in a refrigerator for 1.5-3 months. Planting stratified seeds in open ground is done around April.
Planting material can be naturally stratified... For this, clematis seeds are sown in the beds in the usual way in the fall. By spring, their stratification is completed, after which the phase of awakening (germination) begins.
It is allowed to use the seed breeding method of clematis for growing seedlings at home. In the future, young plants should be planted in the open field in a permanent place. However, experienced florists remind that young clematis painfully tolerate a pick, therefore, they are grown through seedlings in rare cases.
It should be noted that flowering of any seed-grown perennials usually occurs in the second year. Some types of clematis can bloom much later - in the third and even fourth year.
It is noteworthy that many wild clematis are able to actively reproduce by self-seeding. Under favorable conditions, they can spread quickly enough over the territory of the site - just like weeds.
Description of rooting layers
Rooting cuttings is one of the most popular and least traumatic methods of breeding garden vines. The recommended timing for this procedure is late spring or early summer.
Within the framework of this method, it is recommended to use adult bushes with a large number of young shoots for propagation. You can root young shoots in various ways, for example:
- pin the shoot to the ground at the point of the lower node, then cover this place with earth;
- lay the shoot along its entire length in a prepared furrow and cover all its nodes with earth, leaving only the upper part of the shoot and leaves on the surface;
- lay the shoot in the same way as in the previous case, but cover not all of its nodes with earth, but only every second (after one).
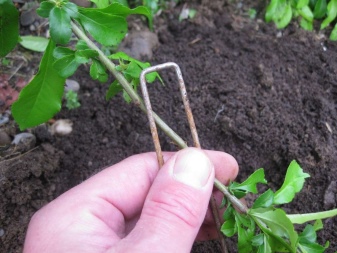
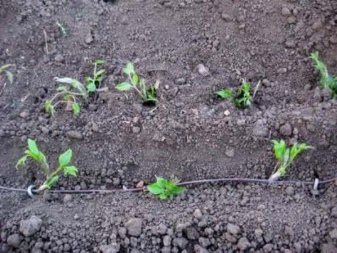
Places covered with earth are watered abundantly with water. Throughout the summer, in places where the cuttings are rooting, the soil is constantly moistened, preventing it from drying out. Usually, by the fall, the layers take root safely.
The shoot from the mother bush is not separated in the first year. In the spring of next year, young daughter bushes are formed in the places of rooting. They are separated from the parent plant and seated in pre-prepared pits in a permanent place.
Vaccination of clematis
This method is usually used by experienced gardeners when breeding varietal clematis, the vegetative parts of which are difficult to root. Recommended timing of vaccinations is the beginning or end of summer.
For the procedure, use:
- stock (parts of the roots of wild species of lianas);
- scion (green cuttings).
Harvesting of roots for grafting is carried out in advance. For this, one- or two-year-old wild-growing vines are planted in 3-liter containers filled with loose and well-drained soil mixture. When the seedlings have a strong root system, the plants are carefully removed from the containers. The roots are cleaned of soil and washed in water.
Then, after slightly drying the plants, the strongest and most developed roots with a length of at least 15 centimeters are separated with a sharp knife. After harvesting the roots, each seedling is planted back into the container.
Small green cuttings about 5 centimeters long are used as a scion. They are harvested in late spring or early summer. There should be a knot with leaves at the top of each cutting. Large leaves are cut in half before grafting.
Vaccination is carried out as follows:
- the upper part of the root and the lower part of the cutting are cut along an oblique line so that both cuts are approximately the same diameter;
- firmly press the cut of the scion to the cut of the stock;
- tightly tie the vaccination site.
Another method of vaccination is considered more labor intensive. With this method, the following actions are performed:
- clean the lower end of the cutting with a knife or scalpel, giving it the shape of a wedge;
- split the top of the root in two;
- insert the cutting with the cleaned end into the split root apex;
- tightly wrapped around the graft with strapping material.
Experienced growers claim that these clematis breeding methods can provide excellent results. With proper grafting technique, the survival rate of cuttings can reach almost 100 percent.
Four excellent breeding methods for clematis are listed below.


The comment was sent successfully.