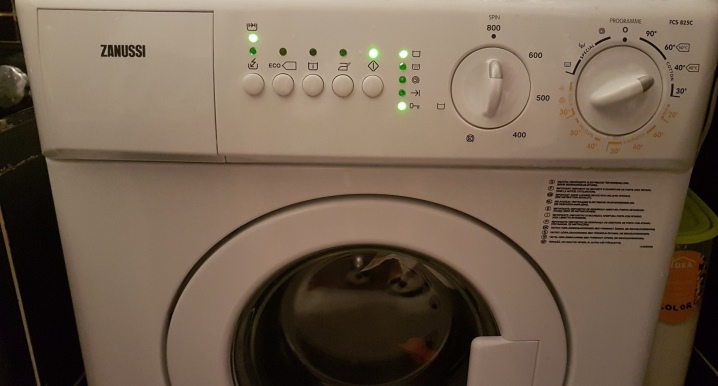
Replacing the bearing on Zanussi washing machines
Zanussi washing machines are renowned for their reliability, but even they are not immune to wear and tear. One of these important components is the bearing assembly. In the article, we will consider how to change the bearing on a Zanussi washing machine with your own hands.

Part selection
Nowadays, it is not difficult to find the necessary parts. In a service center and a repair shop for household appliances, it is enough to name the brand of your washing machine, and the sellers will immediately find the spare part you need. This does not only apply to bearings and seals. In the same way, heating elements, pumps, engines and other important functional elements that require replacement are selected.
You can pick up the parts you need yourself by ordering them through the online store, but for this you need to know the unique serial number of each part. It can be found on the surface of the element you want to change.
Preparation
If the bearing in your washing machine is worn out, this will be indicated by the characteristic noise during the operation of the equipment. It can also be determined by wobbling the drum - if it has a backlash relative to the tank, then this also indicates the need to replace the mentioned spare parts. It is better not to overtighten with the repair, as this can lead to wear on the shaft and the need to change the drum spider, and if the seat on the tank suffers, then the repair will cease to make sense.

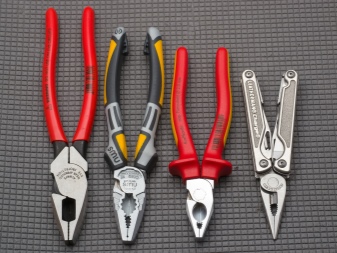
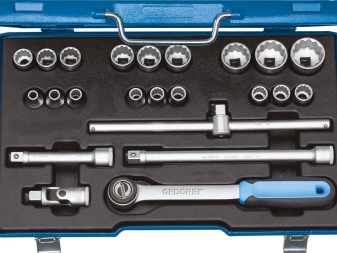
To carry out the necessary repairs, a minimum set of tools is required:
- flat and Phillips screwdrivers;
- set of socket heads;
- pliers or pliers;
- hammer;
- chisel or drift;
- sanitary silicone.
This set of tools will be enough to repair your washing machine.
Parsing the machine
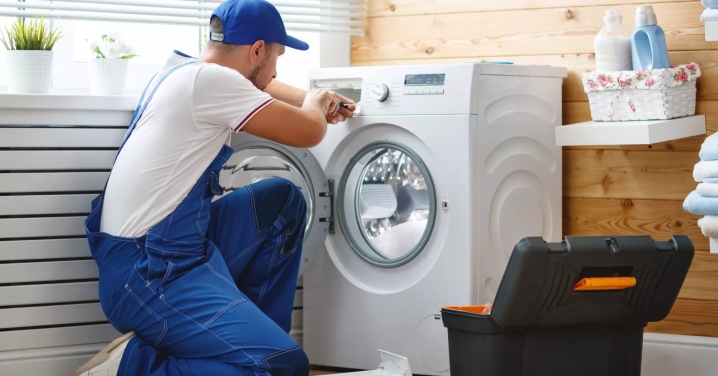
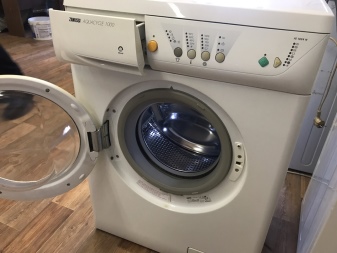
Let's take a look at the sequence of disassembling a front-loading Zanussi washing machine. Before commencing any electrical repair work make sure it is disconnected from the mains. And also it is necessary to turn off the water and disconnect the hose supplying water to the washing machine, and with it the drain hose.
Now, after disconnecting all communications, you can proceed to the disassembly process. If you do not have sufficient experience in the field of repairing household appliances, but still want to do the repair yourself, while disassembling the device, use photo and video recording of all contact connections to facilitate the reassembly process.
The first step is to remove the top cover. To do this, unscrew the 2 screws on the back of the washing machine.
This is most conveniently done with an 8 mm head and a reversible wrench (ratchet). After successfully unscrewing the screws, you need to lift the back of the cover up and slightly move it towards the front panel, then remove the part to the side.
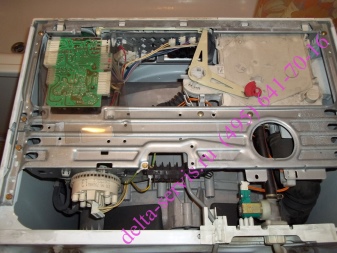
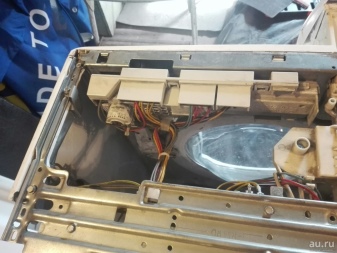
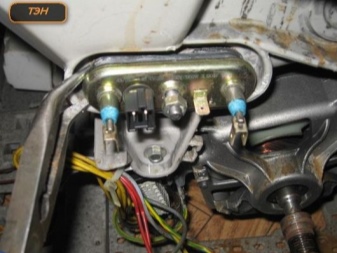
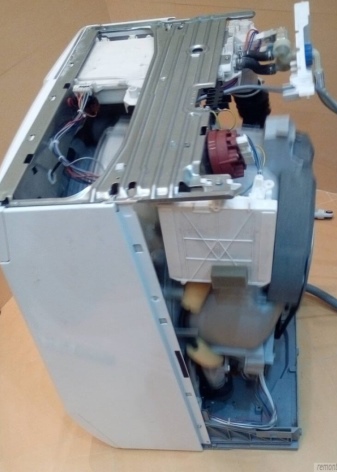
The next step is to unscrew 2 or 4 screws on the top, 2 screws on the sides at the bottom and 2 screws on the back at the bottom... After unscrewing all fasteners, the back cover is removed back. As soon as you remove the rear cover of the unit, almost all the necessary controls will be in the public domain, namely:
- engine;
- TEN (heating element of the device);
- drive belt;
- water drain hose;
- shock absorbers.
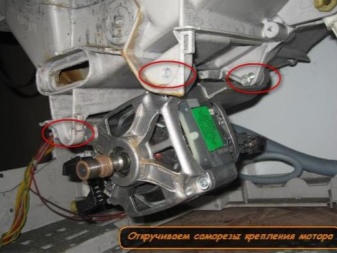
Now let's get started to remove attachments... To remove the engine, we need to dismantle the drive belt, then disconnect the plug with the power wires from it.
We unscrew the mounting bolts and slightly push the motor towards the front of the washing machine.
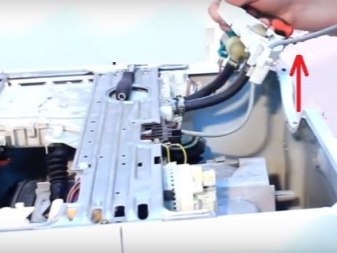
Next, remove the shock absorbers. To do this, you need to get special clips with which these parts are attached directly to the tank. They are easy to remove - you just need to clamp the latch on one side and pull the latch in the opposite direction. For easier work, you can use pliers or pliers. The shock absorbers do not need to be unscrewed from the tank.

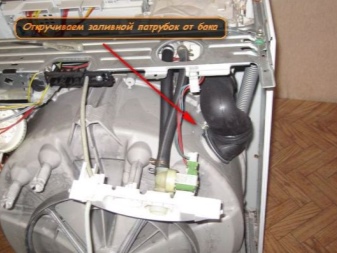
The next step is disconnect the drain and filler pipes... They are attached to the cistern with strong metal clamps. Having loosened these elements, carefully remove the rubber pipes.
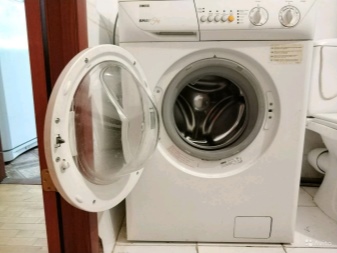
The time has come remove the cuff on the front panel... To do this, you need to unfasten the clamp. A flat screwdriver works well for this purpose.
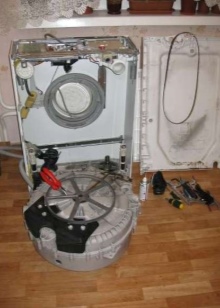
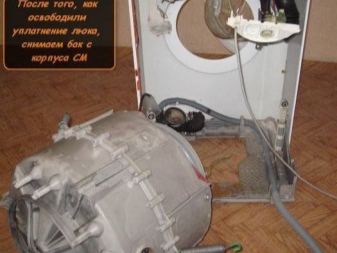
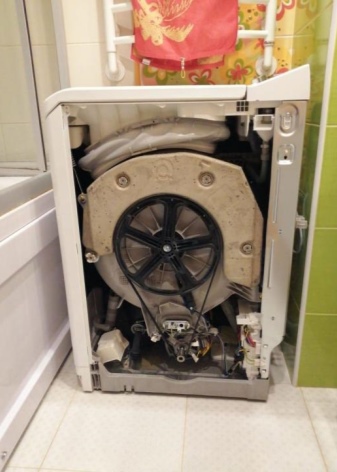
Now you can start to dismantle the tank itself - it contains the bearings that we want to replace. After dismantling all attachments and disconnecting the shock absorber, it remained hanging on 2 springs.
Consider the sequence of disassembling a top-load washing machine. In such devices, some repair work is much more convenient due to the easy access to some nodes.
Before starting repair work with a typewriter of the described type it is necessary to disconnect all communications from it. The main thing is to disconnect the machine from the power supply.
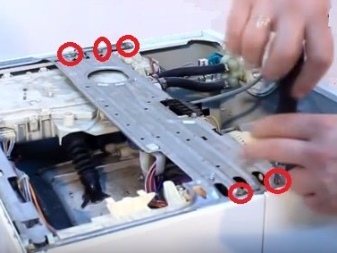
Next, remove the side panel, which is secured with screws at the back, and is also attached with a single screw at the front from the bottom. After that, we will get good access to all the components and parts of the machine structure.

For further disassembly you can immediately dismantle the engine. This procedure is the same as in front-loading models. After removing the belt, remove the terminal, unscrew the mounting bolts and move the engine forward.
Now you need open the top cover and remove the powder dispenser. It is fastened with latches. Next, you need to remove the cover. Pulling back the rubber seal. Under the indicated elements, you can find several self-tapping screws that must be unscrewed in order to remove the plastic panel. By unscrewing all the screws around the perimeter, the upper part can be removed by pulling up. After that, we will gain access to the hatch locking mechanism and the sealing collar.
Having removed the upper part of the machine, we get access to the control panel, which needs to be dismantled for further disassembly. Disconnect the terminals and remove the panel.
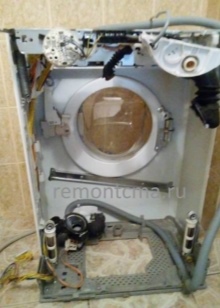
Next you need unscrew the shock absorbers and remove all counterweights from the tank to get it out of the body. It will remain hanging on 4 springs.


Replacing the bearing
After successfully disassembling the washing machine, we took out the tank and can start replacing the bearing, but for this we need to disassemble the removed part into 2 halves. Unscrew all the bolts around the perimeter... After that, the tank can easily be divided into 2 parts.
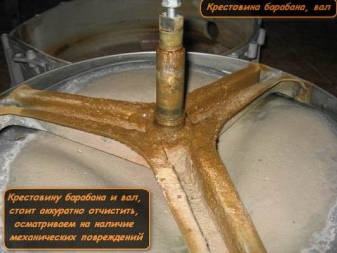
Further it is necessary carefully remove the drum from the back of the tank. To do this, it is necessary to knock the drum shaft out of the bearing. To avoid damaging the shaft from hammer blows, you can use a wooden block. Place a block on the shaft and hit it with a hammer. The tree will not allow the metal to deform - the timber will take over all mechanical damage. The second option is to screw the bolt into the drum shaft and hit it with a hammer. It is necessary to screw this fastener to the very end of the thread so that it rests against the metal. This way, the thread will not be damaged during the knockout process.
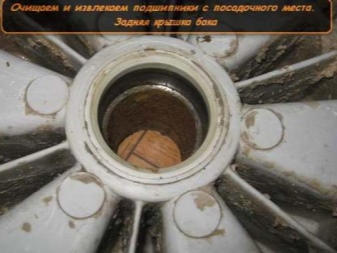
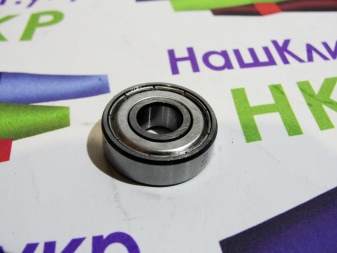
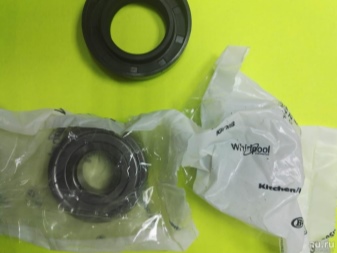
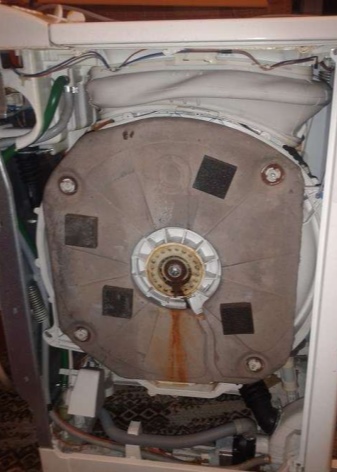
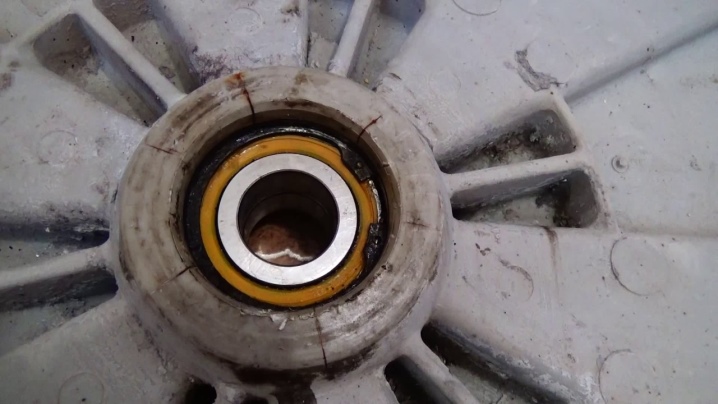
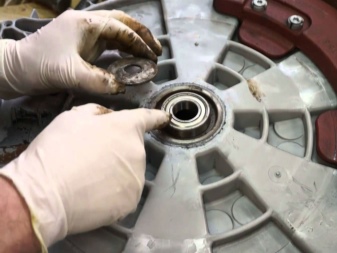
After successfully disconnecting the drum from the tank, you need to knock out the bearing itself, which requires replacement. In Zanussi washing machines, you can find 2 types of bearings: single-row or double-row.
Single-row bearings are installed in pairs, and double-row bearings are installed only one. To dismantle both types of parts together with the oil seal, you can use a special bearing puller or an ordinary hammer and any metal object (chisel)... When all the old mechanisms have been successfully removed, it is necessary to clean the seats of all contamination.
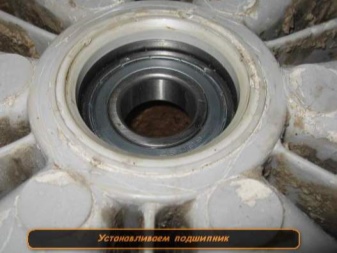
Now you need to install a new bearing and oil seal... The updated parts must be hammered in as carefully as possible. When installing new bearings by hammering them in with a hammer, do not hit the inner race and the cage. Mechanical impact is allowed only on the outer cage. To make the bearing easier to slide into place, it can be slightly greased with any technical grease. After installation, a new oil seal is recommended to be treated with a special oil seal grease.
Possible difficulties
During repair work on replacing a bearing on a Zanussi washing machine, certain difficulties may arise, which it would be good to know about in advance.
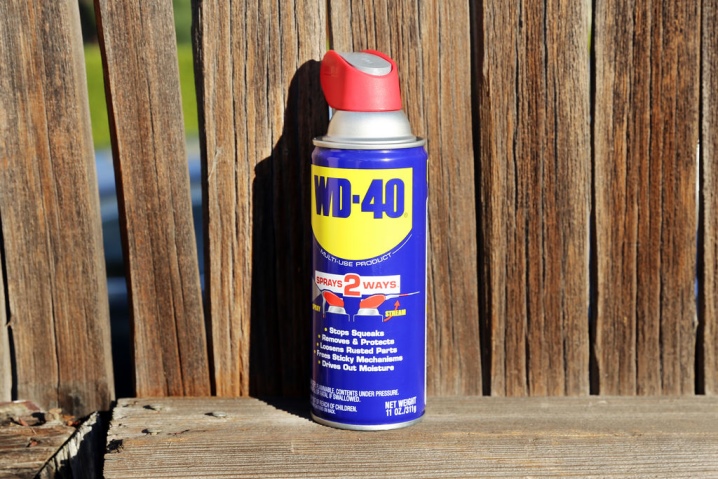
One of the problems often arises when it is necessary to remove the back of the tank from the drum. Sometimes the shaft is very problematic to remove. This element may not give in to any action, stand still. Any lubricant that helps in loosening old and rusty hardware (WD-40) will help with the solution of this problem. After the shaft is completely covered with grease, you need to wait about 1 hour for everything to get wet.
After the lapse of time, take a wooden block, lean it against the shaft and make an accurate hit with a hammer on the block in the area of this part. If it was not possible to extract the spare part in this way, then screw the old bolt into it and hit it on it until the shaft is completely removed.
As mentioned earlier, in modern washing machines of the described brand, 2 types of bearings are used (single-row and double-row). The double row bearing is secured with a retaining ring, it is important to remember this and remove the ring before you start knocking out the bearing. The single-row bearing design will not have a circlip. Instead, two single-row parts will be installed. They will have to retrieve in turn - the outer one is dismantled first, and then the inner one. It is important to take these features into account in order not to face certain difficulties in work.

Assembly
Assembling the washing machine after repair work is carried out in the reverse order. In order not to confuse terminals or wires during these procedures, use the photos you took earlier.
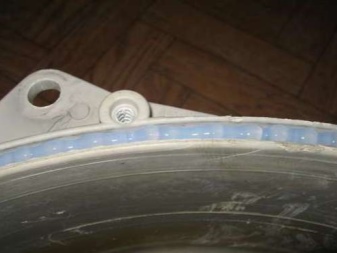
Collecting a tank with a drum, for the reliability of the connection, it is necessary to clean the sealing gum from any debris and coat it with a thin layer of sealant. This will protect yourself from possible leakage at the disconnection point.
When assembling the tank, pay attention to the threads at the front of it. It should not contain debris and other foreign objects. Some tanks have plastic threads, so be very careful when tightening the bolts. Otherwise, you run the risk of stripping the threads and, possibly, permanently ruining the tank.
During assembly, it will be useful slightly clean the contacts from dust and oxidation. The contact terminals, after being fixed in place, should have good contact and a snug fit. Poor contact will cause the connections to overheat, which is no good.
Shock absorbers must be fully and securely attached. Their fixing pin should go all the way and until it clicks, which indicates that it is locked in place.
When the assembly is complete, do not forget to connect all communications before the test run.
Replacing bearings on a Zanussi washing machine is presented below.


The comment was sent successfully.