Washing machine cuff: characteristics, replacement and repair
Replacing any worn out parts of the washing machine with new ones with the help of technical service technicians is not a cheap service. Usually, even for replacing the cuff, they charge the same amount as it costs itself. You can change any part, including the seal, yourself.
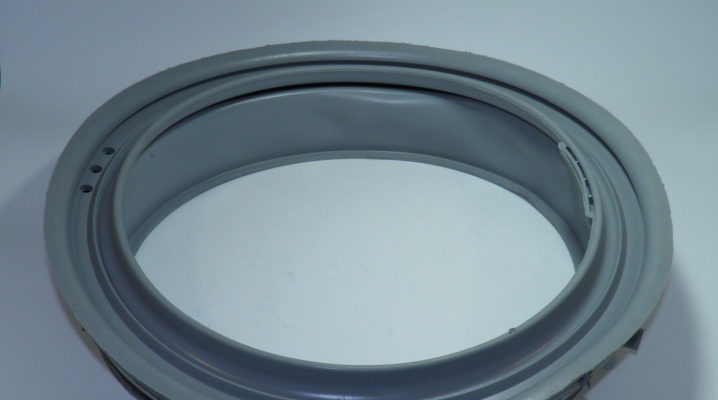
Why do you need a seal?
The hatch closes tightly and does not let water through thanks to a rubber or silicone seal. It is extremely important detail to prevent flooding of the floor, along with serviceable pipes, hoses and valves. The splashes raised by the drum during washing and spinning remain inside the washing compartment.
Symptoms and causes of malfunction
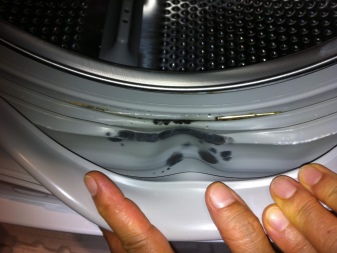
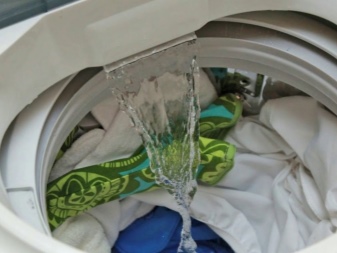
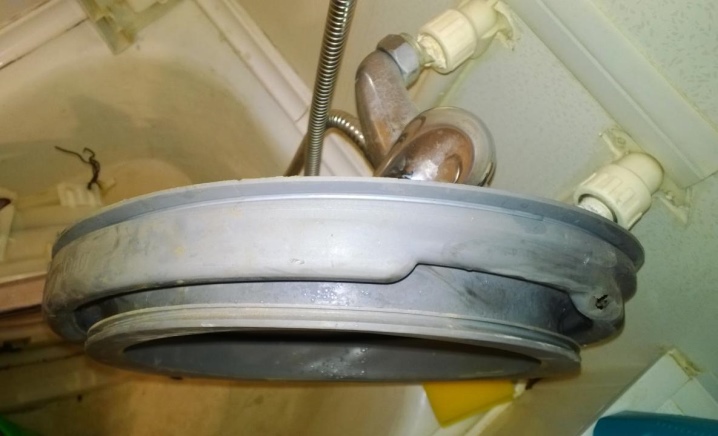
The main symptom of a faulty cuff is water leakage both during washing and during rinsing and spinning. Scuffs, cracks and holes appear in this elastic band.
The hotter the water, the lower the quality of the powder, the more it is put into the washing machine, the sooner the sealing gum will wear out.
A silicone sealant can work without any problems for 10 years, especially when the SMA is quite expensive. The manufacturer, which is a well-deserved and reputable brand, does not save on the quality of materials and technological processes for manufacturing parts.
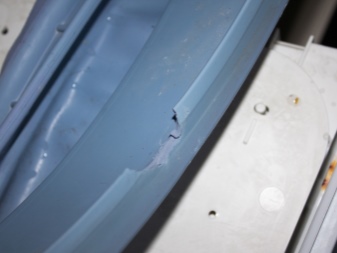
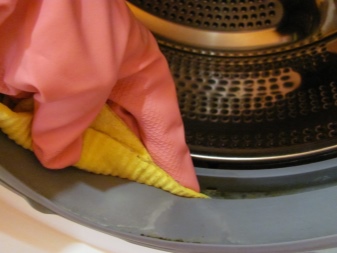
No matter how high the quality of the parts, they are subject to gradual wear. The cuff cracks from frequent overheating when you wash in boiling water, due to the use of special bleaching reagents, both loaded separately and contained in an expensive washing powder. Scale washed off from the boiler (and the remedy for it), excessive water hardness, as well as untimely cleaning of the seal from the mold formed on it, also have an effect. The latter is the most dangerous: mold itself is quite adaptable to new conditions. Germinating into any material, including rubber, it irreversibly spoils it over time. In addition to mold, other types of fungus are also dangerous. By creating build-ups on the surface of the seal, they violate the smooth outer contour of the cuff.
In the closed state of the hatch, gaps remain, which is why the detergent solution and the waste water formed after washing flow out. Because of this, the machine can use additional water pumping by opening the filler valve, which reduces the concentration of washing powder, reduces the quality of the wash and leaves puddles on the floor near the CMA.
Other signs are:
- inability to close the hatch;
- extraneous sounds when the washing machine is running.
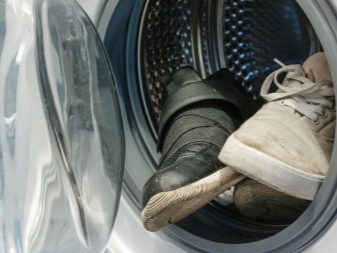
The reason for the abrasion of the cuff can be bra fasteners, caps with peaks, shoes with excessively hard soles, metal zippers and buttons on clothes, coarse overalls, keys not pulled out of pockets, coins, fasteners and much more.
There have been cases when the machine leaked water after accidentally washing the iPhone without taking it out of the pocket. The metal frame of this smartphone, which hugs the device around the perimeter, completed its dirty work, namely: tore the thinning cuff of the MCA in several places.
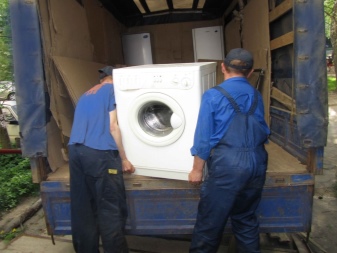
Any electrical appliance, including washing machines, will soon break down if handled roughly. Not quite accurate transportation can damage it, for example, when moving to a new apartment.
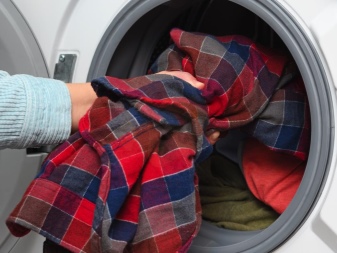
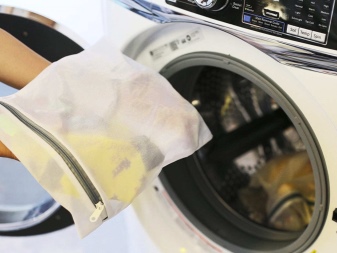
As for washing, then it is permissible to use special bags that are easily permeable to water and detergent powder, as well as to turn clothes inside out... The latter will protect the drum, cuff and hatch door from fasteners, locks, buttons and badges from which they cannot be released.
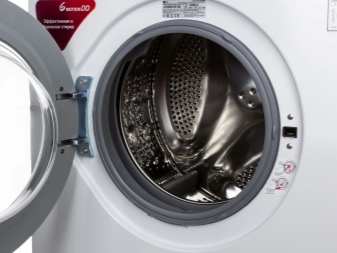
How to remove?
Regardless of the model of the washing machine, it is easy to remove and replace the cuff. You will need screwdrivers and / or hex keys, possibly pliers. Even a kitchen knife is suitable as a technical blade-lever - if you need to open the latches along the contour of the hatch. Some SMA models, for example, from the manufacturer Samsung or LG, allow you to remove the clamp not in one, but in two stages: significant disassembly of the case will be required.
Before starting work, be sure to remove the location of the bolts and wires on the smartphone. Some lay out the pulled out bolts in a "chronological" order - after replacing the defective parts, the fasteners are returned to their place in the reverse order.
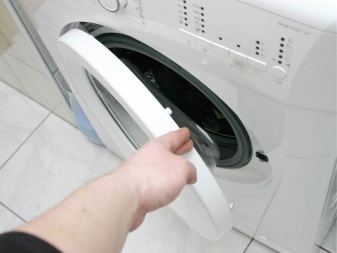
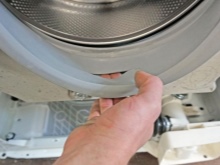
First clamp
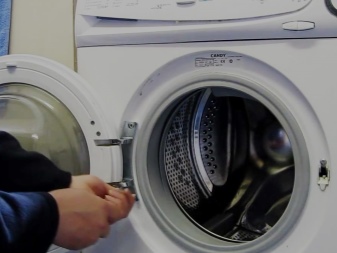
This is the frame that holds the cuff of the SMA hatch on its front wall. Having found a leak, turn on the emergency drain of the contents of the tank and wait until all the water is drained. The laundry must be reached by hand. De-energize the washing machine, and follow a series of steps.
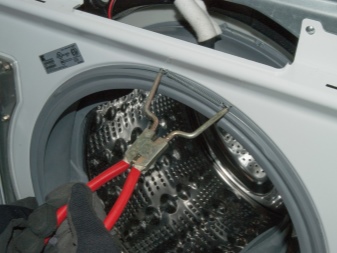
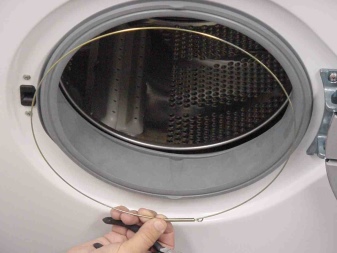
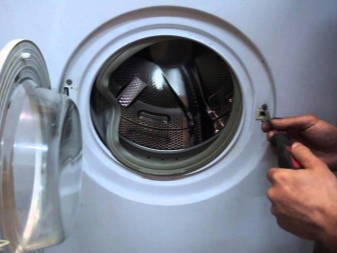
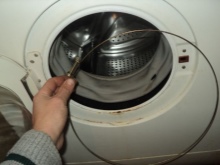
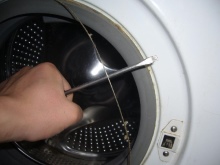
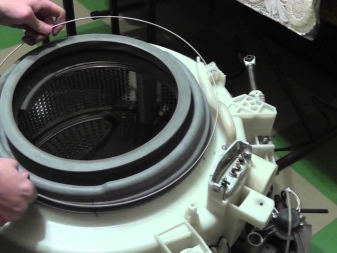
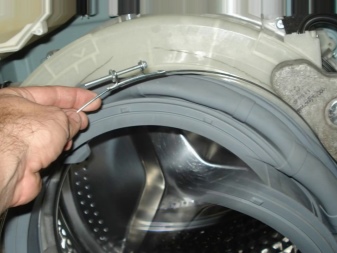
- Find the latch on the hatch (if the clamp is plastic). Pull back the part where the latches are located. If it is a wire clamp, unscrew the screw or pry the spring with a screwdriver. The spring itself is located on the side of the hatch door lock or in its lower part.
- Bend and remove the clamp.
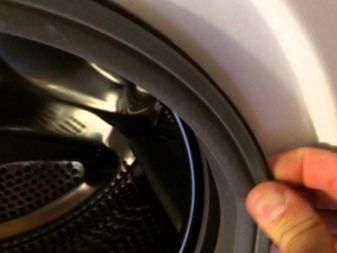
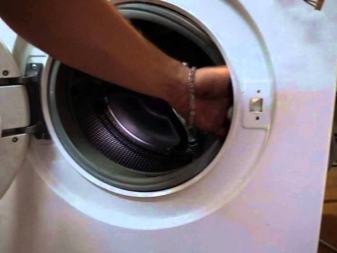
- Place the rubber band inside the drum... At the first stage, it will not be removed - it is held by the second clamp.
Before pulling out the cuff, look for two marks, one on the elastic and the other on the drum. They must match. If there are no tags, mark them.
Front Panel
For the final removal of the seal on most models, you will need to remove the front panel.
To remove it, do a few steps.
- Unscrew the bolts from the side of the rear wall, remove completely the "roof" of the CMA.
- Remove the detergent dispenser. Under it are the bolts holding the dashboard - unscrew them.
- Lift up on the latches holding the dashboard and remove it. The action should not be performed with excessive force - if the latches are damaged, the panel will not hold securely after assembly. Refurbished latches, glued with even the best glue, will put the panel's secure hold into question.
- It is not necessary to remove the wiring (cables, wiring harnesses) from the panel - it is enough to temporarily hang it, for example, using tape.
- Unscrew the bolts from the front of the housing.
- Dismantle the cover that separates the filter of the pumping out pump, and unscrew the bolt under it.
- Pry up the bottom of the front panel - it locks into place with large latches.
- Unscrew the bottom and top bolts.
- Remove and slide this part of the panel aside.
There is no need to remove the door lock device (used for washing). A second clamp will become available.
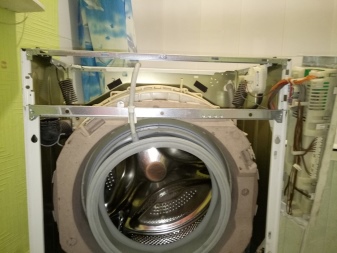

Second clamp
It is filmed in the same way as the first one. The elastic is located on the counterweights and is also completely dismantled.
To remove this wire (or cable) clamp, follow the simple steps.
- Remove the counterweights by unscrewing the screws holding them.
- Remove the clamp carefully. Nothing holds him anymore.
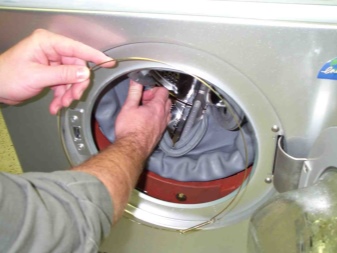
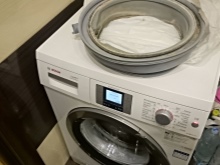
Pull up the leaky cuff. Put on a new one - and repeat the previous steps in reverse order.
Cleaning and repair
A new cuff is not fitted in some cases.
- In a city or area there is no service center where accessories for washing machines are available in a full range. The order can be delivered in a period from several days to 2-3 months. Tell the make and model of the machine to a service worker. Until the desired part arrives, things will have to be washed, most likely by hand.
- At the moment you are limited in spending... Buy or order a new cuff as soon as possible.
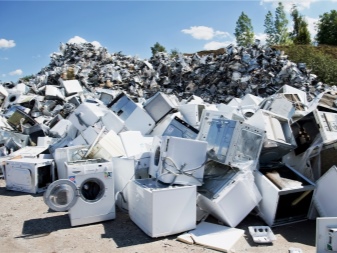
- The model of this SMA has long been discontinued., the standards and sizes of the cuffs have changed, it is unrealistic to find this spare part. Only a garbage dump can help.
Worst-case scenario - trying to make the cuff yourself from a suitable sized car or wheelbarrow camera. The fact is that not every owner of a washing machine, especially an expensive model that still works accurately and properly, will throw out the unit due to the fact that there was no cuff for the SMA. Attempts to repair the old one or cut out a new one from the air chamber will be made by the owner of the SMA repeatedly.
Experiments are also being used to turn the device into a top-loading CMA by running the spin cycle at low (less than 200 per second) rpm, or by erasing it without it at all, and turning off the boiler. But such an alteration of the unit will pay off little. The washing compartment (tank) with a drum is impervious to water - in normal mode, when spinning, splashes scatter in all directions. And yet the load on the motor in the "lying" position of the machine increases sharply. It is impossible to use the classic algorithm for wool, silk and other fabrics that require a special approach.
Some models of the same brand may be compatible - not all parts in them differ in size and appearance.
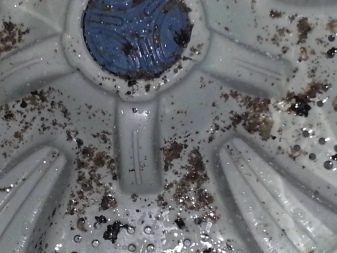
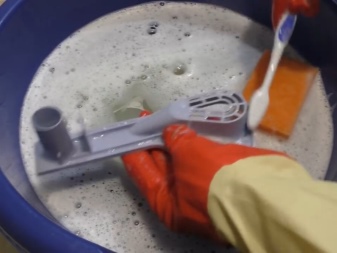
To clean mold and mildew, you will need materials at hand.
- Rags (any)... It does not matter whether this rag has a pile: the cuff does not need shine and shine, it is almost all the time covered by the frame of the hatch door.
- Ethanol... It is not recommended to wipe with vodka - it contains sugar.
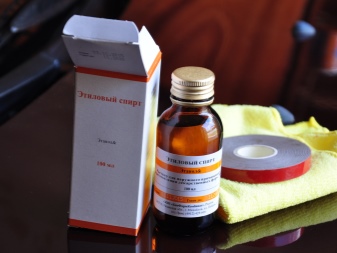
You can try cologne as a solvent.
Do not use "646" thinner and dichloroethane - they dissolve almost all types of plastics. Do not rub the rubber with abrasive detergents without dilution with water, do not use sandpaper when cleaning - you will further thin the gasket.
If spiders, ants and cockroaches are found in your washing machine, use this repair - and clean all the insides where they nest. A washing machine that is clean not only on the outside, but also on the inside will work for a long time. It often happens that in a house full of cockroaches, broken equipment, even one that needs to be repaired, is thrown away - few people undertake to repair it. So, it is not easy to remove cockroach excrement from everywhere: you will need to rinse the mechanics and body parts, internal racks in soapy water. Electronics are immersed in a solution of alcohol or acetone - or blown out of a pressure washer operating in the air blowing mode (without water). All these actions are quite costly.
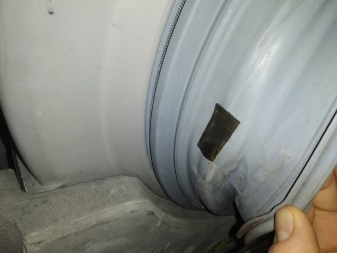
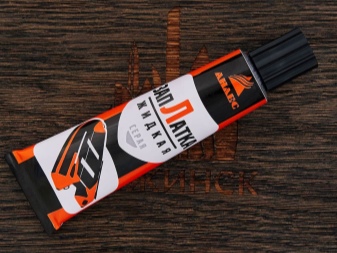
Use a waterproof adhesive with good adhesion to adhere the patch to the wiped area of the cuff. The glue should glue the rubber securely, while not being afraid of soapy water, which, in fact, is a solution of washing powder. The ductility of the rubber thus recovered must remain unchanged.
- At the same time, the patch must exceed the thickness of the frayed area - otherwise the defect will soon form again. If necessary, several thin layers are glued together at once.
- It is advisable to "sand" the surfaces to be glued with fine sandpaper.
- Alcohol or acetone is used as a degreasing agent.
- Lubricated with glue-sealant (or any shoe glue), the patch and the cuff can stand for several minutes - or they are pressed immediately. The best option is to clamp it in a vice with wooden or plastic plates.
It will not be possible to glue the elastic at the bends. You can try vulcanizing with a piece of raw rubber, warming up the place to be sealed with a soldering iron heated to 200 degrees. In this case, "sanding" may not be required: polymer molecules of rubber and additives are distributed during heating in the place of gluing, there is a hot diffusion of solids (rubber) into each other according to the laws of physics.
A suture is also applied to the rupture site... The seam enhances the wear resistance and strength of the repaired zone.The repair as a whole will not save the SMA from replacing the worn-out gum: sooner or later water will get to the electronic board. The slightest short circuit of the tracks on the printed circuit board will immediately disable the sensitive microcircuits - soap solutions and natural minerals contained in the water conduct an electric current.
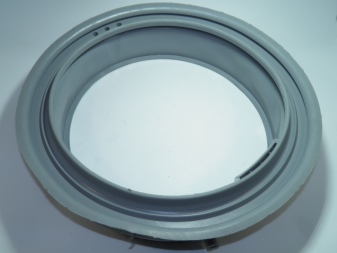
Installing the cuff
It is not enough to remove the clamps and dismantle the old cuff. Moreover, it is not completely symmetrical - it is not plastic, but a much softer material. However, the "factory" deformation will not affect the performance of the part. The cuff will stretch and "fit" into place on all sides. The new one must be installed correctly.
Let's consider what needs to be done for this.
- Apply the cuff and make sure that the alignment marks and technological gaps, holes coincide... It is better to immediately install it correctly than to pull it back and forth.
- Grasp the edges of the cuff and pull it over the edge of the tank... It is very difficult to stretch the rubber, the action may not work on the first try. Excessive force will cause the rubber to burst. The silicone can stretch so that you can't wear it tight and the cuff will lead, so proceed with caution. Move in a circle. If the tension is too tight - you can apply a little diluted detergent or washing powder on the clamp and the groove of the seal.
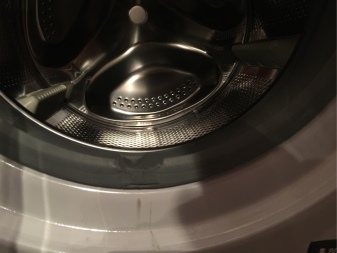
- Check that the cuff is "seated" on the inner collar, has not come off any of its edges... Make sure that the drum does not touch the rubber band - otherwise it will quickly erase it, and the same breakage will manifest itself again.
- To install the inner clamp, use the adjusting screw to set the optimum circumference... It should line up completely with the groove in the cuff. Re-tighten the screw.
- Insert the edge of the clamp where the hook is located... Put the other end of the clamp with the spring on it.
- Fix the clamp at the reference pointpushing a screwdriver through the hole in the door lock. Having hooked the spring on its hooks in the place of the holders, tighten the clamp so that the spring is in its seat.
- Install counterweights inner clamp and tighten the bolts holding them.
- Making sure the cuff sits exactly in place, put the dashboard back by tightening all the screws, including the one located near the drain pump. Replace the pump cover and insert the top of the front panel where it was.
- Insert and snap into the bottom of the front panel.
- Replace the control panel (with buttons) and replace the detergent dispenser tray.
- Pull out the edges of the cuff and attach it to the body.
- Install the outer clamp in place, check the original position of the bolts and latches.
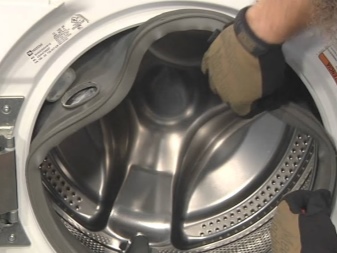
Switch on the CMA and select a rinse cycle. To check for leaks, the AGR is allowed to tilt forward during operation. Water will completely cover the glass of the sunroof and the collar along its entire length.
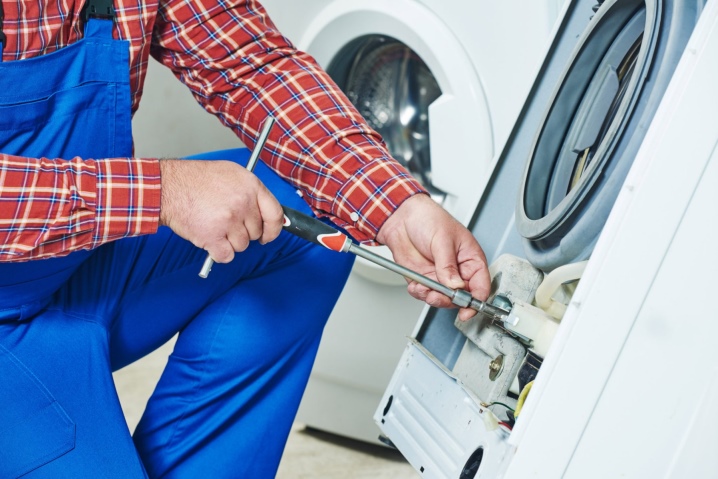
If there are obvious difficulties when changing any spare parts, including the cuff - better contact the service center... Calling the master at home will solve this problem - if you cannot remove the old one and fill the new cuff with your own hands.
An automatic washing machine of any company - even a cheap Chinese one - will last quite a long time. But this is achieved only with timely care, including the replacement of worn-out parts with the same new ones. With a successful combination of circumstances, proprietary technology is able to withstand a service life of 30 years instead of the declared several.
Replacing the cuff of the washing machine hatch is presented in the video below.


Cars are different. On some it is very easy to install the clamp from the front (Indesit), and on some it is very difficult, for example, the early Bosch max5 series. So everything is very individual.
The cuff was changed, but after the second wash it began to deform again.When spinning, extraneous noise appears, and the door began to open with difficulty. With what it can be connected? The first cuff was changed due to deformation, after which the drum cut through it. I thought it was worn out, but with a new one, history repeats itself.
The comment was sent successfully.