How to disassemble and assemble a washing machine?
A washing machine is a device that is found in almost every home. Many different models of similar household appliances go on sale. There are both simple and cheap, as well as expensive options with a large set of functions. Even the most reliable and high-quality equipment may require disassembly for one reason or another. In today's article, we will learn how to do it right.
Required tools
Dismantling and reassembling a washing machine is not the most difficult process, but it is a responsible one. Wherein you need to be careful, correctly connect all disconnected contacts and nodes.
It is also important to use a quality tool, without which such work would be impossible.
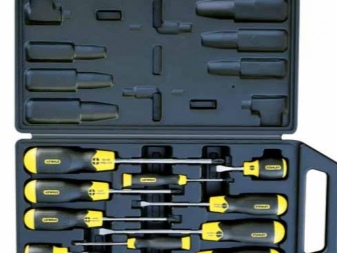
A home craftsman who decided to disassemble and reassemble the washing machine on his own should have the following units of tools with him:
- a set of screwdrivers (these must include an asterisk screwdriver and a slotted version);
- screwdriver;
- several hexes;
- pliers;
- small hammer.
Certain types of connections in the construction of washing machines can simply "stick" over time. To be able to easily unscrew and remove them, you will need to use high quality lubricating fluid... In the arsenal of most motorists there is a composition of WD-40, which is just suitable for carrying out such procedures. Also recommended save a small basin. It will be useful for draining the remaining water from the hose.

A few rags will be useful, with which it will be convenient for you to wipe the internal parts of the device, as well as wipe your hands or quickly collect the liquid that spills out of the basin. It is advisable to prepare all the tools and additional components before starting the dismantling and installation work. Thus, during all procedures, the necessary devices will always be at hand, and you will not have to be distracted by going in search of missing instruments.
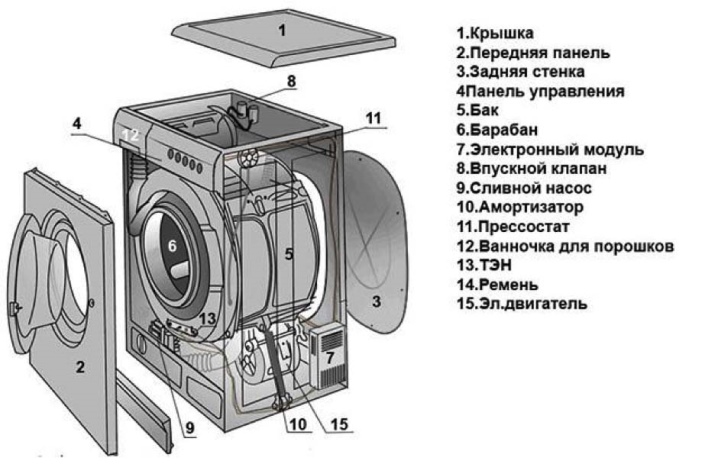
Disassembly diagram of machines
Many users decide to disassemble and assemble the washing machine on their own. There is nothing prohibitively complex and incomprehensible in this process.
The main thing is to act carefully, without neglecting any of the necessary stages. It should be borne in mind that devices with vertical and horizontal loading are disassembled in different ways.
These are models of various designs. Let's consider in detail how to properly disassemble and assemble such units.
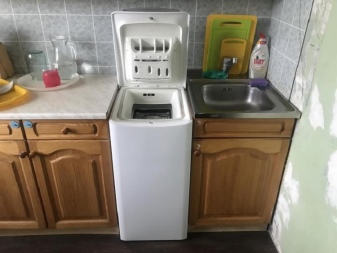
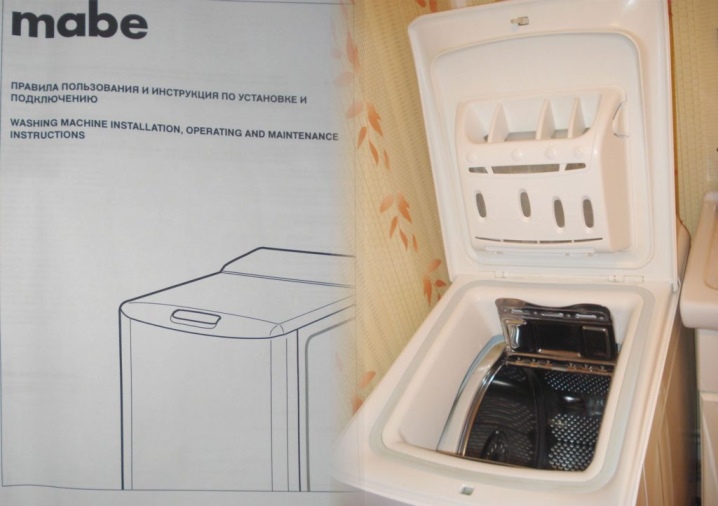
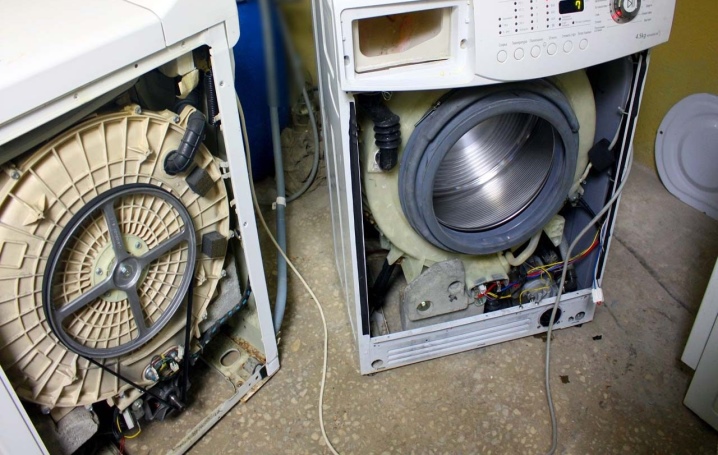
Top loading
Many manufacturers produce high-quality and very easy-to-use machines with a vertical loading type. These devices are small in size. To load laundry into such a unit, users do not have to bend over or sit down, because the hatch is located at the top. Truth, these products cannot be used as an additional work surface built into the same kitchen set.
Top-loading machines are relatively easy to disassemble. The home master will be able to independently cope with such work. The main thing is to strictly adhere to the instructions. It is advisable to find a manual for the operation of household appliances - its pages often contain all the diagrams of the device of the machine, indicating the location of the main spare parts and assemblies.
Let us consider in detail what stages the disassembly of a top-loading washing machine consists of.
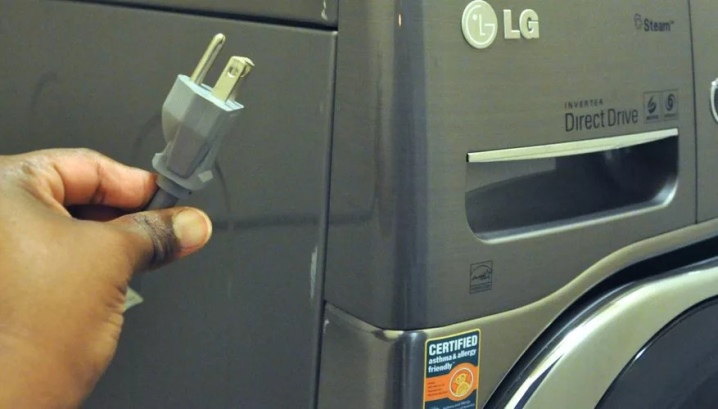
- The first thing you need to do is disconnect the device from electrical energy, from the water supply and from the sewerage. Try not to forget about this important step in performing safe work.
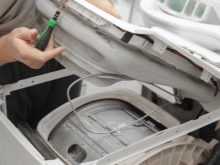
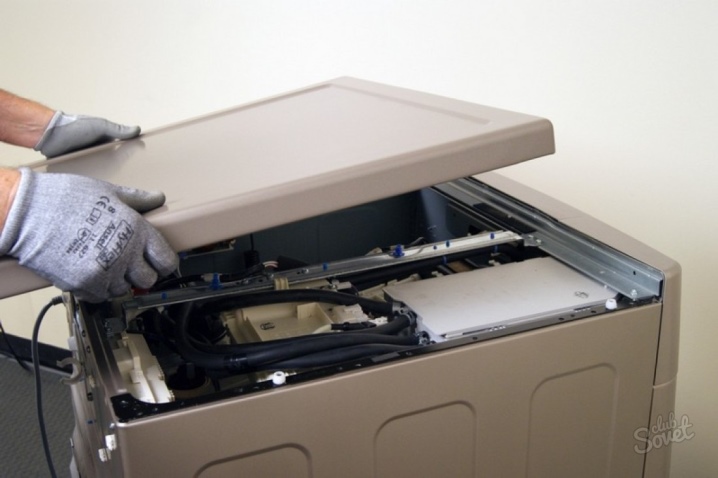
- You need to start disassembling with your own hands from the control panel... Using a screwdriver, pry off the top control panel as carefully as possible. This must be done absolutely from all sides of the unit. Pull the part up and then towards the back wall. Then tilt it at an angle that you feel is more comfortable, so that you can work freely with the existing wires there.
- It is recommended to photograph the location of all wires in the device. Thanks to this, it will be much easier for you to assemble the equipment back, because you will know exactly which wires to insert where. Some masters do not take a photo, but write down the necessary marks in a notebook or draw sketches. Each user does what is most convenient for him. If you are well versed in the structure of your machine, then you can do without prompts.
- Twist the wires and remove them. In this case, you do not need to make sudden movements and jerks - be careful. The printed circuit board contains all the components that can be unscrewed to further detach the mounting module.
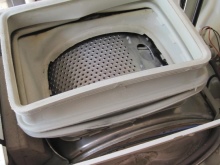
- To remove the side panels of an upright washing machine, you will need to unscrew all the screws, tilt the bottom edge towards you and pull it down.
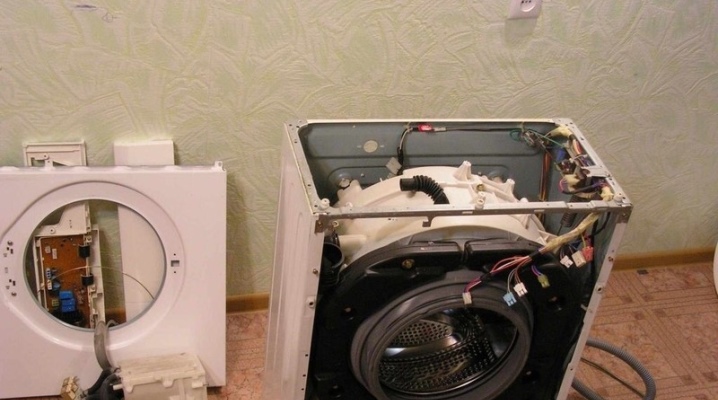
- Then you can go to the front wall of the device.... Its fasteners can be removed only after dismantling the side parts.
After disassembling vertical household appliances, old and defective parts should be replaced with new ones. The location of certain spare parts and major assemblies depends on the specific brand of the device.
That's why it is advisable to have with you the instructions that came with the product.
Horizontal loading
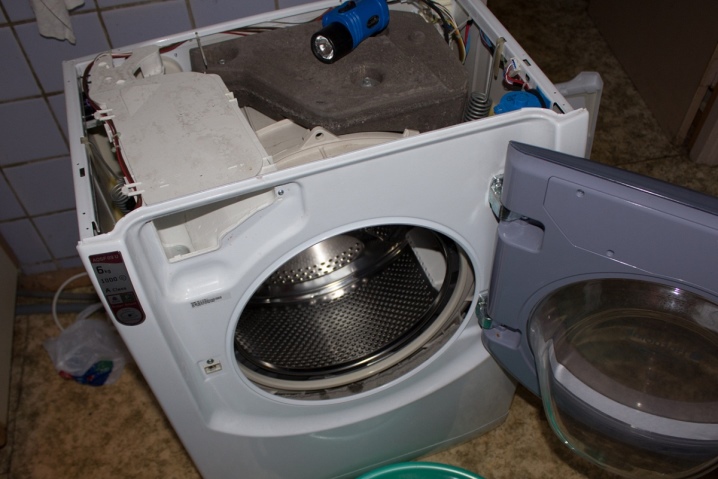
The most popular in our time are units in which a horizontal load of linen is provided for further washing. These devices are presented in the widest range. They differ in many ways: in design, in size, in functionality, and in build quality. Many brands produce horizontal typewriters. Let's sort out the process of disassembling such household appliances "on the shelves".
- The first action that cannot be neglected regardless of the model of the washing machine is disconnecting it from the electrical network, water supply and sewerage systems.
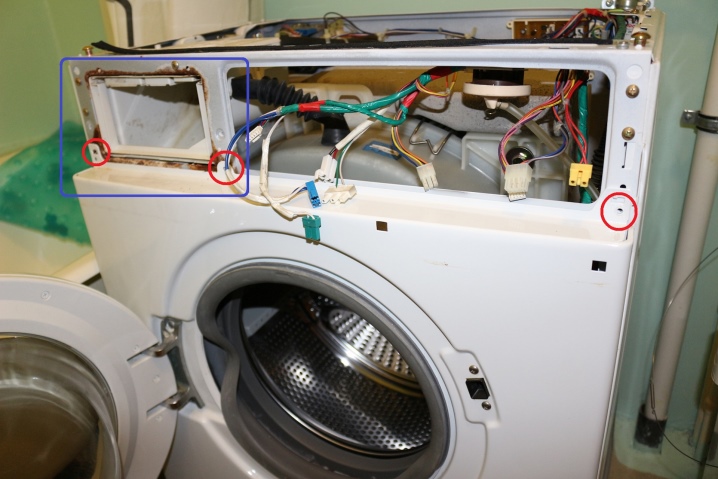
- Next, you will need to start disassembly from the top hatch... This piece is held in place by several screws. They can be removed with a Phillips screwdriver. When you unscrew these fasteners, you will need to lightly press on the cover from the front, and then lift it up.
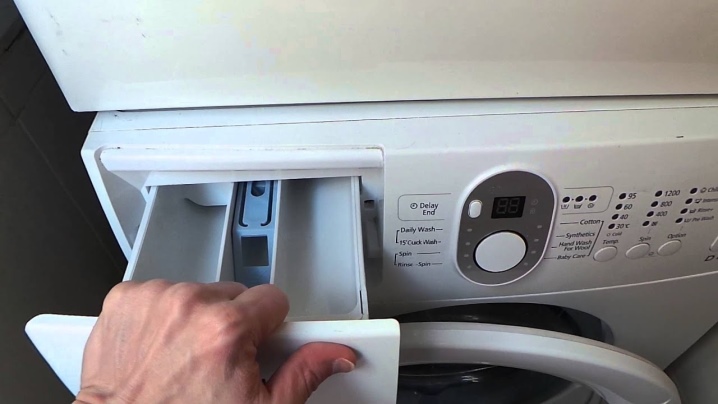
- Next, you need to remove the tray into which detergents (powders, conditioners) are introduced. To remove this component in the design of the machine, you will need to find a special latch button. It is usually located in the center of the tray. You need to press it, and then gently pull the dispenser towards you. That way he can get out.
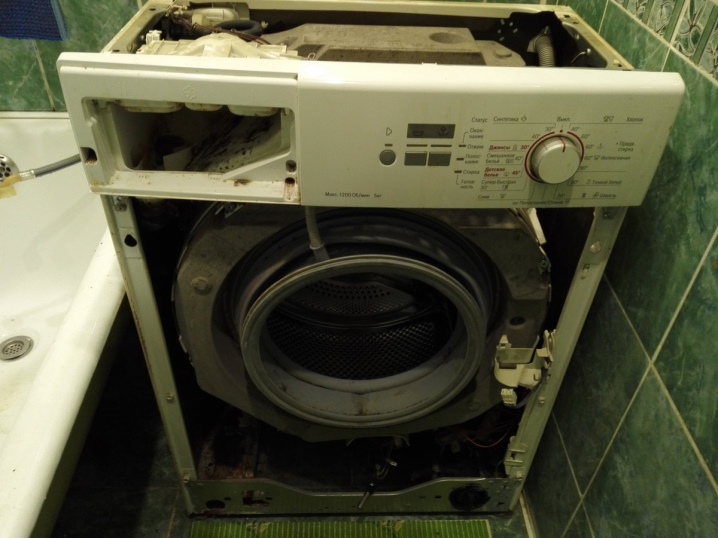
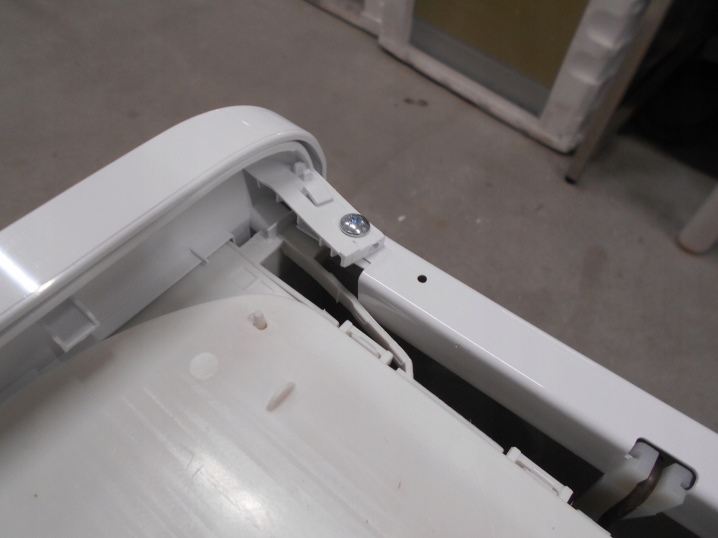
- Now you can start removing the control panel of the washing machine. This element is attached with just a couple of screws. One is located under the tray and the other is on the opposite side of the panel. Do not forget that this component must be handled as carefully and carefully as possible. We recommend placing it on top of the device.
- The next thing to do is to remove the service panel. This component is required for maintenance and retrieval of small objects that accidentally found themselves in the tub during the wash. Removing the service panel is very simple - you need to press on 2 side latches, as well as press on the third one, which is located in the middle.
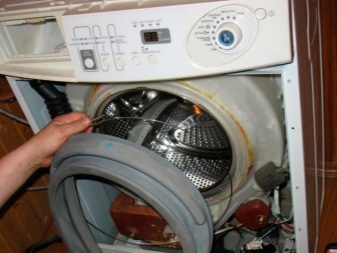
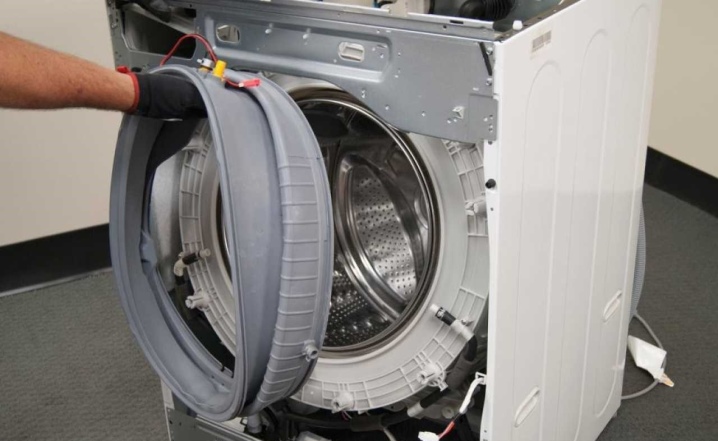
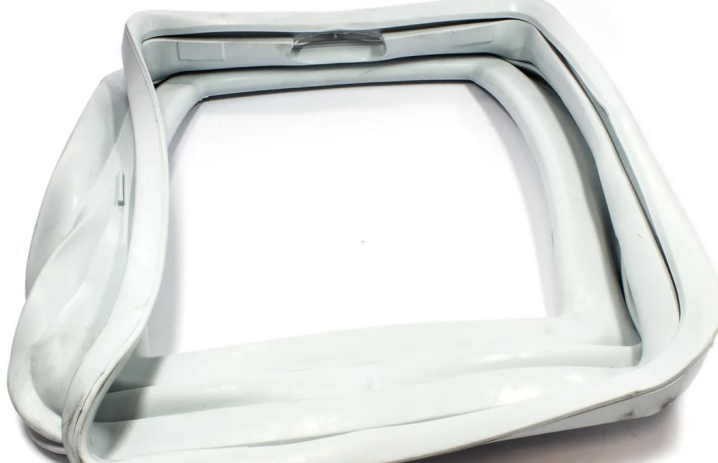
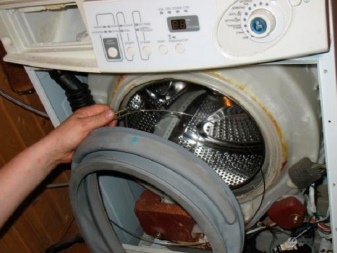
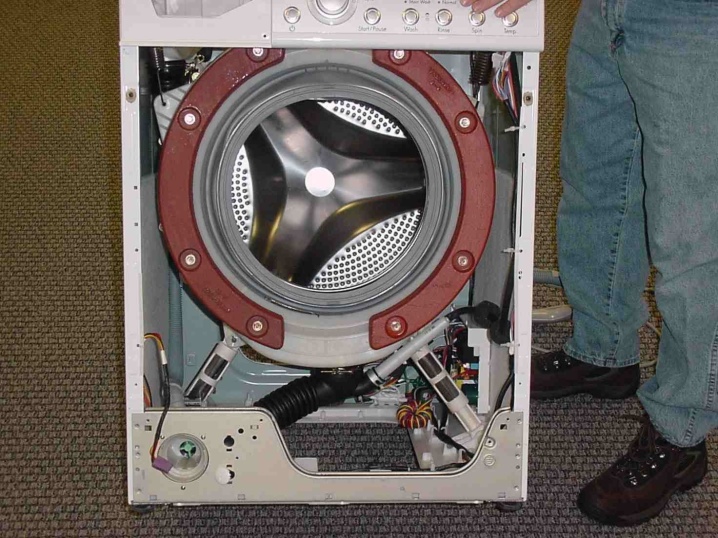
- Next, you need to remove the front wall. First you need to remove the rubber strap that is installed on the loading door. It is held by a small spring, which will need to be carefully tucked in.
- Then you need to tighten the cuff. This should be done in a circle. For this procedure, you should use pliers and screwdrivers. If the cover gets in your way, you can remove it. To do this, you only need to unscrew a few bolts. If the specified spare part does not bother you in any way, then it can be left in its main place.
- Then you need to find special clips, which are responsible for holding the front panel of the machine. In addition, there are hooks on the panel. They can be removed by lifting slightly.
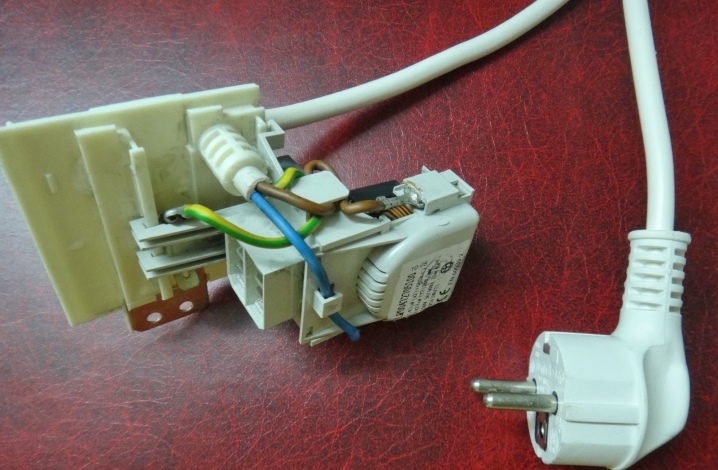
- The power supply plug is removed from the units to lock the hatch. After that, the control panel will be at the complete disposal of the master.
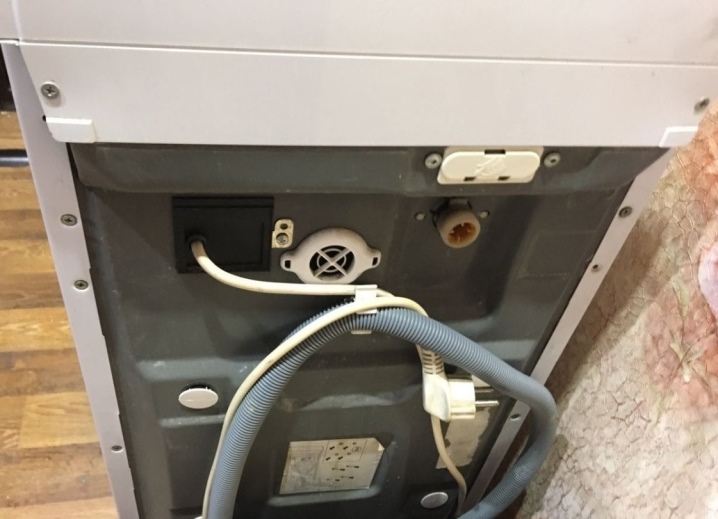
- The next detail to be removed is the back panel. It is removed the easiest way. To do this, it is enough to unscrew all the existing bolts that hold it in the structure.
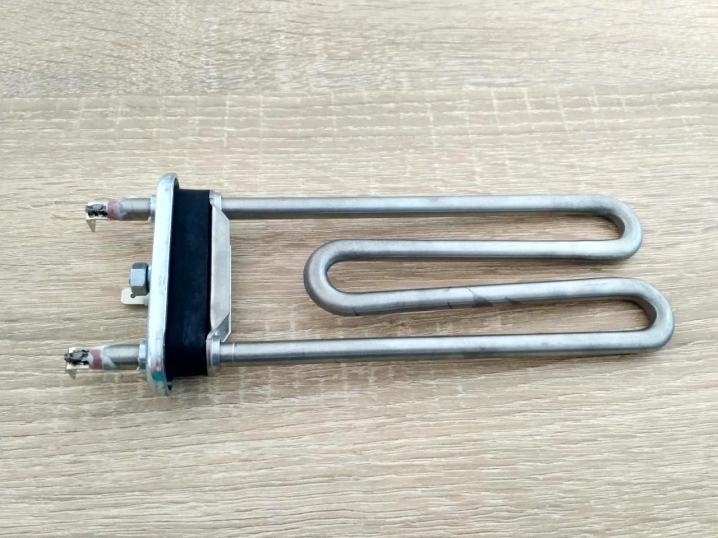
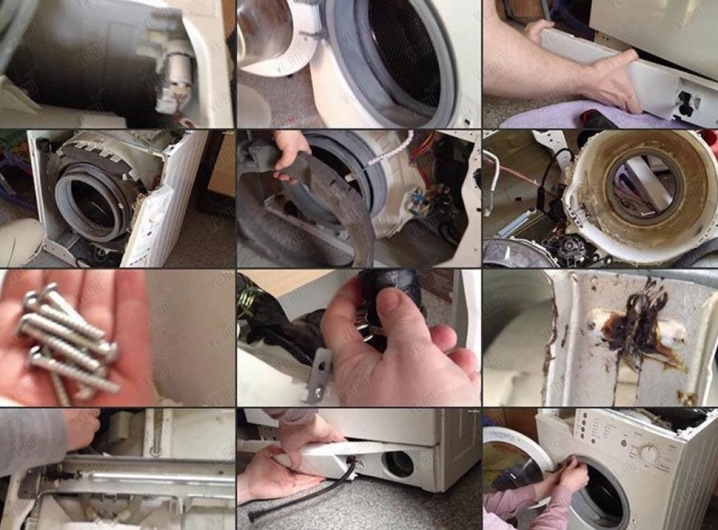
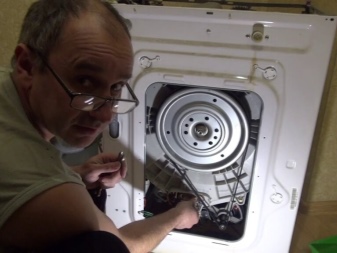
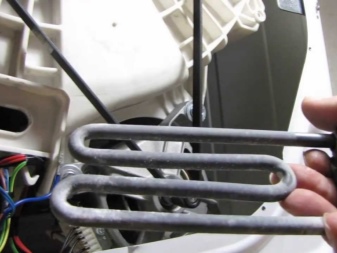
- Remove the heating elements of the device (heating elements). With the utmost care, disconnect any wires that you can see from them. This procedure can be omitted if you just unscrew the nut and completely remove the heating element.
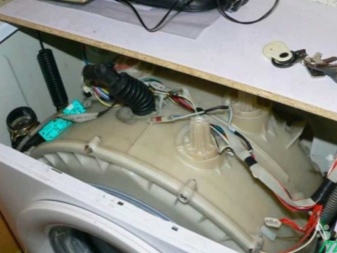
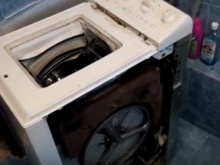
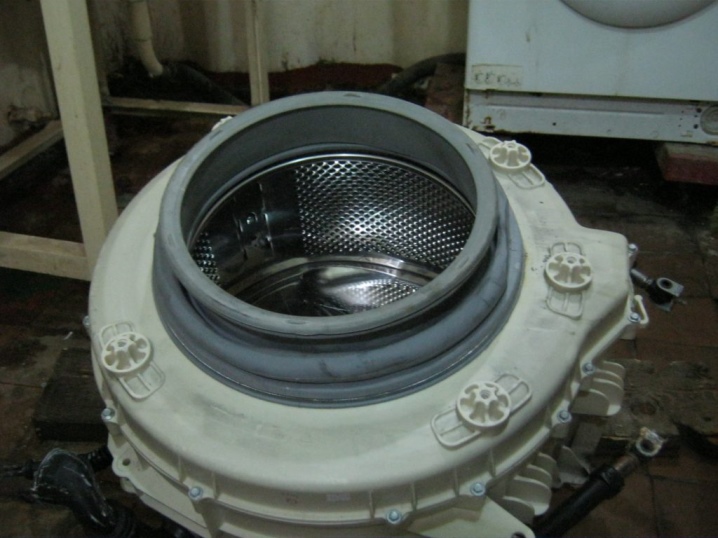
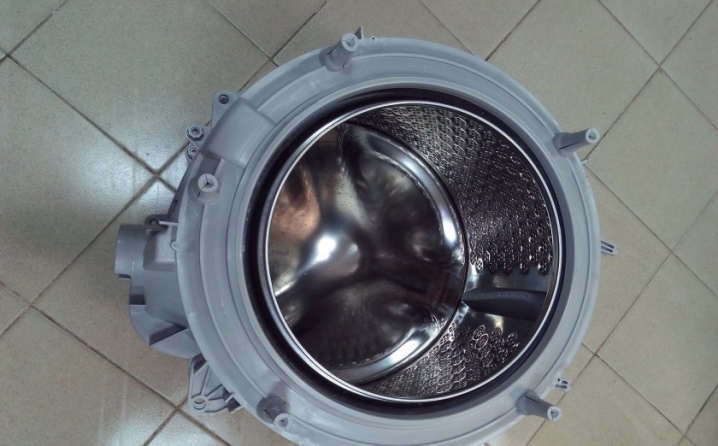
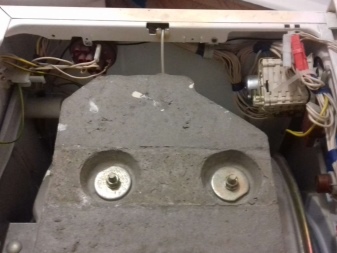
- If you are planning to remove the tank of the device, you will need to remove the counterweights. After removing them, they must be removed to the side so that they do not interfere. Then you should unfasten the shock absorbers holding the tank. To do this, you must use a wrench. Unscrew the bolts that attach the shock-absorbing components to the body of the machine, and then remove them. After that, all that remains is to carefully remove the tank from the spring elements and remove it. Usually, the engine of the unit is removed along with the reservoir.
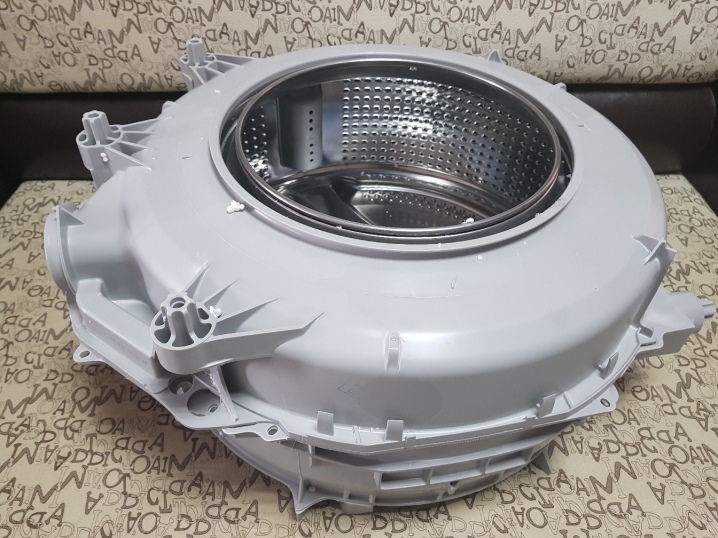
If necessary, then the electric motor must be unscrewed from the tank. When disassembling the tank, you run the risk of encountering the fact that in certain models of devices it is glued. A similar component is required sawing with a hacksaw.
Understanding this technique is not as difficult as it might seem to an inexperienced user.
The main thing is to act carefully at every stage, especially when the work concerns such components as the control unit, motor, tachogenerator.
As with vertical instances, it is recommended that you keep the instruction manual for your model handy.
Having disassembled the automatic machine, replace damaged or badly worn parts. Thoroughly clean all parts and areas that need it. After replacing a broken part, do not be too lazy to inspect the condition of the remaining parts. It is better to put them in order now that the unit is already disassembled.

Assembly features
Having completed all the planned repairs or replacement of certain units of household appliances, you will be faced with the task of competently assembling the machine. This workflow is very simple - you will need to do the same as when disassembling, but in reverse order. For example, in a situation with a horizontal machine, when assembling, you need to make sure that the cuff is fixed on the hatch door exactly in the right place. The triangle icon on this component must correspond to the vertical axis of the device. A drainage groove should be located immediately in front of the specified mark.
In addition, when tightening the bolts and clamps on the collar, you need to make sure that their heads are present at a level that corresponds to the position of the free pin of the guy wires. Many home craftsmen, when disassembling a car, photograph not only the location of all the wires, but also any other most difficult moments.
In such processes, these tips can help you a lot.
Don't assemble the device too quickly... Acting in a hurry, you run the risk of forgetting about installing some (even the smallest) part, which is why the unit will not work correctly in the future. As a result, you still have to re-disassemble household appliances, solve the problem that has arisen and again resort to reassembling. In order not to waste time in vain on double work, it is better to act gradually and with utmost care.
The subtleties of disassembling machines of different brands
The features of disassembling such devices largely depend on the nuances of a particular model. Let's look at a few common examples.
Ariston
In the units of this manufacturer, in most cases, oil seals and bearings fail. The design of the devices is designed in such a way that the specified units cannot be repaired. However, skilled craftsmen can easily deal with such problems.
To replace the oil seal of the Ariston, you need to flare the whole tank or saw it. There is no other way to recover damaged parts.
Of course, you can buy a new matching tank from a brand store or service center, but that will be a waste.
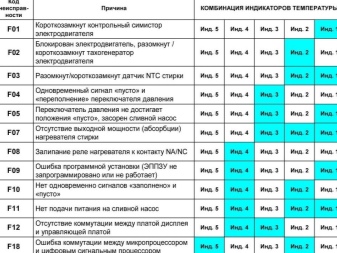
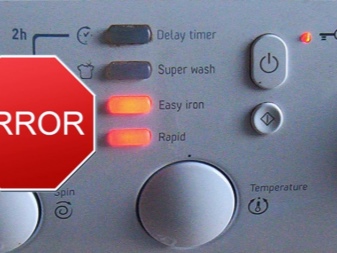
The latest models of the specified brand are equipped with special self-diagnosis devices. In this case, the search for a breakdown is noticeably simplified. The display shows codes of all errors that imply specific equipment malfunctions.
Atlant
Belarusian cars are popular today because they are inexpensive and serve for a long time.
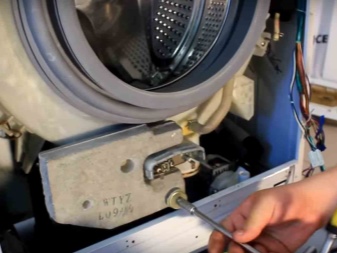
They are designed practically, they can be repaired. At the first stages of disassembling these devices, it is required to remove the counterweight, and then remove the external control panel.
The drum in Atlant machines is assembled from 2 parts, bolted together. Thanks to this structure, almost any working part can be replaced with ease.
Samsung
Household appliances of this well-known manufacturer are attractive by the highest quality. Samsung washing machines are easy to disassemble. Even novice craftsmen, who previously had practically no business with such matters, can cope with such work processes - partial knowledge is enough.
The container for loading detergents in Samsung clippers is conveniently located. It rests on just a couple of self-tapping screws. The heating element is located at the bottom of the unit reservoir, just in front of the front cover. You can get to the heating element without unnecessary problems and obstacles.

Electrolux
Electrolux is another well-known manufacturer that produces high-quality and practical models of washing machines in different price categories. Such equipment rarely breaks down, so it is bought by many consumers looking for durable devices. The front panel of Electrolux branded devices can be removed as easily as possible. Removing it, you can open in front of you access to all the necessary components and spare parts of the unit. Dedicated removable bearings house working bearings and seals - important components of any machine. In order to properly replace them with new parts, there is no need to disassemble the drum.
Lg
Washing machines of the well-known LG brand are widespread today. They are presented in the widest range and differ not only in high quality workmanship, but also in attractive design. True, these units are characterized by a complex technical device.
To remove the front panel, you will first need to unscrew the nuts with a screwdriver, which are responsible for securely fixing the hatch door.
Then you will need to remove the screw that tightly pulls the clamp to hold the cuff. After that, you need to remove the weighting agent, which is located on top. Only after the above steps will it be possible to pull out the tank, which needs repair or replacement.
The manufacturer equips many of its washing machine models with self-diagnostic systems. The decoding of the displayed error codes will help you quickly and easily determine what exactly is faulty in the device of a particular modification. Thus, it will be easier for users to decide whether it is possible to repair the unit themselves or whether it is better to contact a service center.
Recommendations
Disassembly and reassembly of different brands of washing machines is often quick and hassle-free. However, before starting such work, it is better to listen to some useful tips and tricks in order to avoid many mistakes.
- When disassembling the considered units, it must be borne in mind that many parts of their design are made of plastic... This is not the most reliable and strong material, therefore, it is necessary to treat it accordingly. Otherwise, you risk breaking fragile elements.
- In the course of disassembling household appliances, it is recommended to mark different parts with multi-colored markers. Thus, reassembly will be much easier and with minimal time costs.
- When planning to start disassembling the equipment, it is important to make sure that it is completely disconnected from the mains. It is also worth making sure that there is no residual current in specific parts. To do this, you need to use a special device - a multimeter.
- Before putting the hatch cuff back on, it is recommended to carefully inspect the place where it will be installed... If there is contamination there, they should be carefully removed from there.
- Disassemble any machine as carefully and carefully as possible. Do not make sudden movements. Do not pull out the wires with unnecessary force. If you do not follow this rule, you can seriously harm important parts of the device.
- Prepare the necessary repair kit along with all the necessary tools before starting all work.... For example, if you are planning to replace bearings, you need to find suitable options and keep them close to you while disassembling the equipment. In this case, it will be easier to work, because everything you need will be at hand.
- After disassembling the machine, inspect all structural parts that are prone to scale build-up. For example, it can be heating elements. Clean all surfaces that have accumulated limescale. To do this, you should use special chemical compounds sold in many stores. Some users use citric acid for this. This can be done, moreover, such a "folk" remedy turns out to be effective, but no one can say for sure how its effect can affect the details of the machine.
- Even if you know well how to disassemble and assemble the unit yourself, you should not do this if it is still under warranty.... Otherwise, you will lose warranty service - it will hardly be possible to hide the fact of disassembly.
- It is not recommended to resort to self-disassembly of the machine if you are afraid to make serious mistakes or have no idea how such a technique works.... Then it is better to call experienced repairmen or visit a service center.
How to disassemble the washing machine, see below.


The comment was sent successfully.