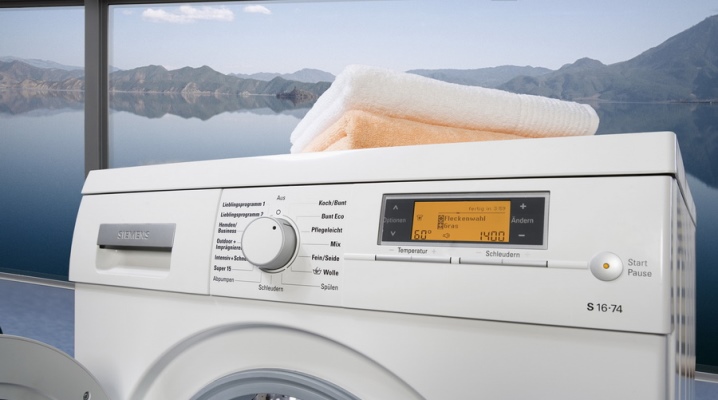
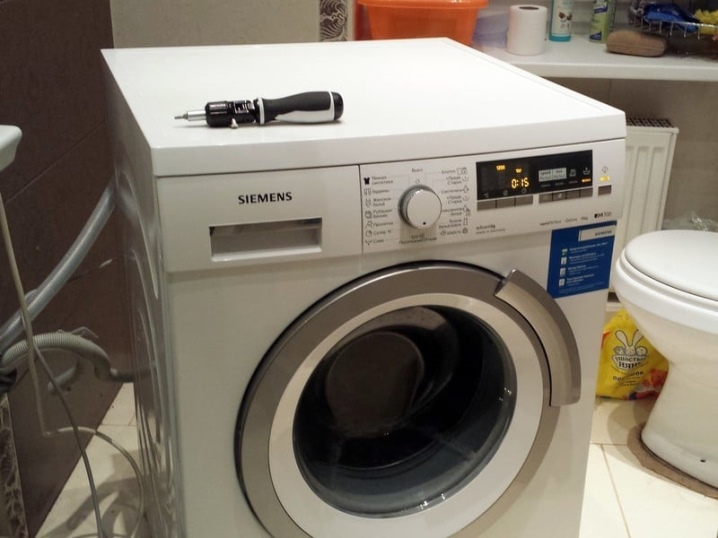
Siemens washing machine repair
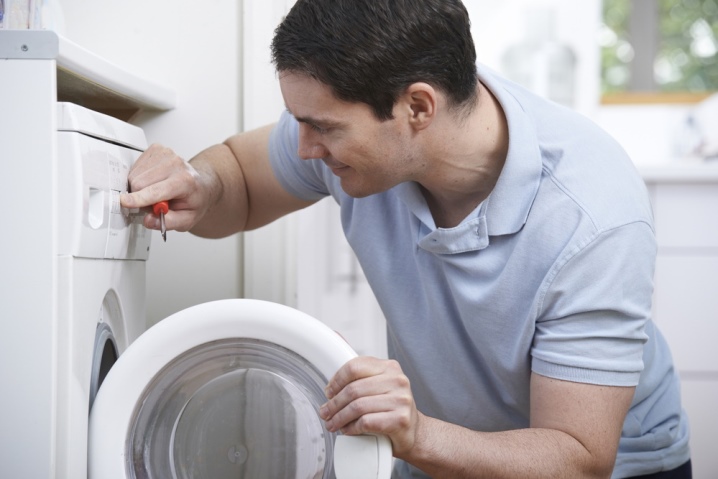
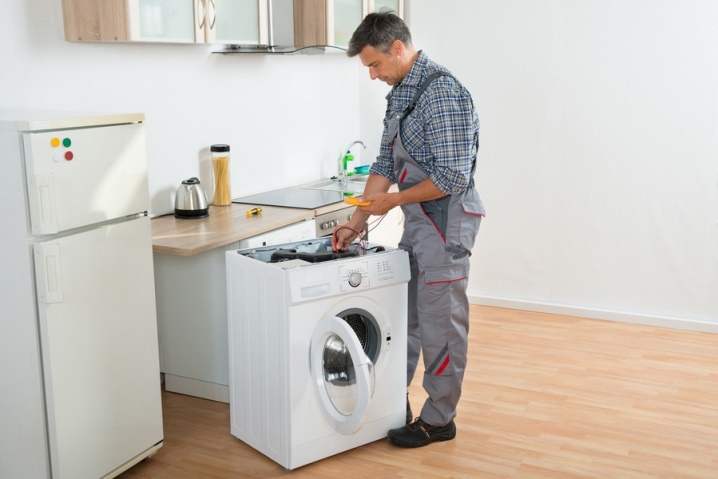
Repair of Siemens washing machines is most often carried out in service centers and workshops, but some malfunctions can be eliminated by yourself. Of course, replacing the heating element with your own hands at first looks almost unrealistic, but still it can be done, like other actions that help restore the equipment to work. Studying the malfunctions of built-in and other models, one has to learn how to disassemble the machine, as well as research the rules for its operation, which help to avoid new breakdowns.
Error codes and diagnostics
Modern models of Siemens washing machines are equipped with an information display that displays all faults in the form of codes. For example, F01 or F16 will inform you that the door is not closed in the washing machine. This could be due to the stuck laundry. If the lock is broken, the display will show F34 or F36. Code E02 will notify you of problems in the electric motor; more accurate diagnostics will be needed to clarify the breakdown.
Error F02 indicates that no water is entering the tank. A possible reason is its absence in the plumbing system, blockage or damage to the inlet hose. If code F17, the washing machine signals that liquid is being added too slowly, F31 indicates an overflow. F03 and F18 the display will indicate a problem with the drain. Notify about the leak F04, when the "Aquastop" system is triggered, a signal will appear F23.
Codes F19, F20 appear due to problems in the operation of the heating element - it does not heat the water or does not turn on at the right time. If the thermostat is broken, an error can be observed F22, F37, F38. Malfunctions in the pressure switch or pressure sensor system are indicated as F26, F27.
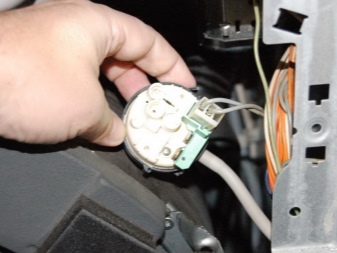
Some errors require a mandatory contact with the service center. For example, when a signal appears E67 you will have to reprogram the module or perform a complete replacement. Code F67 can sometimes be fixed by simply restarting the technique. If this measure does not help, the card will have to be rebooted or replaced.

These errors are most common; the manufacturer always indicates a complete list of codes in the attached instructions.
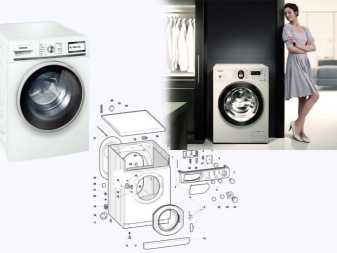
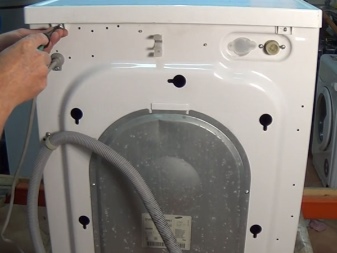
How to disassemble a car?
Built-in models are quite popular among Siemens washing machines. But even if a freestanding machine with a depth of 45 cm or more breaks down, its disassembly must take place according to certain rules. The built-in type of equipment will only complicate the dismantling process.
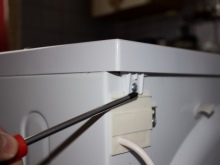
It is worth considering that Siemens washing machines are disassembled from the top panel.
To carry out the dismantling work correctly, proceed in the following order.
- De-energize the appliance, cut off the water supply to it.
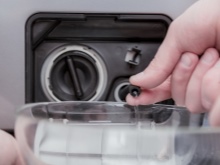
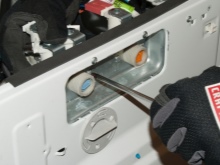
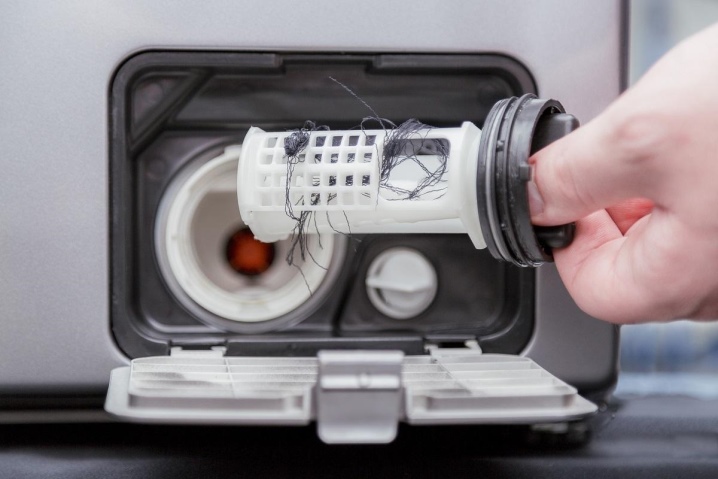
- Find on the bottom of the front panel a drain hatch with a filter inside. Open it, substitute a container for draining the liquid, unscrew the plug. Remove dirt from the filter by hand, rinse it.
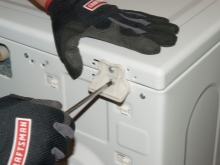
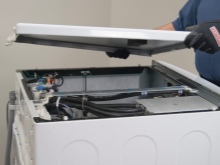
- Unscrew the self-tapping screws on the back of the housing in the upper part. Remove the cover panel.
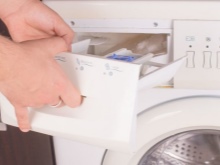
- Remove the dispenser tray.
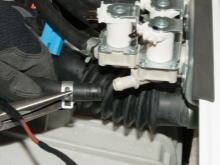
- Loosen the metal clamp holding the rubber grommet.
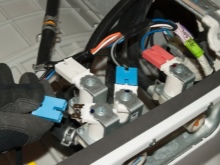
- Disconnect the wiring from the UBL.
- Remove the bolts holding the front panel. After that, it will be possible to gain access to the internal parts of the washing machine.

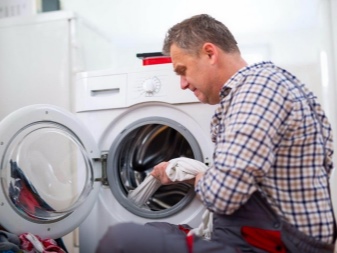
Dismantling the structure may be required in cases where you need to get to the heating element, pump or other parts that need to be checked and replaced.
Major breakdowns and their elimination
It is possible to repair Siemens washing machines with your own hands only if you have certain experience and knowledge. Replacing large units (heating element or pump) will require the use of a tester to clarify the malfunction. It is much easier to remove the blockage or understand why the equipment does not turn the drum, its carriage does not extend.
In general, diagnostics often consist of careful attention to the operation of the washing machine.
If it clicks during rotation, vibration appears, knocking during spinning, the motor does not spin the drum, the unit has obvious problems. Sometimes problems are solely due to mechanical interference or poor maintenance. The technique does not wring out the laundry, refuses to drain the water if a blockage is found inside. An indirect sign of a problem is also the appearance of leaks, an unpleasant smell from the tank.

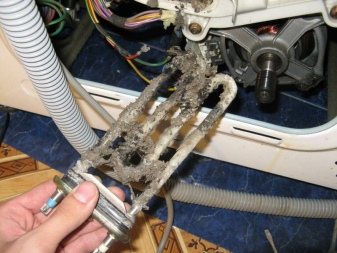
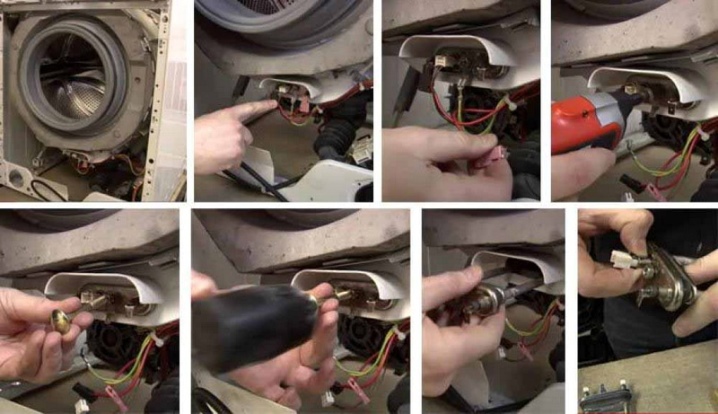
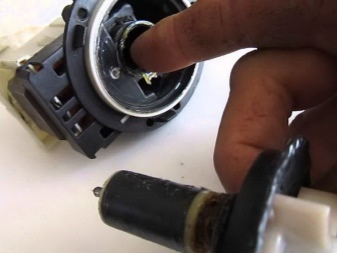
Replacing the heating element
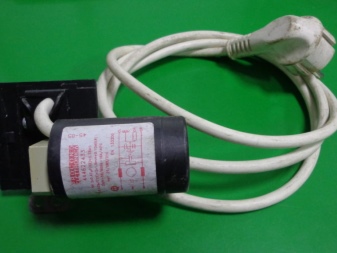
The breakdown of the heating element accounts for about 15% of all calls to service centers. The owners of Siemens washing machines note that this is due to the formation of scale on the heating element or a short circuit. This part is inside the case, you will have to remove first the top, then the front panel. After that, you will have to take a multimeter, attach its probes to the contacts and measure the resistance:
- 0 on the display will show a short circuit;
- 1 or infinity sign - break;
- indicators of 10-30 ohms will be in a working device.
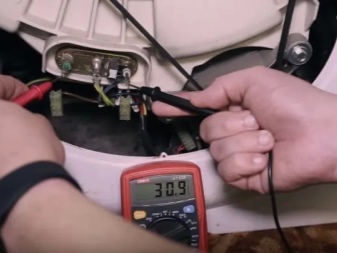
The buzzer signal is also important. It will appear if the heating element gives a breakdown to the case. Having identified a breakdown, you can dismantle the faulty element by disconnecting all wires and loosening the central nut. The bolt inside must be pushed through, prying out the heating element by the edges. You can then purchase a replacement part and then reinstall it.
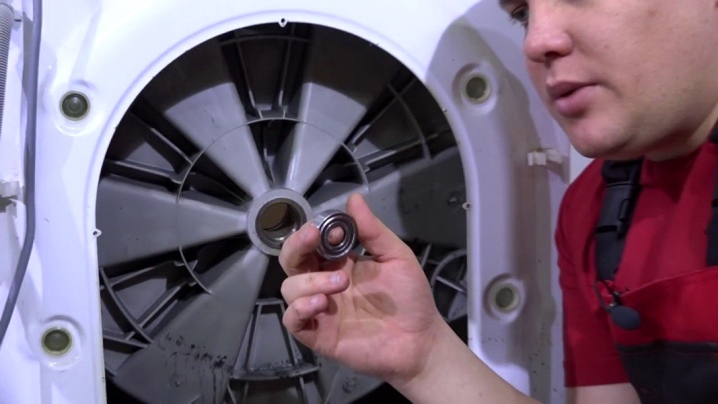
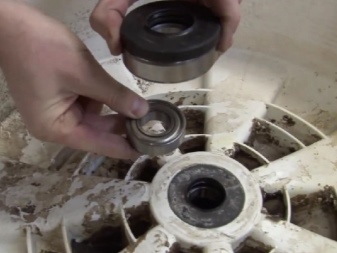
Replacing the bearing
Extraneous sounds, vibration, noises, squeaks are a sure sign that the bearings in a Siemens washing machine need to be replaced. Ignoring the problem, you can aggravate it and wait for the complete failure of the equipment. Since the bearing is located on the shaft, participates in the rotation of the drum, most of the washing machine body will have to be dismantled to solve the problem.
The repair procedure will be as follows.
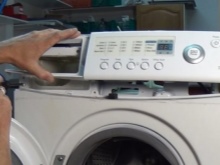
- Remove the upper part of the case by unscrewing the screws holding it.
- Remove the powder dispenser tray.
- Remove the screws on the control panel. Remove it without disconnecting the terminals.
- Remove the metal clamp, insert the gum of the seal inside the drum.
- Remove the internal counterweights and the inlet valve from the machine body. The branch pipes must be disconnected, the wiring removed from the terminals.
- Remove the bezel at the bottom, dismantle the front wall by removing the contacts from the sunroof lock.
- Disconnect the pressure switch and the hose connected to it.
- Remove the contact wires from the motor. Remove grounding.
- Remove the sensor and wiring from the heating element.

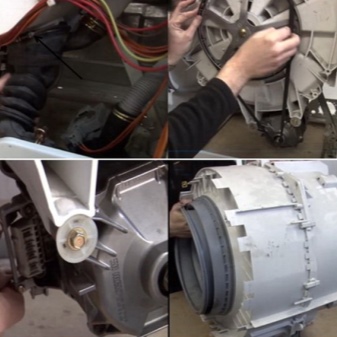
Having gained free access to the tank, you need to carefully remove it along with the motor. The part should be moved to a free location for later repair. Next, the drive belt is dismantled, the bolts holding the engine. The motor can then be put aside by removing it from the tank. Remove the flywheel from the shaft.
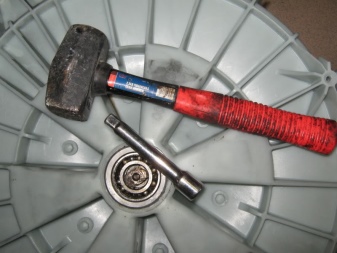
To get to the bearing, you will have to disassemble the tank itself. Usually they are made one-piece, you need to cut or knock down the fasteners. After the halves are separated at the seam, the oil seal can be removed. A special puller will help to remove the old bearing from the caliper. The bonded parts are pre-treated with WD-40 grease.
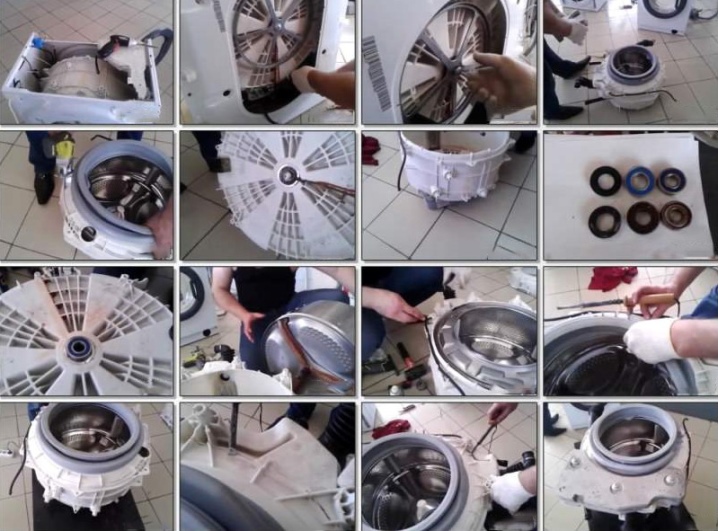
It is necessary to put on replaceable bearings using a hammer and a flat drift. You must proceed with caution... The outer bearing is inserted first, then the inner one. A new oil seal is installed on top of them. All elements are processed using a special lubricant, which is also applied to the place of contact with the shaft.
Reassembly is done in the same way. It is worth paying attention to the fact that you will have to connect the tank with screws, additionally treating all the seams with a sealant adapted for use in a humid environment. To make the assembly correctly and completely, it is worth filming the dismantling process in stages. Then there will definitely not be any difficulties.
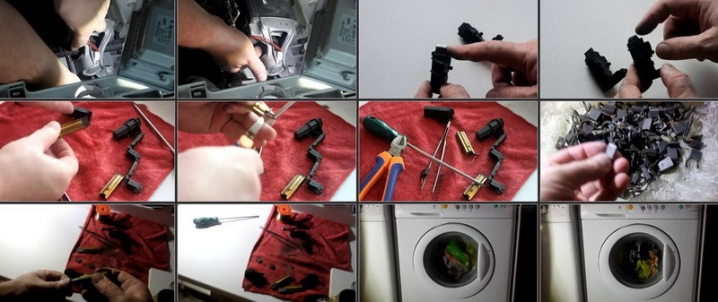
Change of brushes
A breakdown of a washing machine engine is often associated with wear on the collector brushes. Such a malfunction does not occur with equipment with an inverter motor. If such a malfunction is detected, proceed as follows.
- Remove the top and back covers of the washing machine. It will have to be pushed into a free space in order to gain free access to the mounting bolts.
- You need to get to the engine. Remove the belt from its pulley.
- Disconnect the wiring terminals.
- Remove the bolts securing the engine.
- Dismantle the motor. Find the terminal plate on its surface, move it and remove the worn brushes.
- Install new parts to replace damaged ones.
- Secure the motor in the designated place.
Other problems
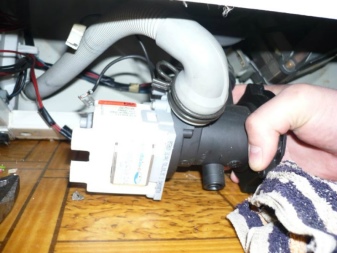
The most common problem with a Siemens washing machine is lack of water discharge. If the drain does not turn on, it may indicate that the pump, drain filter or pipe is clogged. In 1/3 of all cases, water does not enter the sewer due to pump failure. If the drain filter turns out to be in order when dismantling after checking, the front panel must be completely dismantled.
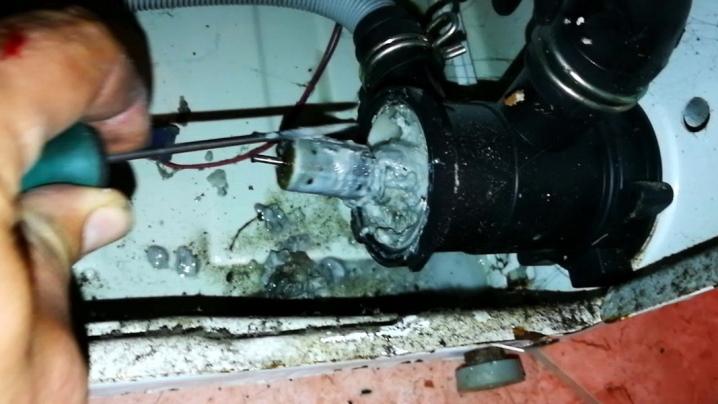
First of all, when you get to the pump, it is worth checking the pipe. It is removed and washed, without revealing problems, you need to proceed to dismantling the pump. For this, the electrical terminals are disconnected, the bolts fixing it to the pump surface are unscrewed. If a blockage is found, damage is detected, the pump is washed or a replacement is bought for it.
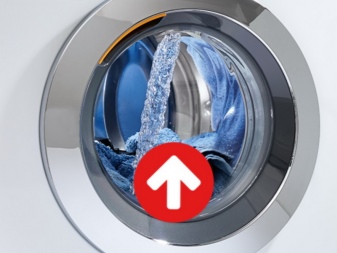
Water is not poured or overflows
When the water level in the Siemens washing machine exceeds the recommended values or does not reach the required minimum, it is worth checking the intake valve. It is quite easy to repair or replace it yourself. This will require the following.
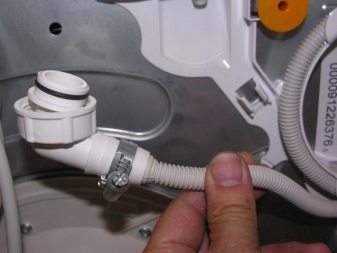
- Disconnect the water intake hose.
- Unscrew the screws at the rear, remove the panel at the top.
- Find the filler valve inside. 2 wires fit to it. They are disconnected.
- Internal hoses are removable. They need to be separated.
- Disconnect the bolted valve mounting.
The defective element can be simply replaced with a new one. You can install it in the reverse order.
Leakage detected
A breakdown associated with a water leak in a washing machine accounts for up to 10% of all Siemens washing machine malfunctions. If fluid leaks from the hatch, the problem is due to wear or damage to the cuff. To replace it, you need to open the door, bend the rubber seal, pry out the metal clamp installed inside. The easiest way to do this is with a flathead screwdriver. Then you can remove the clamp, remove the branch pipe and the cuff. If, after inspecting the rubber seal, damage is detected, they should be tried to be repaired.... Excessive wear requires replacement of the cuff.

You can buy a new one, taking into account the diameter of the hatch and the model of the equipment.
Operational errors
Most often, the reasons for the breakdown of Siemens washing machines are directly related to errors in their operation. For example, the lack of spinning may be due to the fact that it is not provided by the program. This function is not set by default for a gentle wash. Irregular cleaning of the drain filter can also lead to many complications. For example, when it is clogged, the system for dumping water from the tank does not work. The machine stops for rinsing, does not go to spin. The problem is compounded by the fact that open the hatch, you cannot take out the laundry without draining the liquid from the system.
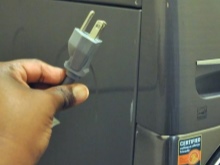
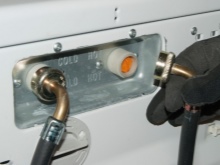
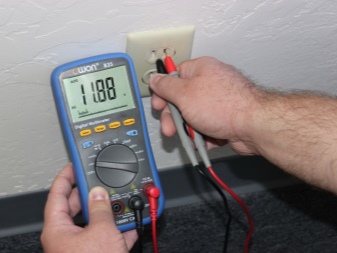
A Siemens washing machine usually does not create difficulties with connecting to power sources. If, after plugging the plug into the socket, the buttons do not respond to user commands, you need to look for a fault in the power cord. Not finding problems, external damage, you will have to arm yourself with a multimeter. It measures the current resistance in the outlet.A breakdown can also be localized in the power button, which falls from too intensive use - they call it, replace it if necessary.
For how to disassemble a Siemens washing machine, see the next video.


The comment was sent successfully.