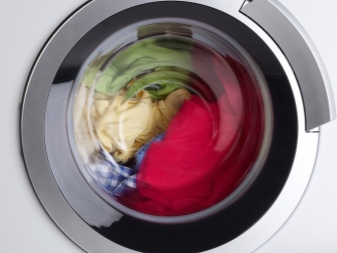
Errors of the LG washing machine: decoding, causes, solution of the malfunction
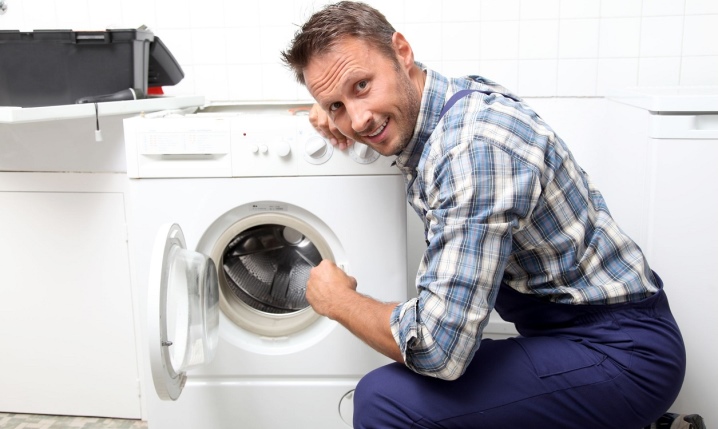
An automatic washing machine is an electrical appliance, which today it is impossible to do without in modern life. Like any complex electronics, a washing machine in the event of a breakdown requires careful and careful handling. For self-elimination of the malfunction, you will need a clear understanding of the essence of the failure, and only after that you can make a decision on how exactly to eliminate this or that failure.

Fault codes and their causes
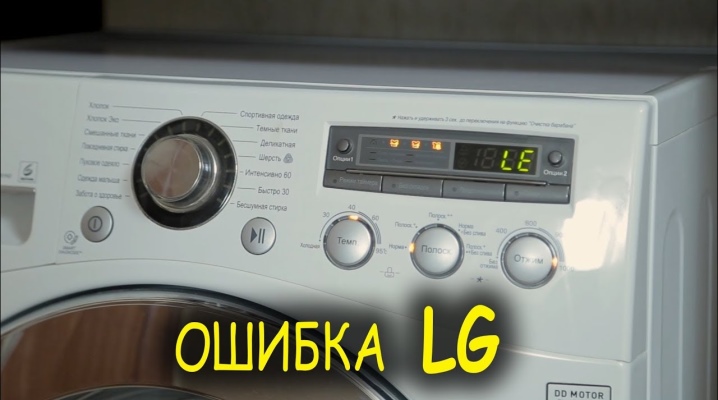
The LG washing machine error code is one of the ways to accurately determine the cause and complexity of the breakdown. This is a kind of language, after self-diagnosis, a symbol appears on the display, and the user takes all the necessary actions to eliminate the breakdown.
Manufacturers often compile a table of the most common mistakes. The table contains an explanation of each designation. Thus, it will not be difficult to understand what a particular set of letters and numbers means - just look at the instructions.
That is why experts advise not to throw away any documents related to electrical appliances after purchase.
In general, all breakdowns can be conditionally divided into two groups.
- Errors encountered due to human factors (usually these are incorrect actions on the part of the user himself).
- Serious damage arising after long-term operation... Repair of such faults is impossible at home in the absence of knowledge and skills. In this case, it will be much more reliable to call a specialist.
Error codes allow you to narrow the search for problems, the washing machine itself gives a signal about problems with a specific unit or part, you just have to check the table provided by the manufacturer. This, together with the automatic self-diagnosis function, makes it easier to operate complex electronics.

Among the most common malfunctions due to the human factor are mentioned:
- overload of the device;
- a problem with the automatic blocking of the hatch;
- incorrect installation of child protection;
- problems with draining or heating water.
Important! There can be a lot of errors in the operation of a modern washing machine, so each problem needs an individual approach for a quality solution. Most of the minor faults can be eliminated on your own, by doing everything that is required according to the instructions.
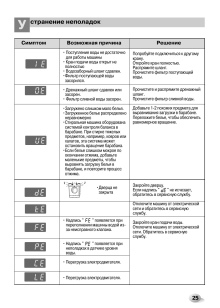
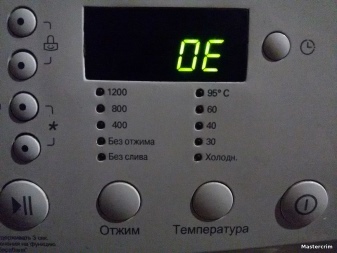
If the OE code appears on the display of the appliance in the midst of operation, there may be several reasons:
- a blockage in the drain system (usually a filter or hose);
- blockage in the sewer system, where the device is usually connected to drain;
- malfunction of the drain pump during washing;
- failure of a sensor that measures and controls the water level;
- breakdown of the controller that protects the engine from water.
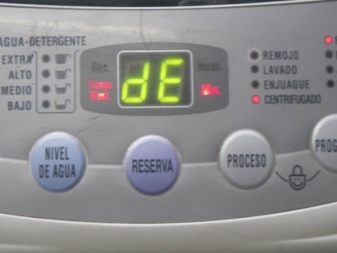
DE malfunction in LG usually signals that the drum door has not been closed.
Sometimes it is a mechanical problem when the door locking mechanism itself breaks down.
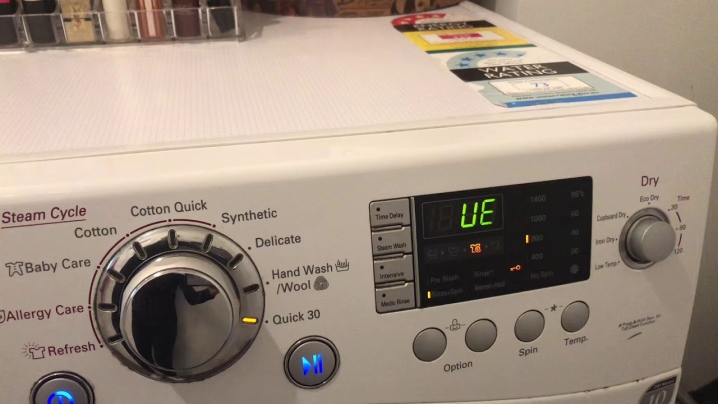
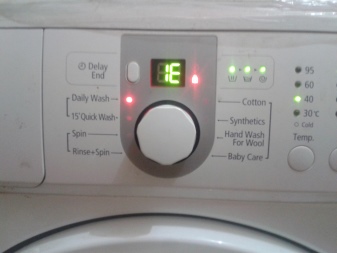
UE Is a fairly popular problem encountered by many users. It signals an imbalance in the drum, that is, the items to be washed have not been distributed evenly enough to start washing. It should be borne in mind that:
uE - means that the device independently distributes weight to complete the task, no action from the user is required in this case;
UE - to start washing, you need to put the laundry again manually, the automatic weight distribution system does not cope with the task.
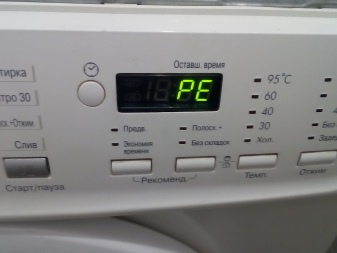
Error IE signals about the lack of water in the tank, sometimes, if the water fills it too slowly, the system signals this with a code PE. There are usually several reasons for such a malfunction:
- the water supply is cut off or water is not supplied to a particular house;
- the pressure in the water supply system has dropped, which makes it impossible to supply water to the washing machine;
- the inlet valve is damaged;
- defective water level switch.
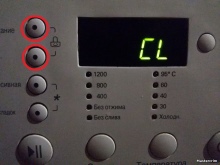
CL error usually familiar to all small or large families. This is a reliable signal that children will not accidentally start the washing machine and interfere with its operation during washing. If this inscription flickers constantly, this indicates an obvious malfunction in the operation of the function and the need to seek help from a specialist.
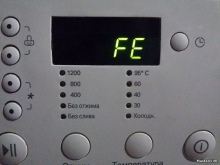
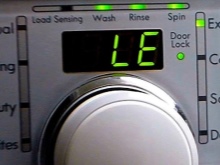
FE or LE - signals that the tank is overfilled with water, due to which the operation of the entire system as a whole is blocked, There may be several reasons:
- breakdown of the electrical controller;
- violation of the level relay;
- problems with the bay valve;
- excess foam settling in the tank.
For a more specific determination of the cause, it will be necessary to carry out diagnostics, attention should be paid first of all to the sensor and wiring, to make sure that the relay is working correctly. Last of all, the tightness and tightness of the valve is checked, they can be violated even if a small foreign object enters.
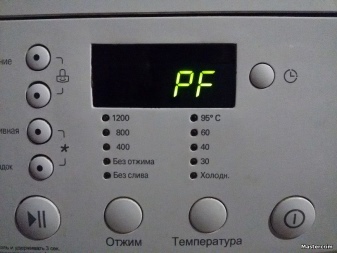
PF - a power failure occurs for a number of reasons, ranging from improper fastening of the power cord or lack of connection to the outlet and ending with a broken filter, broken wiring or overheating.
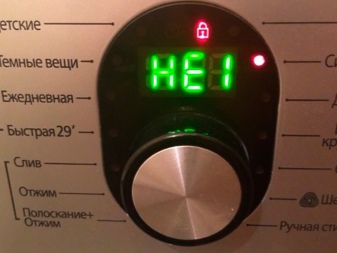
Problems with a water heating element are often solved by a simple replacement with a new one, this is indicated by a code HE and can signal both a serious malfunction of the device and a breakdown of the sockets to which the machine is connected.
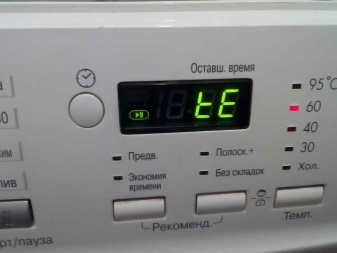
Another combination TE indicates a problem with the thermistor if the temperature in the tank does not match the readings of the instruments.
Here we are talking, rather, about the violation of the heating circuits themselves.
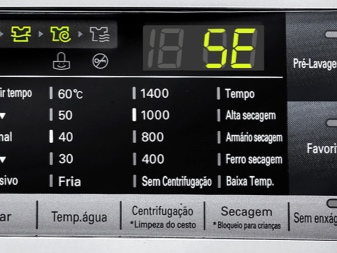
When using a direct drive clipper, users can very often encounter an error SE - this is a violation of the tachon generator, which is responsible for speed control. Externally, you can notice a breakdown due to the lack of rotation of the shaft, the problem is solved only by replacing the damaged part.
Error E3 occurs much less often than all the others, in some models of the LG line it is also indicated by a code EE... It appears only when the device is loaded for the first time, when it is impossible to determine the device load level.
tE - indicates a breakdown of the temperature sensor. It makes sense to check the condition of the contact circuits and the presence of a short circuit. Controller malfunctions usually occur for these reasons.
Elimination
Most often, the solution to the problem in the event of a washing machine breakdown is to replace the part, but when dealing with the LG brand, many things can be done with your own hands. The most important thing is not to forget about safety precautions before making repairs, since the most important nodes work when connected to electricity with a voltage of 220 volts.
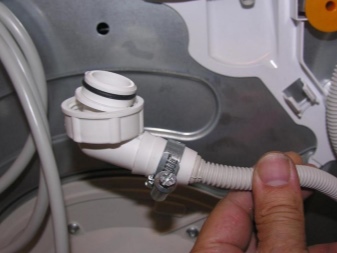
In the event of a problem with water drainage, you should first check the integrity of the pump. It may not necessarily be damaged; problems with drainage occur in the event of a normal blockage. First you need to drain the water, otherwise everything will be on the floor. Near the round plug behind the drum or behind the panel (depending on the assembly version) you can find a thin hose plugged with a small plug. Pulling it out and uncorking it, it remains to carefully drain the water into any suitable container.
There is another rather simple way - lower the drain hose to floor level. Only after draining the water can you remove the pump and view the status of the drain system. In most cases the usual cleaning of debris by hand or with the help of special means helps.

If the pump is broken, then here you have to carry out a small disassembly of the device:
- be sure to remove the plug from the outlet;
- pull out the dispenser, there is usually residual water in it, so it is better to tilt the machine;
- remove the bottom panel and put the machine on the left side (most LG machines have a pump on the right).
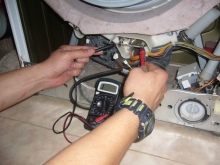
Before removing the pump, the mandatory step is test it with a multimeter... It also makes sense to check the integrity of the electrical circuit or pump.
Sometimes drainage does not occur due to mechanical wear or the fact that the impeller does not hold tightly enough in the structure.

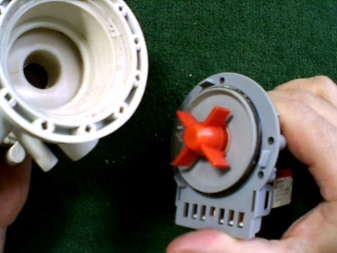
If the pump is worn out, it will also need to be replaced. For this, the dispenser is removed in the same way and the bottom panel is removed. Regarding the latter, an ordinary Phillips screwdriver may not always work. For reassembly, it is best to photograph or mark all terminals and hoses. The hoses are secured with clamps, the filter plug is unscrewed when everything else has been turned off. There should be no problems with the selection of a drain pump, they are usually universal and suitable for all modern models.
Before reassembling, be sure to you need to clean up dirt and deposits. First, the pump is screwed on, then all the hoses and wires are reconnected, after which the plug is closed. You can verify that it works by simply running a short operation. For example spinning. And if everything is in working order, you can put the machine back together.
A breakdown of a water heater implies its replacement, but before that be sure to check it with a multimeter or similar device. The heating element itself is located at the bottom of the tank, a ground wire and several power ones are connected to it to supply current. After disconnecting the terminals, you can check the device for functionality.
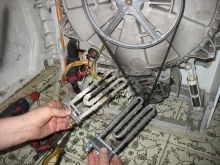
To remove the device, just unscrew the nut in the middle and press the pin a little. Next, the rubber seal is removed. This must be done very carefully so as not to break the tightness.
A replacement heater is also purchased with a seal included. If a temperature sensor is installed in the heater, it is not necessary to replace it together with the entire set. It is enough to check the efficiency of the work. There is a special bracket inside the tank for installing the heater, into which it must be installed. There should be no scraping sound when you roll the drum after installation. It makes sense to pour water into the drum and make sure the seal is not leaking.
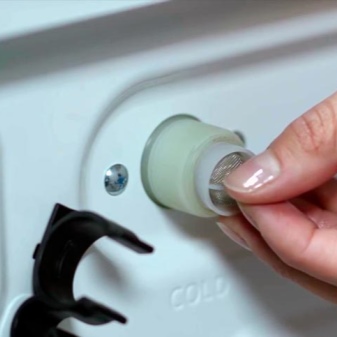
If water is collected slowly, it makes sense to check and clean the filter, it is located behind the inlet hose at the entrance to the machine.
Cleaning does not require any particularly difficult steps; this can be done with a shower or small toothpicks.
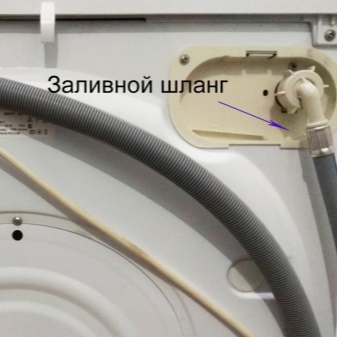
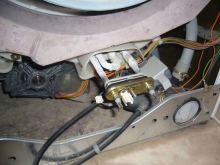
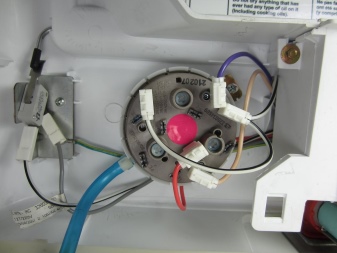
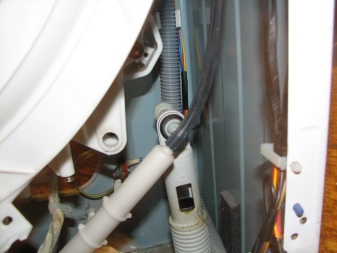
If water is not drawn in the machine at all, in addition to checking and cleaning the filter with a multimeter, the valve is also tested... It is located behind the top cover, which can be easily removed if you unscrew a few screws.
If the machine does not wash, but the water gurgles, this is a sure indicator of wear on the mechanical part. Before replacing the valve, be sure to photograph the wires. The valve itself is removed after disconnecting all wires and hoses, it is secured with special latches that must be clamped by slightly turning it. With the installation of the part, proceed in the reverse order.
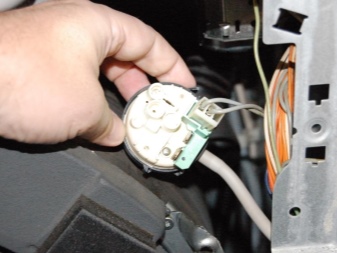
If, on the contrary, it collects too much water, then a software reset of the settings may not help - you will need to change the pressure switch to a new one. The sensor itself is in sight immediately behind the top cover, it is removed after disconnecting the terminal. But before that, you can purge the pressure switch. If a characteristic click was heard, it means that the part is in good order and does not need to be replaced.
Advice
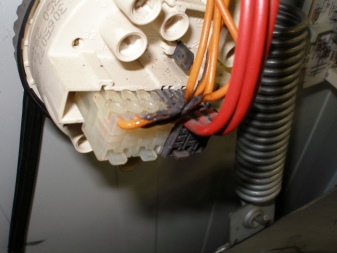
The most difficult thing is to diagnose wiring faults, violation of contacts or the integrity of wires can lead to a variety of consequences, up to a real fire. The terminals in a working machine must be clean, and the wires uniform, bright and well insulated. It is recommended to monitor the status of the wiring for:
- oxidized contacts or the appearance of a characteristic plaque;
- isolation violations;
- contact with water.
In the latter case, everything is not as scary as it seems, the water can be dried or wiped off. And in the case of oxidation, it is imperative to find the reason for the ingress of moisture on the terminals. The contacts themselves are happy to be replaced.
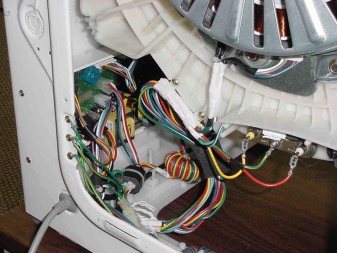
When repairing wires, you will need a soldering iron with a minimum power of 60 watts. If the insulation is broken at the wire, it must be completely replaced so that this does not lead to a short circuit or fire.
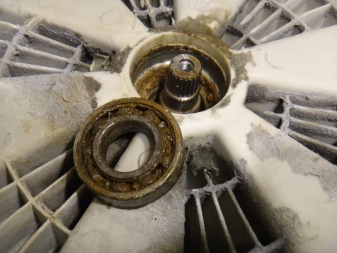
If a hum appears during spinning or during operation, it makes sense to pay attention to the condition of the bearings and oil seals. The repair itself is not difficult, but delay can be costly in the future. A damaged bearing slows down the rotation of the drum, this can lead to a broken tank and a broken cross.
If the bearing rusts, water will enter the motor and the consequences will be more than serious.
A number of tools are required to work with bearings:
- key 14 mm;
- pliers;
- nippers;
- ties or clamps;
- silicone sealant (never glue).
In addition, it is worth stocking up on gloves and a flashlight. Before removing the tank, you need to remove all fasteners and wires. The pliers are useful for cutting the clamp. The tank is supported by several springs and shock absorbers. If the machine has a direct drive, you will need to remove the motor as well. To do this, unscrew the screw, it is better to hold the drum in the process so as not to cut itself on the edges and not to damage the entire structure. The clamp can be removed by prying the spring with a screwdriver.
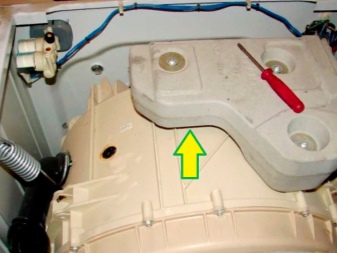
Next, the front panel is removed, the wires and hoses are disconnected, the pressure switch is removed. To remove the edge of the top cover, simply remove the jumper. After that, the dispenser and valves are removed, the counterweights are unscrewed with a key or a head. LG usually has them on the top and front. The shock absorbers are fastened with latches, so it will not be difficult to remove and remove them.
The tank is pulled forward very carefully so as not to damage the water control tube. Next, you need to disassemble it and replace bearings and seals, which will not take too long.
Assembling, disassembling and repairing a washing machine requires accuracy and a step-by-step approach. You can learn about the nature of errors with the help of codes and personal observations, but the most important thing is not to postpone even minor problems and immediately find a solution. Anyone who has at least basic repair skills can cope with the elimination of errors in the LG washing machine. The main thing is not to rush and check the manufacturer's instructions, it contains all the necessary information that can facilitate the operation of the electrical appliance.
For more information on LG washing machine errors, see the following video.


The comment was sent successfully.