Calla: description and tips for home cultivation
Calla is an unusual plant, often chosen for decoration of a garden plot. Despite some difficulty in placing and caring for it, the appearance of beautiful snow-white flowers justifies all the difficulties. It is worth mentioning that according to modern concepts, calla has only one species - marsh.
Plant characteristics
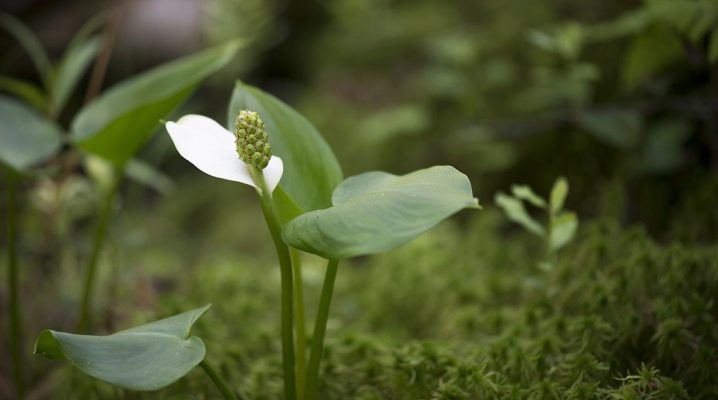
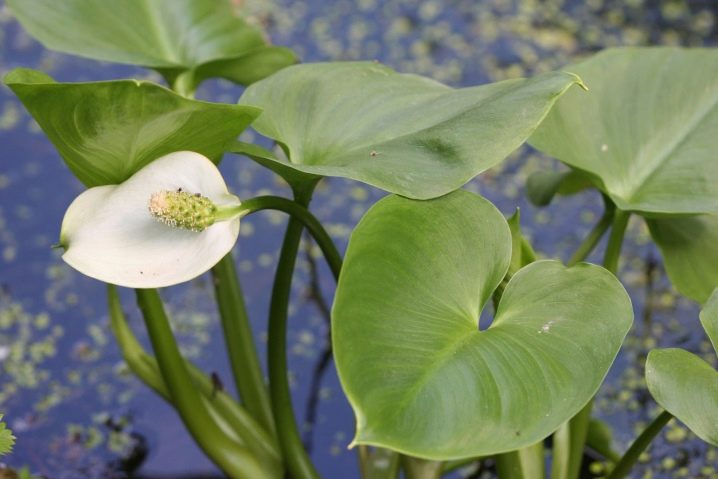
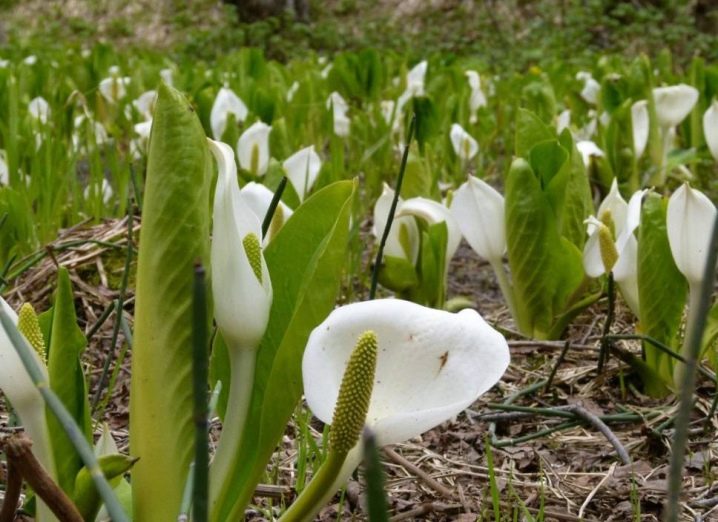
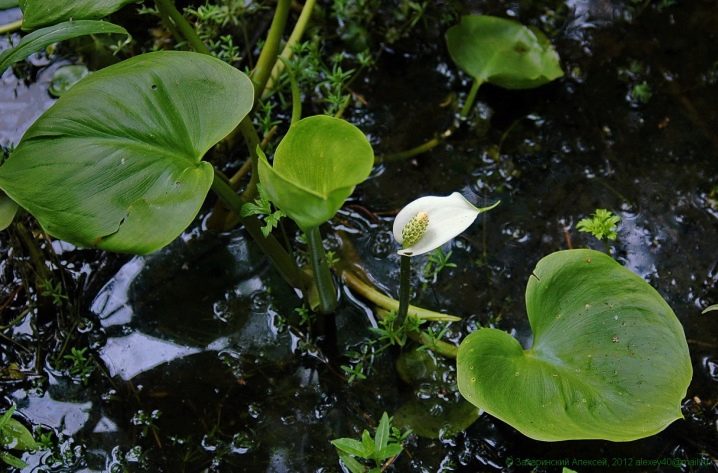
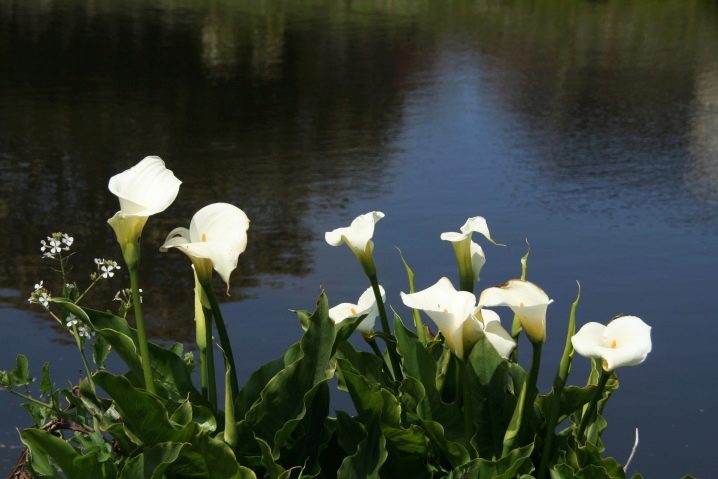
The marsh calla is a perennial belonging to the aroid family. Aquatic herbaceous plants naturally inhabit bodies of water such as rivers and lakes, as well as wetlands. When grown independently, it is customary to place it near an artificial dam or on a waterlogged part of the site. The flower is very similar to the exotic calla, of which it is a relative, which is considered one of its main advantages.
That is why the second name of calla sounds like marsh calla.
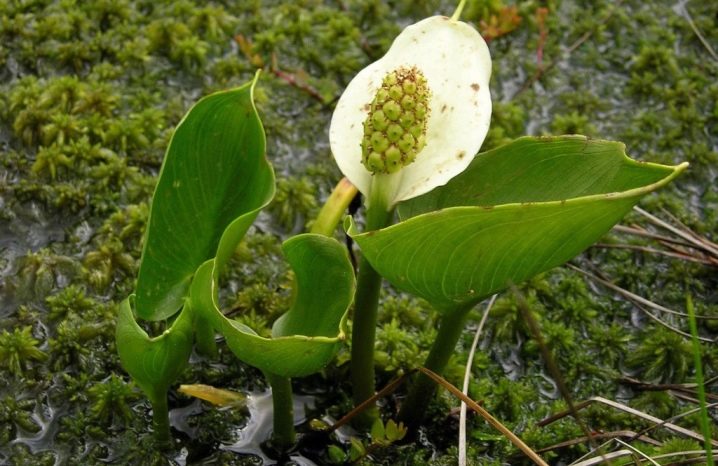
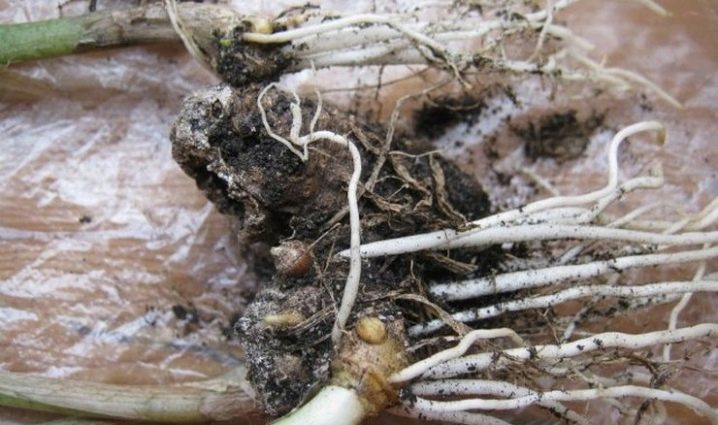
Calla roots are thick and long, covered with brown scales and numerous processes. The plant has a central root and lateral fibrous roots that hold marsh calla lilies on unstable soils, such as sandy or marshy soils. The upper part of the rhizome with buds is located on the surface. The elongated leaves are heart-shaped and have long petioles. The glossy skin of a light green hue is covered with prominent veins.
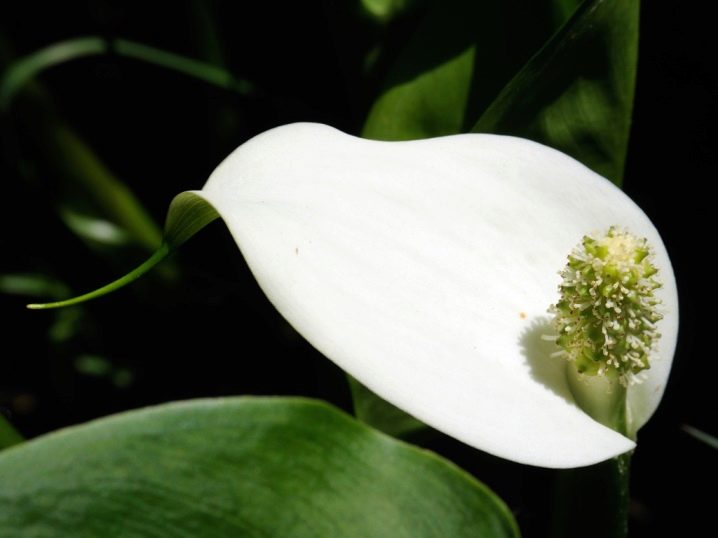
The fleshy peduncle has a smooth surface. The inflorescence, painted in a light yellow shade, resembles an ear, covered with a snow-white blanket. An interesting feature of the flower is the ability to respond to weather changes. Before the rain, the upper part of the blanket deviates from the cob, and the closer the precipitation, the more its tip moves away. In good weather, the bedspread remains tightly pressed.
In August, when flowering is complete, calla is covered with reddish fruits, similar to cherry berries, which change their bright color to brown over time.
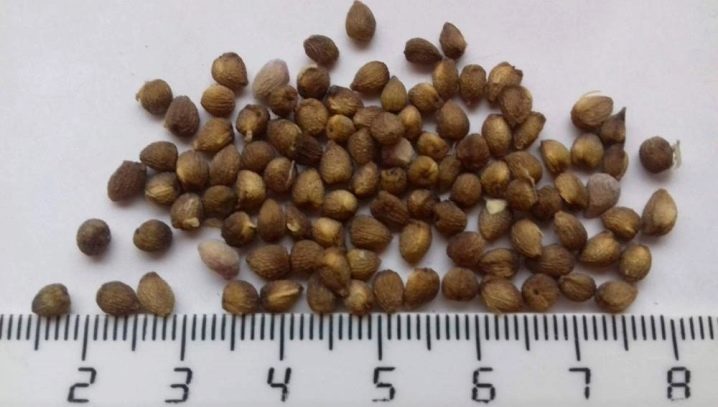
Inside each fruit, from 6 to 8 oval seeds are formed, which are gradually covered with mucus. Calla stem does not exceed 25 centimeters in length. It is important to mention that calla is a poisonous plant that can provoke very severe poisoning. However, in folk medicine, it is often used to combat migraines, colds, kidney disease, and even snake bites.
In any case, you should work with it with the utmost care, having previously understood all the precautions and contraindications.
Reproduction methods
Under natural conditions, the reproduction of calla is provided by the seeds that the birds carry. But gardeners most often use the method of dividing rhizomes. If preference is still given to seeds, then freshly harvested seed should be used, otherwise it will quickly lose its germination. Additionally, it can be treated with a biostimulant that accelerates the germination process, for example, a solution of potassium humate. For about a week, all the seeds will have to be removed in a cloth bag and thoroughly moistened.
When the bag is out, the seed can simply be wrapped in a wet cloth. The package is put away in a warm place. For seven days, you have to make sure that it does not dry out, moisturizing the fabric if necessary. If everything is done correctly, then after this time the seeds just sprout.
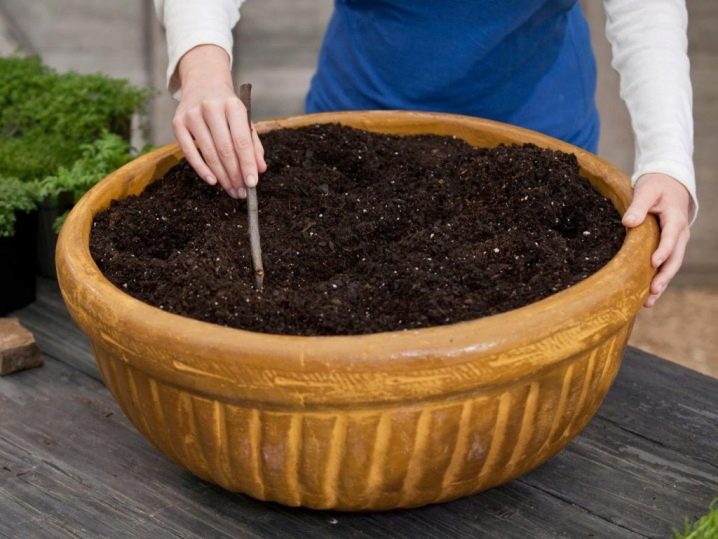
Sowing seeds is carried out in an already watered substrate, distributing several seeds into the holes. As soon as the sprouts have full-fledged leaves, it will be time for them to dive into separate pots for further development. The diameter of the containers is about 15 centimeters. One pot takes two sprouts, deepened by 3 centimeters.
In summer, basal shoots sprout around the adult plant in large numbers. They can be painlessly separated and transplanted to a new place. The sprouts must be irrigated regularly and additionally sprayed. When the rhizome develops, it can be transplanted to a permanent place of growth. Typically, this is a large pot set at the bottom of the pond.
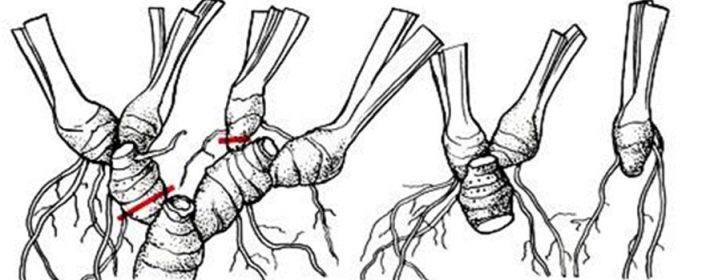
In spring, calla often reproduces by dividing the rhizome. Each particle used must have at least one kidney. All roots should be carefully examined and removed from those fragments that are sick, damaged by insects, or are not credible for other reasons. Additional treatment with a biostimulant is also recommended.
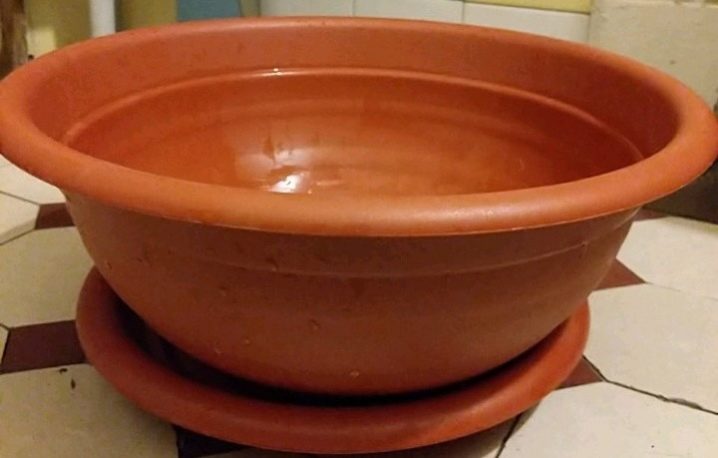
The roots should be planted in a container under which a high tray for liquid is installed.
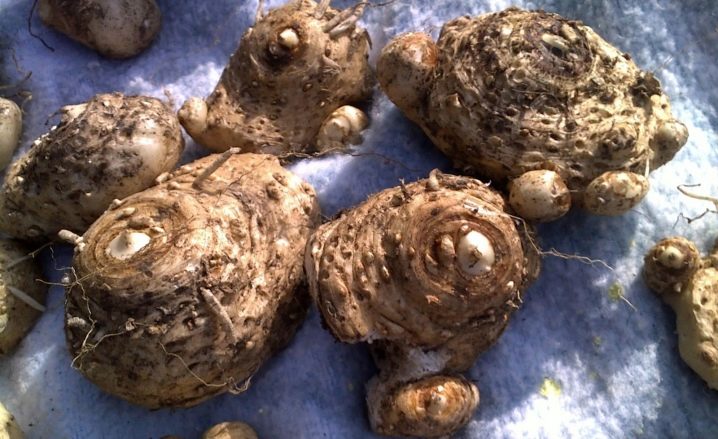
There is still an opportunity to use tubers for reproduction. Selected tubers are kept for a certain time in a warm room for ripening. This usually takes about a month. The tubers are then transferred to a dry and not too hot place. In such a room, the fragments are kept throughout the winter months.
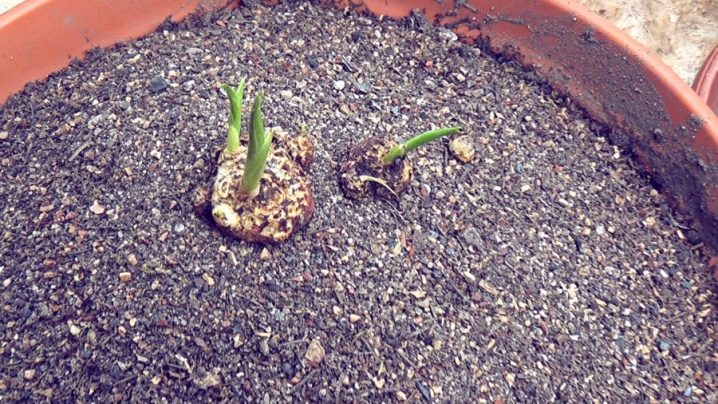
Already in March, planting is carried out in prepared containers filled with substrate. The tubers must be deepened by 5–10 centimeters so that they look upwards. Typically, germination will take about two weeks. During this period, the plant is watered abundantly and moisture is kept high by using trays filled with water. The transplant is carried out as needed.
The bottom of the container is covered with a drainage layer, the height of which ranges from 6 to 8 centimeters. The soil level should not reach the edges of the pot. The rhizome should not be deeply buried - swollen white buds should be visible above the surface. The proper planting depth is between 7 and 10 centimeters.
It is recommended to form a greenhouse by covering the container with a half of a plastic bottle or with a polyethylene film.

Home Care Tips
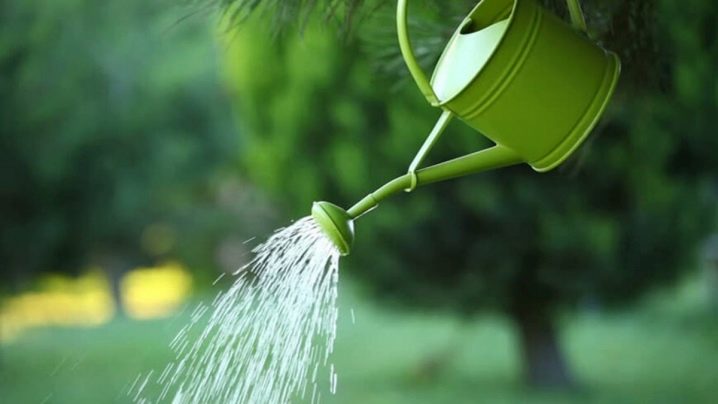
Indoor callaires require sufficient moisture, so it is customary to grow them, if possible, next to a reservoir or even in water, at least in summer. But in any case, the pot is necessary, otherwise the root system will grow and fill the reservoir. The container should be covered with clay on top to preserve the soil, and also have large holes to prevent overgrowth. The vessels themselves are placed at the bottom in places with sufficient shade.
If a plant develops in a city apartment, then in winter it needs to create high-quality lighting. The pot is placed on the windowsill, and if necessary, it is additionally illuminated with fluorescent lamps. In addition, the temperature should not drop below 15 degrees. In the summer, you cannot leave the calla on a freely illuminated windowsill, otherwise direct rays of sunlight will fall on it. The substrate should be formed from leafy soil, coniferous soil, peat and sand mixed with fine coal, bark and sphagnum moss.
Watering calla in any case should be abundant and regular. Usually, every 3 days the bush is irrigated 3 to 4 times a day. Irrigation is usually carried out when the topsoil dries up. After flowering is completed, irrigation is reduced, and from November to February is not carried out at all. The flower must be transplanted every 3 years.... In the case of young plants, the frequency increases - the transplant is carried out annually.
The substrate is formed from peat, turf, humus and leafy soil, as well as charcoal and sphagnum moss.
It does not matter whether the plant lives in a flower bed or is bred at home, the main recommendation for care is to maintain the required moisture level. Calla will have to be irrigated regularly, often sprayed so that the soil is always moist. But strong waterlogging should not be allowed. In the last days of May, the plant begins to bloom. During this period, it is important to spray it regularly.
If the pots are in a greenhouse, then they are lowered onto the lower shelves of the structures. For the first 2–4 years, calla flowers are very active. Then, in order for everything to remain at the same level, the plant needs to be transplanted into a new pot, having previously separated the side shoots.
Approximately 2 months after planting, mineral fertilizers can be added to the water used for irrigation. When conducting the irrigation itself, it is important to ensure that the drops do not end up on the cover of the flower. Watering is accompanied by spraying the leaves. It is important that the soil does not dry out, but the water does not stagnate either.
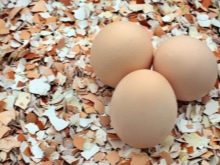
During flowering, eggshells, tea leaves or fruit skins should be added to the top dressing. The optimum temperature for marsh calla lilies is 20 degrees, and the humidity level does not drop below 80%. Once flowering is complete, irrigation can be reduced.

Growing difficulties
If the care of the plant is carried out incorrectly, then there may be some difficulties with its cultivation. For example, root rot occurs when the soil is overly moist. In this case, as a rule, the calla cannot be saved - it has to be thrown out along with the ground, although at the very beginning of the disease, the bush can be moved into dry soil.
Gray spots on the leaves signal a bacterial rot infection. To reanimate the plant at an early stage, it is enough to cut off all damaged parts, and then transplant the flower into a new pot with fresh substrate. However, most often the bush cannot be saved. In this case, it is much wiser to carry out prevention: to process the tubers before planting.
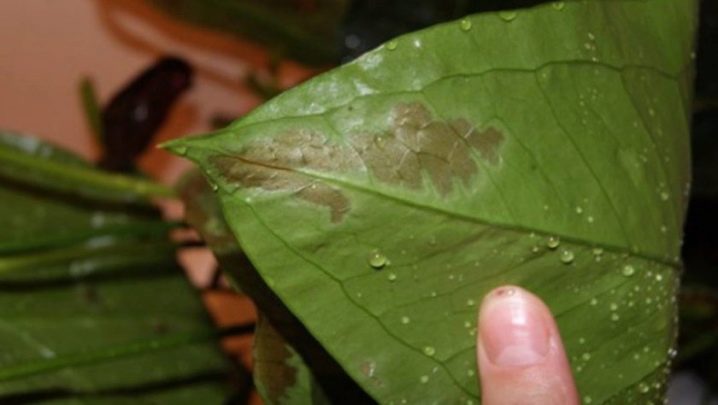
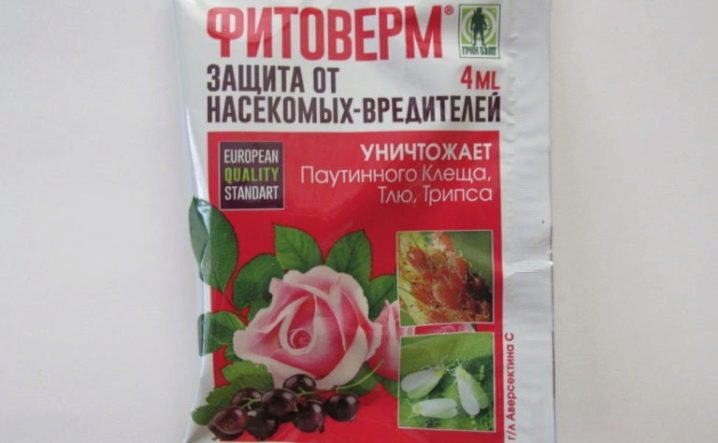
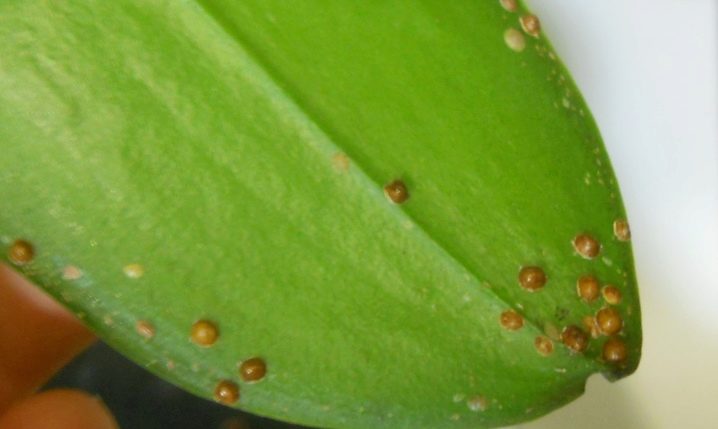
If the plant is exposed to pests, then the issue can be solved only with the help of insecticides. Previously damaged areas are removed directly along with the pests. Most often, marsh calla lilies infect aphids and spider mites, as a result of which yellow specks appear on the leaves. Ticks can be eliminated by spraying with tobacco infusion or Fitoverm.
Aphids are easily dealt with by washing the leaves with soapy water.
When the plant does not bloom, then the problem may lie in the wrong container. In a confined space, calla does not bloom, and all fertilizers applied go to the active development of foliage. When determining the diameter of the pot, you should allocate about 20 centimeters in diameter for one flower. The optimum material is porous, allowing excess moisture to evaporate.
If the leaves turn yellow, and dew forms on the surface, then we are probably talking about a scale insect. The plant will have to be wiped with a cloth soaked in soapy water or immediately sprayed with insecticides.
For information on how to grow calla, see the video below.


The comment was sent successfully.