How to make a wonderful shovel with your own hands?
Working in the garden and garden is a troublesome and responsible occupation that requires not only physical effort, but also the use of high-quality, strong tools and equipment with high productivity. For manual digging of soil, a bayonet shovel is usually used. But with age, such work becomes too much: back hurts, fatigue quickly sets in, joints ache.
To facilitate the work of gardeners, well-known manufacturers produce various modifications of tools. Among the wide range of models, there is sure to be a miracle shovel, which will greatly facilitate the work on the site.
Views
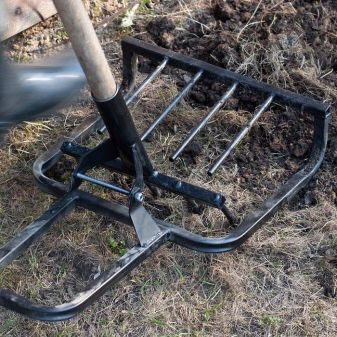
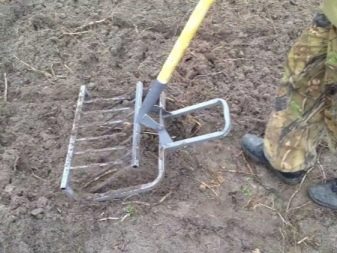
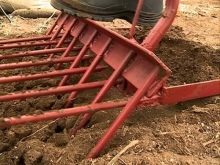
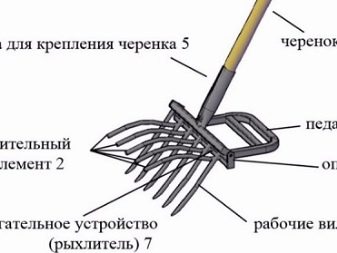
The classic version is a device in which on a metal panel there are “forks” attached to it by means of hinged joints. Translational-rotational movements are made: the pointed rods plunge into the ground, digging it up. When the “pitchfork” is pulled out of the ground, there are lumps that have to be broken down with a rake.

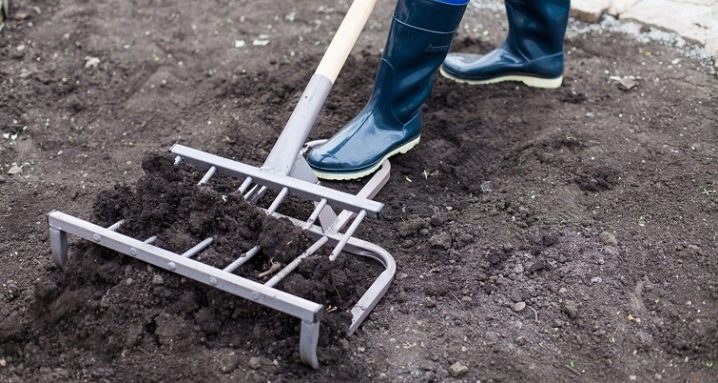
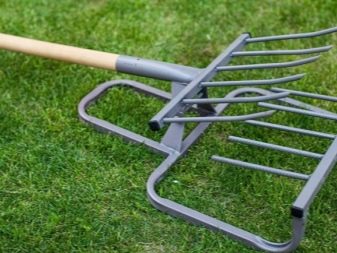
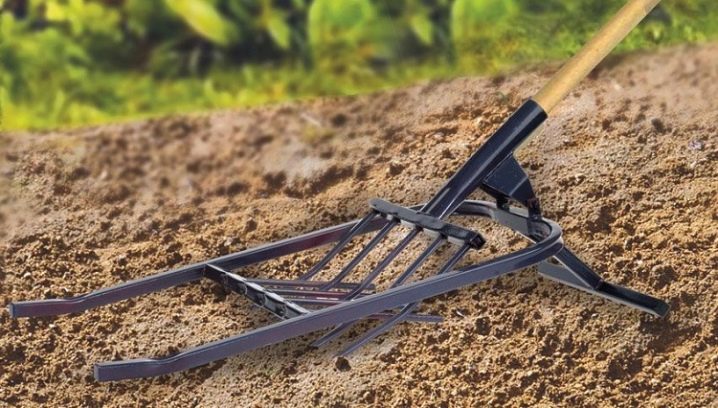
Advanced Ripper Shovels are models with a crossbar accessory, on which the same pointed pins are welded as on the main part. The pitchforks plunge in and out of the ground, passing through the gaps between the bars of the crossbeam, crushing large lumps into small fractions. The roots of the grass cling to the pins, they only need to be pulled to the surface.
Known modifications - "Plowman" and "Mole". The first has a length of loosening bayonets, reaching 10-15 cm, the second - 25 cm. The latter option is convenient because it plows the soil deeply, clinging to a layer of freezing earth in the off-season.
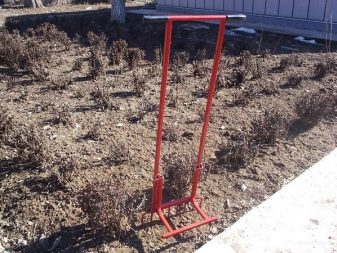
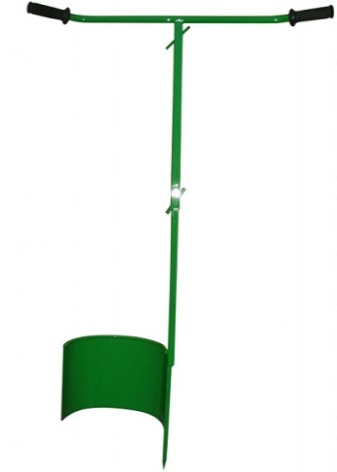
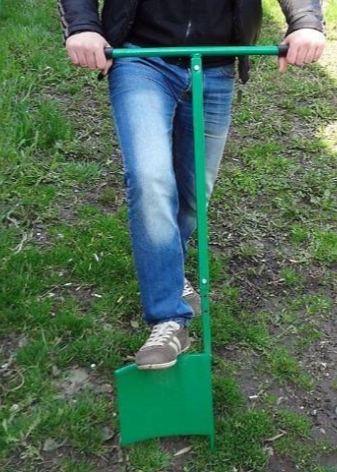
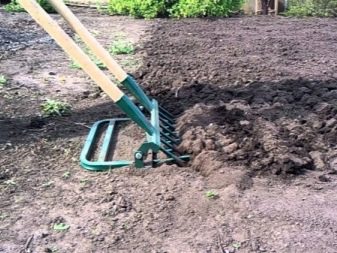
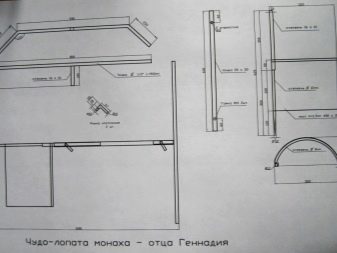
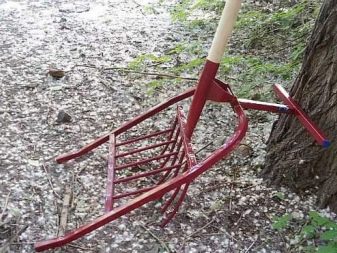
In addition to the "Mole" and "Plowman", the model "Vyatka Plowman" is known, the drawing of which was developed by the monk Father Gennady. Due to the state of his health, the clergyman found it very difficult to work on his personal plot. He came up with a convenient and simple miracle shovel. It requires a minimum of parts to manufacture, and the performance of the tool exceeds all expectations. An arched steel plate is attached to the metal pipe on the left or right (depending on whether it is made for a left-hander or a right-hander) (in homemade devices, you can use the main part of a bayonet shovel instead).
A pin is located at the end of the pipe, which immerses the plate to the depth of the excavated soil. Then a rotational movement is made, a lump of earth with a shovel easily leans to the side. Digging in a straight line backwards will leave an even furrow. Potato tubers, root vegetable seeds are left in it. When the gardener begins to process the next row, the fresh soil will lie flat in the furrow dug earlier. The homemade shovel of Gennady's father was taken as the basis for similar models that are now being produced by well-known manufacturers. Taking into account the physical characteristics of a person and his state of health, it is not difficult to find a suitable version of the miracle shovel.
Advantages
The advantages of the new structures are that working with them does not require a lot of time and physical effort.
In addition, they are convenient in that:
- labor productivity increases 3-4 times;
- no need to bend over to the ground;
- there is no need to strain the muscles of the back when the shovel moves upward along with the clod of earth (when the ground is damp, it is even harder to do this);
- due to the rotational movement of the digging or loosening main element, only the hands are strained, pressing on the handles, which are attached to the handle.
When buying, you need to pay attention to how much a person's weight is designed for a miracle shovel. For example, the classic options can be used by people no lighter than 80 kg, since the devices are quite bulky, it is difficult to move them on the surface. But the construction "Plowman" is suitable for gardeners weighing 60 kg and more. Father Gennady's shovel is much lighter than complex configurations, so a person who freely holds it in his hands will not be difficult to carry out garden work, regardless of his weight category.
disadvantages
The gardeners did not find any significant "flaws" in the miracle structures for digging the land, but no one will argue with objective facts:
- The "working" grip of the ripper shovels can reach 40 cm, which means that in the area where the seedlings are planted close to each other, it is a useless tool;
- it will not be possible to dig a deep hole with a loosening or digging device (the invention of Father Gennady);
- advanced models are difficult to repair in the event of breakdowns, as they are made of a large number of parts.

The fewer elements, rotating mechanisms, bolted joints are provided in the device, the easier it is in routine maintenance and repair. Therefore, it is better to start making homemade shovels with a careful selection of the drawing, which involves the use of a small number of simple elements. For pointed rods on panels, shanks, handles, you need to select durable, corrosion-resistant materials. The ideal option in this case is stainless steel. A metal pipe is suitable for the handle; you can also make a bar and an emphasis from it.
How to make a model of Gennady's father?
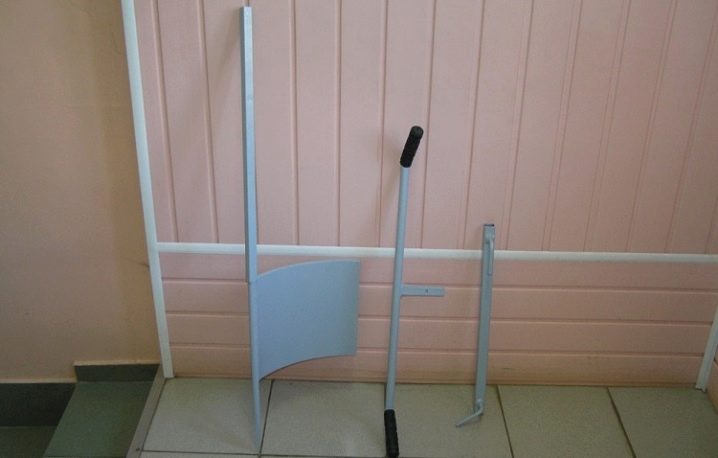
NM Mandrigel, a resident of Dneprodzerzhinsk, proposed his modification of the priest's model. Its main difference is that used parts can be used to manufacture the structure. To make a miracle shovel at home, you will need:
- bicycle handlebars - for handles;
- a pipe made of stainless steel - for the handle;
- steel shovel - instead of an arcuate plate;
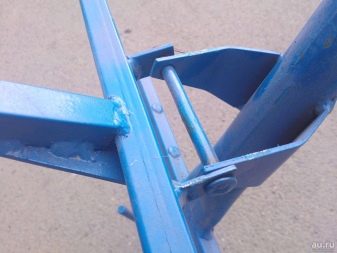
- a movable steel pin or with a spring - for easy immersion of the main part in the ground (its height is adjustable depending on how deep the earth is dug).
It is possible to make a shovel in several stages. If desired, it can be made in 1 day.
- The steering wheel is aligned. It will be easier to put pressure on him with your hands. On the ends, you can pull pieces from the old hose.
- The pin is pushed from below into the pipe with the sharp end outward. To give it a static position, a 2.11 M8 bolt is used.
- The handlebars are welded to the tube (to the opposite end of the pin).
- A shovel is attached to the bottom left and right by welding.
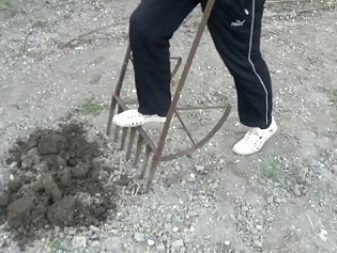
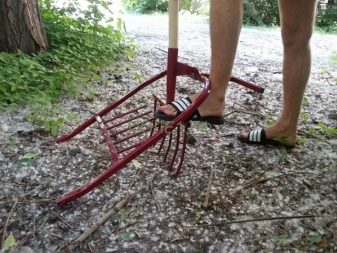
A person puts light pressure on the handle, the pin sinks into the ground, and behind it is a shovel. The steering wheel makes a rotational movement to the left or to the right, and a clod of earth rushes with the shovel to the side.
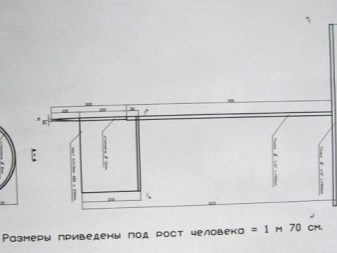
It is important to correctly select the height of the pipe to which the handles are attached. They should be located approximately at chest level. A resident of Dneprodzerzhinsk has developed a special formula for this, which is presented along with a drawing of a shovel.
Homemade ripper shovel
When choosing a suitable model, difficulties often arise with the selection of the constituent elements. The way out of this situation is simple: many houses have old sledges, pipes from wheelchairs, and fittings dusty in the garage. To make a ripper shovel you will need:
- drill and file for metal processing;
- welder;
- measuring instruments (corner, tape measure);
- steel pipes or corners;
- fittings from which the teeth will be made;
- metal handle.
The details must be precisely sized and fit the height of the person. Therefore, the parts are assembled by first measuring them and cutting off unnecessary parts with a saw.
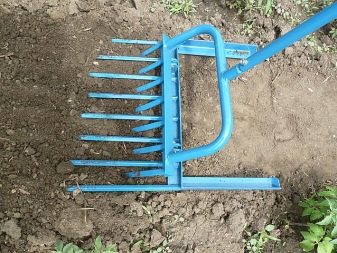
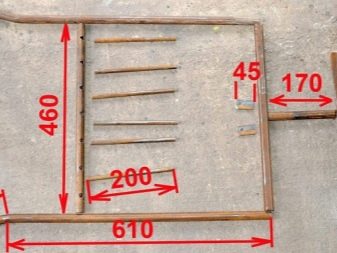
- The support frame is made from a metal tube. It is bent in the shape of the letter "P". If the upper crossbar is 35-40 cm, then the legs are 2 times longer - 80 cm.
- A transverse auxiliary bar with teeth is made. In their capacity, pieces of unnecessary reinforcement 20 cm long, sharpened on one side, can act. If the bar is made of pipe, several holes are drilled in it at a distance of 50 mm, into which the teeth will be inserted and welded. If this is a corner, then the pins are welded directly onto the metal.
- An auxiliary bar with pins is welded to the bottom of the legs at such a distance from the crossbar in the support frame so that the main forks move freely.
- A stop is attached to the outside of the crossbeam of the support frame. The main load will be exerted on it with pressure on the sticks. The stop has the shape of the letter "T".
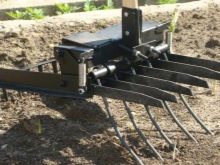
- A piece of pipe is selected that is 50 mm less than the width of the auxiliary strip. The main ripper teeth are welded to it.
- Swivel joints are made of steel ears and a piece of pipe, on which the main "pitchfork" will "walk".
- A handle is inserted into the pipe section, to the upper part of which a pipe is welded, which acts as handles. A straightened bicycle handlebar can be used for this purpose.
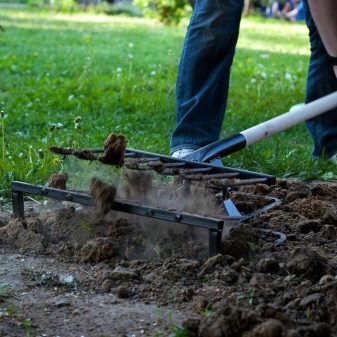
It is better to make a stalk from metal pieces, since a wooden part can break under load. Having carefully studied the drawings, it is easy to understand the stages of assembling parts. The simpler the structure and the stronger the materials, the greater the performance of the finished shovel. The main mechanism is constantly in motion. The teeth pass through the gaps of the pins of the auxiliary transverse bar, plunge into the ground, and, returning back, crush it due to the counter pins.
The movements of the main and auxiliary parts are based on the principle of a lock. If there are a lot of bolted joints in the miracle shovel, then they will constantly unwind, which is why the product will have to be often repaired. Therefore, it is better not to invent complex mechanisms, but to use drawings of simple and solid models.
For information on how to make a wonderful shovel with your own hands, see the next video.


The comment was sent successfully.