How to make a bird feeder from a 5 liter plastic bottle?
The birds that did not fly away to warm lands need our help. Many birds die in winter. During this period, it is difficult for them to find food on their own. To do this, you need feeders, which are made by caring adults and children with their own hands. It's easy to make. You can craft from different materials. Today we will discuss one of the most popular - this is plastic, or rather, plastic bottles.
Peculiarities
Each apartment has a 5-liter bottle, and often more than one. Usually they are lying around or thrown away, which is harmful to our environment, since plastic takes a long time to decompose. Let's not pollute nature, but find a useful use for it - we will make a feeder for tits, and best of all - several. Everyone is good, and the birds also have a place to eat. There are the following features to use exactly the 5 liter bottle:
- it is not subject to temperature extremes - well tolerates cold, heat, rain, snow, will serve for a long time;
- does not get wet, the feed will remain dry, like the birds, which is important for the construction of the feeder;
- quite easy to do - no special tools and complex skills are needed, even a child can cope with this task; it will not take much time - 20 minutes is quite enough;
- quite roomy - it can contain at least two pairs of birds;
- can be poured a lot of feed;
- titmouses will be frequent visitors - since the structure is unstable and light, it is these birds that fly into it; they keep their balance well when compared with other birds;
- you can cut holes, so that the titmouses fly in and out freely;
- no need to look for special material, after all, it is in every home or it costs a penny if you buy it.
Important! Before making a bird feeder, rinse and dry the container.
Required tools
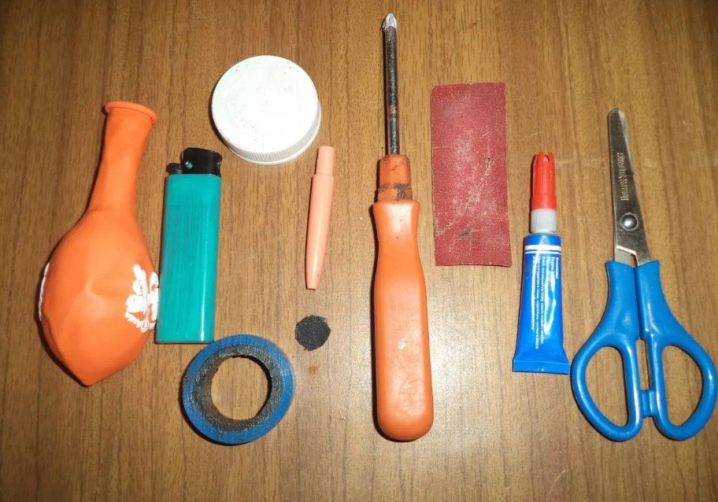
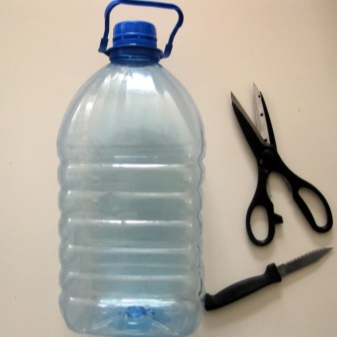
To make an ordinary feeder, you will need simple tools that are in every home. The main thing is to observe precautions when working, especially when the child uses sharp objects. So, you will need tools such as:
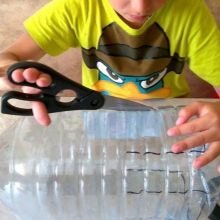
- stationery knife or scissors - we will cut, cut, cut with them;
- old cable, electrical tape or tape - for the safety of birds, so as not to get hurt;
- marker - to draw the entrance and make it more noticeable;
- awl for holes or you can use a nail heated on a fire, but then do not forget the pliers;
- pliers - it is convenient to hold a hot nail with them, and also to fix the visor so that it is above the entrance;
- ruler - to draw beautiful and even windows;
- hot gun - This is an optional tool, but if there is, then it is convenient to use it for decoration or for gluing something.
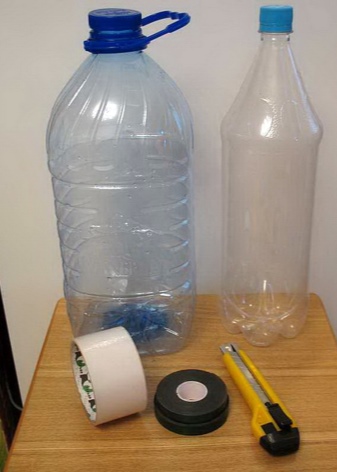
In addition to the tools, it is worth preparing the following materials:
- a bottle of 5 liters and another 1.5 liters - the latter is useful for automatic feeding;
- rope or wire - to hang the feeder;
- skewers, pencils, sticks - will be needed for the roost;
- stones - for the stability of the structure;
- decorif you want a beautiful feeder - there are no exact elements here, it all depends on imagination; it can be paint, twine, twigs, glue, cones.
How to make?
Even a child can make a simple feeder with his own hands. It is advisable under the supervision of an adult if he is still small.Sharp tools are used to work, so you need to look after him and his work. During such an activity, you can have fun and usefully spend time with the whole family, since a common cause unites and rallies, and the birds will be grateful. After preparing the tools, you can start the master class. First, we decide which feeder we will make. There may be several of them.
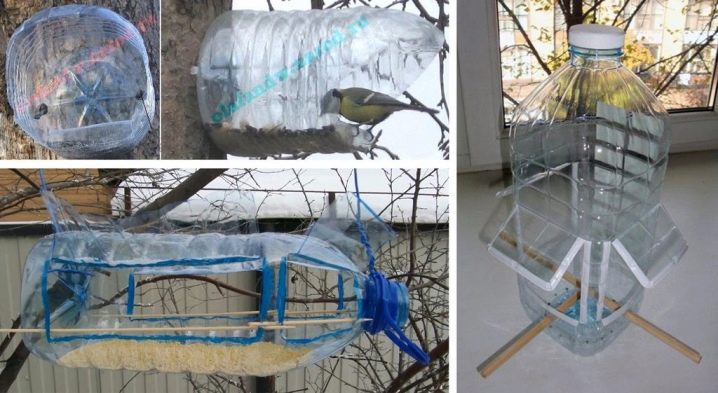
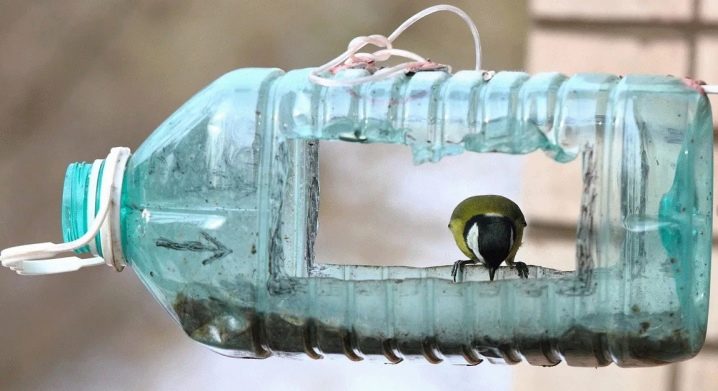
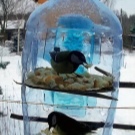
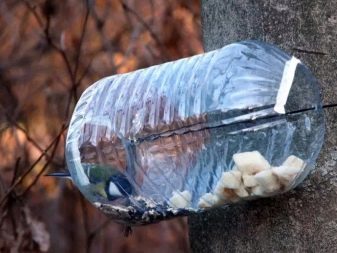
Horizontal
This is the most capacious feeder. Several birds will be able to freely be in it. The larger area allows more grain to be poured. The manufacturing process is fairly straightforward and involves several steps.
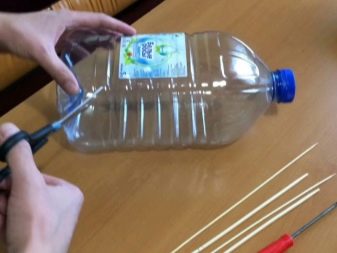
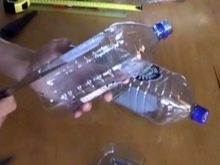
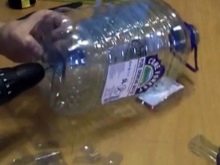
- Place the 5 liter bottle horizontally. We retreat 4–5 cm from the bottom and draw a rectangle with a marker. This will be the entrance. It needs to be made quite large so that the birds can fly in and peck calmly. Opposite the first window we draw another one. You can make two large and several small side by side. It is not so important how many entrances there will be, it all depends on the master.
- We take an awl and make a puncture on the bottom line of the rectangle. This will make it easy to start cutting the window with the scissors. Holes are not needed with a clerical knife. We cut through the bottom line and on the sides. We leave the upper part to make a visor. It can be trimmed or folded in half so that it stays above the window.
- Let's go over the bend of the visor with pliers. It will be needed so that precipitation in the form of rain and snow does not fall into the feeder, and the birds are not wet to sit under the roof. We carry out the same manipulations with the second entrance.
- We have torn edges - this is dangerous for birds, because they can injure birds. To make it safe and pretty glue the sides of the entrance with electrical tape or tape... Another option is an old cable. We cut it along, remove the wires, cut along the length of the sides of the rectangle. We glue the edges with glue with finished blanks. You can use a hot gun.
- To make the birds sit comfortably we will make perches for them... You will need wooden skewers, pencils, sticks, or spoons. We make two holes with an awl at the bottom of the corners of the windows. We pass a skewer into them along the edge of the entrance. We do the same with the rest of the windows.
- The roost can be across the trough. To do this, we pierce holes opposite each other with an awl, thread a stick - everything is ready. To make the entrance better visible, you can draw the edges with a marker. Birds are much more willing to fly into such a feeder.
- At the bottom we make punctures with an awl. They are needed so that moisture leaves, and not accumulates inside. The holes should not be larger than the grains of feed, otherwise everything will spill out.
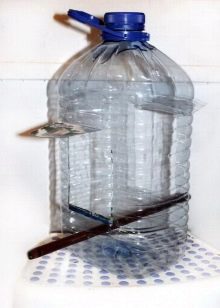
- To hang the feeder make two holes at the bottom opposite the neck at a short distance from each other. They must be on the same line. We thread a rope through them or, better, a wire, because the latter is more reliable. We make a loop on the neck of the bottle. We hang our birdhouse by the resulting two loops. Place a few stones inside for stability. So, she's definitely not going anywhere.

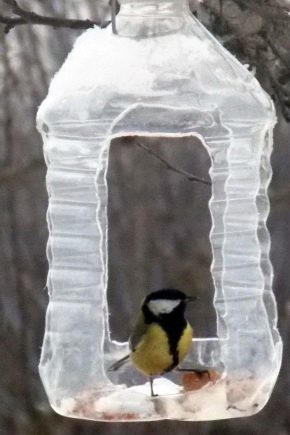
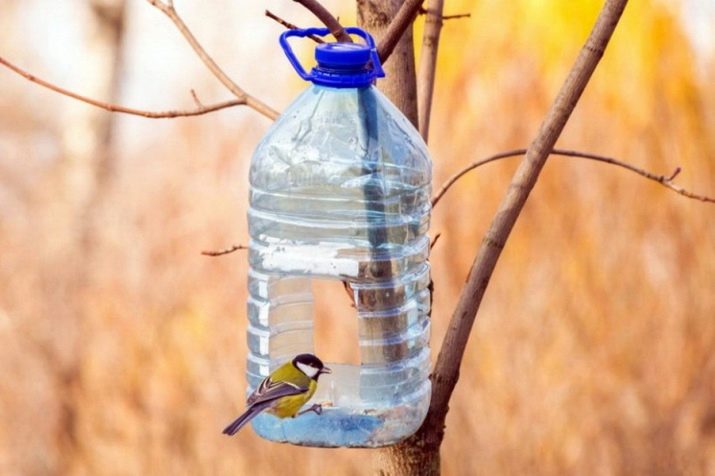
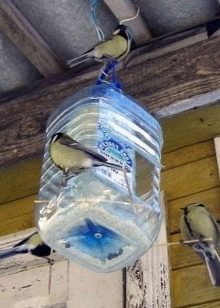
Vertical
The vertical five-liter feeder is less spacious. The area is not as large as in the horizontal one, but it is also practical and convenient. The process of making it is simple and similar to how to make a horizontal one, but there are some differences. The manufacturing process is as follows:
- we put the bottle on the bottom, mark the entrance with a marker;
- bottles can be different in shape: round, semi-arch, square, so the number of windows depends on different preferences; in a round bottle, it is better to cut 2 large windows opposite each other, in a square bottle - 3 windows.
- glue the edges with tape, electrical tape or wiring;
- make holes at the bottom with an awl;
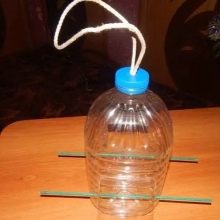
- we build a perch from wooden skewers - we pierce two holes from the bottom of the entrance and pass the skewers through them;
- perches can be made along or across; in the latter version, you can hang bacon on the skewer inside the feeder and outside on the ends of the stick, which are exposed, in this case we make the perches a little higher - closer to the middle of the window;
- the options for how to hang can be different - if there is a handle, then you can use it, if not: we make a hole in the bottle cap, thread the two ends of one rope, tie a knot inside and close the lid.
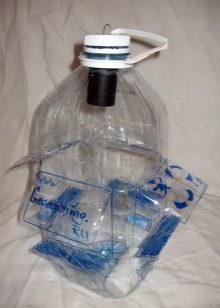
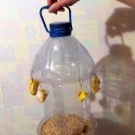
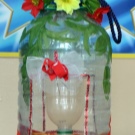
There is another subspecies of vertical feeders - with an automatic dispenser. The fact is that it is better to pour the grains every day.Before that, you need to clean and remove the remnants of the old feed, which will protect the birds. Parasites quickly appear in an uncleaned feeder.
It is recommended to wash the structure in hot, running water once a month. It is better to do this with gloves.
But not everyone has time to keep an eye on bird feed every day. In this case, a feeder with an automatic dispenser will help. It is easy to do, and it will take a little time. For manufacturing, we need two different bottles: 5 and 1.5 liters. There can be many options here too. Let's consider the simplest one. Its main advantage is that the feed is poured automatically, it lasts for a long time. As soon as the feed runs out, a new one is added. A large amount of food will allow birds to fly in and stay full for a long time. A master class for a feeder with an automatic dispenser includes the following steps:
- we put a large bottle on the bottom;
- cut out rectangles or entrances for tits;
- glue the edges with electrical tape or make them safe in other ways;
- at the bottom you need to pierce holes with an awl;
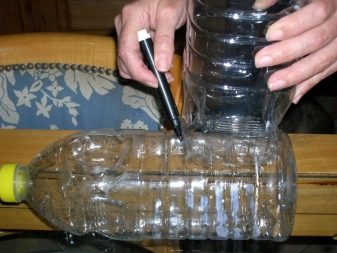
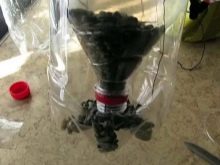
- we try on a small container to a large one - it is necessary to insert it upside down into a large bottle; we cut off the bottom of the small container, there are no accurate measurements, but you should insert the small one into the large one so that its bottom rests against the neck of a five-liter bottle, and the neck of a half-tartar - into the bottom of a large bottle;
- so that the food spills out better, we make vertical cuts on the neck of the 1.5 liter bottle and remove some of the plastic;
- insert a small bottle into a large one;
- pour food through the top;
- We make a loop on the lid.
Winter
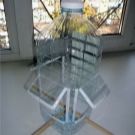
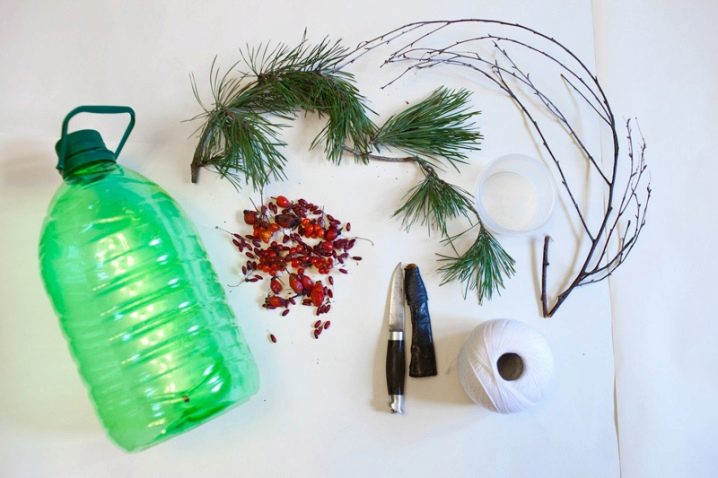
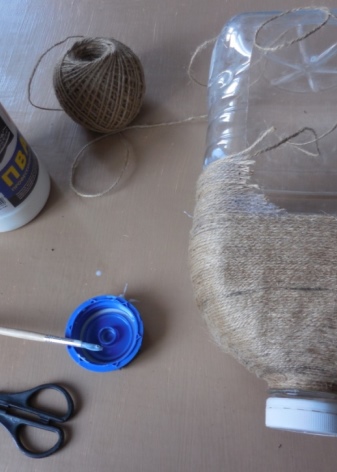
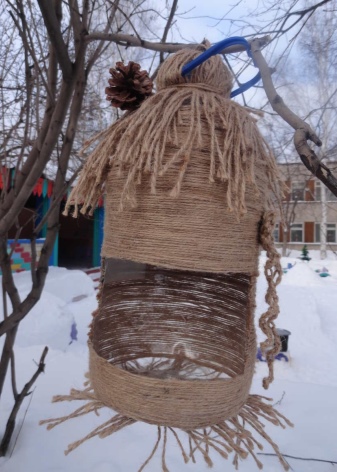
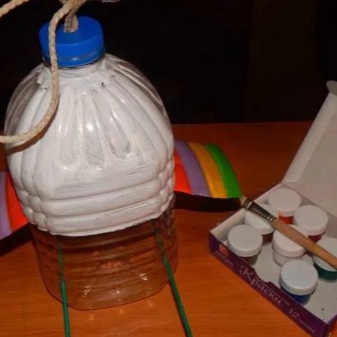
We made sure that the feeders even from one five-liter bottle are completely different. The main thing in a winter feeder is that it must be durable, waterproof, frost-resistant, securely fixed and still beautiful. To do this, it can be decorated in different ways. This design will decorate and transform any personal plot. Let's consider several options step by step. The first one is suitable for those who plan to hang the feeder under a roof or canopy. Not all materials can withstand precipitation in the form of rain and snow, so it is better not to hang them under the open sky. For such a feeder, you will need a bottle, twine, glue, twine, a whitewash brush, and a stationery knife. The step-by-step instructions are as follows:
- cut windows in the bottle;
- we make a loop on the lid in order to hang;
- at the bottom of the entrance we pierce two holes with an awl and insert a skewer - this will be a perch;
- apply glue to the bottle and wrap the entire bottle with twine;
- we make a slot in the middle of the windows, bend the edges of the string inward and glue it - we get a window for the birds;
- we put on a whitewash brush in the form of a hut on the neck and fasten it with twine - we got the roof of our house;
- We will embellish with various decorative things.
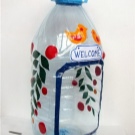
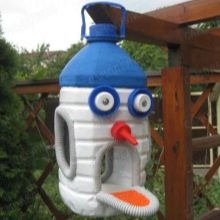
Another option is a painted feeder. To create it, you will need the following materials and tools:
- 5 liter bottle;
- stationery knife;
- wooden skewers;
- twine, wire or rope;
- acrylic paints.
The process of making a beautiful feeder includes several steps.
- We make an ordinary vertical house for titmouses. All actions are the same as described above.
- We cut out the windows, We glue the edges with tape or electrical tape, make a loop in the lid for hanging, thread skewers into the holes made at the entrance.
- Let's start decorating. We take a sponge or brush, arm ourselves with ideas and create. There can be many options. Everyone will have their own bird house. Everyone will be unique.
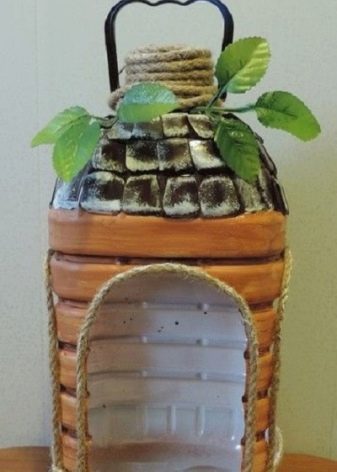
Let's make another birdhouse with tiles. It will need the following tools and materials:
- marker;
- twine;
- stationery knife;
- dye.
First, we will do everything that we made in the previous products - we cut out the entrance, glue the edges with electrical tape, make a loop on the lid to hang it, build a roost from sticks. Next, let's get down to the decor. This process has the following sequence of actions:
- paint the bottle with a sponge with white paint and wait for it to dry;
- dried up, apply a second layer - the product will look prettier and more reliable;
- in the manufacture of windows, plastic remained - we cut out the tiles from it, focus on the real roof from the tiles;
- paint the made roof elements first with white and then brown paint; waiting for everything to dry;
- we glue the bottom row of the roof on the bottle, over it we glue the next one and so on up to the neck;
- we wrap the handle of the bottle and the neck with twine;
- if desired, can be decorated with fir branches or other decorative elements
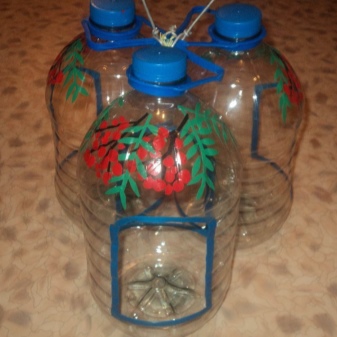
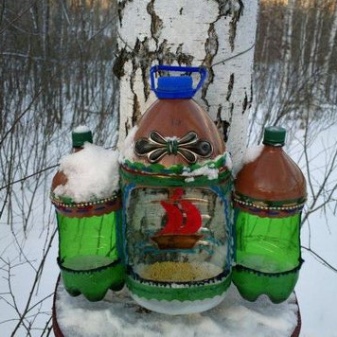
To make a feeder for a large number of birds, you will need three 5 liter bottles, as well as tools and decor material. The manufacturing process is as follows:
- cut out a large entrance in each container;
- glue the edges with electrical tape;
- we make perches;
- we connect bottles with screws, bolts or wire;
- wrap the neck with wire or strong rope, build a loop;
- it turned out to be one roomy feeder; it can also be decorated and decorated.
These are just a few of the beautiful and practical winter feeders. Focusing on them, you can invent your own version. Feel free to experiment. Craft with your children, because this is a very exciting, useful activity.
For information on how to make a bird feeder from a five-liter plastic bottle, see the next video.


The comment was sent successfully.