Features of crushed stone paths
Country estates seem to most modern people a great way to take a break from civilization with all its bustle. However, after the rain, when all the local paths turn into a mess mixed with puddles, you don't want to walk not only in the neighborhood, but even in your own yard. True, on a personal plot, a hardworking owner may well solve this problem, and without high costs - all you need to do is arrange paths from rubble.
Advantages and disadvantages
Country paths made of rubble in the garden are just one of the many options for paving the main routes... Given the huge competition for the title of the optimal material for solving the problem, you should first consider why it is worth and why you should not use crushed stone.
We will start the study from the positive sides of the material:
- crushed stone looks pretty pretty, it harmonizes well with the surrounding area and architecture, therefore it is often used in expensive design projects;
- crushed stone paths are unpretentious to operating conditions, they are equally appropriate in any climatic zone;
- consumables, like construction, cost a penny, so the implementation of the venture will be affordable for everyone;
- to fill a path from a granite screening, no prior experience of such work or any auxiliary equipment is needed;
- the material of the fine fraction can be used in different colors and sizes so that the coating acquires a unique, or even completely meaningful pattern;
- crushed stone does not slip at all, even in wet weather providing reliable grip with the sole;
- deciding to make a path from rubble in the country with his own hands, the owner will forever solve the problem of the formation of puddles and "swamps" that interfere with the passage.
However, some of the properties of crushed stone may lead you to think that it is better to use gravel or some other alternative material. There are not so many disadvantages of crushed stone fill paths, but for you personally, they may turn out to be fundamental.
So here's what makes you think:
- crushed stone is not laid out once and for all - due to the fine-grained structure, "hills and valleys" will periodically form, which will have to be leveled;
- the edges of the stones can be sharp, and if you have children who love to frolic in the garden and inevitably fall during the game, this type of coating can cause injury;
- even if there is no one to fall on the backyard, crushed stone can damage the sole of the shoe - at least you will have to abandon those shoe models whose base is too thin.
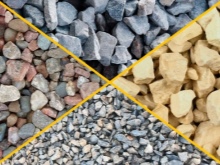
Types of rubble
There are no less than three varieties or grades of crushed stone, and all of them are used for road works. The classification by type was not introduced by chance - the difference between individual species, albeit small, is still present.
In view of this, we will consider all positions.
-
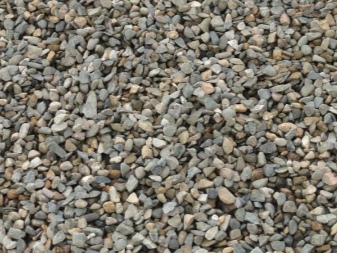
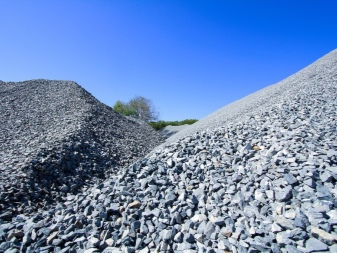
Granite crushed stone is produced as a result of blasting operations in quarries and crushing of those fragments of stone that are not suitable for any other purpose. It is this option of raw materials that is considered the most popular, since it is indifferent to extremely low temperatures, practically does not absorb water and does not wipe off.The most common fraction is 5-20 mm, however, there are also finer gravel, and much larger, which in the design of the yard will remind of real wildlife. It is from this material that pillows for highways are made.

- Crushed gravel created by nature itself - these are the pebbles that were turned into the sea or river by the force of the waves. Such material, for obvious reasons, is a little less sharp, and therefore safer, but you should not perceive it as perfectly smooth round pieces. However, due to the relative absence of sharp corners, it is precisely such raw materials that are most often used in landscape design. It is also relevant in railway construction and concrete production.
- Limestone crushed stone also known as dolomite. The main reason for its relative popularity is its low cost, even against the background of its closest competitors. The reasons for the loyal pricing policy of suppliers selling such goods are also obvious - pebbles can be white, yellow, red and brown in one batch, and a different color, of course, indicates a variety of chemical composition and performance characteristics.
Required tools and materials
Strictly speaking, the set of tools and materials for the construction of a crushed stone path may be different, after all, the project can be made both extremely simple and somewhat more modern and advanced. Each option has the right to exist, and your project may require additional consumables and equipment, or, conversely, may not need any of the following.
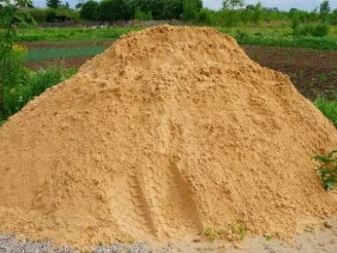
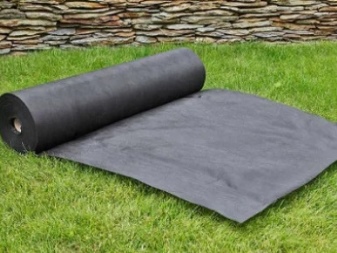
Consider a set of required materials. We will definitely need sand to drain water and geotextiles that will prevent plants from sprouting in the path of the lord of nature.
Curbs will help the path not to creep over the entire site, and the rubble itself will be the main covering.
This completes the list of required elements, but if the path is still not purely gravel, you may need a "real" coating, be it tiles, stone or asphalt. In some cases, when collecting a specific pattern from pebbles of different colors, the designer wants to fix exactly this arrangement of elements, therefore he glues them together with glue or epoxy resin. If the path should be such that even if you drive a car, the plastic lawn grill will not be superfluous.
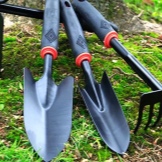
Respectively, the more you use different materials, the more tools you will need to work with them. Actually, for elementary earthwork you will need a shovel and a rake, and for marking the contours of the future engineering structure - a tape measure, stakes and twine. If you want a dense finish, also use a compactor that you can buy or make yourself. To work with concrete you need a concrete mixer, and for tiles you need a special rubber hammer.


Manufacturing technology
So that the project, chosen for the sake of minimum costs, does not disappoint with its quality, it is necessary to fill the track correctly, making its device in the form of a puff pie. Let's talk in more detail about how this is done.
Markup
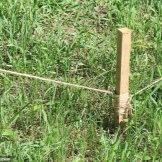
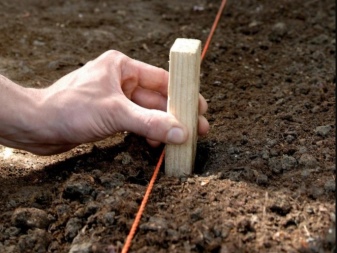
First of all, you cannot work with a project that exists only in your head. Mark out the exact contours of the future path on the site, transferring them from the paper drawing to the real area. You can outline the outlines using ordinary wooden pegs, between which a string stretches at a low height. If the outline of the trail is not intended to be coal at all, the marking can be done using a flexible hose, which is fixed at the bending points with wire half rings. It is important to securely fix all these elements, otherwise, during the implementation of the project, an unexpected distortion of the layout is possible.
When the markup is done, it is important, without embarking on the next stages of implementation, to once again evaluate the correctness and expediency of the concept with an unclouded eye.
Now, in fact, is the last moment when changes can be made to the project without much harm to your own site.
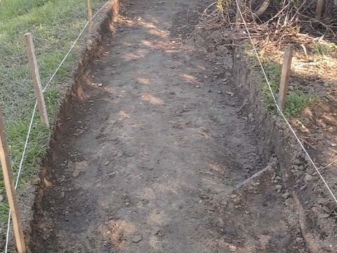
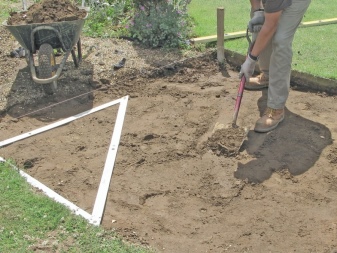
Trench
Like any other structure, the track needs a foundation, and since it should not rise too much above the surrounding area, a trench is needed. Do not neglect this step - it allows you to effectively remove the roots of plants, so that the path will not be overgrown with weeds for many years.
It is necessary to dig a recess in accordance with the contours specified by the above-described markings. Too much depth is usually not required - more often than not, one shovel bayonet is sufficient. In this case, it is important to tamp and level the bottom, as well as, if possible, give even contours to the edges of the resulting pit.
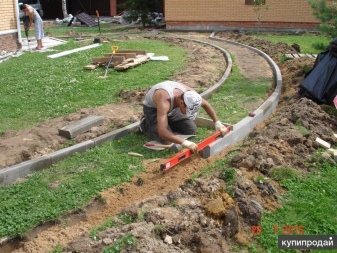
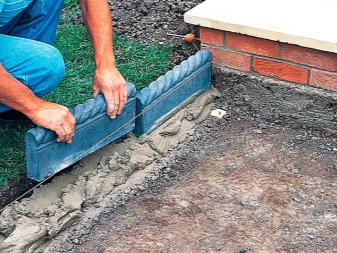
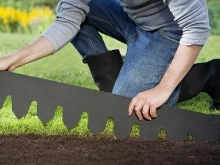
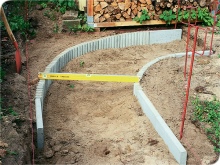
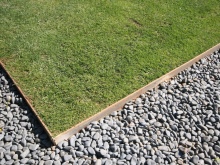
Installation of curbs
note that the border is laid out in different ways. In some cases, if the track does not experience serious stress, it can be purely decorative, therefore it is not attached in any way. If you nevertheless decide to make a path "for centuries", first lay the pillow (the next described step) and only then proceed with the installation of the borders as described below.
To begin with, cement, sand and water are mixed to form a mortar. From the resulting mass, a layer of medium thickness is laid out under the future curb, which will predictably be slightly above the level of the pillow. It should also be wider than the curb itself, so that the material chosen for the fence can be slightly drowned in the viscous mass. In this case, the installation of individual fragments is carried out immediately with alignment along the twine, which cannot yet be removed.
By the way, a wide variety of materials, including very unexpected ones, can apply for the role of a border. Curb stones, wooden beams, metal plates and bricks are also "pop", because some people even use old plastic bottles for fencing, and it turns out pretty well.
In short, show your imagination and you will be rewarded.
Pillow
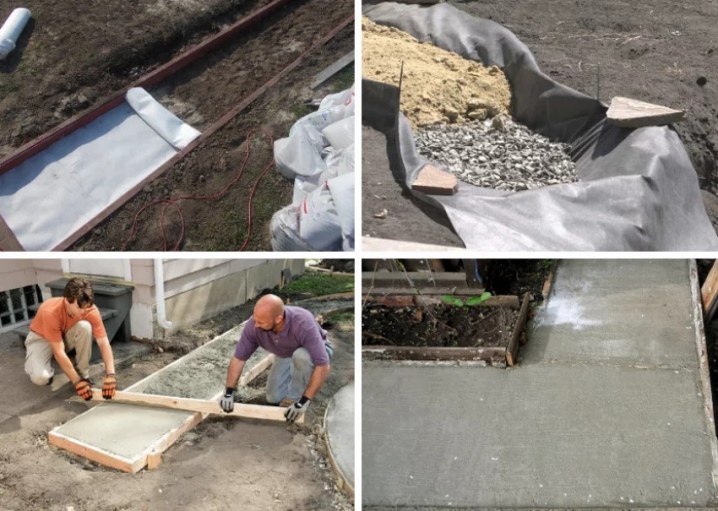
We dug a trench specifically in order to put a pillow in it - it is a kind of foundation for the road under construction. When the soil bottom is leveled, the first level is laid out, which can be made of a lawn trellis or geotextile. The first is cut exactly along the contour and dimensions of the track being built, but the second is taken with a margin - so that a good half meter remains in all directions.
The first layer of filler will be a coarse-grained stone, which in some cases is mixed with clay. It is poured over a grate or geotextile, after which leveling and thorough ramming are performed using a rake. If it is geotextile that lies under it, then its edges, which we deliberately left long, then wrap up.
On top of the stony layer, a 10-centimeter layer of sand is poured, which also needs to be well tamped. It will be easier to do this if the bulk material is tamped wet.... Sometimes, to create a truly strong and durable path, sand is poured from above with a layer of cement.
Backfill
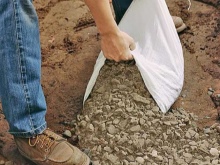
The actual laying of the top layer is not difficult. - you just need to fill up the rubble on top of the laid pillow so that it does not fall out over the upper edge of the curb, but at the same time it lies in a rather thick layer and does not expose the pillow hidden under it. If the material is approximately homogeneous and you have not conceived any arts, it should simply be tamped down - and the object is ready.
With beautiful design solutions, the situation is a little more complicated, because they require higher quality and a completely different level of aesthetics. If your task is simply to increase the durability of the object, then you can pour wet sand into the space between the stones, pour cement or even plant lawn grass to give the road an old look. note that all these operations are usually done only with coarse crushed stone - for fine-grained they are impractical.
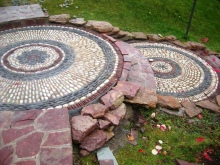
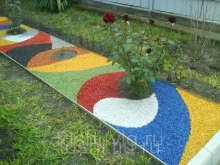
If the master specially purchased multi-colored stones and wants to make a complex, aesthetically valuable pattern from them, then he will have to work more carefully.To fix the shape and location of the image, a polymer binder is used, which, with a thin crushed stone layer, can even be poured onto a dense pillow, after which a granular coating is poured.
Otherwise, you must first fill in the crushed stone, and only then carefully spill it with polymer, but then it is desirable that the composition be colorless, otherwise its appearance will affect the perception of the artistic message.
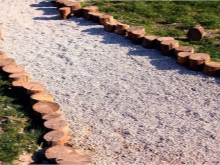
Beautiful examples
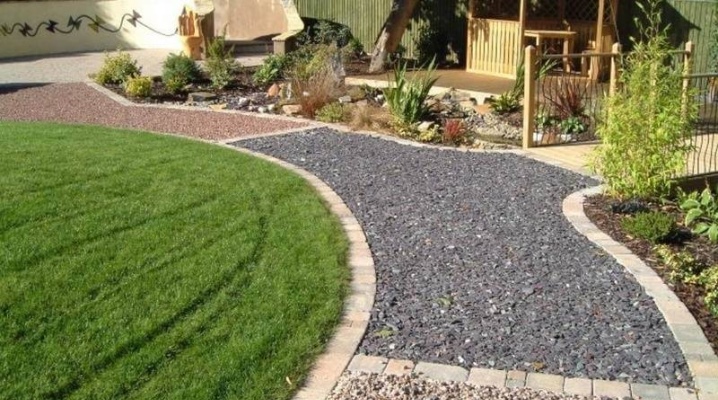
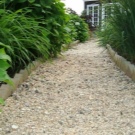
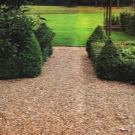
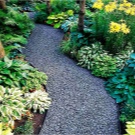
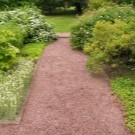
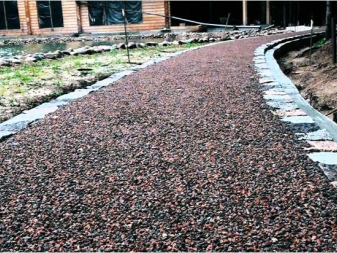
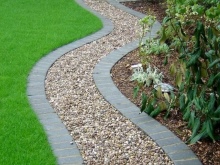
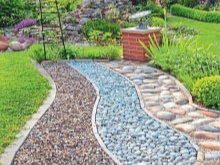
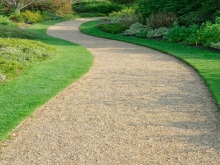
Classic paths made of fine gravel crushed stone can be found in almost any park in our country, although they do not look as perfect everywhere as in the first example. This option of paving still looks more natural than the asphalt that is boring for city dwellers, and, mind you, it goes well with the framing fresh greenery.
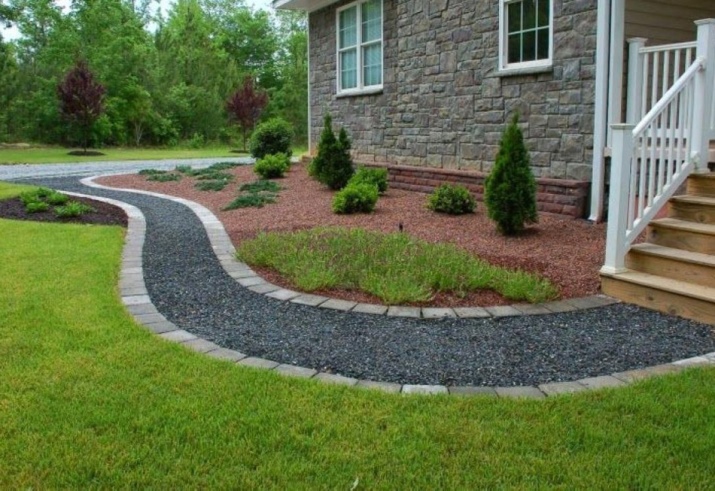
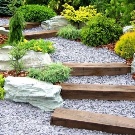
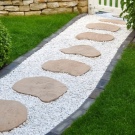
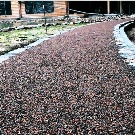
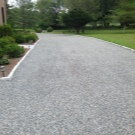
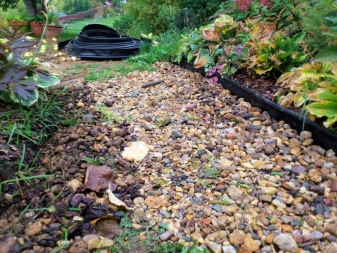
If in the first photo the path was made of fine gravel crushed stone, then in the second case coarse granite was used. In a sense, such a path does not even seem to be too easily passable - you definitely cannot drive here on small wheels, and you have to step, carefully choosing a place. However, the author, apparently, intended it this way - he needed a completely wild path, reminiscent of the bottom of a dry river.
The plants growing rapidly on the sides of the passage give the impression that you have never been so far from civilization.

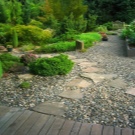
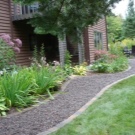
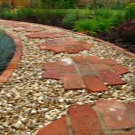
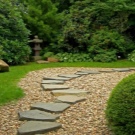
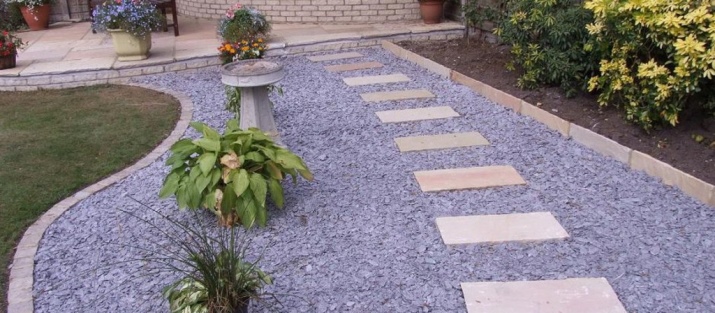
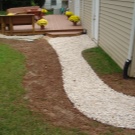
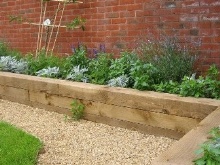
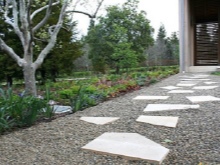
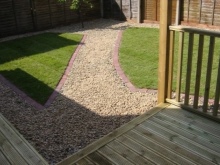
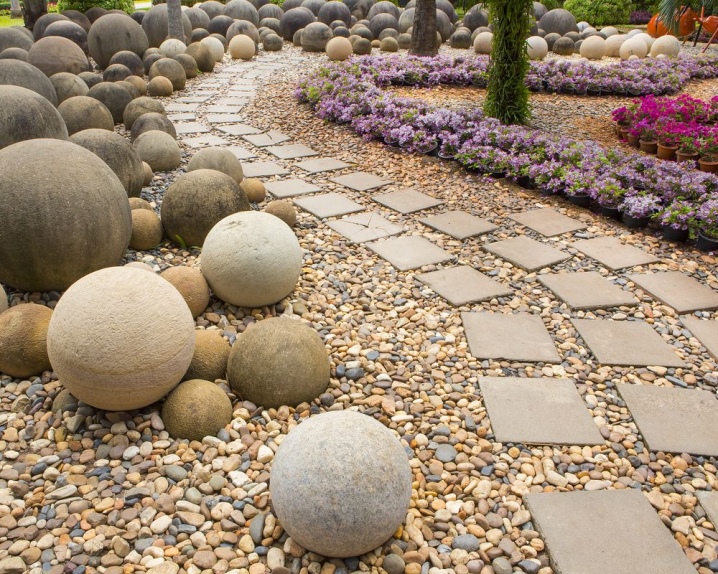
The third example shows how tiles can be integrated into a gravel walkway without interfering with the perception of the gravel itself. The latter, however, is rather decorative here - people will probably walk on the tiles. At the same time, the stone essence of the object is favorably complemented by large artificial stone balls, reminiscent of Japanese rock gardens.
How to make a path from rubble, see below.


The comment was sent successfully.