How to propagate hydrangea?
Buying a hydrangea bush in a pot is easy, you don't need to think about how to propagate an existing plant. But only by multiplying what is already growing on your site, you do not spend extra money, control the whole process, and finally, approach the solution of the problem creatively. Moreover, there is nothing daunting in the reproduction of hydrangea.
Timing
Why still sometimes it is impossible to avoid independent reproduction of the bush - if cuttings of a gorgeous hydrangea blooming to everyone's envy are shared with you, it is simply stupid to refuse such a magnificent "genetic material". Finally, even if you buy a plant, be sure to cut it... The hydrangea in the garden should grow from a small cutting, then it is more likely to "register" in your area.
In the spring
Spring is a good time for breeding. At this time, you can "dissect" large-leaved, treelike and panicle hydrangea. And do it optimally by dividing the bush. The separated parts have excellent time to germinate in a new place until autumn, which provides them with a calm winter. If you are going to propagate the plant by seeds, then you need to do this in March. If the separation of offspring is a warm spring (only tree-like and large-leaved).
Summer
Midsummer is considered by many experts to be the optimal breeding time for the shrub. In July, all types of hydrangea can be propagated by cuttings - there is a high probability of the effectiveness of the operation in this month. The period when the plant fills the buds is most favorable for cutting cuttings.
In July, the hydrangea still has buds, and the shoots did not have time to coarse. Shoots from old bushes are no longer cut, they are rejuvenated and young shoots are expected to appear.
Rooting of cuttings usually occurs in the middle of August, at which time it is recommended to transplant them to a permanent place.
In autumn
Sometimes they are engaged in dividing the bush in the fall, this choice may be successful, but the chances of a successful operation are less than doing the same in the spring. But in the fall, you can safely deal with the separation of the offspring of all varieties of hydrangea.
The ways
Treelike, paniculate, large-leaved - all these species can be propagated independently. And the way chosen as the basis for reproduction, not one: seeds, offspring, cuttings, as well as layering and dividing the bush, you can successfully propagate hydrangea. Which method is faster and easier, one cannot say for sure. The most popular cuttings, but each method has disadvantages and advantages.
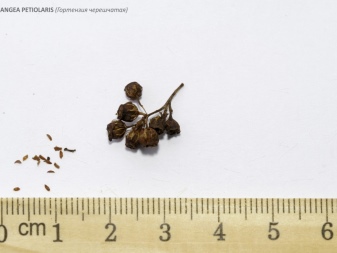
Seeds
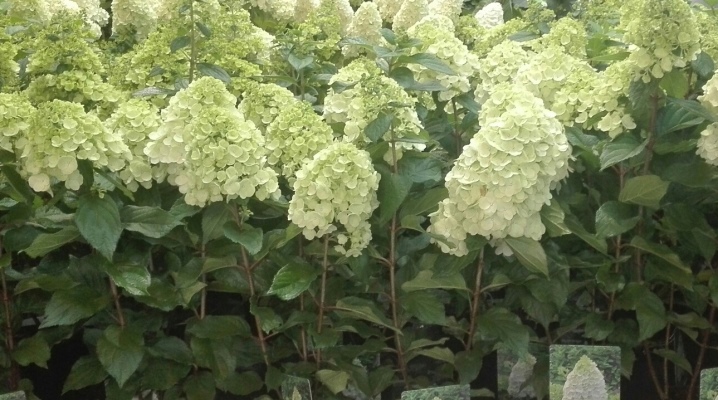
Hydrangea seeds are small, dark brown, oblong grains. Their appearance is rather modest, you do not expect at all that lush hydrangeas will grow from inconspicuous seeds.
How to understand that the seeds are of high quality:
- they are free of stains and traces of mold;
- the seeds should not be frozen, damp, sluggish;
- outwardly, they must correspond to the varietal characteristics.
You can collect the seeds yourself at the end of the season; you need to store it at room temperature in a dry place. By the seed method, garden hydrangea reproduces most successfully.
The main goal of seed reproduction is selection, but if there are no cuttings, then sowing with seeds can also be a productive measure.

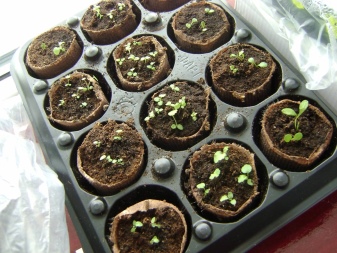
The process of sowing seeds.
- In a box with drainage holes made and a height of 20 cm, soil is poured, leaving 3 cm to the edge.
- High-quality dry seeds are laid out on the surface of the soil. There is no point in deepening them.Sprinkle them with sand on top, and then just pour the substrate moderately.
- Next, you need to make a greenhouse - cover the box with transparent film or glass.
- If the seeds were planted in flower pots, then you can do with them even easier - cover with an ordinary glass jar.
- Remove the shelter periodically for watering and ventilation.
- As soon as shoots appear, the greenhouse must be removed. Germination usually takes 2 weeks.
Keep the potting soil moderately moist. Water the soil with soft, settled water. Do not forget to periodically loosen the soil. Light for germinating seeds needs bright, but diffused. When the first 2-3 leaves appear, the seedlings need to be thinned out, dived into separate pots. It should be dived again in May, when the sprouts reach 8 cm. At home, hydrangeas are kept for 2 years, and when they grow to 35 cm, they can be transplanted into open soil.
In warm weather, pots of young shrubs are often taken outside to harden (but not overnight). Cut off the buds of the seedlings immediately - otherwise the plant will spend energy on flowering, and its task is to form a strong rhizome.

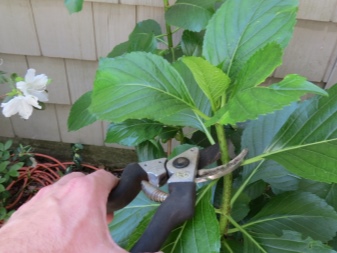
Cuttings
This method can be considered the simplest, but rather, it is the most demanded and regulated. For cuttings, cuttings with a lignified stem are not taken, but green shoots are what you need.
It is customary to engage in cuttings of hydrangeas at the height of summer. But the option of cuttings on the warm days of spring is not excluded, when young shoots are formed on the bushes.
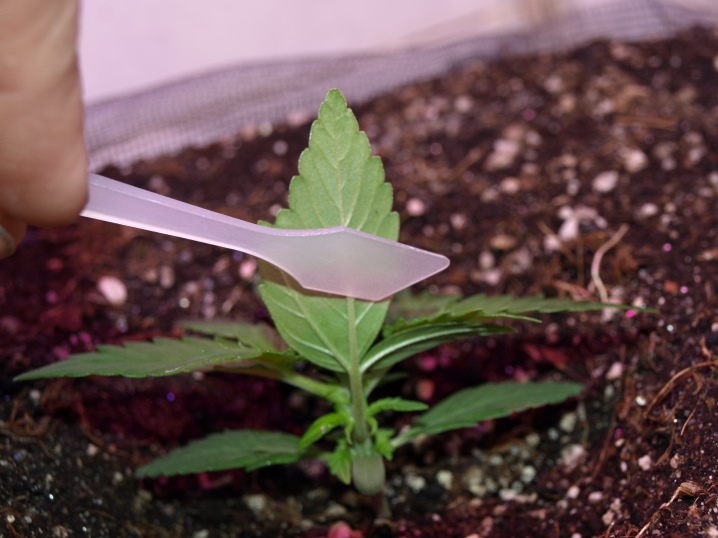
Features of cuttings.
- Choose a strong lateral shoot that has 2 or 3 pairs of leaves. The lower leaves should be removed.
- Cut the stalk at the bottom with a knife at an angle of 45 degrees. The cut must be made half a centimeter below the knot.
- All other leaves need to be cut in half. The upper part of the cutting is cut at 90 degrees.
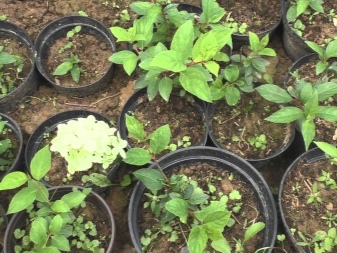
- For rooting, take plastic containers with holes, the containers are filled with a composition of sand and peat soil 1 to 2.
- The soil is watered, the cuttings are dusted with Kornevin, or you can soak the slices in Epin.
- Cuttings are planted in the ground 3 cm deep, the interval between plantings is 5 cm.
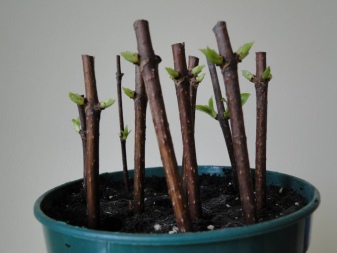
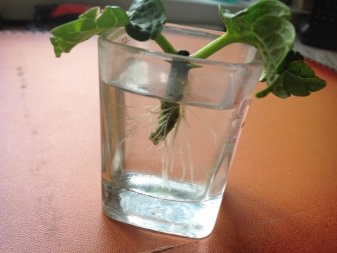
Spray the planted cuttings with water from a spray bottle, cover them with something transparent, cap-shaped. Wipe off condensation with cloths. Water the cuttings at least once a week, place a container with them in a shady area. In about a month, roots will appear, leaves will begin to develop.
Cuttings will take root by mid-August, after which they are transplanted to a new place. Do not forget to cover the shrubbery for the winter so that frosts do not threaten young roots.
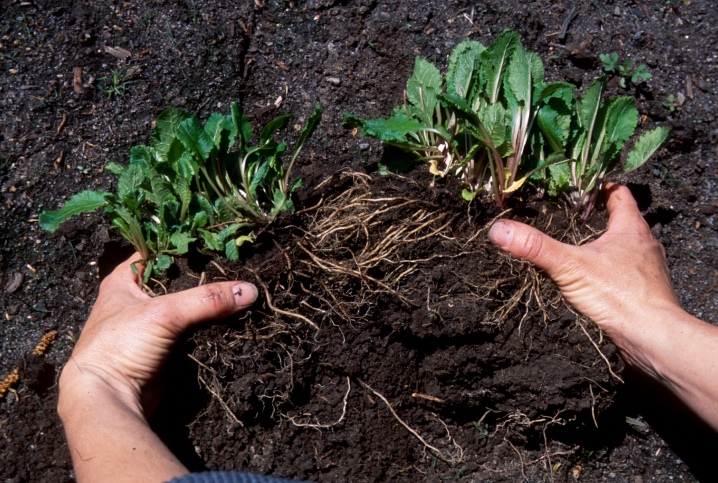
By dividing the bush
To plant a plant, you first need to find a good place. The correct area is the area where the plant will “enjoy” the sun in the morning and evening, and at lunchtime it will be able to hide in partial shade. If you plan to make a flowering border, you need to step back from the paths for the bush to develop.
Process steps.
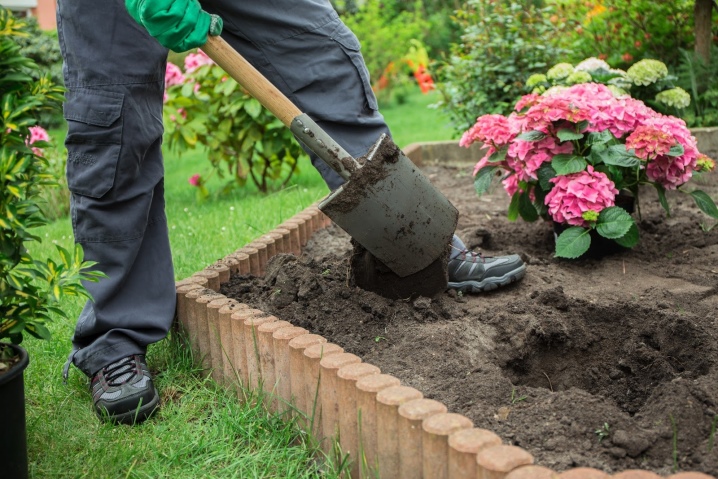
- Dig a hole in the chosen location. Its size will depend on the root system of the delenka (the ideal size is 50/50/50).
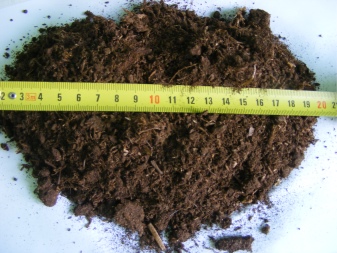
- Prepare the soil - the pH content in it should be equal to 5. Brown peat is optimal for the soil. Experts can advise such a proven soil recipe: 2 parts of garden soil, 2 parts of humus, 1 part of river sand, 1 part of peat. Fill the pit with nutrient.
- The diaphragm must be installed so that its root collar is above the ground. Fill the empty spaces with soil and compact.
- Water the plant abundantly with water. Top up the soil if the soil has subsided after watering.
- Mulch the soil surface with peat and spruce sawdust. Cut off the shoots, leaving a couple of buds on each.
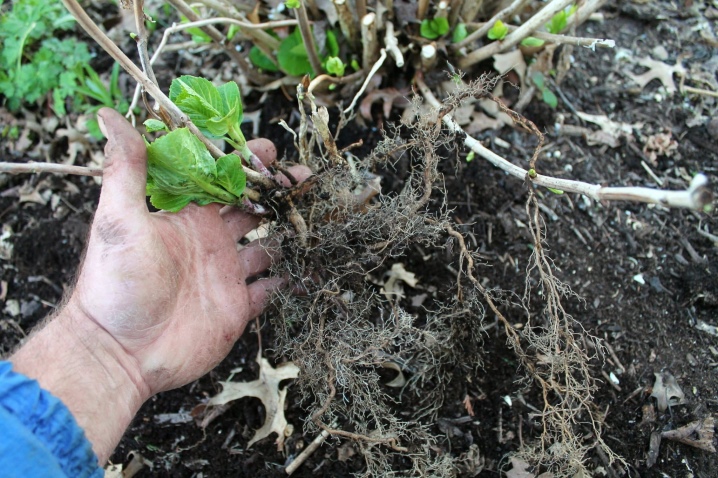
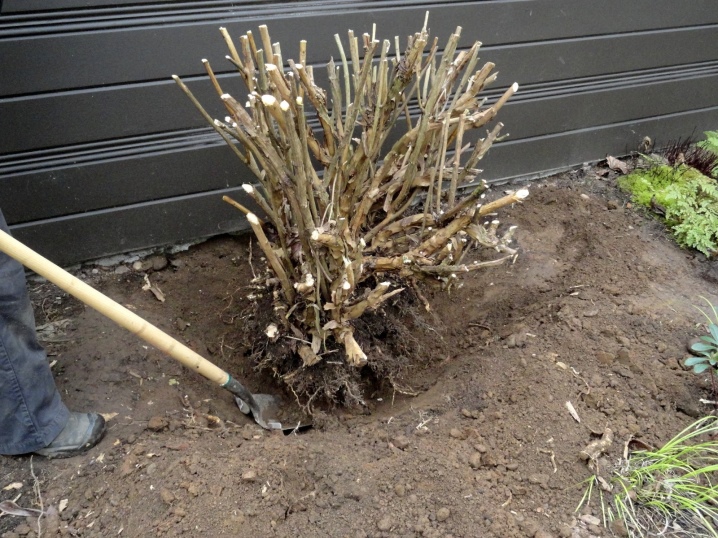
And directly about how to properly divide the bush itself: dig it up and clear it of the earth. Wash the root system in a manganese solution. The bush is divided into divisions with a full root system and 3-5 points of growth.The roots should be trimmed before planting. Sprinkle the cut sites with activated charcoal for disinfection purposes.
Layers
It is customary to propagate hydrangea by layering in early spring, even before bud formation. First, it makes sense to dig up the ground around the bush, then it should be leveled. Next, the grower makes radial grooves 2 cm deep. To prevent the branches from straightening, you will need to pin them with homemade slingshots, and then sprinkle them with earth a little.
In order for the roots to form faster, on the layers in front of the first developed kidney from below, a constriction is made in a couple of turns from a thin coarse wire. By the end of August, several young shoots should have grown on each of the layers. As soon as they grow up to 20 cm, they need to be hilled. Re-hilling should be done after another week. And this should be done until the mound reaches 25 cm.
In October, the layers need to be dug out, and then the formed shoots must be separated from each other. Their height will already reach half a meter. The seedlings should be dug in, and in the spring they can be planted in the garden. Only after a year are they recommended to be planted in their place.
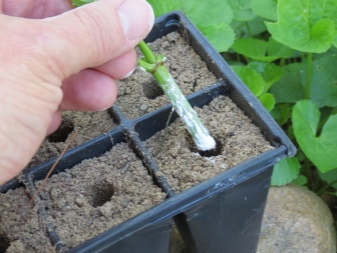
Offspring
This method helps to breed broadleaf and other types of hydrangea with young shoots. The method itself is not bad, but it requires maximum concentration and caution.
Reproduction algorithm.
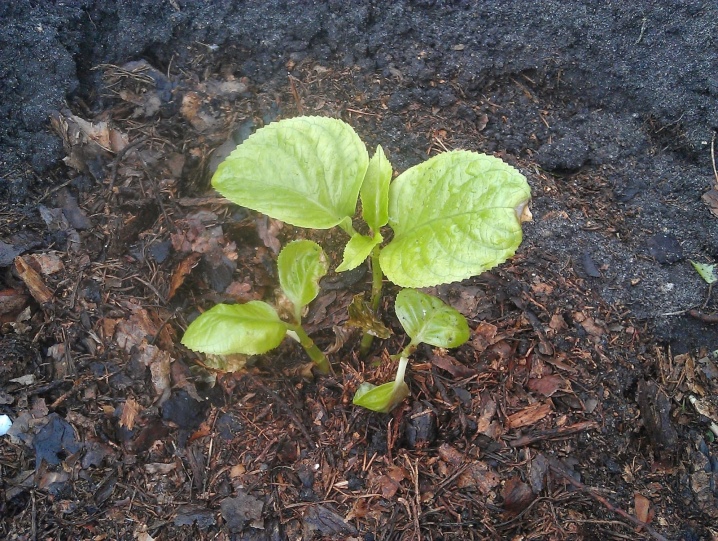
- Next to the hydrangea bush, you need to remove the topsoil so that the roots are bare in this area. Do this carefully so as not to damage the root system.
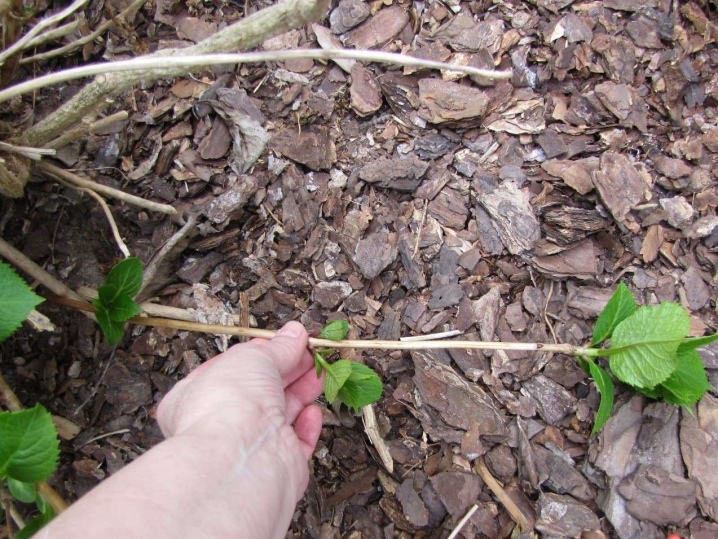
- The coppice shoot should be separated along with the root part. If you identify several such shoots, you will hedge the breeding operation.
- Shoots are immediately planted on the street, in the garden, because they are already adapted to the street environment.
- So the shoots grow in the garden for a year or two, and then they are already determined to permanent places.
Preparation for planting in the ground
Preparation is a serious and multi-component process. Of course, it is extremely important how correctly the permanent place for the bush is chosen. The requirements for choosing a place for landing in the ground are as follows.
- Hydrangea is a moisture-loving plant, but it nevertheless does not accept stagnant moisture. Therefore, swampy places, lowlands, as well as places where groundwater are high, are not suitable for landing.
- The plant requires sunlight, but soft and dosed. More sunny places of hydrangea are needed only in the Urals, in Siberia, in the Leningrad region.
- The area where hydrangeas grow should also be sheltered from cold and strong winds. But normal air circulation remains an important requirement for choosing a location for a hydrangea.
- Hydrangea needs a nutritious, loose and sufficiently moisture-absorbing soil with a weakly acidic reaction. Clay soils and soils with an alkaline reaction will not work.
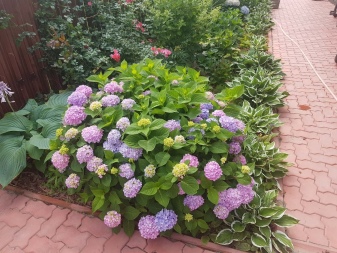
- Of course, consider the "neighbors" as well. The hydrangea, adjacent to astilba, boxwood, hosta, looks great. These three combinations have already become classics of landscape design. But you should not plant a hydrangea next to other trees and shrubs that have a shallow root system. Plants will oppress each other.

Always prepare the site and the landing pit in advance. This can be done in advance in the fall or a month before disembarkation. The root system of the hydrangea is such that careful preparation of the site is needed both in breadth and in depth. If you decide to plant several shrub seedlings at once, then maintain a distance of 1 m between the bushes, or better - 1.5 m.If you plant a shrub to form a hedge, maintain a gap of 70 cm.
Clean the landing site itself of debris, roots, weeds and stones. Ideally, if you dig up the soil along with the high-moor peat, and then loosen it with a rake.
It makes sense to fertilize the pit with organic matter and minerals. Refueling for the pit can be as follows:
- high-moor peat (sour) - 1 share;
- compost - 1 share;
- urea - 15 g;
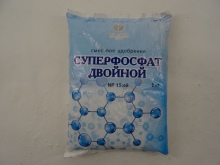
- superphosphate - 60 g;
- potassium sulfate - 25 g.


All this must be thoroughly mixed.
If you don't have to choose the soil, and you are forced to plant the hydrangea in heavy, clayey, almost infertile soil, the pit will have to be prepared with special responsibility. The bottom of the pit should be laid out with coniferous litter or rotted needles in the form of sawdust. Further, 2/3 the pit is filled with the following composition:
- 2 shares of leafy land;
- 2 shares of humus;
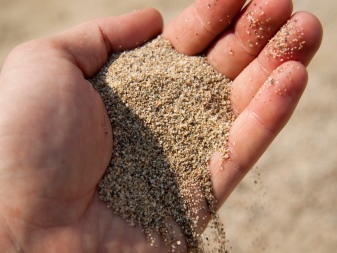
- 1 share of river sand;
- 1 share of sour high-moor peat.
When the pit is ready, it must be well shed, so that the soil is a donkey.

The seedlings themselves need to be prepared, but this is easier: only material with an open root system is prepared. Before planting, soak the roots of the seedling in a solution of any high-quality root formation stimulator (the same "Kornevin" or analogs).
And then the process of caring for the plant begins. By the way, in Japan, the hydrangea is called "yearning for water", therefore, the flower responds to watering... Once a week, or a little less often, pour several buckets of water directly under the root of the shrub, so you can control the required moisture in the soil.
If, after successful reproduction (by any of the above methods) and successful planting in the soil, you still did not wait for the hydrangea to bloom, then mistakes were made. Flowering may not occur due to a lack of nitrogen in the land, due to improper pruning or preparation for wintering, finally, due to too bright lighting.

Growing hydrangeas is not the easiest, but enjoyable and multi-step process. You should not give up growing this beautiful shrub, even if you have not yet acquired a plot and a house on it. Try to grow a hydrangea on the balcony, and then by the time the plant is planted in the ground, you will be ready for the process of independent reproduction not only mentally, but also informationally.
3 easy ways to propagate hydrangea in the video below.


The comment was sent successfully.