Laying paving slabs on a concrete base
Paving stones are the best material for arranging playgrounds, city streets and garden paths. From the material in this article, you will learn how to properly lay it on concrete with your own hands. We will consider in detail step by step the stages of installation on pillows from different compositions.
Technology features
Laying paving slabs on concrete is a guarantee of the quality of the roadway. The concrete base is stable and durable. Unlike other structures, it is inert to atmospheric influences and does not sag at maximum weight loads.
This technology is used for reasons of practicality. It is in demand if you need to lay tiles on an area with unstable soil. For example, this is true when the soil on the site or in the courtyard of a private house is shrinking or heaving in the place of masonry.
A distinctive characteristic of the method of laying paving stones on concrete is the creation of a perfectly flat surface with a strict geometry. Other key technology drivers include:
- resistance to deformation during many years of operation;
- increased frost resistance, subject to installation rules;
- shrinkage resistance, maximum fixation of all elements;
- acceptable cost of material and optimal installation time;
- labor intensity of work in comparison with sand and cement-sand cushion;
- insufficient drainage of water and moisture, the need for a comprehensive drainage system;
- problematic dismantling in case of damage to the elements of the finished cladding.


Unlike other substrates, laying on concrete is immovable. Such paving is recommended for the arrangement of car parks, sidewalks within the city, as well as access roads. This scheme of laying is resorted to when the site is located near the quarries, in places where there is no possibility of dismantling the material.
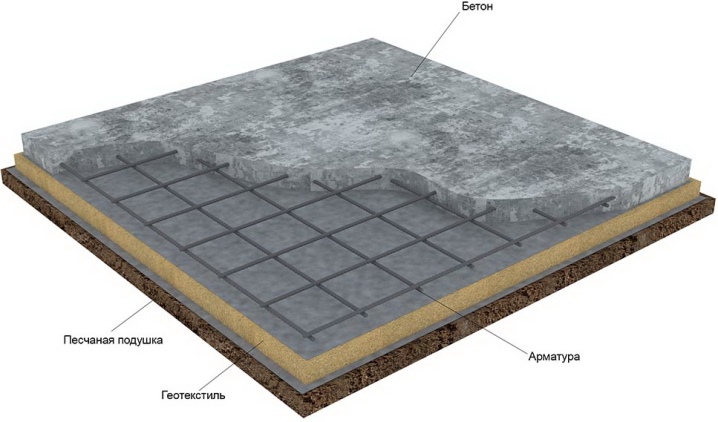
Installation technology involves careful preparation of the foundation, leveling the surface, creating a concrete screed using reinforcing structures. The reliability and durability of all the work performed depends on the foundation and compliance with the laying rules. In this case, the foundation is fulfilled according to certain requirements.
Requirements for a concrete base
It is necessary to install paving slabs on a fully formed surface. All work on the removal of vegetation cover, soil compaction, planning is carried out in accordance with the requirements of SNiP 3.02.01-87. The key norm is the creation of a basic level surface.
In addition, it is necessary to observe the slope, which in the end should be at least 1.5 cm for every 3 m of the track length in the direction of the slope of the surface. The substrate to be prepared must be compacted. For these purposes, a special technique is used, not forgetting about the timely moistening of individual layers of the base being equipped.
- Each base layer has its own thickness standards and compaction coefficients. According to the regulations, the compacted sand must be sanitized (treated with sterilizing special means).
- When arranging the base for pouring concrete, waterproofing should be laid. The density of the separating layer should be at least 120-150 microns. In the absence of geotextiles, a dense polyethylene film with a minimum overlap of 15-20 cm should be used.
- According to the requirements of SNiP, it is necessary to use a concrete mixture of class B15 in the work. In this case, the optimal thickness of the concrete layer should be at least 15 cm.
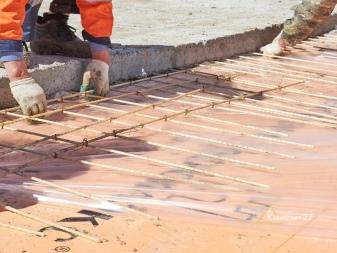
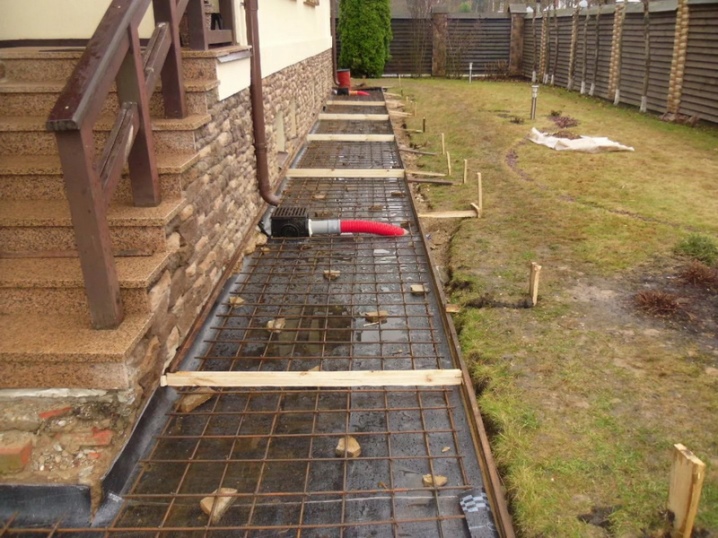
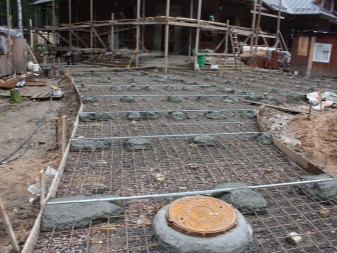
- For reinforcement purposes, it is necessary to use reinforcement. The minimum reinforcement assumes the use of a network with a wire diameter of 5 mm and cells of 15x15 cm. If the technology allows the replacement of reinforcement, metal fiber is added to the concrete (using fiber-reinforced concrete).
- Concrete aggregates can be washed and fractionated. In this case, the grain size should not exceed 2.5 cm. There should be no foreign inclusions on the surface layer of concrete. Its moisture content should not exceed 5%.
- The width of the expansion joints in the middle of the courts should be 2.5 cm. They are filled according to building codes. To reduce surface stress, they are engaged in cutting concrete into cards with a shrinkage seam.
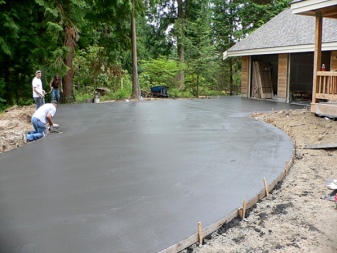
- Installation work is carried out in dry weather at a temperature not lower than +5 degrees Celsius. Within 7-10 days from the beginning of concrete hardening, the surface is protected from precipitation and moisture loss. Further, the optimal mode is maintained for increasing the strength of the base.
- The evenness of the surface is controlled by means of a long 3-meter rail or a rule. The standards allow a slight deviation: no more than 3 mm for every 3 m of length in any direction.
The drainage design is determined for each specific project on an individual basis. Drainage is a prerequisite for high-quality foundation preparation. This is necessary not only to remove moisture, but also to prevent soil erosion at the place where the tiles are laid. Waterproofing prevents water from entering from below.
The base should be near perfect. The quality of laying and joining depends on this. Distortions and inconsistencies of tiles are excluded. All prepared base layers must be stable and stable.
Preparation of materials and tools
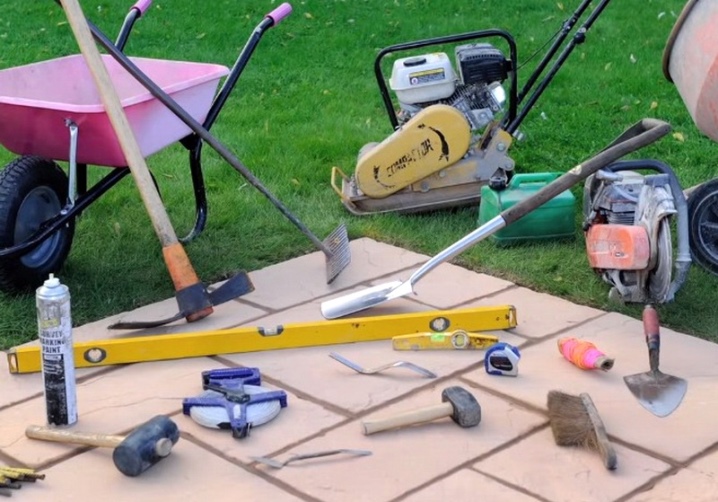
In order to lay out paving slabs with high quality and properly prepare the base, it is necessary to purchase tools and consumables:
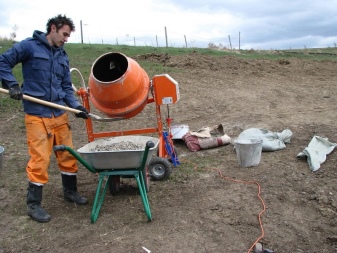
- concrete mixer;
- sand;
- crushed stone;
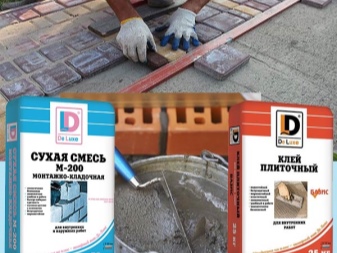
- cement (preferably M500);
- building level;
- tamping machine;
- stakes and marking cord;
- rubber mallet;
- broom, rake;
- watering can (watering hose).
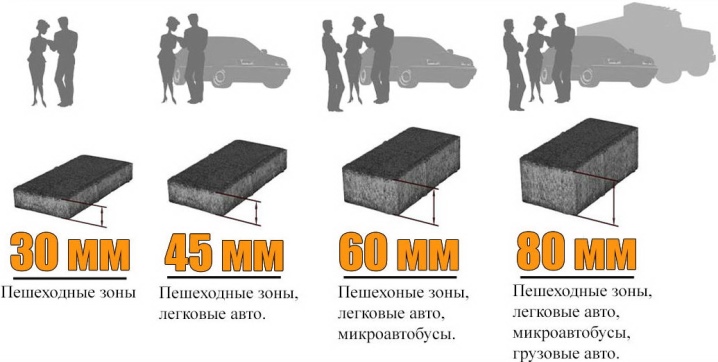
In addition, you need to prepare the paving stones. The material must have at least 200 freezing cycles, strength over 30 MPa, water absorption up to 5%, abrasion up to 0.7 g / cm2. The thickness of the paving stone is selected based on the type of planned loads.
If you decide to equip a garden path or sidewalk, you should take a material with a thickness of 3 cm (thin tiles). If it is necessary to lay out a stone where a passenger car will drive on it, it is better to take 5 cm thick paving stones. 8 cm thick tiles are taken for arranging roads in places where heavy vehicles are moving.
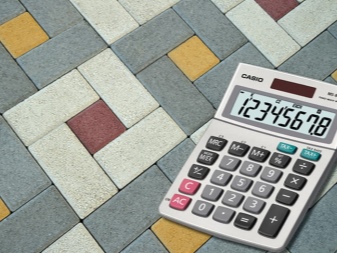
The calculation of the required number of tiles depends on the size of the laying area, the parameters of the tile modules, the size of the butt joints. Professionals do the calculations pretty quickly. For beginners, it is easier to turn to online calculators that determine the exact amount of raw materials required.
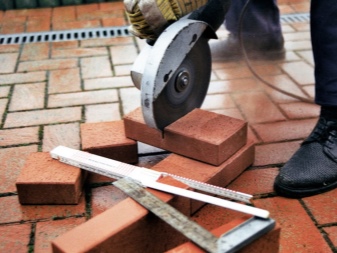
However, such calculations do not take into account the pattern of the cladding and the peculiarities of the shape of the paving. To simplify the work and achieve the identity of the joint joints, it is worth buying a package of crosses for laying tiles. For pruning, you can use a grinder.
In order not to be mistaken with the choice, you need to order facing raw materials with a small stock (up to 10-15%). The required quantity can be checked with the seller. Specialized stores have special calculation programs. The stock is taken for trimming blocks along the edges, damage during transportation and replacement of elements in case of accidental damage.
Step-by-step installation instructions
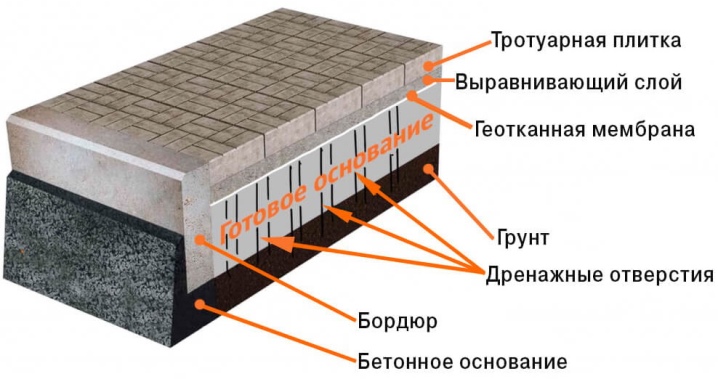
Initially, they are engaged in preparatory work. To make the base according to all the rules, you need to create a base for concrete pouring. In other words, a so-called layer cake is constructed from several layers of different materials.
Preparatory work
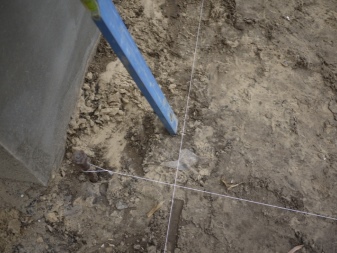
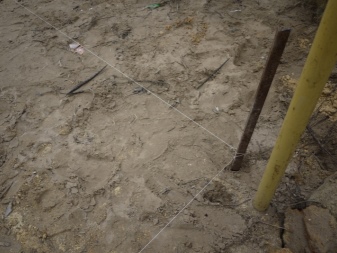
First, the required area is marked, analyzing its characteristics (strength, slope angles, soil moisture). After that, the necessary tools and materials are purchased. Having chosen the boundaries of the paving, stakes are driven into the ground. A rope (twine) is pulled over them, marking the boundaries of the future masonry.
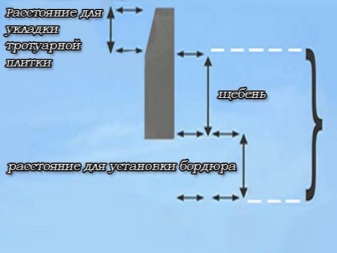
Laying paving slabs involves the creation of a foundation pit. To do this, after marking, they are engaged in excavation. The depth of the trench is at least 25-30 cm. In addition, when marking, the ground is freed in places behind the rope by a couple of centimeters. In the future, this will come in handy for installing curbs.
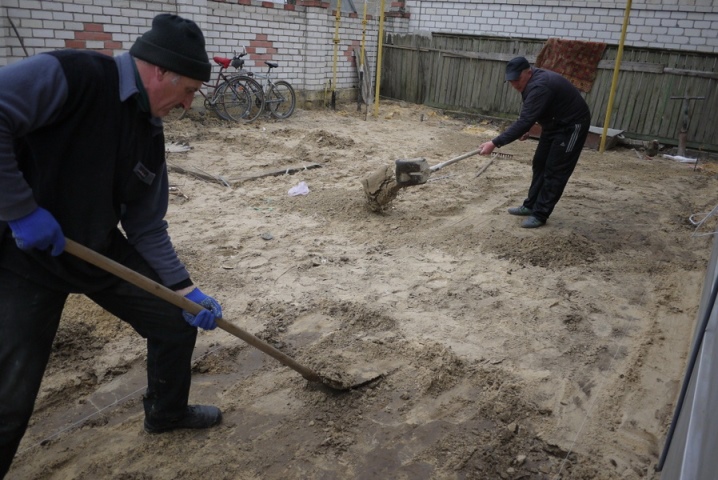
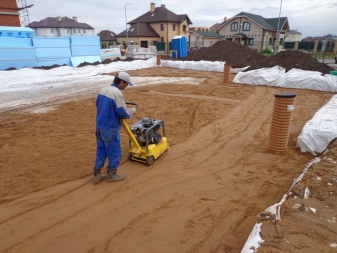
The bottom and sides of the dug pit are cleaned of roots, weeds and pebbles. Remove all foreign objects that can cause deformation of the base under load. The bottom layer of soil is leveled with a rake. After that, the surface is moistened with water (spilled from a hose) in order to prevent soil subsidence.
To seal the bottom, you can use a manual or pneumatic rammer and water. Wait until the soil is completely dry before continuing to work.

It is important to remove the entire fertile loose soil layer, since it does not compact, and the compaction of each layer is a prerequisite for the preparation of a high-quality and reliable foundation.
Drainage pad and waterproofing
Regardless of the type of concrete pad used, drainage is carried out in the preparation of the base. A typical procedure requires the creation of two layers: sand and crushed stone. First, a layer of sand is poured onto the rammed bottom, the thickness of which is about 5-10 cm. It is leveled taking into account the required slope of the surface, compacted with water.
After that, a layer of crushed stone 10-15 cm thick is poured over the sand. It is also rammed in compliance with the slope of the surface. The size of the stones should not be too small or, on the contrary, large. If the crushed stone is large, it will sag over time, which will lead to deformation of the base.
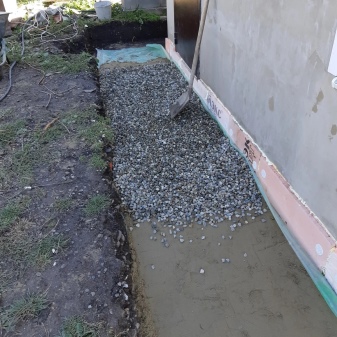
The ramming of crushed stone must be careful: waterproofing will be laid on top of it. The material can tear on the sharp edges of the stones, so they need to be well aligned. A cushion of sand and gravel should sit for a couple of days. After that, you can continue to work.

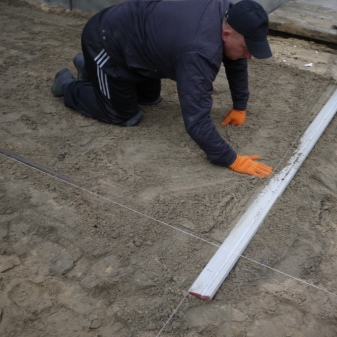
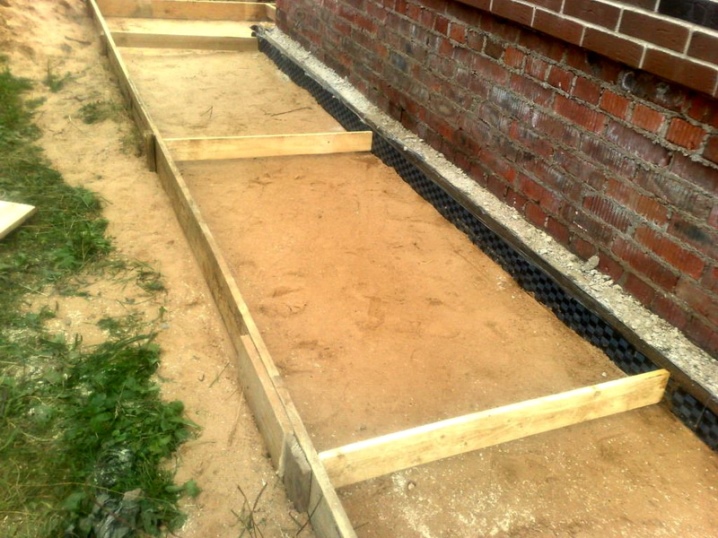
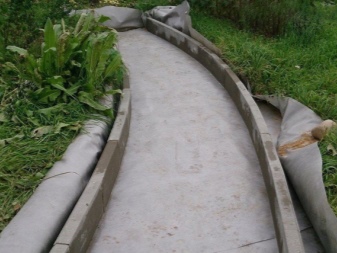
It is necessary to build a formwork, which will further fix the installation, preventing its shift and curvature. To create it, use wooden boards with a thickness of at least 4 cm. The formwork is secured with hammered stakes in increments of no more than 1 m. After creating the box, they begin to lay the waterproofing.
Waterproofing will protect the concrete base from groundwater and ensure optimal hydration of the cement. It keeps the germination of weeds, maintains the integrity of the base for a long time. After that, a layer of crushed stone is poured on top. It is leveled and compacted, preparing the base for reinforcement.
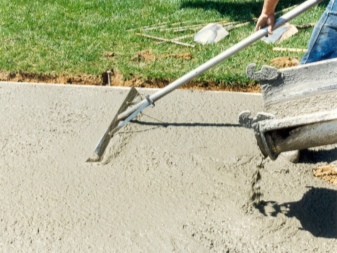
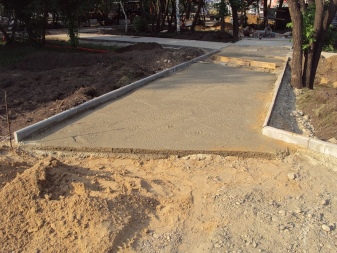
Pouring concrete
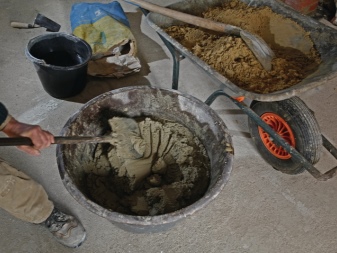
The next stage of work is the preparation of a concrete solution. The recipe and ratio of components for 300 kg of cement are as follows:
- sifted sand - 600-700 kg;
- crushed stone or small gravel - 1000-1100 kg;
- water - no more than 180 liters.

In addition, a plasticizer is included in the mixture, which is necessary to impart elasticity to the solution.
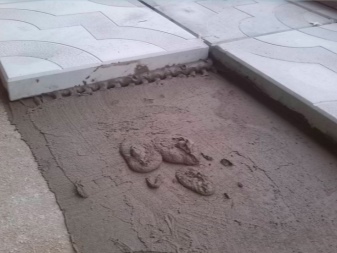
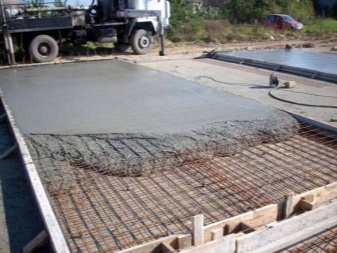
After stirring the composition to homogeneity, concrete is poured onto the bottom of the trench with a layer of 3-5 cm.In the future, a reinforcing mesh is placed on it, which is poured with a second layer of concrete up to 10 cm thick.
If it is necessary to strengthen a monolithic slab, make a grating in 2 tiers. Metal corners are placed under the reinforcement. The frame is placed in the middle of the reinforced concrete slab.
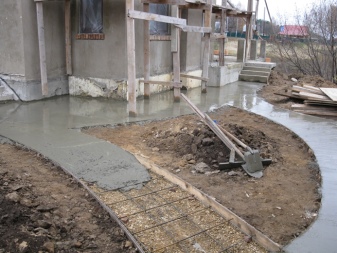
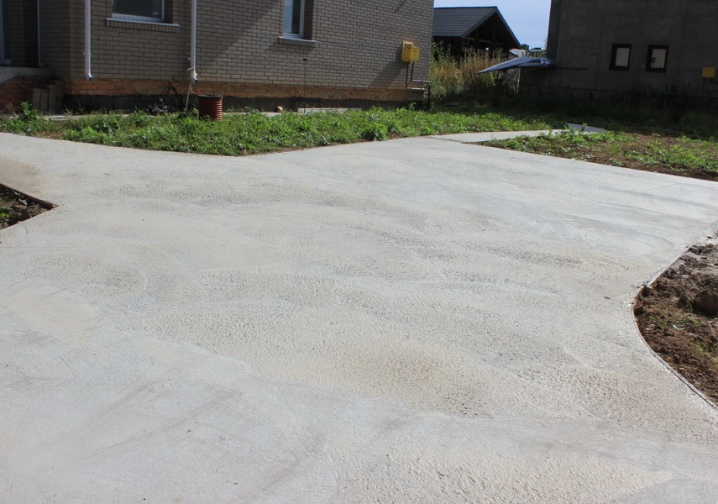
If the paving area is large, the area must be divided into zones. The boundaries of each of them are wooden boards of the required thickness. The seams between them are subsequently sealed with bituminous mastic.After the final pouring, it is necessary to wait until the base is completely dry.
When pouring, make sure that the level of the fill does not reach the surface of the earth. The top layer of concrete is leveled by the rule, not forgetting about the slope for the drain.
It is necessary to pour the concrete mixture without the formation of voids and cold seams, which reduce the strength of the formwork.
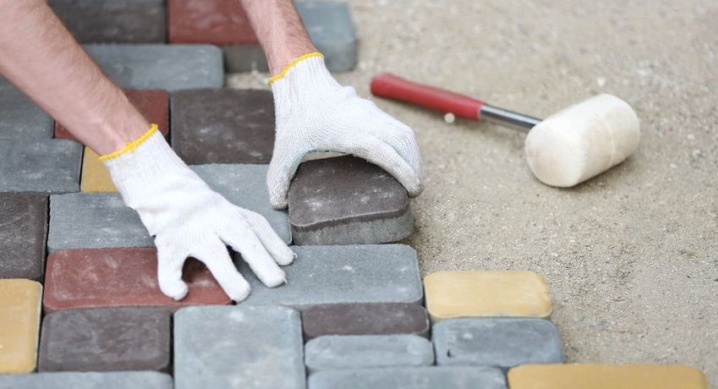
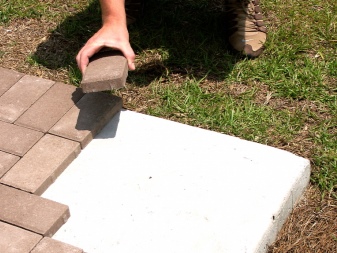
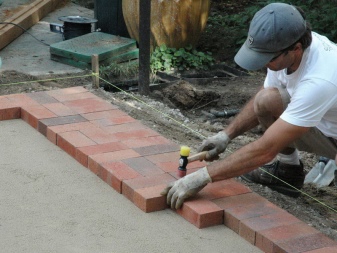
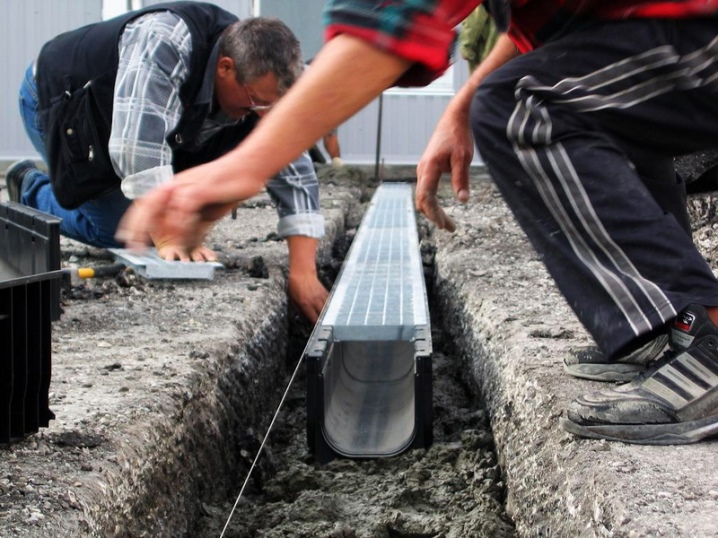
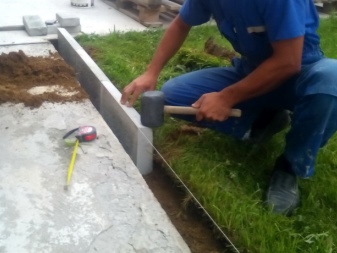
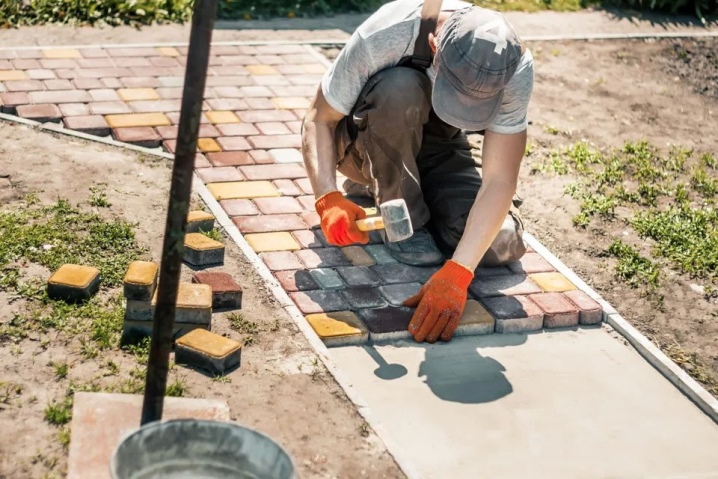
The installation of the curbs is done after the concrete is poured. They are mounted after dismantling the formwork, placed in the remaining recess and poured with hard concrete. A rubber mallet is used to seal the stone. If, during installation, small gaps form between the curb elements, they are poured with liquid concrete.
You can also put a border on the laid markings, focusing on the stretched threads. In this case, a trench with the width of a curbstone is dug along them. Its bottom is leveled and tamped; crushed stone is added if necessary.
Then a sand-concrete mixture is poured on the bottom. At the end of the pouring, stones are immersed in the solution. Then they are compacted, the position is leveled. The curb is set with the mortar in about a day. After this time, the voids between the stones and the ground are filled up and rammed.
After that, you can proceed to further work and lay the plates themselves. The curbs are immersed in the trench about half the height. Stones help to protect tiles from damage during use. According to the technical requirements, the height of the curb should be slightly lower than the height of the paving stone. This is necessary for optimal drainage from the cladding surface.

The further type of work depends on the weight load on the pavement. If a driveway for trucks is equipped with building materials, the paving stones are attached to glue or cement. When the load is less, use the technology with a sand-cement pad.
For sand-cement mortar
It is not difficult to lay paving slabs on a sand-cement mortar. The technology is quite simple and allows you to achieve high quality paving.
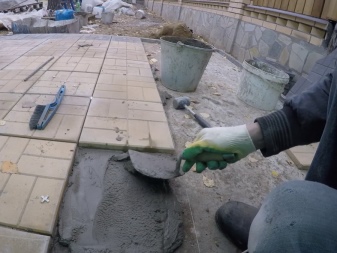
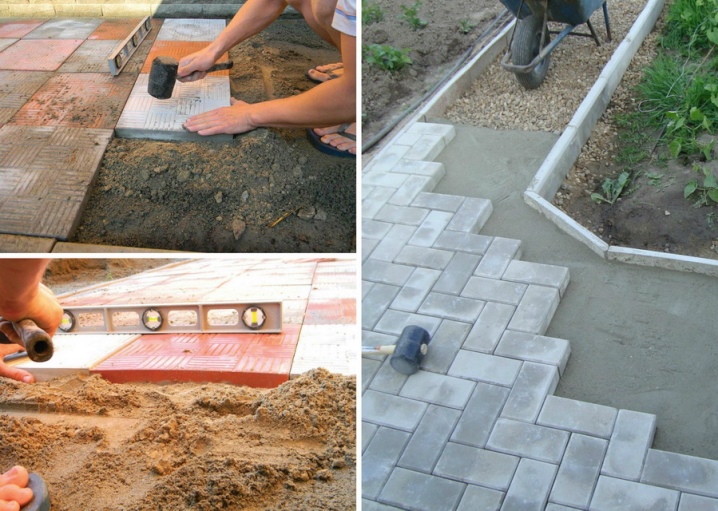
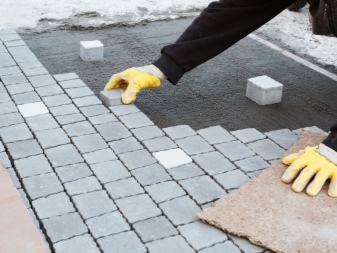
The sand is combined with cement, the solution is kneaded, then applied in the reach of the hands and leveled with a notched trowel. Then the tiles are laid.
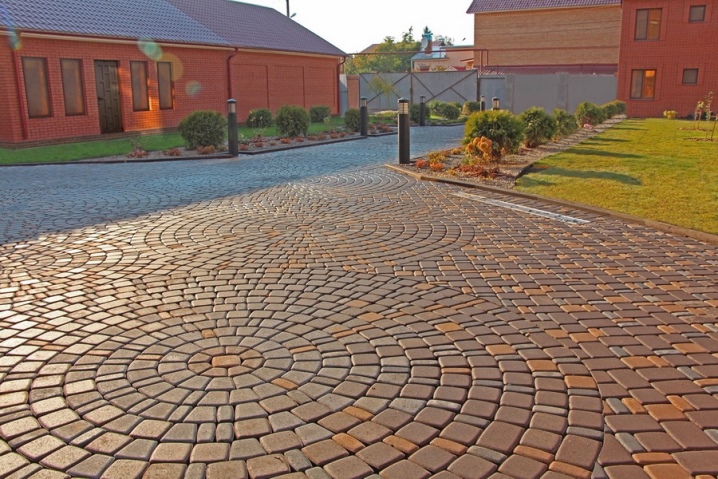
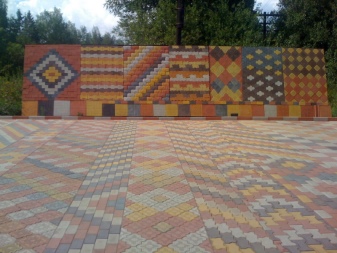
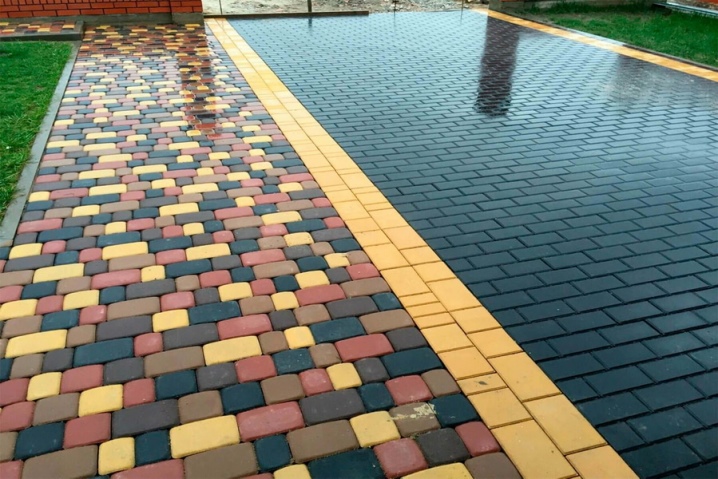
The drawing can be laid out with plates of one or different colors. To make it look beautiful, the design is planned even before the purchase of the cladding. The number of blocks of different colors, their position, symmetry about the center are taken into account.
Cement mortar is a reliable base for laying. In this case, the seams are allowed to be processed by rolling with thorough moistening. The installation method is the same as for conventional ceramic floor cladding. It is imperative to wash out residual cement and sand.
On glue
You can glue the boards on glue with a polymer or cement base. When choosing a suitable option, the frost resistance class of the composition and its elasticity are taken into account. The higher it is, the better the glue cushioning and the better the base cushion cushion.
The technique is similar to laying tiles and mortar. Glue is applied to the base and the element itself, distribute it over the surface, after which the module is put in place with some indentation into the adhesive.
Adhesives dry very quickly due to the short life cycle of the diluted solution. Therefore, they have to be kneaded in small portions. This is the material of specialists, it is easier for beginners to work with a cement-sand mixture.
The composition is applied to the concrete screed with a thin layer (no more than 1 cm). After that, the tiles are laid using plastic crosses for the identity of the seams. At the edges, the modules are cut with a grinder. At the end of the work, the seams are treated with glue or glue.

For dry mixes
The cladding scheme according to this technique is somewhat different. When using dry mixes, after the preparation and pouring of the concrete screed, dry material is poured onto the dry base. The average layer thickness is 3-5 cm. The mixture is distributed over the base by means of a rule, level the layer.
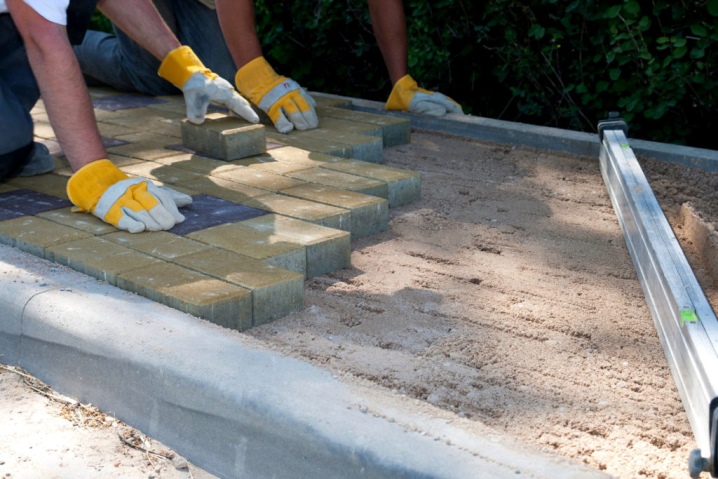
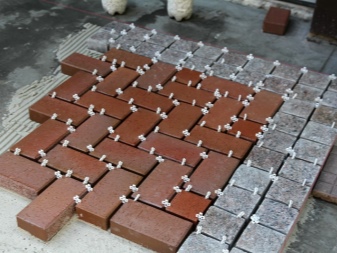
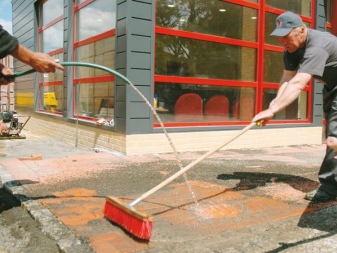
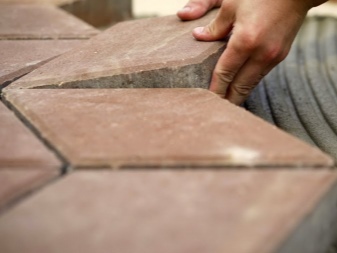
After that, they begin to install the paving slabs.Laying is carried out according to the selected pattern. Typical patterns are herringbone, braid, diagonal, and checkerboard patterns. At the end of the work, the entire coating is spilled with water. This will secure the elements to the base and to each other.
After the coating is dry, they are engaged in sealing the seams. To do this, they are filled with a dry mixture and spilled again. After 2-3 days, the composition finally solidifies. It remains to remove the remaining debris, get rid of dust and spill the sidewalk under the strong pressure of water.
Elimination of possible problems
In order to avoid mistakes at various stages of installation, you need to pay attention to several nuances.
- The dimensions of the track and platform are selected in such a way that solid slabs are laid between the edges. This will reduce waste and waste on building materials.
- Cutting paving stones is best done with a grinder with a disc designed for stone surfaces. You need to cut the bars correctly: first by notching, and then by chipping. A mark must be made before cutting.
- If you do not have a lot of experience working with building mixtures, you should not mix a lot at once. Working solutions (especially adhesive) have a short life cycle. When it runs out, the glue loses its best qualities, which can affect the durability of the finished lining.
- Compliance with installation technology is a key factor in the work. If the base is not properly prepared, deformation and subsidence of concrete is not excluded.
- In order for the tile to look monolithic, during installation, it is necessary to ensure that it is immersed in the pillow at the same level. In this case, if necessary, you need to trim the blocks until they grab.
- Expired formulations must not be used in the work. After the expiration date, they lose their properties. In this case, you should not count on the durability of the sidewalk.
- Laying tiles on concrete without a slope is fraught with stagnant water. If the joints are not properly treated, water will flow through the joints and accumulate between the block and the concrete. As a result, the coating will move away from the base.
- Usually, the seams are sealed with the material of the cushion used. This grout prevents plant growth and prevents water from flowing through the joints to the base. You can rub the seams with a hydrophobic compound.
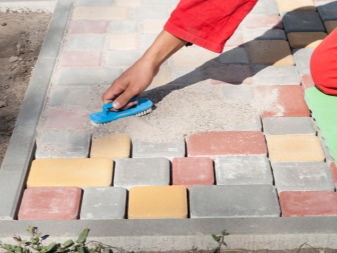
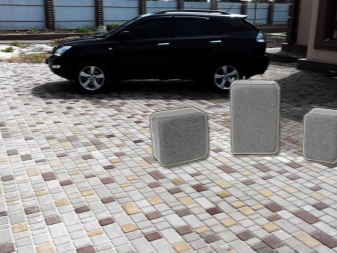
When laying tiles, in addition to practicality, one should not forget about the decorativeness of the coating. Modules welcome some kind of randomness. If paving stones with different shades of the same color are being laid, stain formation should be avoided. Clusters of tiled elements of the same tone against the general background do not look beautiful.
In order not to doubt the color of the material, you need to purchase it from one batch. So the coating will look monolithic and status. If a stone of different sizes and colors is used in the work, the different tones of the stone are not so noticeable. As for the pattern, it all depends on the skills of styling and the pattern of the pattern, as well as the amount of purchased raw materials.
When working with an old concrete base, before laying, inspect the base, clean it from collected debris, chips. Such a base is first putty and rid of irregularities, and areas of significant damage are removed. Only after that a pillow is put on it, and then the tile itself.

For information on how to lay paving slabs on a concrete base, see the next video.


The comment was sent successfully.