Rules and technology for laying paving slabs

Even non-professionals can lay paving slabs. Any newcomer, having watched how specially trained workers work, makes successful attempts to create something of their own - from what the production of building materials in the 21st century offers.

Peculiarities
According to GOST, paving slabs must withstand a certain permissible level of load. This load can be pedestrians, special equipment, cars, demountable structures, for example, a podium on the occasion of the next holiday. Paving slabs should ideally last for several decades before being replaced with a new one.
The ratio of cement and other building materials when creating an artificial stone is determined by the difference in the tasks assigned to the stackers.
According to SNiP, the construction of sidewalks and pavements is based on certain standards. You cannot lay the tiles directly on the ground - the very first heave will turn the sidewalk into an indistinct pile of artificial stone. Grass should not grow through the tiles - the soil should be insulated with a technological coating (layer) impermeable to weeds so that it does not spoil the appearance, the view of the sidewalk, yard, driveway. The spread of the newly laid path threatens to turn into not just a spoiled appearance of the site or the surface of the approach / access road, but also certain inconveniences when parking, exiting and entering cars, passing pedestrians, the difficulty of arranging landscape planting of trees and shrubs, front gardens and flower beds.
Tools and materials
The master will need the following tools as tools:
- measuring tape (folding ruler of tape type);
- building level (liquid, hose hydraulic level or laser);
- rubber mallet or wooden mallet;
- grinder with a set of cutting discs for stone;
- mobile mini-concrete mixer (works on the basis of an electric drive), bayonet and shovels, buckets;
- the rule is - the longer, the better (try to get at least one meter);
- beacon guides (you can also use an ordinary professional iron, for example, a square professional pipe);
- bump stop.
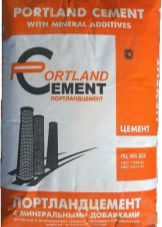
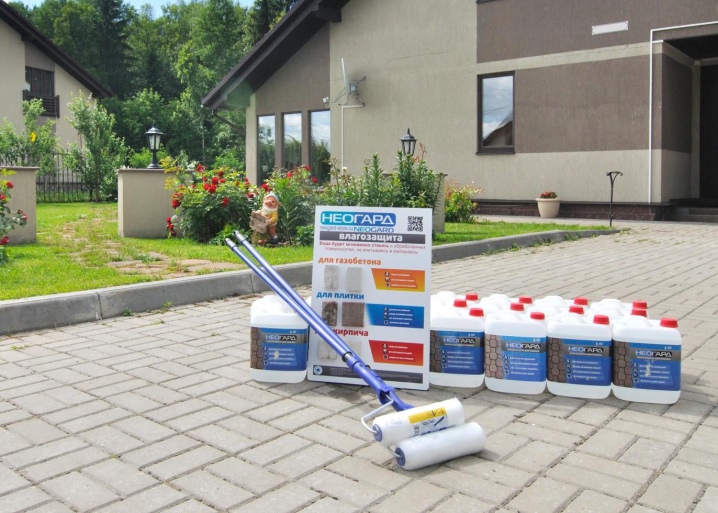
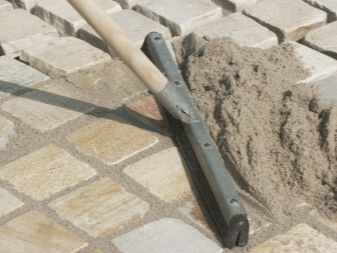
In addition to tiles, the following are used as building materials: geotextiles, crushed stone of a standard fraction (about 10-22 mm per pebble), cement (grade not lower than M-400), frost-resistant glue (glue grout), quarry sand (seeded), curbstone (the required number of pieces of the required dimensions - according to the calculated estimate).

How to markup?
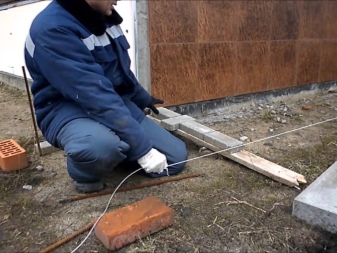
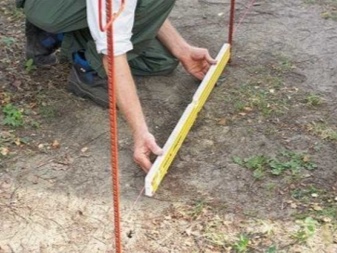
The plan of your house and the entire backyard area provides for the placement of sidewalk coverage in the yard, paths at the summer cottage. Mark and drive in reinforcing or wooden pegs in all corners, from which the area laid out with tiles is highlighted. Having double-checked, having consulted the plan, pull the fishing line between them: now you have a visual reference point along which you will lay out the courtyard, blind area and paths with tiles.
For better visibility, use colored fishing line - for example, against a dark, brown background, white, with a reflective texture, will do. Place the checkboxes - this will allow in the process of work not to deviate from the set plan.
The rules for laying tiled flooring in the courtyard of a private or apartment building provide for all the same stages as in the case of laying approach paths in a park, on a city square, near a building of a municipal or private object of public importance, etc.
Excavation
Having marked out a part of the house plot, mow out all the vegetation and remove the soddy fertile soil layer to a depth of about 30 cm.If you eliminate the old covering - paths, sites - then completely remove and take out the old, cracked building material (for example, it can be paved stone or concrete covering ). So, if ready-made slabs were used as the old material, then to facilitate their dismantling, break these fragments into pieces with a bump stop. A powerful (from 2 kilowatts) perforator is sometimes used as a chipper, but if the volume of dismantling work is impressive, it is better to call “chippers” who work on professional jackhammers. After clearing, leveling and deepening the niche for the new site and / or paths, proceed with the arrangement of the drainage.


Drainage device
Arrangement of a drainage system in a garden or summer cottage includes the following steps.
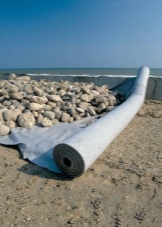
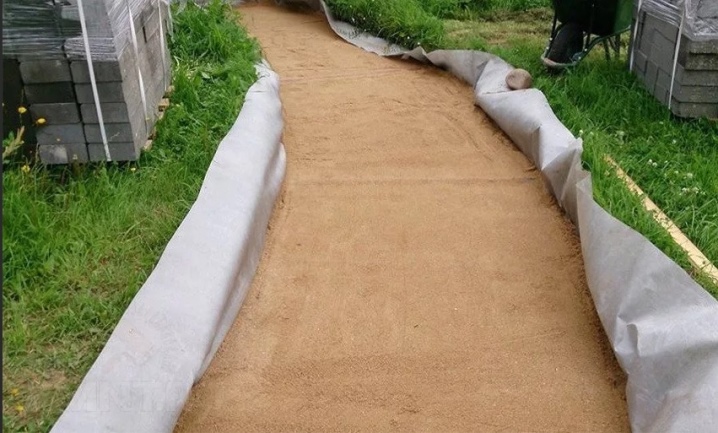
- Lay down geotextile... It allows water to pass through, but prevents the growth of roots of weeds, which often go 50-60 cm deep into the ground.
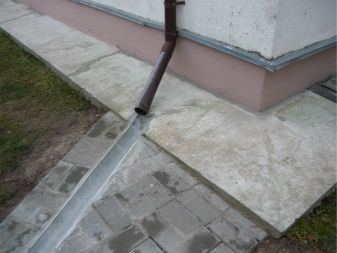
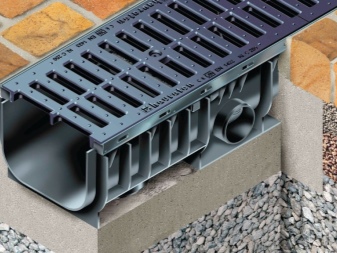
- Select a location for the waste (technological) channels. This is a kind of storm drain: a drain from the roofs of a house and outbuildings. As a rule, they are located either along the edges (near the curbs) of the site and paths, blind areas, and in some places they can intersect the erected tile covering, approaching the drainpipes (or one pipe).
Channels for rainwater drainage can be either external - they look like a longitudinal bowl-shaped component with a bottom rounded in the center, or they can be poured into the base on their own, have a strictly rectangular shape and overlap from above with drainage grates that coincide in length and width with the drainage channel itself. The second option is the most capacious - it will not overflow even with a shower.
If the concrete is used as strong as possible, with iron (sprinkling with a small amount of cement and smoothing it to the damp, not hardened concrete solution), then such a channel will last much longer than the finished tiled "hollow", since it was made by the master himself, and not purchased as a workpiece, about the quality of which not everything is known.
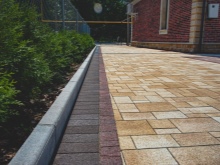
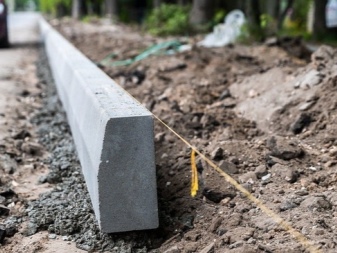
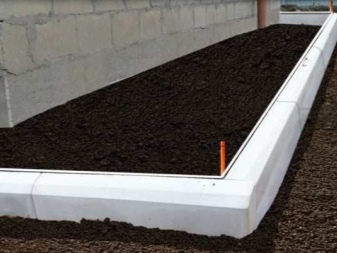
Installation of curbs
T. n. The "curb" is made of ordinary curb stone. That, in turn, according to GOST, is made of high-strength concrete grade M450 / M500. It is installed as follows.
- In the place of installation of the curb, formwork is placed. Its width is at least twice the width of the curbstone.
- Waterproofing (thick-film polyethylene or roofing felt) is placed inside the formwork. That is, the formwork must be completely lined with it. This will allow, when the boards rot in 5 ... 10 years, reliably waterproof the concrete base.
- The first layer of concrete is poured - for example, 15 cm in height (relative to the formwork).
- After waiting for this layer to set, the craftsmen carefully lay and line up (along the stretched fishing line) curb stones in rows.
- Having double-checked the evenness of their relative position, the craftsmen will add concrete to fill the remaining unoccupied space within the formwork. It is carefully shaken with the help of trowels, achieving evenness of spreading.
- The evenness of the interposition of the curb stones is re-checked. If there is a displacement, then the stones are pushed, corrected, putting them in place (according to the project).
- After waiting until the concrete begins to harden (1.5 ... 2 subsequent hours), the poured concrete is "ironed" using a narrow spatula or trowel.
- After waiting for the concrete to fully set, in order to build the strength of the base, they begin to water the "curb" structure poured the day before.Watering takes at least 30 calendar days - in the heat, the structure is filled with water every hour or three, in the off-season - less often. If at this time a period of frequent, prolonged rains begins, then the concrete around the curb will gain maximum strength.
- Next, the formwork boards are removed - from the inside of the future site or path.
"Curb" is completely ready. Let's move on to the next stage.
Base options
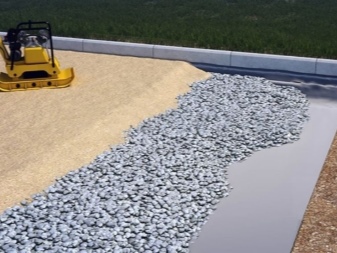
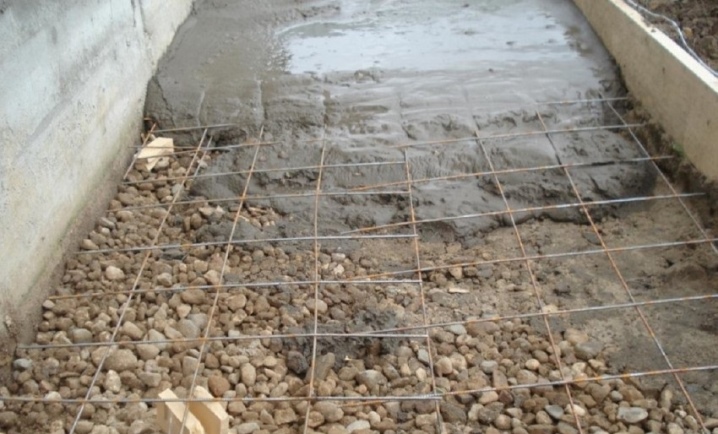
A layer of sand is poured onto the geotextile - about 5-7 cm. Further - the same layer of crushed stone. You can fill it with another layer of sand. On it, in turn, you can lay a polyethylene film or another layer of geotextile. This ordering will prevent the sidewalk puff cake from mixing, shifting. But the base for the tile can be made by the following methods.
Concrete
Laying concrete straight on the ground is contraindicated. There should be at least three layers: geotextile, 5 cm of sand and 5-7 cm of rubble. All layers are carefully rammed using a mobile electric rammer or trampled down. It is also possible to attract a special rammer vehicle - a roller, another rammer on wheels (or tracks), which is used by motor roads.
Laying (pouring) concrete without a bottom layer of crushed stone can lead to accelerated destruction due to heaving of the soil, whose depth, depending on the region, ranges from 60 to 220 cm in Russia, and sand with crushed stone neutralizes its frost movement, swelling.
The situation depends on how heaving the soil itself is, however, a sand and gravel cushion (GWP) is definitely needed. You can also fill it up from ASG (sand and gravel mixture). Next, do the following.

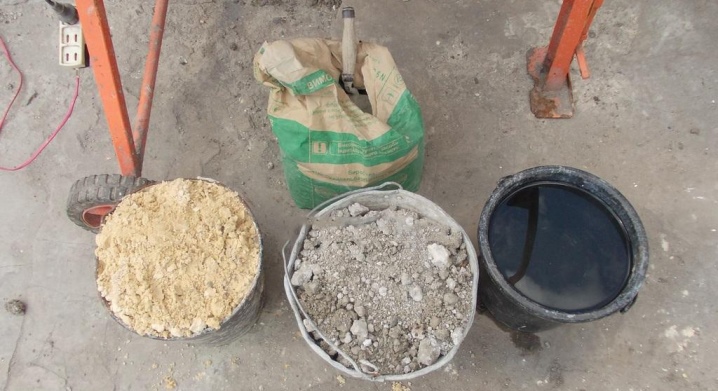
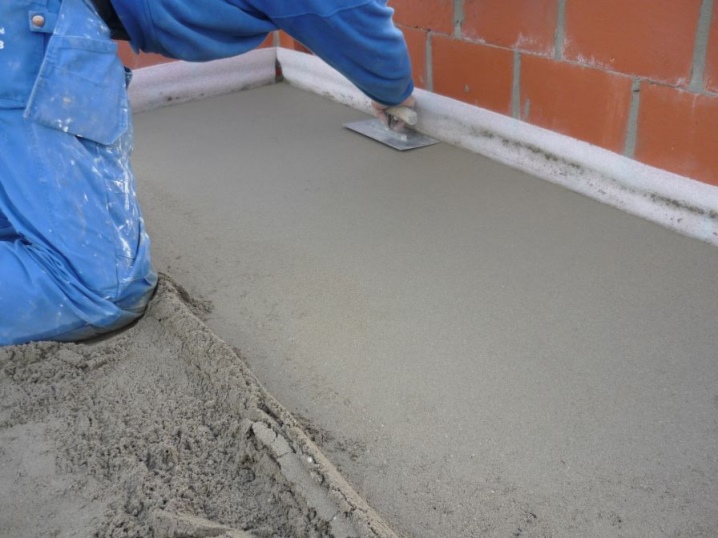
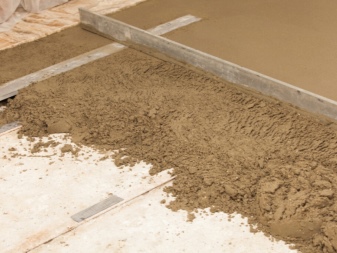
- Prepare concrete in the proportion of "sand-cement-water", typical for the M-400 brand (1: 4 in the "cement-sand" ratio). Do not skimp on cement - a flawlessly made base will stand without much cracking or any signs of creeping or splitting for at least 35 years. It is convenient to make large batches of concrete on a concrete mixer. If you do not have such a device, and you do not want to bother with transportation in a wheelbarrow (or carrying with buckets), you can order a car with a concrete mixer (up to several cubic meters of ready-made (ready-made) concrete.
- Lay polyethylene on the GWP and pour freshly prepared concrete, immediately distributing, leveling it. A layer of poured concrete can reach 15 cm. Even greater strength can be obtained by placing in this space before pouring concrete a "knitted" or welded metal frame (self-assembled lattice) made of reinforcement "10" or "12" class A3 (A-400 ). In the future, this will make it possible to occupy a part of the yard for a capital extension (a change in the design of the house, estate will be required). Before pouring, the frame grating is raised 5 cm above the GWP.
After waiting for the concrete to harden, start watering it regularly. The maximum strength gain period is a month.
Cement-sand
You can do without (iron) concrete altogether - a cement-sand mixture is poured instead. It is made using the same technology as concrete - except for the non-use of crushed stone in its composition. The actions are the same - pouring, hardening. You can also use lean concrete - the ratio with sand is such that the amount of cement in it, unlike standard compositions, is not 20 ... 45%, not counting water, but only 6%. As you can see, the cement consumption has been reduced up to several times. The disadvantage is that the coating is not intended for the arrival of cars and special equipment on such a site.
From compacted sand
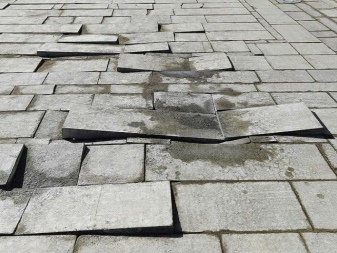
A foundation without cement, using only gravel and sand, can be unstable. Even in spite of the "curb" edging along the perimeter of the track / platform, the use of a metal frame next to it, the tiles can swell and squeeze over time. This method is recommended only where there are no not only cars, but also intense human traffic, in addition, such a tile will need to be trimmed, and the sandy base that has gone from under your feet should be shaken and re-tamped. Germination of weeds in the sand is possible.Displaced tile fragments often break due to uneven load.
Tile processing
Processing of tiles before laying on sand concrete is carried out as follows. Her impregnated with a water repellent, preventing the ingress of water into its near-surface layers, which in frost would lead to cracking. The hydrophobic composition prevents moss, mold and mildew from settling on the tiles - this increases its attractive appearance. Salt stains are also excluded.
It is necessary to immerse in the solution and dry the tile fragments twice. After drying, the tile fragments are inspected for cracks and chips. Products with such products are laid out in the background, for example, away from the gate.
Possible schemes
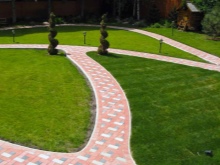
Laying tiles - including in the country - can be done according to any of dozens of schemes. Both generally accepted "park" schemes are used, as well as something of their own. For example, you can put some slogan, character, etc.
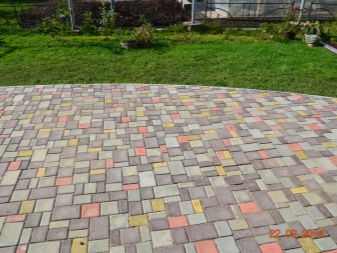
Chaotic
Tiles of different sizes, colors and shapes are used. As a result, your yard or path turns into a mosaic.
Wake up the talent of a mosaic artist - show your imagination by laying out something unlike anything else.
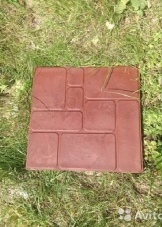
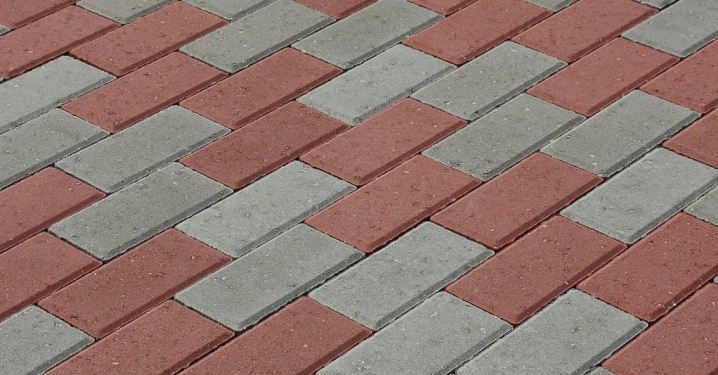
Herringbone
This styling scheme is from the USSR. It was used for indoor flooring. We need appropriate long bricks to make the texture.
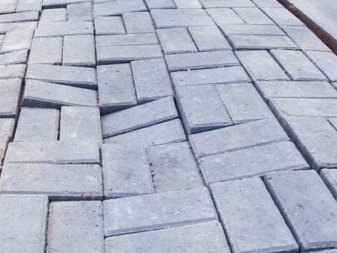
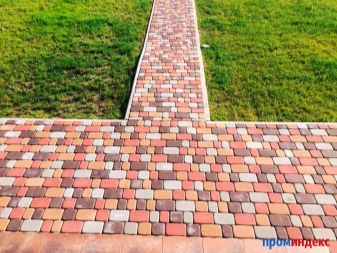
Offset
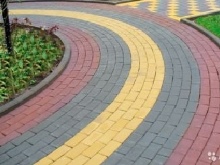
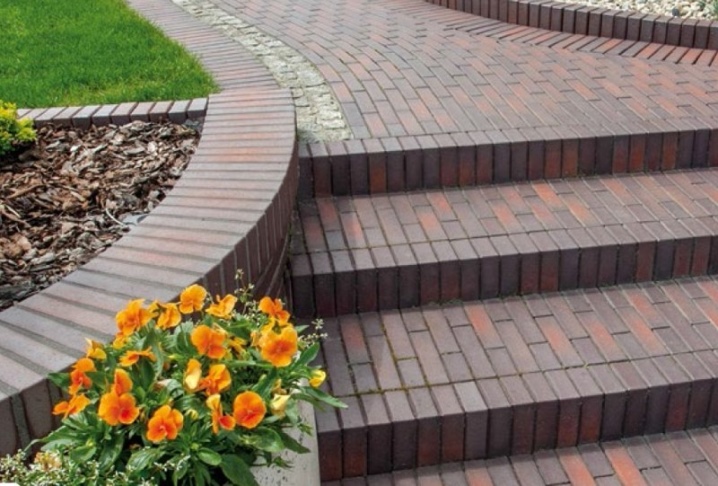
Use a tile beam, bricks to offset the edges of the fragments. They don't have to coincide with each other. The result is a shifted texture. Cubes can also be used. As a result, the executed sidewalk design looks beautiful.
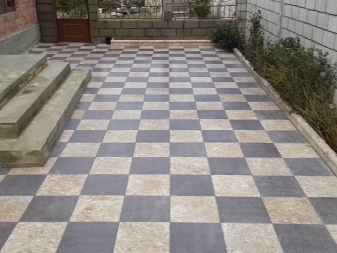
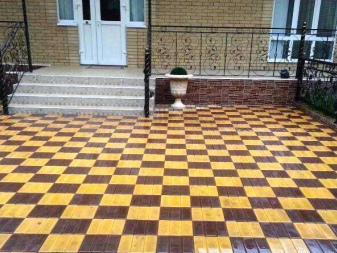
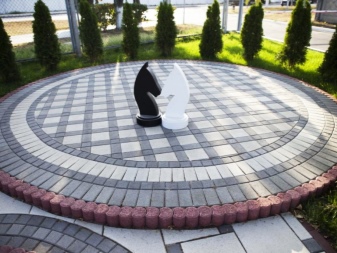
Chess
The simplest scheme: here you need squares of a dark and light tone. It doesn't have to be a black and white combination - you can put, for example, gray and green, yellow and blue, etc.
The main thing is that the texture of the two colors is contrasting.
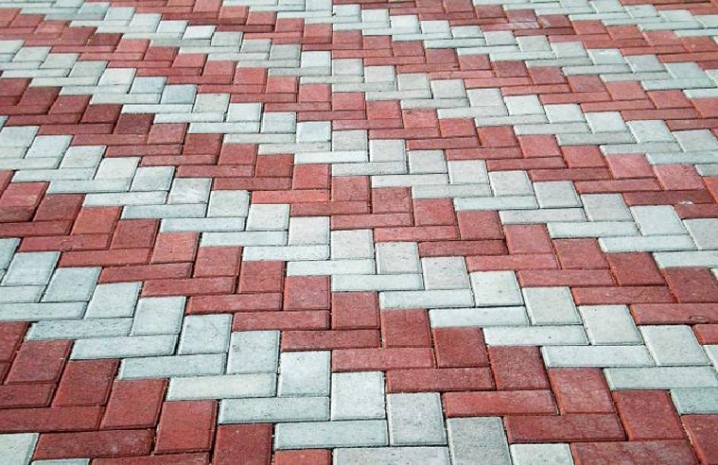
Geometry
From cubes, bricks, bars, you can lay out a square, circle, circle, triangle. The disadvantage is the need to saw some of the bars to ensure a seamless connection. Or wide joints, uneven in their structure, are sealed with an excess amount of standard cement-sand mortar (1: 4). This scheme is poorly suited for a sandy base - you need (iron) concrete with a cement-sand layer between itself and the tile.
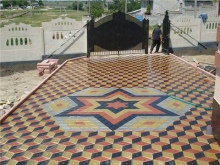
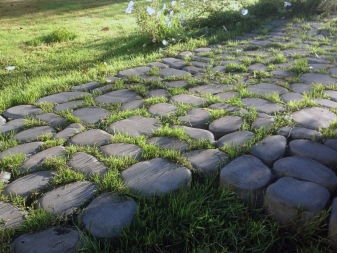
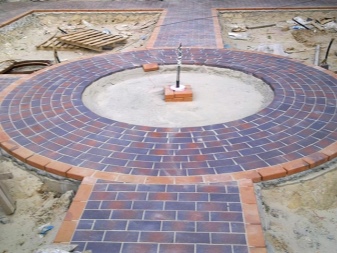
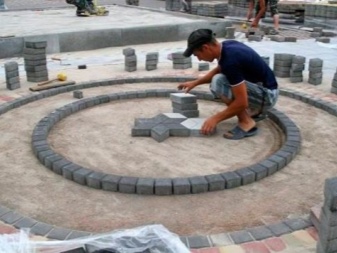
Circular pattern
Circular patterns can be made from ready-made, factory-optimized (in shape) fragments. The masonry is like a puzzle, to which clear instructions are given. An attempt to "alter" the pattern while paving will deprive the sidewalk of its attractiveness.
As a rule, it is possible to lay out only one structure here - this is not a "Lego constructor", there is little compatibility here, and the flight of the installer's imagination, most likely, will not allow laying out a completely different one instead of a specific drawing.
How to stack correctly?
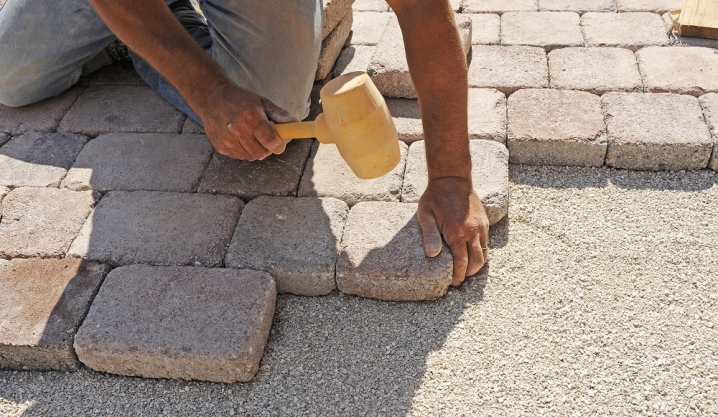
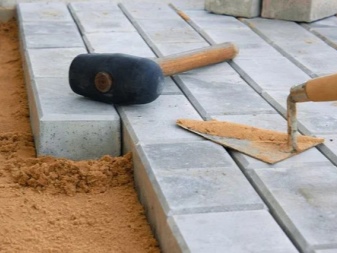
Laying paving slabs on a concrete base is not complete without first installing it on a cement-sand layer. Tile fragments are placed on the cement mortar in such a way that all the cracks and gaps from the bottom and sides are filled with this mortar. The seams should not diverge by more than 3 mm: a larger consumption of 5 or more millimeters is impractical, although the tile will hold well.
The alignment of the tile fragments is carried out using a mallet or a rubber mallet. Evenness and smoothness are checked by means of the building level. The simplest bubble level with a length of 1 m will be able to provide this. In order to avoid distortions, do not use a calibrated level that has repeatedly dropped from a height: having found that the level is letting you down, it is recommended to re-adjust it using a different, serviceable level gauge, or using a transparent, flat and wide reservoir of water (based on the laws of physics).

As you progress, the master moves to the already laid and "grabbed" tiles, which under his weight will not move anywhere.Uneven laying, as a rule, leads to the fact that people passing on such an area may stumble, catching the edge of the sole on a slightly protruding tile fragment. To get a perfectly even monolith, all the joints are leveled, trowelled after the cement layer has hardened.
When laying tiles on a pure sand layer, tilers usually lay the laying towards themselves, adding / pouring a sand layer if necessary.
Having laid the tiles on the sand, the craftsmen sprinkle the cement-sand mixture, which is then spread using any broom or brush. So that the cement does not "weather out", after laying the laid tiles are spilled with water - this allows it to flow into the sand. Then the seam, essentially a skinny concrete, hardens. Watering of the laid tiles is repeated once a day - the seams will gain ultimate strength.
Install tiles on the slope, the descent is possible only in accordance with the terrain. In this case, "aiming" on the slope is created, since it is impossible to put the tiles vertically in this case. Laying is done only on a full-fledged cement mortar - the stronger it is, the better. This is not the case when you need to save on cement. Tiled fragments do not form something remotely similar to mini-rungs of a very long staircase, but lie parallel to the earth's surface.
In some cases, the slope must be terraced, that is, fixed using engineering methods of landscape and relief improvement, so that it becomes possible to align the tiles parallel (flat) to the horizon, with the simultaneous creation of flights of stairs and transitions. In this case, the areas and sections of the tracks must be strictly horizontal, without a slope.
Frequent mistakes
Do not use a simple, steel working part instead of a rubber hammer. The slightest overkill with effort - and the fragment will crack, after which it can be thrown away.
Do not use lime or other substitutes for laying tiles instead of cement or sand concrete. Most likely, the masonry made in this way at home will be fragile.
Do not use tiles that are too thin (less than 70 cm) for laying out a car ride on a site - it will quickly wear out. When laying tiles with your own hands, observe the technology for performing work, check with SNiP and GOST. Do not try to replace vibro-pressed tiles with vibrocast (and vice versa), unless this step is justified by weighty arguments.
Do not replace standard concrete with so-called lean concrete, with reduced cement content, in the place where you plan to drive.
Follow the recommendations, try to repeat exactly one of the step-by-step instructions followed by experienced craftsmen.
See tips for installing tiles.


The comment was sent successfully.