Paving technology

Paving technology can be very simple and relatively affordable. But you need to carefully figure out how to do it yourself from the very beginning in the country. There are various styling options, and each of them is performed according to step-by-step instructions.
Schemes
There are many options for laying out paving stones. They are thought out by experienced designers, taking into account many nuances. Both the size of the sites and the type of soil on which the decorative material is laid out are taken into account. It is important to take into account both the play of light and perception in the environment of other objects. Finally, the design is determined by the geometry of the boards used.


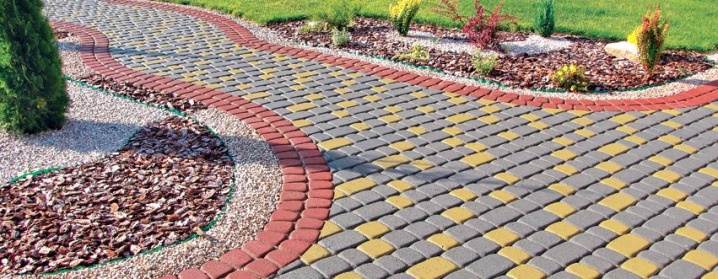
The use of one-color blocks, differing in their dimensions and geometric shape, is often practiced. But no one bothers to create original drawings (including patterns) from multi-colored elements. The industry can supply designers with products of any color. Finally, you can also design areas with a radius shape. Specific schemes can even be modified to your liking to make it look more beautiful.

Other options include:
-
checkerboard dressings;
-
change of directions;
-
concentric rows.

Pavers for paths of the same color do not necessarily look boring. Sometimes it turns out to be a good solution - provided that the color itself is chosen correctly. Additional intrigue is added by the fact that you can vary the hues and saturation, even while remaining within the same color. The scale should correspond to the decoration of the details of the site itself and the building.
With the help of chaotic combinations of different tones, you can form an accent zone.

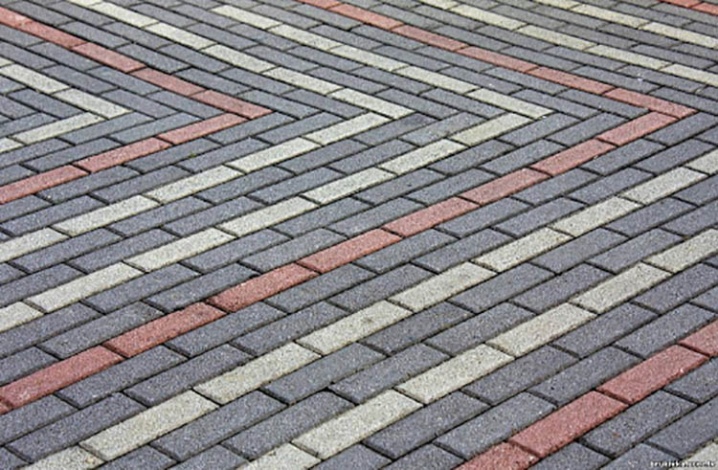
When choosing a tile, in any case, you must be guided by its texture. A neutral coating is formed by matte finish. Fake scuffs give the look of an older material. But you can also combine tiles of two colors and even more types. Combining different types of paving stones is quite simple; the combination of light and dark colors looks especially good.

You can collect a combination of 3 or 4 shades. But then it is necessary not only to choose visually beautiful ways of presentation. It will be necessary to form detailed diagrams in which the dimensions of the elements are accurately painted. Diamond-shaped slabs create unique color effects on the surface of the earth. The easiest way is to lay the paving stones according to the “herringbone” or “checkerboard” system.

These options are suitable for:
-
pedestrian path;
-
sidewalk;
-
medium-sized decorative sites.
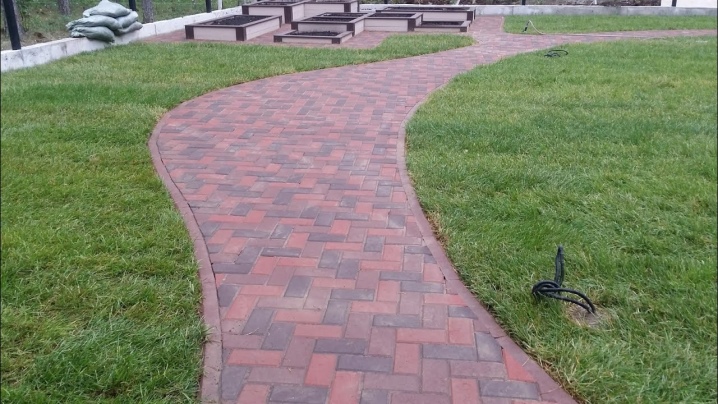
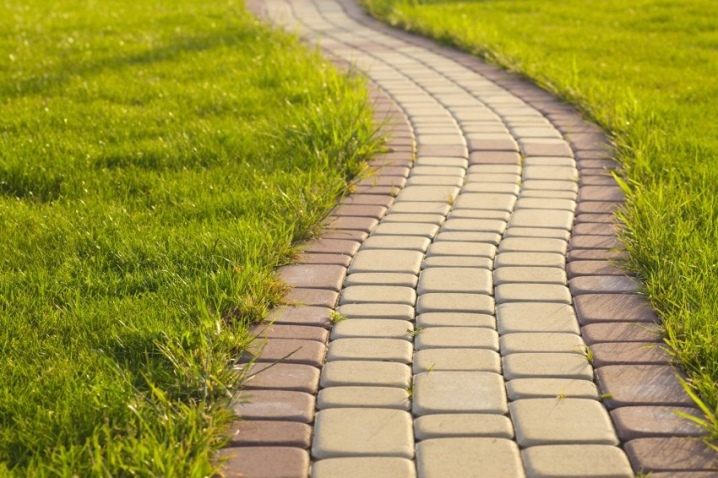
However, for wide roads, the herringbone or chess system is not suitable. It is more correct to use curvilinear transitions and concentric circles there. In radius areas, it is more important to compensate for the shape of the territory. This problem can be solved in different ways. One of them is the already mentioned herringbone system, in which the blocks are placed at right angles or at an angle of 45 degrees.
You can also resort to staggering. You will need simple brick blocks for it. They are placed with their elongated side across the track. Leave wedge-shaped gaps.
It is imperative to design the entire layout very carefully.
A combination of slabs with fragments of lawn grass is also allowed. In this case, parts of various configurations can be used. Sow low-growing plants such as bluegrass.Large tiles and collectible mosaics are trimmed, but this approach is laborious. The brick method (aka spoons) is also widely used due to its simplicity and economy.
Plain-colored spoon masonry can be outwardly more varied due to the contrasting execution of borders or seams... When choosing a linear installation, there are 2 more specific options. By placing the blocks without shifting, you can move them vertically or horizontally; this is determined by the geometry and the overall size of the site. Offset laying is considered a more aesthetic choice and helps to correct the unevenness of the area.

Shuffle is another good option. They deliberately take parts that differ in color and size, in bulk. Sometimes a random layout is combined with geometric patterns. The proportions are chosen according to your taste. This solution is especially good for multi-format slabs.

Additionally, you can put paving stones:
-
simple rhombuses;
-
rhombuses with a three-dimensional effect;
-
in the form of a star (good for large spaces);
-
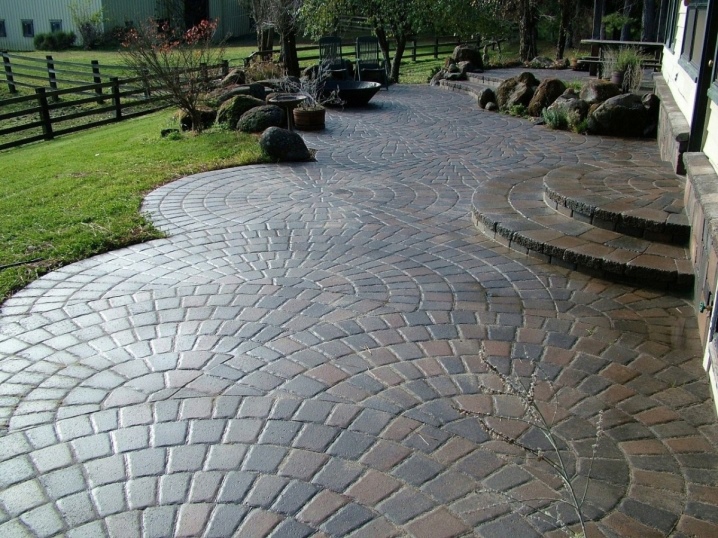
by circular paving according to a previously thought out scheme;
-
according to a figured pattern;
-
with imitation of natural stone;
-
in the manner of a mosaic.

Required materials and tools
Usually the paving stones are placed on the sand. Laying on concrete is practiced much less often. A sand base is cheaper and more practical, while ensuring optimal performance. As a result, it will be possible to achieve a perfectly flat surface.
Any tidy person can lay out paving slabs using publicly available tools.

The minimum version will require:
-
bayonet shovel;
-
shovel shovel;
-
Angle grinder with disks for concrete;
-
metal buckets;
-
a tank where you can mix the solution;
-
spatulas;
-
trowels.

But before taking on all the work, you need to carefully measure and prepare everything. Measurements are carried out using a tape measure at least 10 m long. The boundaries are marked with a rope pulled between the stakes. Additionally, you will need a square and a building level. Marks are made with a pencil. Instead of the latter, you can also use a marker - in many respects this is a matter of taste.

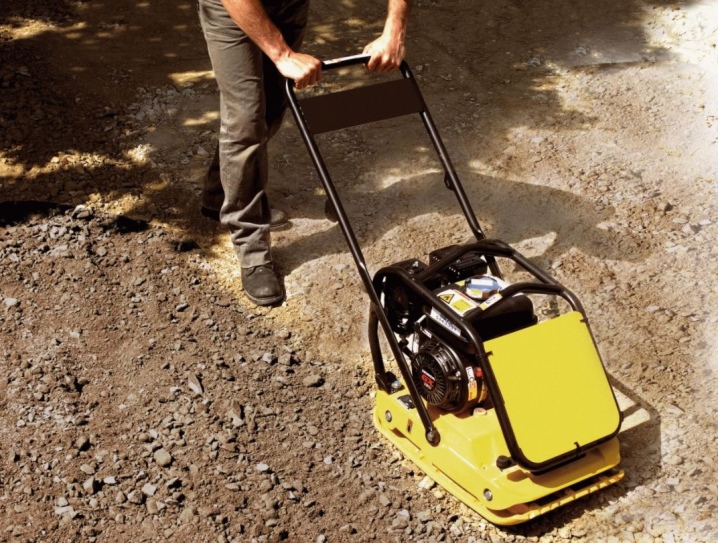
In large volumes, tiles are laid with more complex tools. Often a vibrating plate is used. It allows you to compact loose soil and ensure a perfectly smooth substrate. The key properties are the depth to which the seal is made and the type of drive.
The electric plate compactor is more practical, but at the same time it cannot be used in remote places where there is no normal power supply.

How deep you need to ram depends on the purpose of the site:
-
for pedestrians and cyclists;
-
for passenger cars;
-
for freight transport.
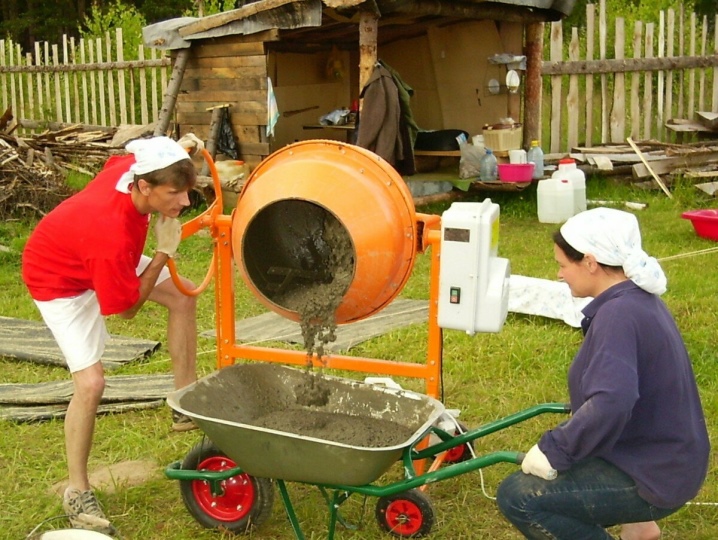
A guillotine knife is also useful. With its help, professionals divide the tiles into fragments of the required size. The use of angle grinders on a large scale of work is impractical and too time consuming. You will need a lot of discs for the grinder. Since the tiles are laid only together with the curbs, concrete will have to be poured, which means that a concrete mixer is indispensable.

This tool is often rented out. Manual kneading cannot give such a good result. Hand grips are also very useful for setting curbs. Such work is laborious and even dangerous. Also useful:
-
grips for carrying tiles;
-
meters, markers;
-
manual planners;
-
machines for rubbing seams;
-
vacuum grippers.
Material calculation
This moment is no less important than other nuances. Large quantities of tiles can be discarded when cutting. You also need to leave a supply for the battle. The calculation is especially difficult when laying out curly blocks. The basic information provided in the descriptions on the manufacturers' websites is not always quite accurate; also, you don't have to rely on online calculators in most cases.

During transportation, some of the material may break.Undercut by 5%, which is generally recommended, should be observed only for tiles not larger than 300x300 mm... If the blocks are larger, almost all of the cuttings go to waste. When forming complex patterns, the calculation is carried out individually. A lot depends on the chosen paving scheme, and even with the most careful preparation, problems are inevitable; the reserve should be at least 10%.

Curly tiles are laid after marking the terrain and forming layouts. The same requirement is imposed on the design of the picture. It is necessary to mark the territory with special borders. This approach is the most accurate and allows you to reduce the cost of trimming paving stones to 7-8%, which gives a fairly noticeable savings. Whether to draw a layout on paper or in graphic editors is a matter of personal taste; drawing up a template on a Whatman paper, although it will take a lot of time, will help to achieve an excellent aesthetic effect.

Styling process
Preparation
Before studying the nuances of the laying technology, it is still necessary to decide which paving stones are to be used. In Russian conditions, almost the most important parameter will be the frost resistance of this material. It is even more significant than visual beauty, because otherwise the very first winter will destroy all the beauty of the coating. Water absorption also characterizes weather resistance. Bending, compressive and abrasion forces will also need to be analyzed.
Correctly laying paving stones and other tiles with your own hands from the very beginning means leveling the area and removing all dirt that may interfere with work. There should be no plants left, and even just their roots. Of course, a detailed diagram and drawing must be prepared even before the start of clearing.... Following such step-by-step instructions guarantees high speed of work and minimizes errors. On the ground, the markings are performed either with stakes with pulling the rope, or (less often) with sand paths.

Be sure to get rid of the turf. It is not very wise to throw it away. In many summer cottages, such material can serve as an element of landscape design in other places. Before installation, all conditions should be created so that the paving stones come out 5 cm above the surface - this is taken into account when forming the support platform.
The base must be leveled and hardened in advance, and it is also desirable that it has excellent drainage properties.

If there is a ready-made concrete base (which is not such a rarity in summer cottages and in suburban areas now), you can use it. The surface is cleaned and moistened before the procedure itself. Choosing a dry layout is useful if you plan to make changes to the composition in the future. But in summer cottages, as well as in the courtyard of a private house, it is quite allowed to lay paving stones directly on the ground without additional layers. True, in this case, you will need to prepare pits of exact dimensions.

Markup
The standard approach is always to determine the required elevations. It is best, in the absence of experience, to entrust the whole matter to specialists.... Stakes for marking should be taken with a length of 50 cm. Whether they are wooden or metal - it does not matter. All corners and turns are required to be marked; only after that does it make sense to take on the choice of high-altitude points.

The importance of their marking is to ensure the outflow of melt and rainwater. The upper paving point is selected so that the doors close quietly even with heavy icing. According to the generally accepted procedure, it is necessary to lay the tiles so that a slope of at least 1 cm is formed per 1 m of length.But it is better to avoid too strong a slope: it is ugly, unreliable, inconvenient and, in addition, difficult to work with. If it is not possible to withstand the calculated slope in one direction, you must try to calculate it in the other direction.

Laying the underlay
There are several options for mixes for substrates, namely:
-
landing on small crushed stone or gravel;
-
sand with cement;
-
Sand and gravel;
-
concrete screed.

But even before these materials, geotextiles are often used. It allows you to work effectively on soil with different geological parameters. Such a film also acts as an excellent subsurface waterproofing. This is a specific format of natural drainage, which guarantees rapid drainage of water from the upper layer of the earth. Non-woven geotextiles are better than woven geotextiles because they are stronger and cheaper at the same time; Among its subspecies, needle-punched geotextiles are most valued.

Installation of curbs
Curb stripes are especially useful in confined areas such as narrow garden paths. When using them, the total service life of the coatings increases several times. You can use plain concrete or reinforced concrete for framing. Cement grade in both cases is not lower than M400. You can also use a stone, which can have different dimensions and geometric shapes.

Stone curbs are durable, but they can be quite expensive. Whether the reliability of such an element and its unique design justifies the high price, it is necessary to decide for yourself. In appearance, artificial stone is also valued, which is significantly cheaper than its natural counterpart.
Alternatively, you can also use clinker, polymer-sand mixture, rubber and plastic.
The installation procedure itself, regardless of materials, is of the same type:
-
remove the sod;
-
a small layer of earth is removed;
-
add a sandy pillow;
-
compact and level this sand.

Base device
Drainage, waterproofing and drainage are not all the requirements that this very foundation must satisfy. The surface will have to be very carefully leveled. The base is checked for stability so that individual tiles do not move when operational loads occur. The deepening (pit) is made in such a way that the drainage fits calmly, and the path itself has good support. The laying of paving stones on top of the old base is made taking into account its condition; if there is even a small risk of subsidence, it is better to dismantle and equip everything from scratch.

Masonry
The cement-sand mixture on the tiles hardens quickly. If it has not yet had time to grab, you can wash it with any detergent composition. Even a self-prepared soap solution will do. Then apply a stream of water, preferably under pressure. The procedure is repeated 2 times as necessary; if time is lost, you will have to contact specialists.

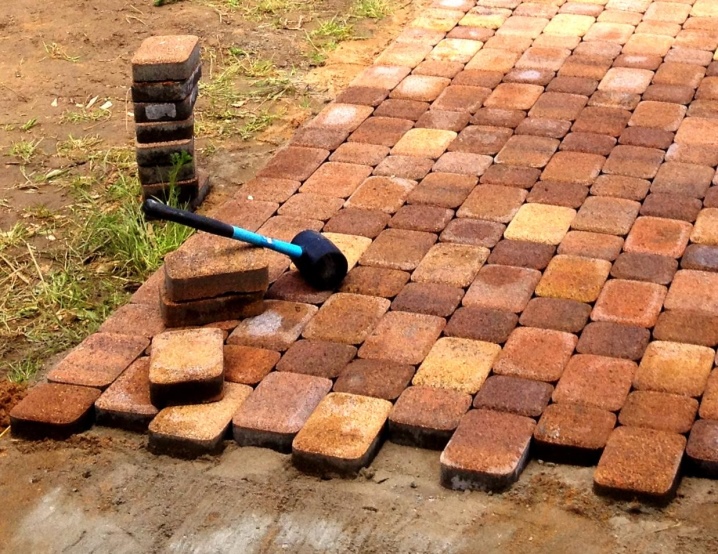
It is customary to lay paving stones from the curb. Having laid out the first few elements, you need to check how the geometry is maintained in level. In large areas, paving slabs are usually mounted on a cement-sand mortar. It must be leveled with a notched trowel.
In any case, even if the tiles are glued to the concrete with construction adhesive, equal 5mm gaps should be maintained between them.

The seams can be closed with the same glue. But it is not forbidden to use a hartsovka. The concrete base gains the required strength approximately 72 hours after pouring. You can only circle hatches, drainage holes and other obstacles with solid tiles. After installation, walking and driving on the paving stones is possible only after 3 days; essential walkways are formed by flooring plywood sheets.

A detailed master class on laying paving stones can be found in the following video.


The comment was sent successfully.