How to bend an LED strip 90 degrees?
In the case of homemade LED strips, everything was simple - an assembly of any length was soldered on wires and packed in a transparent silicone hose. Industrial light tapes are produced by length, which allows them to be cut in fragments - and to connect the segments to each other along the relief of the premises.
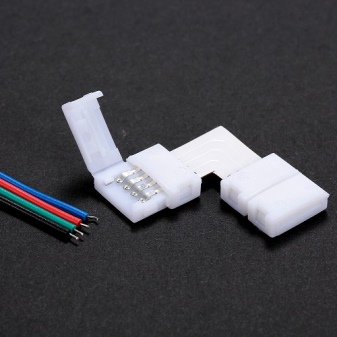
How to turn with a connector?
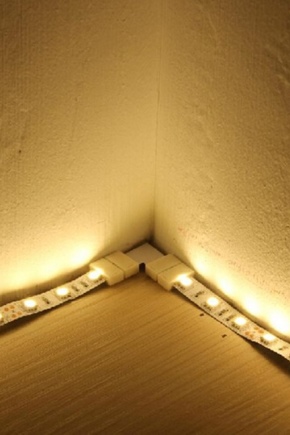
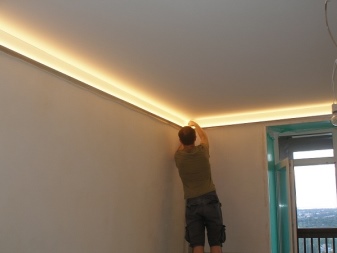
To fit, for example, into a non-standard ceiling, on which the design provides for an additional step, multi-step drops with right angles, you need to bend the LED strip 90 degrees. The finished tape - in silicone - cannot be bent so that it repeats as closely as possible the relief of the ceiling, wall transitions and steps on the floor (if the floor is backlit). For small transitions, the 12 or 24 volt tape is cut into fragments in places where it is necessary. Then these fragments are connected either with connectors or wires.
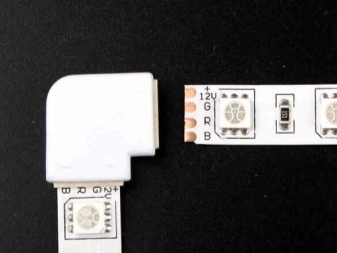
Connectors at 90 degrees are the optimal solution for users who are too lazy to work a little with a soldering iron at a height.
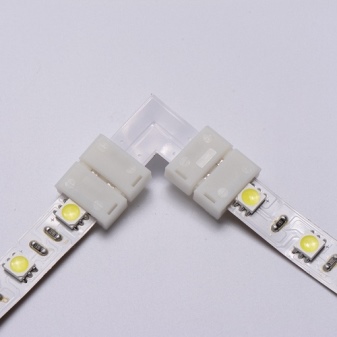
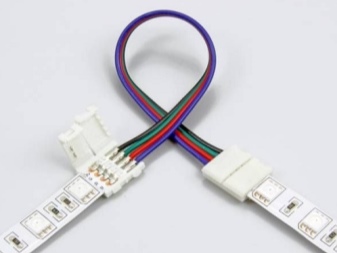
There are connectors for non-standard angles, for example 45 degrees. Adjustable movable connectors are being developed and implemented, making it possible to bend them (one or more times) to any required angle. Multi-piece connectors can be turned up to several tens of thousands of times - until the thinnest, several micrometers, layer of gold on them is erased, as is the case, for example, with USB connectors. The most common connectors are with a fixed angle - they are used as a simple turn of conductors. If necessary, the tape can be easily disassembled - and transferred to another place using unfolded (straight) connectors. The simplest connector is a wire-connected latches or a rigid corner element that is not flexible.
If the connector bends due to the lengths of wire, then it will withstand many small bends.
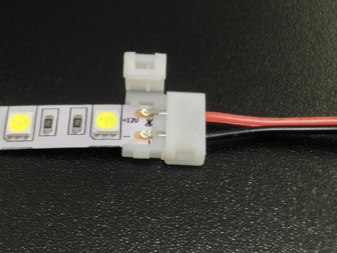
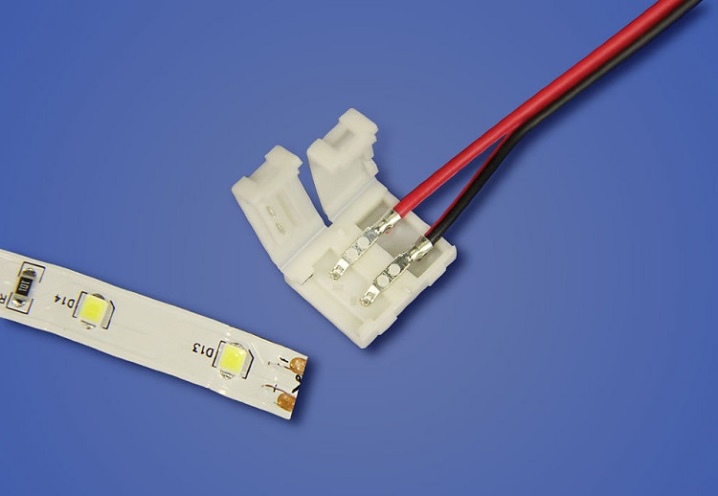
Before applying (securing) the tape, pass one of the parts of the tape cut along the cut line into the connector. Pressing the end of the tape into the connector is carried out with preliminary stripping of the contacts from the protective shell (if any). Stick it to the surface along with this connector. When the adhesive has set and part of the tape is firmly attached to the ceiling or wall, insert the other part of the tape into the connector. Glue it in another place. Make sure that all contacts are connected - white and monochrome LEDs have only two, three-color ones - 4 (one common "minus" and separate "pluses"). If the ribbon is connected correctly, the light will turn on immediately after power is supplied from the adapter or driver. For 220-volt tapes, the segments reach a considerable length - they can be bent only with a minimum bend radius of 5 cm. Sharper bending can damage the light assembly.
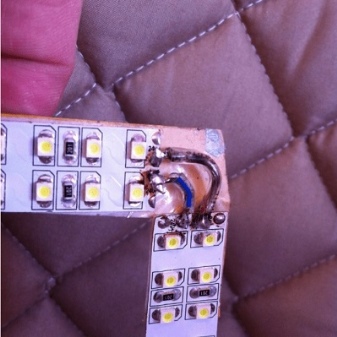
How to bend wires?
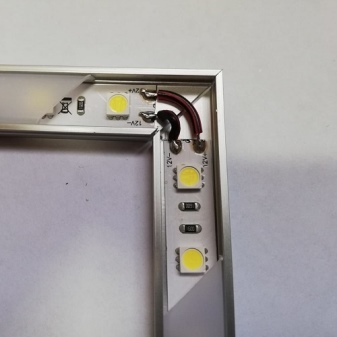
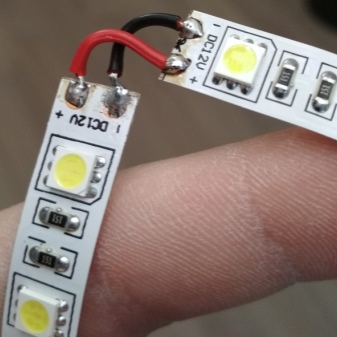
Wires, unlike tape, will tolerate almost any bend. They are not “picky” about the bend radius, since they bend mostly once, when it is required to make this bend in especially difficult conditions. The bending radius can be equal to the diameter of the wire (with insulation). To connect two sections of light tape at any angle, do the following.
- cut and strip small pieces of wire;
- cut the tape (at the cut) and clean its contacts;
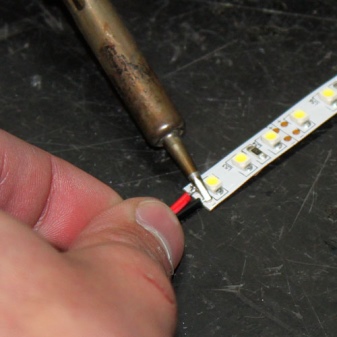
- apply a drop of soldering flux and cover the contact points to be soldered with solder;
- using a little more solder, solder the prepared pieces of wire and light tape.
For each soldering point, 1-2 drops of solder are spent, one drop of flux. The flux is required for the soldering to take no more than one second, otherwise the diode tape will overheat, the conductive tracks may lag behind the polymer-foil substrate. Soldering is one of the most reliable ways of connecting contacts; only a contact-bolted connection can "compete" with it.
The disadvantage is the impossibility of quickly disassembling such a connection.
Useful Tips
It is not allowed to heat the LED strip with a soldering iron for more than two seconds.
The hissing and evaporation of the flux serves as an additional heat sink, which allows you not to overheat the seam. Do not neglect the flux - it allows you to apply a layer of solder to copper contacts and wires almost instantly.
Do not try to bend the connector to a right angle. Even if you do this and the contact is not broken, if necessary, it will be difficult to unbend it to the same angle. Likewise, it makes no sense to unbend a rectangular connector to an unfolded angle of 180 degrees, or to bend it in the other direction. For direct connections, simpler adapters are used - or even wires, as in the case of a soldering connection.
Make sure that the connectors are used for the type of light tape you are extending. 2 or 3 pins will not work with 4 or 5 pins - and vice versa. If a suitable connector is not at hand, then use the wires. In order not to spoil the design, for example, of the ceiling, the wires must match the color of the tape: contrast is not always a reasonable solution.
It is impossible to bend the tape itself "cool" (under a small bending radius) - it will be damaged immediately. The tape materials are not designed for this use.
You can find out more information on this issue in the video below.


The comment was sent successfully.