How to connect LED strip together?
LED strips or LED strips these days are a fairly popular method of decorating the interior lighting of a house or apartment. Considering that the back surface of such a tape is self-adhesive, its fixing is very quick and easy. But it often happens that there is a need to connect together pieces of one tape, or a torn tape with another, or several parts from different devices of this type.
Let's try to figure out how such a connection scheme is implemented, what is required to know for this, and what methods of connecting such elements exist among themselves.
How to connect two tapes together?
It should be said that it is possible to connect 2 tapes to each other in different ways. This can be done with or without soldering. Let's consider both options for this type of connection and analyze the advantages and disadvantages of each of these methods.
Soldering
If we talk about the method using soldering, then in this case, the diode tape can be connected wirelessly or using a wire. If the wireless soldering method was chosen, then it is implemented according to the following algorithm.
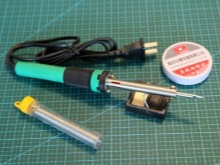
- First, you need to prepare the soldering iron for operation. It is good if there is temperature control in it. In this case, it is required to set its heating up to 350 degrees Celsius. If there is no adjustment function, then you should carefully monitor the device so that it does not heat up more than the specified temperature level. Otherwise, the entire belt may break.
- It is best to use a thinner solder with rosin. Before starting work, the tip of the soldering iron should be cleaned of traces of old rosin, as well as carbon deposits using a metal brush. Then the sting needs to be wiped with a damp sponge.
- To prevent the LED thread from traveling in different directions during operation, it should be fixed to the surface with adhesive tape.
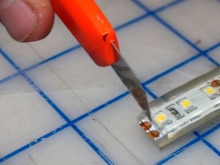
- The ends of the pieces of tape need to be cleaned well, pre-removed the silicone cover. All contacts must be cleaned from it, otherwise it will be simply impossible to do the work correctly. All manipulations are best done with a sharp clerical knife.
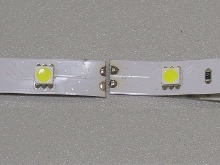
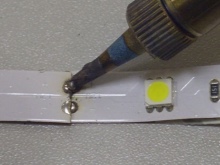
- Contacts on both pieces should be well tinned with the thinnest layer of solder.
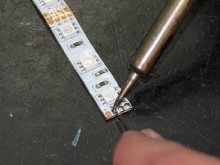
- It is better to overlap, slightly overlapping the parts one on top of the other. We securely solder all the connection points so that the solder melts completely, after which the tape should be allowed to dry a little.
- When everything is dry, you can connect the thread to a 220 V network. If everything was done correctly, then all the LEDs will be on. But if there is no light, there are smoke and sparks - somewhere in the soldering, a mistake was made.
- If everything is done right, then the joint areas need to be well insulated.
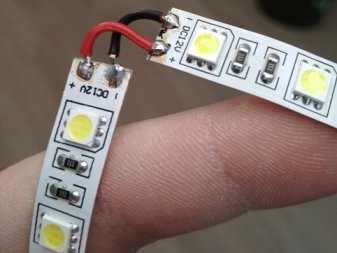
If it was decided to use a wire, then the algorithm here will be the same for the first 4 steps. But then you need a cable. It is best to use a copper product with a diameter of 0.8 millimeters. The most important thing is that the cross section is the same. Its minimum length must be at least 10 millimeters.
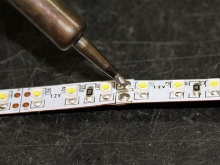
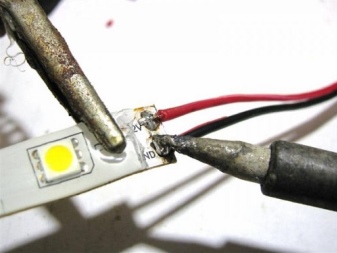
- First, you need to remove the coating from the product and tin the ends. After that, the contacts on the parts of the tape must be aligned together and each of the ends of the connecting wire must be soldered to the contact pair.
- Next, the wires should be bent at a 90-degree angle, and then soldered to the contacts of the LED strip.
- When everything dries out a little, the device can be plugged into the network and check if everything is fine. It remains to insulate the wires with high quality and put on a heat-shrinkable tube for good protection.
After that, such a tape can be installed anywhere.
By the way, the place where the soldering was carried out can be located in the corner in order to somewhat reduce the likelihood of impact on this place.
No soldering
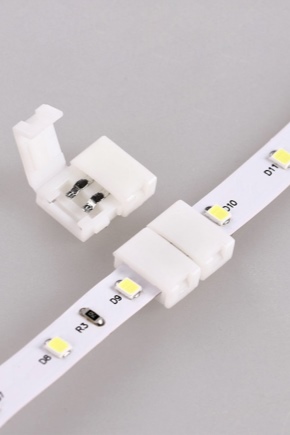
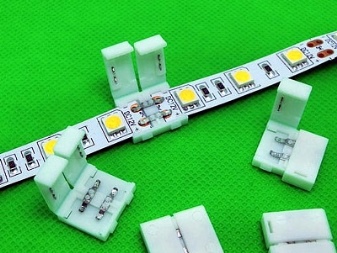
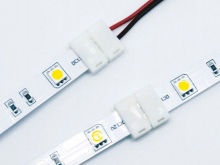
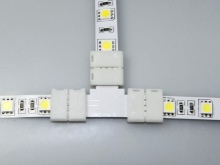
If for some reason it is decided to do without a soldering iron, then the connection of individual LED strips to each other can be done using connectors. This is the name of special devices that have a pair of nests. They are used to connect single-core copper wires. Each socket is equipped with a special mechanism that allows you to firmly and reliably press the ends of the conductors of the LED strips, combining the conductors into a single electrical circuit.
The algorithm for connecting a diode tape by this method will be as follows.
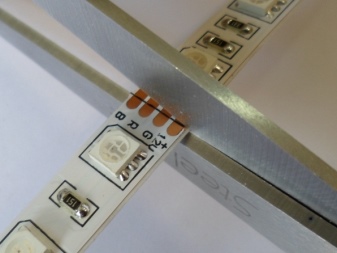
- Each tape must be divided by perforation or a marker into identical pieces of 5 centimeters. The incision can only be made in the designated areas. It is also here that it is best to clean the conductor cores of the circuit.
- Each connector socket is designed to secure the end of the tape there. But before connecting it to the connector, it is required to strip each core. To do this, using an assembly-type knife, it is necessary to remove the silicone lamination layer from the front side, and the adhesive coating on the other side to expose all the conductors of the electrical circuit.
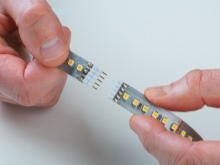
- On the connector socket, it is required to raise the plate responsible for the clamp, and then install the already prepared end of the LED strip there directly along the guide grooves.
- Now you need to push the tip forward as much as possible so that the most tight fixation occurs and a reliable and fast connection is obtained. The pressure plate is then closed.

In exactly the same way, the next piece of tape is connected. This type of connection has both its strengths and disadvantages. The advantages include:
- the connection of tapes using connectors is carried out within literally 1 minute;
- if a person is not sure of their own skills in handling a soldering iron, then in this case it is simply impossible to make a mistake;
- there is a guarantee that the connectors will allow you to form the most reliable connection of all elements.
If we talk about the disadvantages, then the following factors should be mentioned.
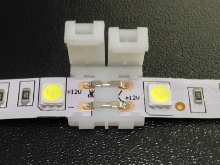
- This type of connection does not create the appearance of a single tape. That is, we are talking about the fact that there will be a certain gap between the two segments that need to be connected. The connector itself is a pair of jacks interconnected with 1-wire wires. Therefore, even if the sockets of the ends of the tapes are close to each other and can be positioned, a gap of at least a pair of connector sockets will still be noticeable between the shining diodes.
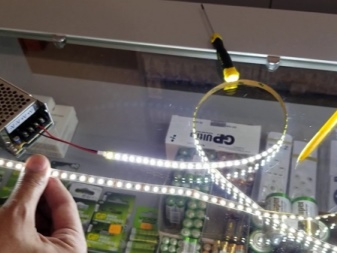
- Before attaching an additional piece of diode tape to an already made section, make sure that the power supply is rated for the load that will be generated. Going beyond it is the most common mistake in all methods of extending the length of such a tape.
But it is with the connector method that it manifests itself more often, because the blocks overheat and break.

How to connect LED strip to power supply or controller?
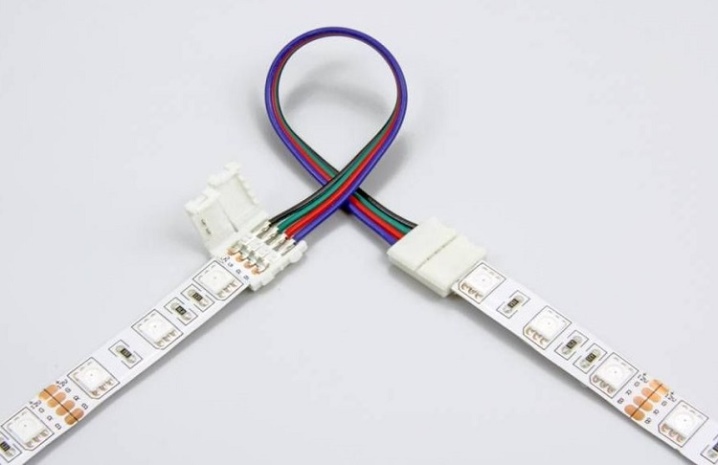
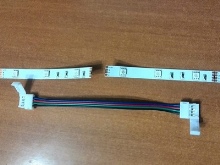
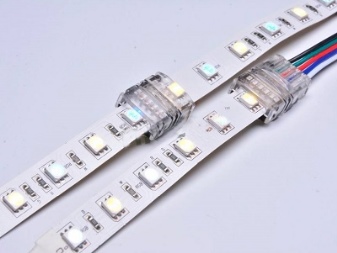
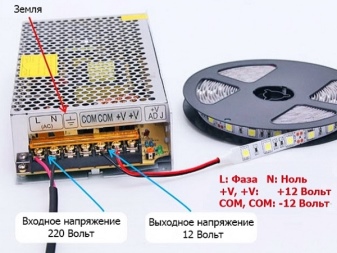
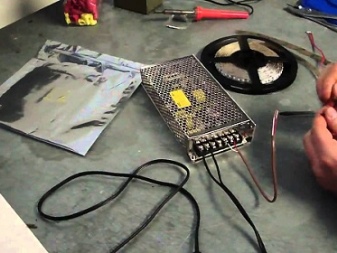
The issue of connecting the device in question to a 12 volt power supply or controller is equally important. This can be done in several ways without using a soldering iron. In the first case, you will need to buy a ready-made cable, where on one side there is a connector for connecting to the tape, and on the other - either a female power connector or a corresponding multi-pin connector.
The disadvantage of this method of connection will be the limitation on the length of the ready-made connecting wires that are commercially available.
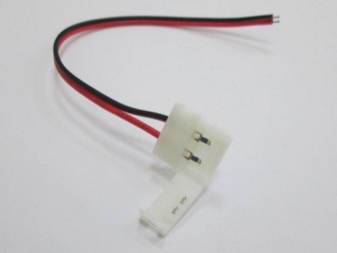
The second method involves making a do-it-yourself power cord. This will require:
- wire of the required length;
- a female power connector equipped with screw crimp contacts;
- straight connector for connection to tape wire.
The manufacturing algorithm will be as follows:
- we lay the ends of the wires in the slots of the connector, after which we close the lid and crimp it using pliers;
- free tails should be stripped of insulation, installed in the holes of the power connector, and then clamped with fixing screws;
- we attach the resulting cord to the LED strip, not forgetting to observe the polarity.
If you need to create a serial or parallel connection, then this can be done using the controller. If the cables with the mating connector on the controller are already soldered to the tape, then everything will be easy to do there.
To do this, we connect the connectors taking into account the key, after which the connection will be formed.
Useful Tips
If we talk about useful tips and tricks, then the following points should be said.
- The device in question cannot be called the most reliable, therefore it is best to install it taking into account the fact that a break can occur and it will have to be dismantled for repair.
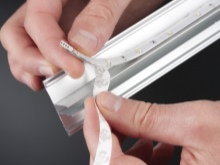
- On the back of the device there is an adhesive layer with a protective film, which is removable. To fix the tape in the chosen place, you just need to remove the film and firmly press the product to the place where it is planned to be fixed. If the surface is not even, but, say, rough, then the film will not adhere well and will fall off over time. Therefore, to make it more reliable, you can pre-stick a strip of double-sided tape on the installation site of the tape, and then attach the tape itself.
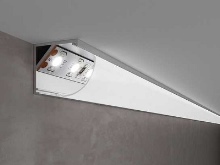
- There are special profiles made of aluminum. They are attached to the surface with self-tapping screws, after which a tape is glued to it. This profile is also equipped with a plastic diffuser, which allows you to hide the LEDs and make the light flow more even. True, the price of such profiles is more than the cost of the tape itself. Therefore, it will be easier to use the most common plastic corner, which is attached to the surface with simple liquid nails.
- If you need to highlight a stretch or simple ceiling, then it would be best to hide the tape behind a baguette, plinth or molding.
- If you are going to use a powerful power supply, then you should take into account that they are often equipped with coolers for cooling. And while working, they make some noise, which can create some discomfort. This point should be taken into account when installing in various rooms or premises where people who are very sensitive to this moment may be.
You can learn how to properly solder the LED strip from the video below.


The comment was sent successfully.