All about J-profiles
Many users are trying to learn everything about J-profiles, their scope, as well as the installation features of such elements. The increased interest is primarily due to the popularity of such a modern finishing material as siding. Today, these panels are used to decorate buildings of various purposes, regardless of their design features. The installation technology in this case provides for the use of special fasteners and joining elements.
What it is?
In the segment of budget finishing materials for facades, it is vinyl siding that occupies a leading position in the current popularity ratings. This increased demand is due to its availability and performance. Among other things, we mean the ease of installation, which, in turn, is due to the peculiarities of the corresponding accessories and additional parts.
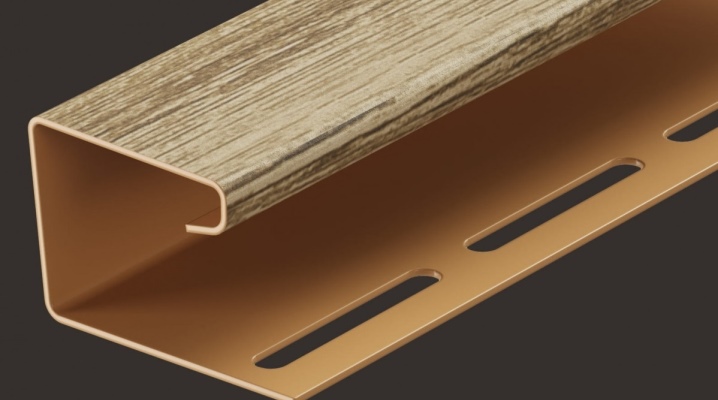
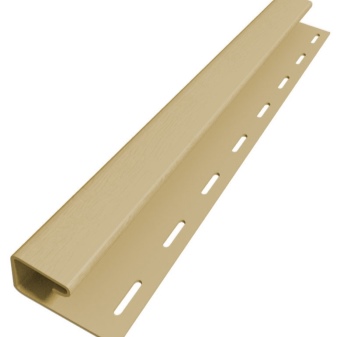
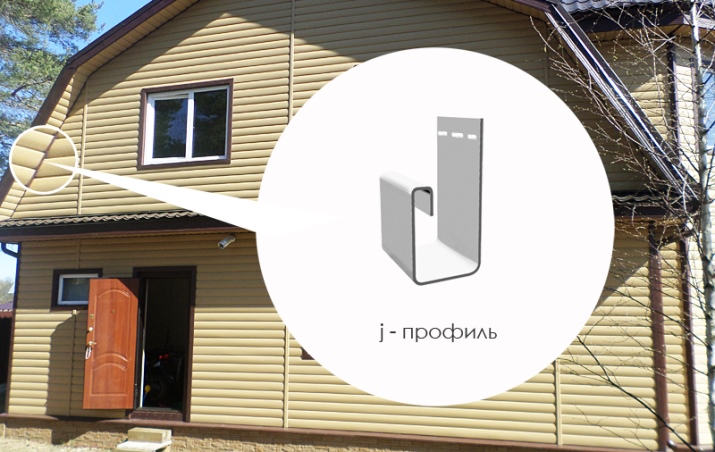
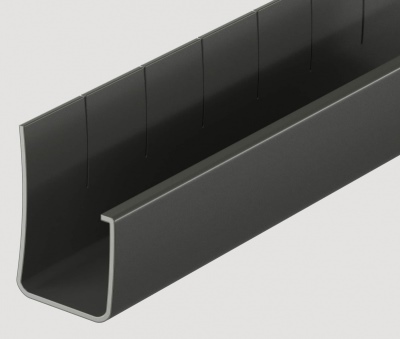
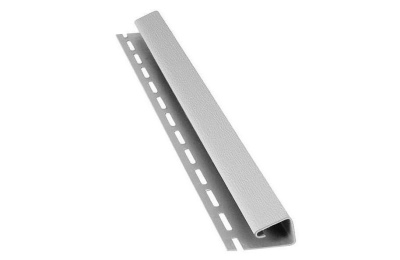
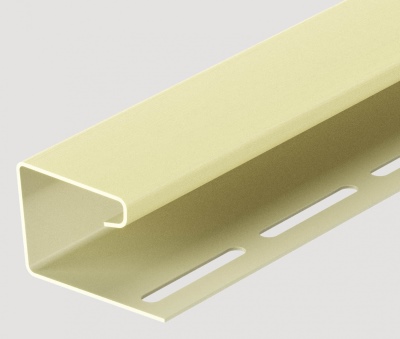
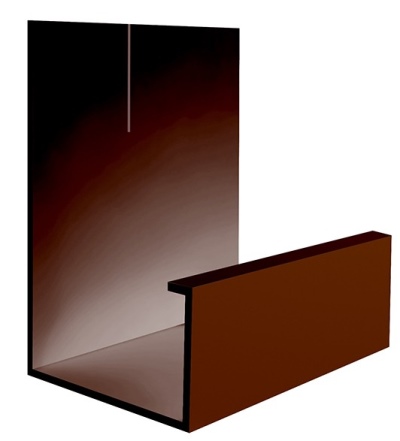
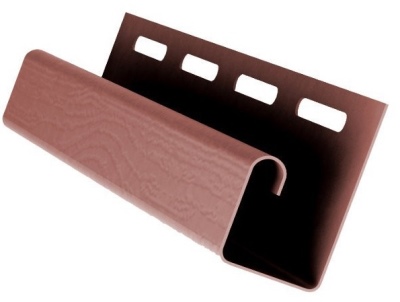
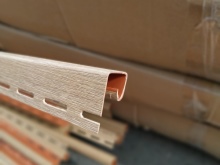
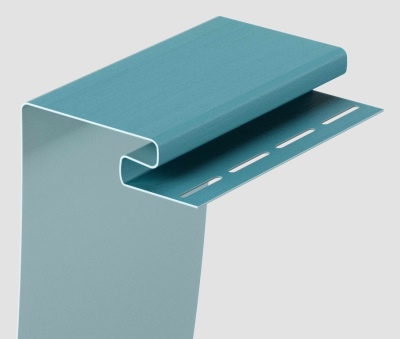
This type of profile got its name due to its shape, as the strips look like the Latin letter "J". Specialists in the installation of facade panels use such parts for various purposes. Taking into account the design features, we can talk about both siding fasteners, so, for example, about framing a window or doorway. In other words, the described type of additional elements is universal and can replace many other parts during the installation of facade structures.
But it is important to remember that its main task is to finish the end parts of the installed facade panels.
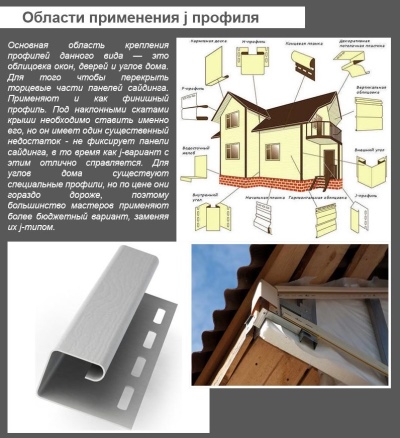
Applications
It is the universality that determines the distribution of the described planks, which are currently used in a variety of situations. Let's consider several options.
-
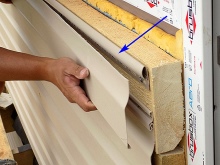
Decorating the edges of siding panels, which is the main purpose of these mounting elements. In this case, we are talking about cuts at the corners of the finished object. In addition, the profile is needed to decorate the slopes on window and doorways. Do not forget about the use of strips for joining different materials to each other. One of the key points in this is the size, namely the width of the element. Models with dimensions of 24x18x3000 mm are often used, but the parameters should be selected individually in each specific case.
-
Installation instead of a finishing strip, which is possible due to the maximum similarity of the two products.
-
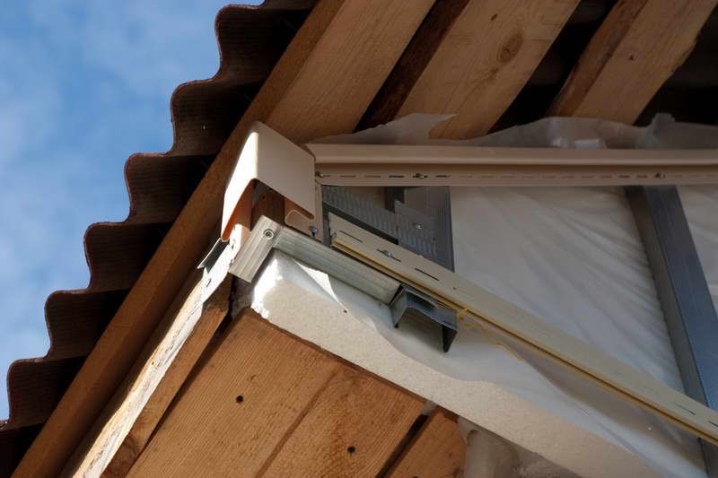
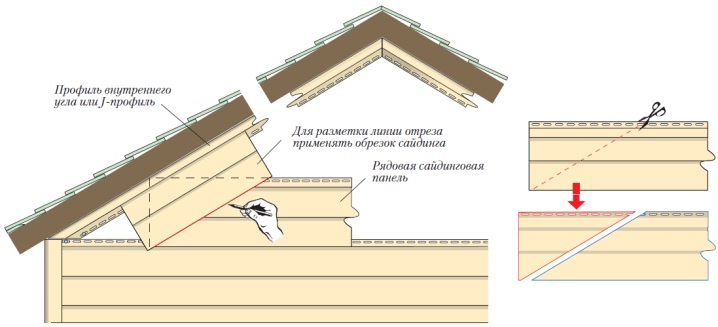
Finishing of the gables. It is worth noting that most other parts do much worse at securing siding panels securely at the edges of roof structures. It is the design of the J-bar that allows you to solve the problem of finishing such places with minimal costs.
-
Use as corner pieces. It is important to take into account that we mean the installation and connection of two profiles, which is not reliable. Such options are usually resorted to in extreme cases.
-
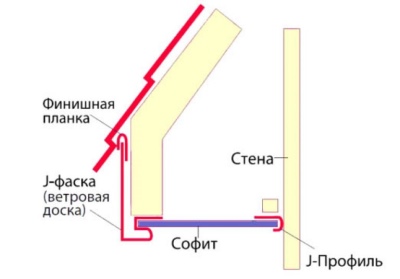
For finishing soffits of any configuration. A wide profile is often used, which can replace other mounting and finishing elements.
-
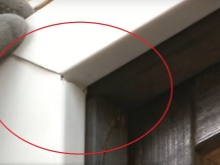
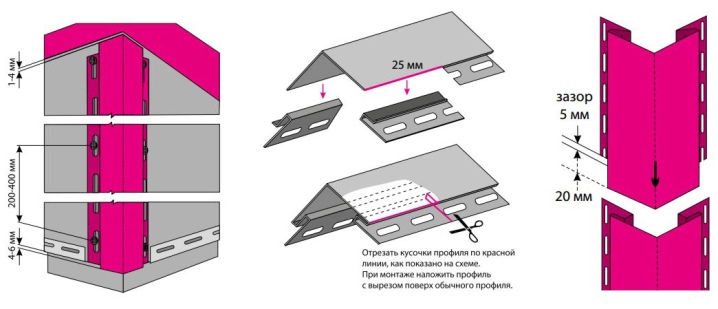
For decorative framing of corner pieces at the top and bottom. In such situations, a cutout is made on the planks and they are bent taking into account the design features of the object. As a result, it is given the most aesthetic appearance.
It is important to take into account that, despite the rather wide scope and versatility of J-bars, their use is far from being relevant and effective in all cases. For example, the starting bar for siding panels, due to its design, cannot be replaced with the described products. In some cases, wide models are used as starting parts for attaching siding. However, such a connection will be of poor quality, and a loose fit of the mounted panels is possible. It is worth remembering that their shape in some situations contributes to the accumulation of moisture. This in itself has an extremely negative effect on the finishing material.
Also, experts do not recommend using a J-profile instead of H-planks. If you connect two elements, it will be extremely difficult to prevent dust, dirt and moisture from entering the joint between them. As a result, the appearance of the finished facade may deteriorate.
Another important point is that the elements in question perform the functions of supporting, that is, they are not the main fastener.
Views
At the moment, manufacturers offer a potential consumer several varieties of a profile, which allows you to choose the best option for each specific situation. Various types of planks are available for sale.
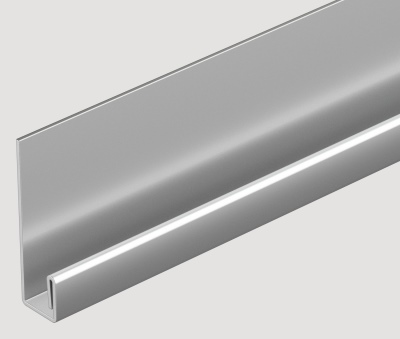
- Regular - with a profile height of 46 mm and a so-called heel width of 23 mm (indicators may vary depending on the manufacturer). As a rule, they are used for their intended purpose.
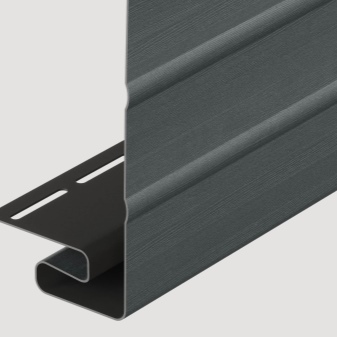
- Wide, used for finishing openings. In this case, the products have a standard width, and their height can reach 91 mm.

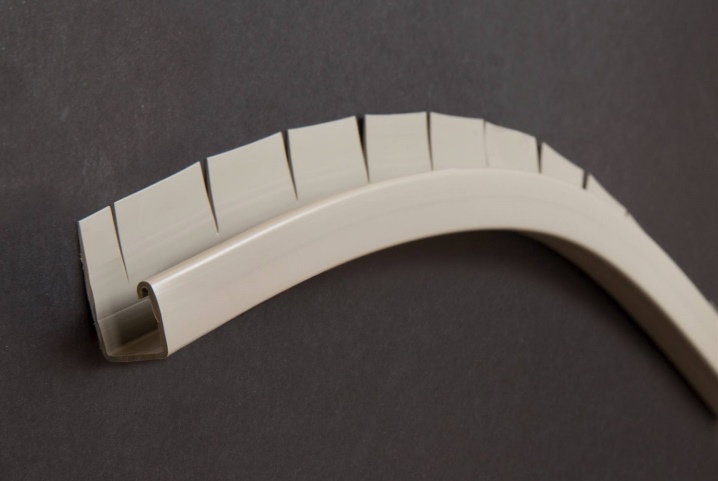
- Flexible, the main distinguishing feature of which is the presence of cuts to give the profile the desired shape. Most often, such options are relevant when decorating arches.
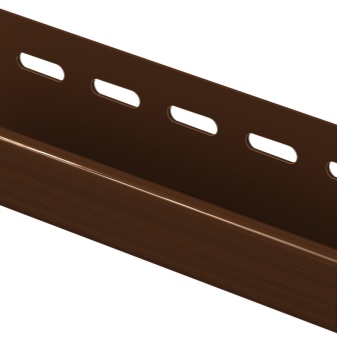
In addition to design and dimensions, products currently on the market are classified according to several other criteria. In particular, we are talking about the material of manufacture and color. The first is determined taking into account the characteristics of the finishing material itself. The second parameter directly depends both on the decorative properties of the siding and on the design idea. Manufacturers offer more than a wide palette, in which, in addition to the white and brown profile, you can find almost any shade.
By material of manufacture
Like all other mounting elements and accessories, J-Planks are made from the same material as the finishing material itself. Metal and plastic products are now represented in the corresponding market segment. In this case, an equally important role is played by the protective outer coating of the metal profile, which can be:
-
puralov;
-
plastisol;
-
polyester;
-
PVDF type.
It should be noted that, according to experts, it is the last option that is the most reliable. This material (composition) is characterized by maximum resistance to mechanical damage, as well as to the effects of an aggressive environment, including direct ultraviolet rays.
By appointment
As already noted, the main function of the described type of profile is to decorate the ends of the siding panels. However, the scope of their application in practice is much wider. Based on the versatility of the parts and the increased demand, other types of planks have been developed.
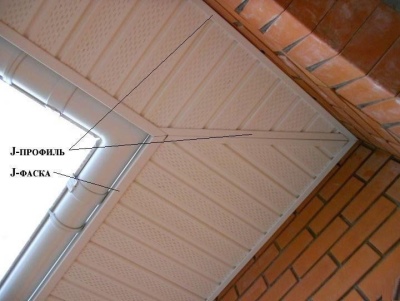
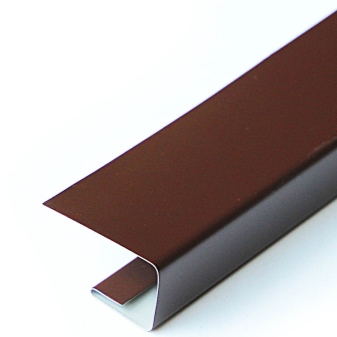
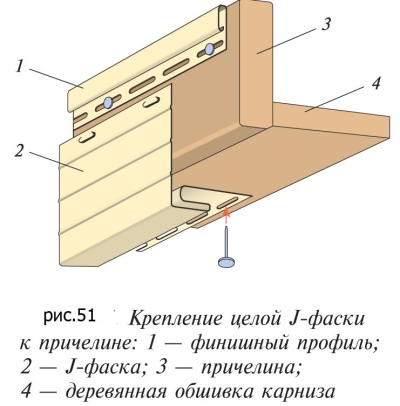
Chamfered J-planks are often referred to as windboards. When decorating various facades, such elements are successfully used if it is required to veneer narrow strips of the surface. This "board" is often used as an alternative to the J-profile itself. And this despite the fact that its main purpose is the design of the corresponding roof strips. The standard J-chamfer is 200 mm high and ranges from 3050 to 3600 mm in length.
Taking into account the peculiarities of this type of planks, the profile in question is relevant not only when performing roofing work.The products have proven their effectiveness in facing the frames of recessed window and door openings. Some experts describe the J-bevel as a symbiosis of a wind board and a regular J-profile. Due to their performance characteristics, such products have become the best option for the installation and finishing of structures, the elements of which are soffits. For finishing slopes, as a rule, wide profiles are used, also called platbands.
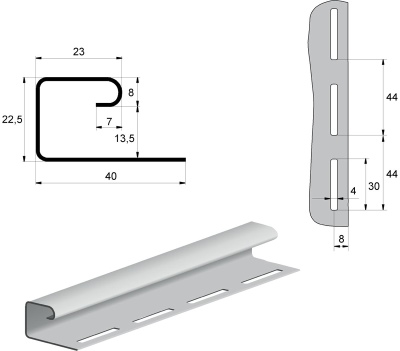
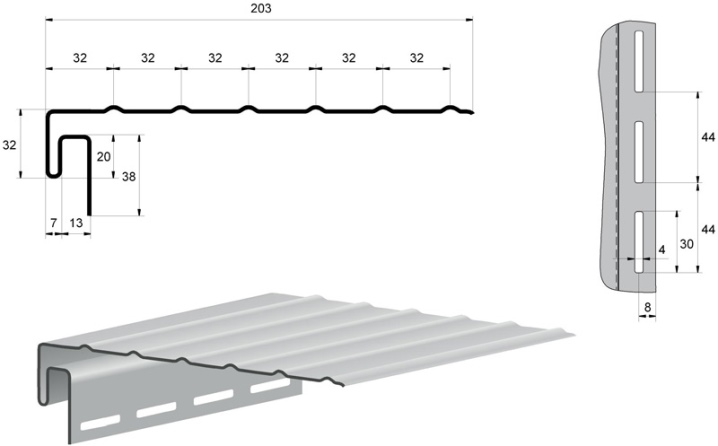
Dimensions (edit)
This parameter may vary depending on the brand of products. However, in general, the dimensions of the profile can be called standard. Depending on the types described above, the size ranges for the planks are as follows:
- classic profile - width from 23 to 25 mm, height from 45 to 46 mm;
- extended (for platbands) - strip width from 23 to 25 mm, height from 80 to 95 mm;
- flexible (with notches) - profile width from 23 to 25, height from 45 to 46 mm.
The indicated figures, depending on the manufacturer, may differ by an average of 2-5 mm. Taking into account the specifics of the finishing material itself, such deviations, as a rule, can be considered insignificant. However, they should be taken into account when calculating the required number of elements, which will avoid additional costs and unpleasant surprises during the installation process. An equally important parameter is the profile length. Most often, strips with a length of 3.05 and 3.66 m go on sale.
How to choose?
Determining the specific type of J-bars is pretty straightforward. The key criteria in this situation will be the purpose of the profile, the design features of the object, as well as the material for the manufacture of the siding panels themselves. You should also not forget about the color of the strips, which can coincide with the main material or, on the contrary, stand out.
The decisive factor is the correct calculation of the amount of required material and, of course, additional parts. In situations with a J-profile, the first step is to decide how exactly the slats will be used. These are some of the key points.
-
When designing window and door openings, it is necessary to determine the total perimeter of all such structural elements. You can determine the number of planks by dividing the result by the length of one part.
-
In the case of installing spotlights, the total length of all side parts of such elements should be added to the sum of the perimeters.
-
If the facing of the ends of the building and gables is being carried out, then it is necessary to additionally determine the lengths of the 2 sides of the latter, as well as the height of the wall to the roof at each corner. If, instead of an angular profile, it is decided to connect two J-strips, then this is also important to take into account when calculating the required number of products.
The very calculations of the material in this case are elementary. It is enough to determine the length of the ends of the panels to be mounted, as well as the perimeters of the openings to be finished. However, when determining the number of planks, it is important to remember about aesthetics.
In order to create a complete and most accurate appearance during cladding, it is strongly recommended to take into account such a concept as the integrity of the planks. From this point of view, it is highly undesirable to join the profile on the same plane. Naturally, we are talking about areas comparable to the length of the parts.
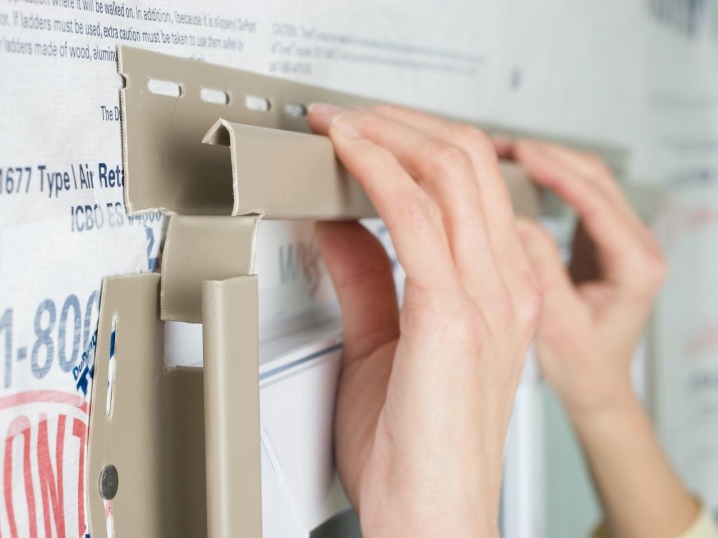
Installation tips
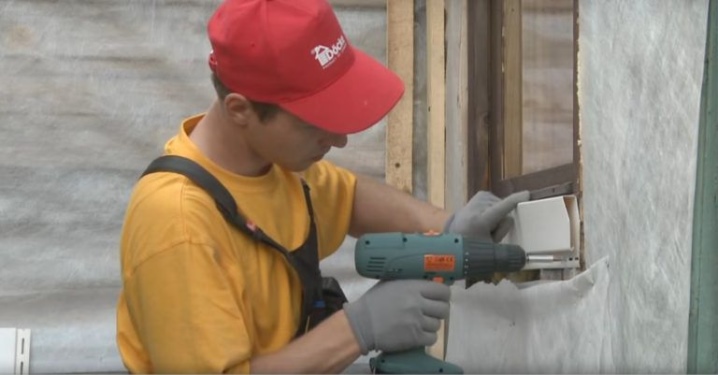
The algorithm for performing work when installing the described type of profile for siding is directly determined by where exactly the strips are mounted. If we are talking about facing a window or doorway, then the sequence of actions will be as follows:
-
cut the profile taking into account the dimensions of the opening, while leaving a margin for trimming the corners (each element is increased taking into account its width by approximately 15 cm);
-
make corner joints at an angle of 45 degrees;
-
make so-called tongues about 2 cm long on the upper elements of the future structure to protect the inner surface of the profile from the effects of an aggressive environment;
-
in the case of a window opening, start the installation of the slats from its lower part, setting and securing the lower horizontal profile with self-tapping screws or nails;
-
position and fix vertical (side) elements;
-
fix the top bar;
-
place the "tongues" in the side structural elements.
It is important to remember that each element is fixed by placing screws or nails exclusively in the center of special holes. The correct position of the fasteners can be checked by moving the planks along the axis.
Finishing the pediment involves several steps.
-
Using 2 trims of the profile, make a template for the joint. One of its elements is applied along the ridge, and the second is placed end-to-end under the roof canopy. It is on the upper fragment that the slope of the roof structure should be noted.
-
Measure the length of the left bar according to the pattern made.
-
Place the template on the profile with its face up at an angle of 90 degrees. After making a mark, cut the plank.
-
Mark the second section for the right side. It is important to leave the nail strip at the same time.
-
Combine the obtained segments of the J-planks and fix them on the wall to be finished with self-tapping screws. The first fastener is screwed into the highest point of the top hole. After that, the profile is fixed with self-tapping screws along its entire length with a step of approximately 250 mm.
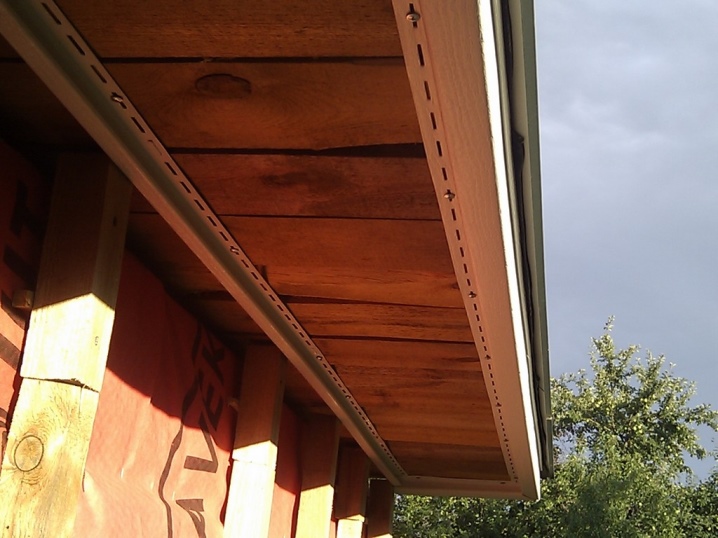
The process of installing the described variety of additional parts for siding panels when decorating spotlights is as simple as possible and looks like this:
-
at the initial stage, a support is located immediately under the sheathed element, the role of which is most often played by a wooden beam;
-
place both strips opposite each other;
-
determine the distance between the installed elements, subtract 12 mm from the obtained value;
-
cut elements, the width of which will correspond to the result;
-
place the parts between the two strips, and secure the entire soffit through the perforated holes.
Taking into account all of the above, the installation process can be described as as simple as possible. Naturally, the quality and duration of all the work provided for by the technology is determined by the experience of the master. However, with a competent approach and the presence of minimal skills, a beginner can also cope with the installation of a J-profile. At the same time, if you have the slightest doubts about your own abilities, it is strongly recommended to entrust the installation and other operations to professionals. Such an approach to finishing the facade will help to significantly reduce time costs and avoid additional financial costs.


The comment was sent successfully.