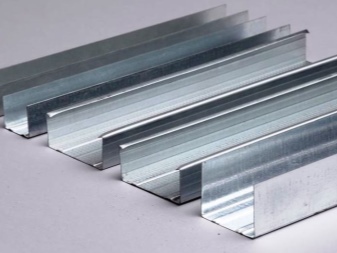
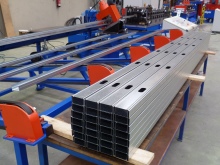
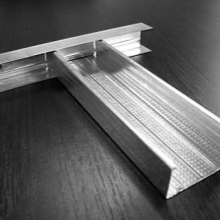
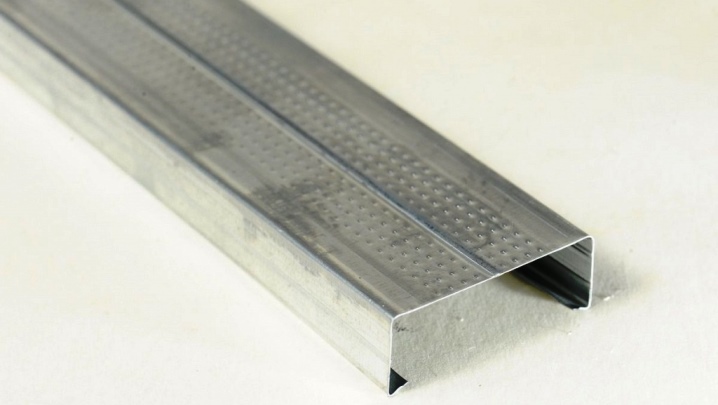
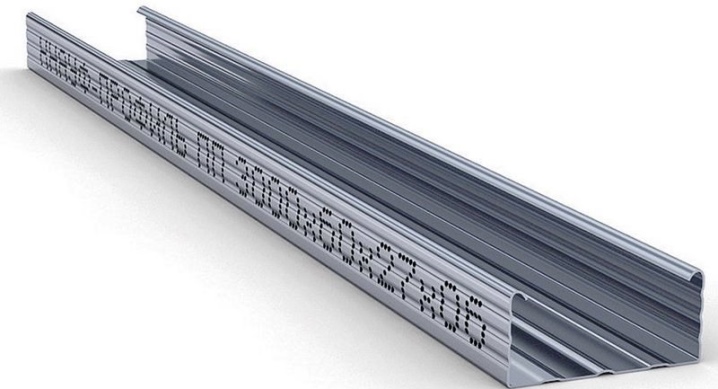
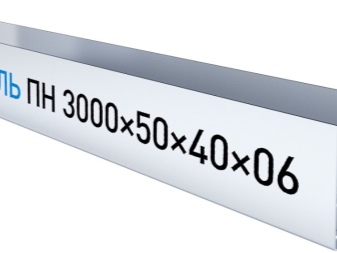
Rack profile

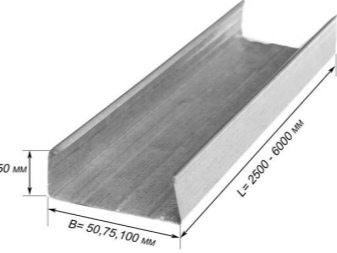
The rack profile can be sized 50x50 and 60x27, 100x50 and 75x50. But there are products of other sizes. It is necessary to take into account the difference with the guide profile, as well as deal with the fastening of the drywall profiles.
Peculiarities
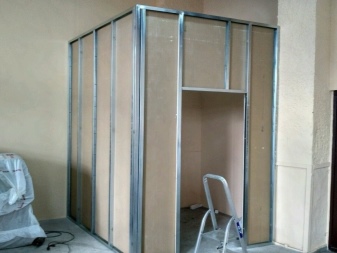
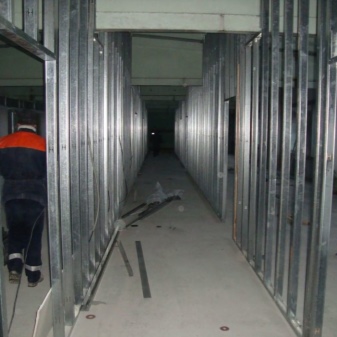
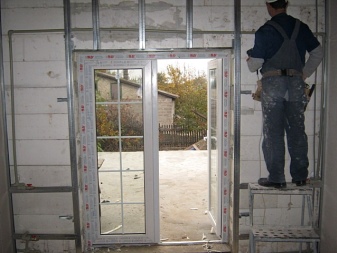
Installation of drywall always requires the use of rigid frame structures. Only metal elements (profiles) have sufficient reliability. Such products are widely suitable for the preparation of residential, industrial and administrative facilities. Depending on the specific case, a different section of the structures is selected.
The rack profile, which is often abbreviated as PS, is distinguished by both lightness and rigidity, which just allows you to successfully solve a variety of tasks.
Plasterboard sheets are screwed directly to such elements. If they are not there, there can be no question of any normal casing. Sometimes there are recommendations to use wooden slats instead of good steel. But they should be chosen as carefully as possible. Moreover, even the best wood has a number of unpleasant weaknesses that prevent it from being considered an ideal choice.
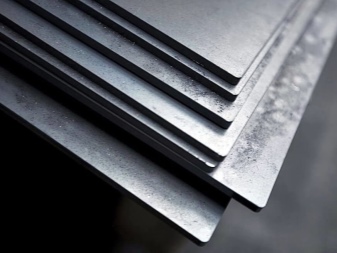
The basic requirements are reflected in GOST 30245-2003. The standard provides for the use of both square and rectangular sections. Such products are obtained by crimping on so-called rolls. The standard establishes requirements for the size of the manufactured products. The permissible deviations from linear parameters are also fixed.
To obtain rack profiles, you can use:
-
carbon steel for universal use;
-
low alloy steel alloys;
-
quality carbon steel.
In any case, the rolled products must comply with GOST 19903. The specific steel grade and thickness are determined separately in a specific order. The permissible curvature of the profile does not exceed 1 mm for every 4000 mm. The permissible convexity and concavity of the profile is 1% of its size. The profile is cut strictly at right angles, and the deviation from perpendicularity should not bring the product out of the standard dimensions.
Presence is unacceptable:
-
cracks;
-
sunsets;
-
deep risks;
-
significant roughness;
-
dents and other defects that interfere with the normal use of the products or the assessment of their visual qualities.
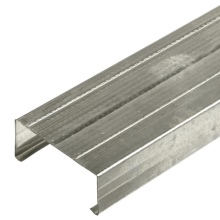
How is it different from a guide profile?
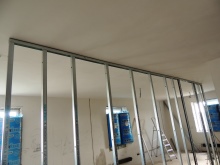
The difference between rack-mountable and coordinating profile products is undeniable. Any assembly must contain both those and other elements. The similarity between the post and guide parts is that they must have the most accurate fit. Only under this condition is high strength and the absence of backlash in the joints created. In addition, what unites such products is that they are standardized in size for use in different premises.
Any slats produced now are 3 or 4 m long. Such parameters are associated not so much with production subtleties (almost any product can be made), but with the most common dimensions of the premises. If slightly different parameters are required, then the profiles are cut off or made up of several prefabricated parts.
The profile for finishing walls and ceilings, working with walls has standard dimensions of shelves. Therefore, the installation of structures does not constitute any significant work.
Of course, all profiles are provided with anti-corrosion layers. But there are still differences, and they are significant. Elements of various widths are used to decorate walls and form partitions. This parameter directly determines the future thickness of the structure. For the assembly of walls, parts with a width of 5, 7.5 or 10 cm are mainly used.
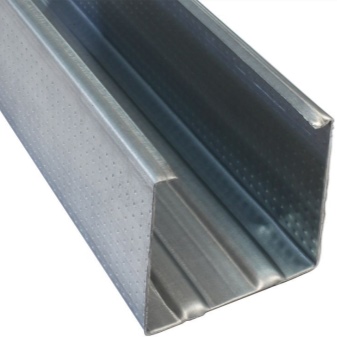
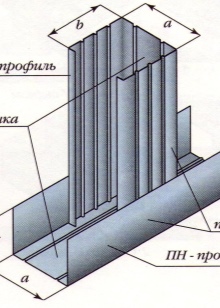
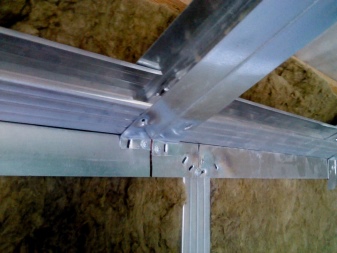
But it's not just the width, the diameter of the products also plays an important role. The cross section of the rack blocks has special stiffening ribs. The bends of the shelves are also provided to make the rail stronger and more mechanically stable. The reason is simple - rack structures are subjected to much more significant stress than their guide counterparts. Another nuance lies in the specifics of the installation.
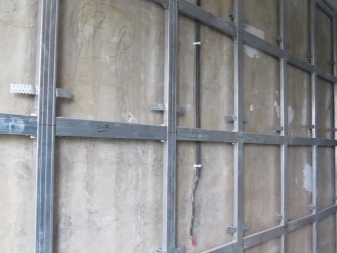
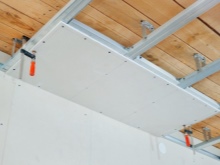
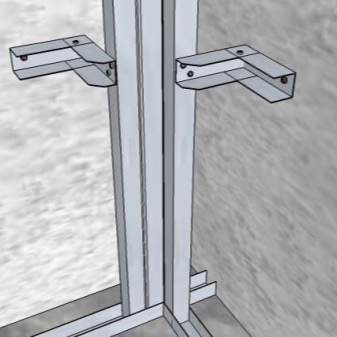
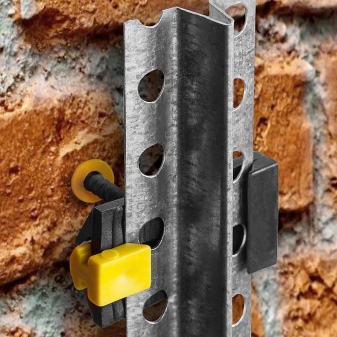
The guides are placed directly on the reference plane. For this purpose, special fasteners are used that are capable of piercing the profile itself. As a result, a very reliable support is formed. The racks, in most cases, hang in the air, are supported only by their edges on the guide elements and are stabilized with the help of suspensions.
Attention: regardless of the profile format, you will have to create a strictly defined number of pressure points, otherwise strength and stability cannot be guaranteed.
Another important difference is what kind of hardware is used. To mount the guides, you need to use a dowel-nails. For rack structures, self-tapping screws are used for metal. The choice of press washers or bedbugs among them should be made for technical reasons. Further, the rack cannot be mounted without adding auxiliary suspensions.

Types and sizes
It has already been noted that the typical length of the rack-mount profile is 3 or 4 m. But in fact, manufacturers can also supply a product with any other parameters, however, only on an individual order. The nuances of the sizes are mainly due to the scope of application of certain products. So, the CD47 / 17 profile is often found. First of all, it is needed to construct frames for capital wall cladding. Sometimes it is also used to form false walls where full-fledged wall assemblies cannot be used.
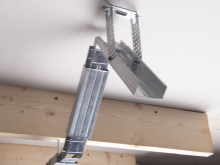
On a profile of this kind, called a ceiling one, the fixation of direct suspensions is made on self-tapping screws 0.35x0.95 cm in size. The wall thickness depends not so much on the application as on the engineering approach of a particular manufacturer. It usually varies between 0.4-0.6 mm. But on request, thicker or thinner profile products can also be made. True, such a need arises relatively rarely.
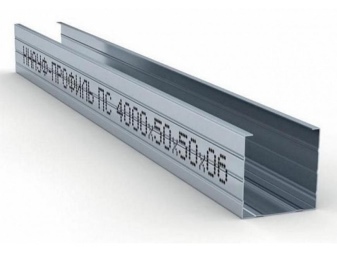
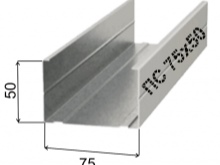
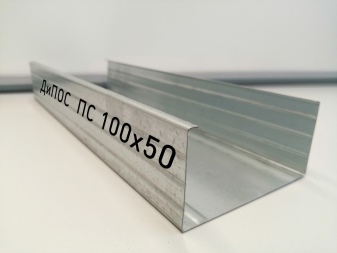
The rack profile 50x50 is very widely used. These are the dimensions in the line of the world famous Knauf brand. The first number in this marking, like that of other companies, indicates the width of the back. The second indicator is, respectively, the width of the profile shelf. But you need to understand that the actual dimensions may slightly differ in the smaller direction.
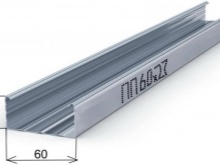
So, if the marking is 75x50, then the actual width of the shelf will be only 48.5 mm. This circumstance should always be taken into account when choosing and installing products. Often 75x50 blocks can be cold rolled. They try to make them using modern roll forming equipment. As for the 60x27 profile, these products usually have the shape of the letter C.
Most often it is used together with PPN 27x28 ceiling guides. The bending of the shelves inward provides the ability to mount on straight hangers. Such suspensions are equipped with clamps. 3 grooves (so-called corrugation) ensure the highest level of reliability. In addition, corrugated 27x60 models are much easier to mount.
In some cases, a 50x40 reinforced profile is used. It is present, for example, in the Knauf product range. Such products are even suitable for mounting doors weighing 25-27 kg. Models 50x40 also imply the use of guide components of the same size. Another C-shaped version of the profiles is 100x50.
They are suitable both for the formation of solid walls and for partition construction. High durability allows these products to be used even in office furnishing. They are reliable enough even for the arrangement of tall rooms. Apart from Knauf, such a product is produced by the Russian company Metalist. Shirring further increases the strength of the products.
The cost of 100x50 models is quite high. But the suitability of this material for thermal and sound insulation will undoubtedly be a plus. Special openings allow for hidden wiring. Finally, the 150x50 profiles are designed for use with medium and maximum loads. This load can be applied even in the vertical plane. The length of galvanized and aluminum profile structures varies from 0.2 to 15, and the thickness is from 1.2 to 4 mm.
Applications
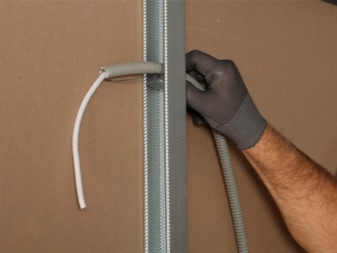
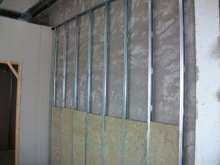
Rack profiles can be used for drywall. Their main role is not only to hold the fastening sheets, but also to lay inside various communications. The uprights can be used for both ceilings and walls, despite the specific "ceiling" name. They are also used:
- during the construction of wall and wall frames;
- when installing plywood;
- for installing gypsum fiber sheets;
- for installing a glass-magnesium panel;
- when fixing gypsum board;
- when working with cement-bonded particle board;
- for fixing oriented slabs.
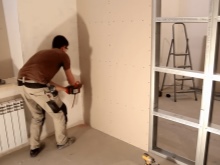
Fastening technology
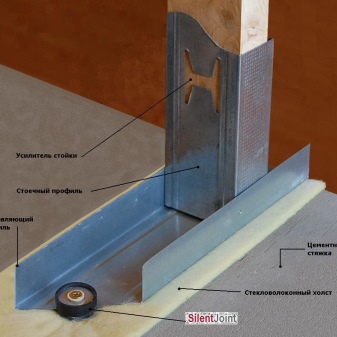
The scheme for mounting a profile to a wall sometimes includes the use of additional corner or beacon profile nodes. However, this is rarely practiced, because basically the installation of gypsum board does not put forward such requirements.
Important: even in private practice, it is recommended to use a material not thinner than 0.55 mm.
In order to calculate the need for support blocks as accurately as possible, the distances for subsequent installation are measured and an additional correction of 15-20% is introduced, which compensates for the production and installation defects. The marking of surfaces plays a very important role.
Sizing errors can be subtle at first, but then they create a number of problems. To begin with, find the most protruding point. The distance from it to the inner edge of the cladding material should be at least equal to the width of the metal supports. Next, a line is drawn on the floor showing to what level the guide profile must be fixed. Such a contour is transferred along a plumb line to the ceiling, achieving absolute unity of the plane.
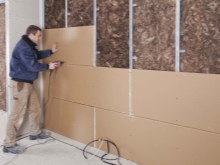
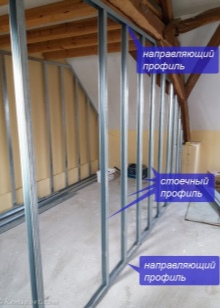
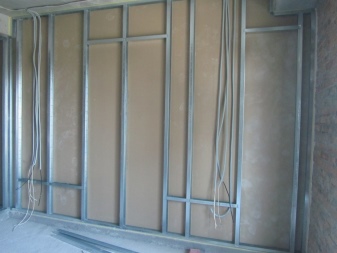
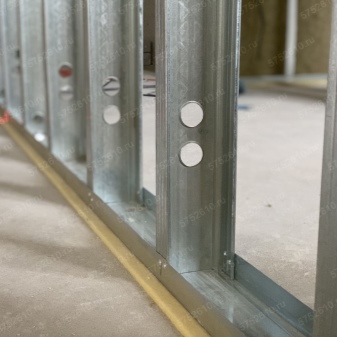
The connection between the sheathing sheets and the metal profile implies the fastening of any panel to 3 or 4 racks. Therefore, the installation step will be equal to 400 or 600 mm. It is necessary to count the distances from the extreme racks. Most often, 3 profiles are used for each panel. Before attaching the racks, guides are installed - they should be both on the floor and on the ceiling.
Next steps:
- pasting of surfaces with tape-seal;
- fixing the lower guide by screwing in self-tapping screws;
- installation of direct suspensions by means of dowel-nails;
- bending the wings of the suspensions like the letter P;
- entering profiles into guides;
- joining parts of the lathing with a cutter;
- tracking the position of the extreme profiles due to the level or plumb line;
- accurate bending of the suspension wings to the sides, eliminating interference when installing sheets;
- placement of crossbars at horizontal joints;
- careful check of the uniformity of placement of all elements.


The comment was sent successfully.