We make machines for sharpening knives with our own hands
Knives live not only in the kitchen - in a workshop, a hunting lodge, they are also required for fishing. You can hardly go on a hike without them, and there are actually many cases when you cannot do without them. And if knives are used often - and it would be nice if they were always perfectly sharpened - the question arises about the need for a grinding machine. It is not necessary to buy it - you can make a machine with your own hands.
Simple manufacturing methods
Of course, you can also sharpen the knives manually, but it will be difficult to maintain the correct angle, and therefore the quality is lame. But sharpening with a machine retains the original angle for the entire working process, and, in addition to the main operation, you can also fine-tune the knife on the machine.
The main requirement for a home-made machine tool is a rigid fixation of the blade and abrasive. It is due to this that the sharpening angle is created and maintained.
From the corners
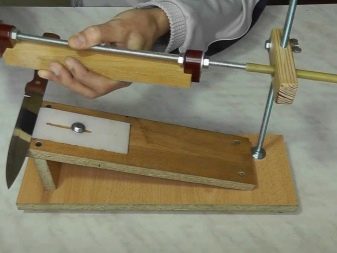
This is an elementary vertical equipment that will make it possible to quickly sharpen knives by hand. It is a wooden structure assembled with a corner.
You can do it without exact drawings, because the dimensions in the end will depend on the dimensions of the grindstone.
What to take to create a manual machine:
- 4 bars / planks 5–7 cm wide, 3 cm thick (the length of the plank is equal to the length of the stone);
- 4 bolts M4-M6 with a "lamb", you can calculate the length of the fastener using the formula - the thickness of the board, multiplied by two, plus the thickness of the whetstone, plus 1 cm;
- 4 self-tapping screws for wood - plank thickness minus 2 mm;
- protractor or equivalent;
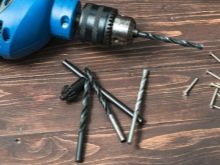
- drill with a drill to fit the bolt;
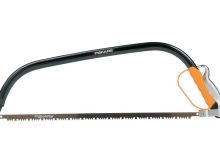
- hacksaw for wood;
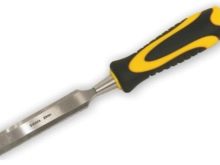
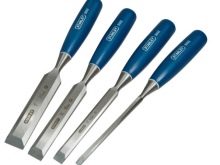
- chisel;
- marker.
The machine will be manufactured so that 2 corners are obtained from the existing boards.
Let's describe the progress of work.
- On one plank, at a distance commensurate with its width, a hacksaw cut is made to the center.
- Next, from the end of the board, you need to chop off the sawn-off part with a strong knife or chisel. The second board will also have the same chip - when joining the boards, both sides must have a common plane.
- The planks are articulated into a corner with chipped fragments. The second part of the unit is assembled in the same way.
- Bolt holes are drilled in the upper and lower parts of the device. They are marked on the sides opposite from the connection point of the ends, on each plate there are 3-4 pieces. And the holes are marked so that from the edge of the board to the outer bolt there is at least 3 cm, and the gap between it and other holes clamped the edge of the grindstone.
- A mark is placed on the inside or outside of one board, it must correspond to each of the potential sharpening angles.

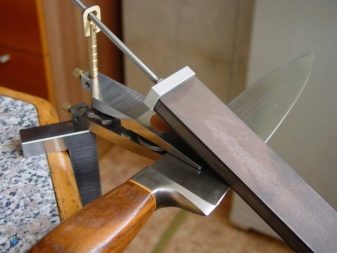
How to work with such a machine: the sharpened knife is placed with the blade on the whetstone, so that the blade is in a vertical plane. Further, with reciprocating movements (that is, "from oneself and to oneself"), with a smooth pressure, the knife moves along the emery.
If you need to perform an even finer sharpening, then the sharpening stone must first be wrapped with sandpaper. The resulting device is simple, cheap, but not all is well with the fastening of the stone - other methods will help to achieve the required rigidity of the fastening.
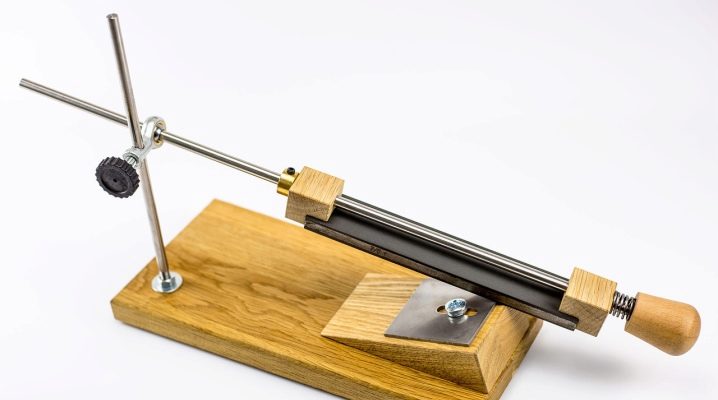
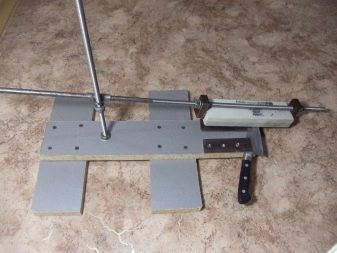
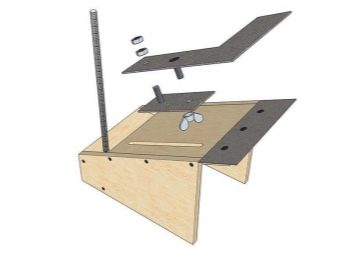
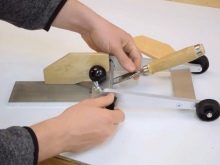
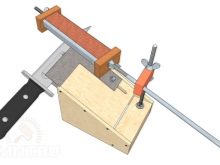
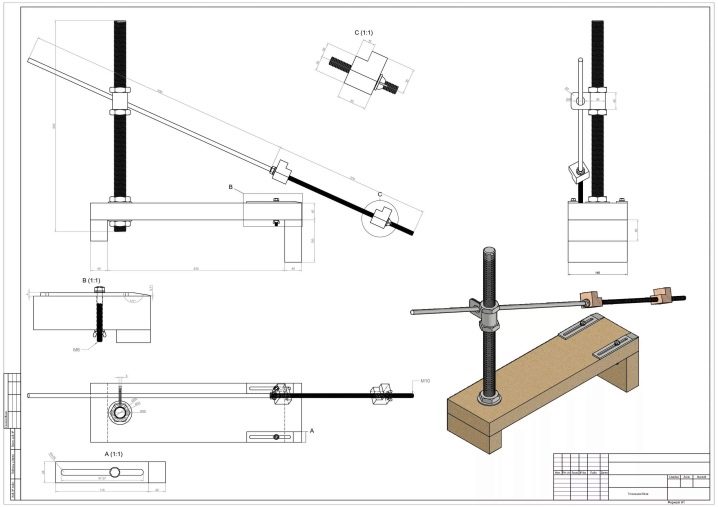
Plywood
The device will turn out to be box-shaped, on one side there is a blade fixing unit, on the other - a carriage fastening rod with a stone fixed on it.
What you need to adapt:
- 2 sheets of plywood: the thickness of each is up to 10 mm (not less than 6), one is 23 cm by 4 cm, the other is 23 cm by 15 cm;
- 2 wooden blocks (hardwood is preferable): one - 15 cm by 5 cm by 5 cm, the second - 7 cm by 5 cm by 3 cm;
- 2 carbolite hold-down washers - 5 cm by 5 cm by 0.6 cm;
- 2 pieces of sheet steel 1 mm thick;
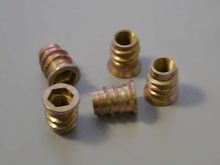
- 2 furniture fittings;
- sandpaper;
- chisel;
- hacksaw for metal;
- angle grinder;
- drill, drill;
- hammer;
- screwdriver;
- boot knife;
- welding unit with electrodes;
- screws, as well as washers, bolts and nuts.

Here is the process of manufacturing the machine in stages.
- Work begins with the creation of a plywood base box. First, the plywood sheet needs to be sawn (the one that is 23 cm by 4 cm) in two. It is necessary to cut obliquely along the long side, and so that in the end you get 2 trapezoidal parts with dimensions of 23 cm by 3 cm by 1 cm.If possible, you can take two plywood pieces of the given dimensions at once, which will become the sidewalls of the base.
- Further, on a large plywood sheet, stepping back 4 cm from the edge, a groove is sawn. Plywood layers are removed so that a 2 mm deep groove is formed. After the ends have been processed with sandpaper, you can assemble the structure.
- First, one sidewall is screwed to a large sheet with self-tapping screws, then the second. And the sheet is positioned so that the selection is in front of the base. In the back of the box, a wooden block is fixed with self-tapping screws. At a distance of 25 cm from the left sidewall, a hole is made in the block with a diameter corresponding to the diameter of the outer thread of the case.
- From below and from above, it is necessary to screw the fittings into the bar with coaxiality to each other. The adjustment stud will be attached there.
- The handcuff is made of steel plates measuring 17 by 6 cm and 15 by 4 cm. The smaller plate is placed on the larger one, 5–6 mm recede from the edge, the plates are welded. Already in the assembled structure, 2 holes are made for the M4-M6 bolts. Bolts are inserted there, they are welded to the plate. The grinder can cut welded beads.
- The clamping bar is made up of two parts: the top is made of a steel plate with the letter G, the bottom is made of a rectangle. The plate includes a large part of 15 by 8 cm and a smaller 5 by 4.5 cm. The rectangle is 10 by 5 cm. The L-shaped plate must be laid so that its small part covers the handcuff, but does not reach 3 cm to its outer edge.
- A small one is placed under the long fragment of the upper plate. Two through holes are made in them, each half the size of the bottom plate. The plates themselves are twisted into bolts. The heads of the bolts are welded to their plates - and necessarily "stagger".
- On the surface of the base, a line is drawn parallel to the sidewalls, it runs along the center of the feet, which stand at the back of the base in a bar. From the edge of the upper foot it is necessary to retreat 4 cm, from the edge of the hand-hand - 2.5 cm - along the line drawn with a jigsaw, make a groove with a width corresponding to the diameter of the bolts that are welded to the plates.
- The groove into which the fasteners of the clamping bar are inserted will be adjusting.
If the nuts are loosened, you can move the pressure plate to the handguard, you can move it away from it, that is, blades of any width can be conveniently fixed on such a machine.
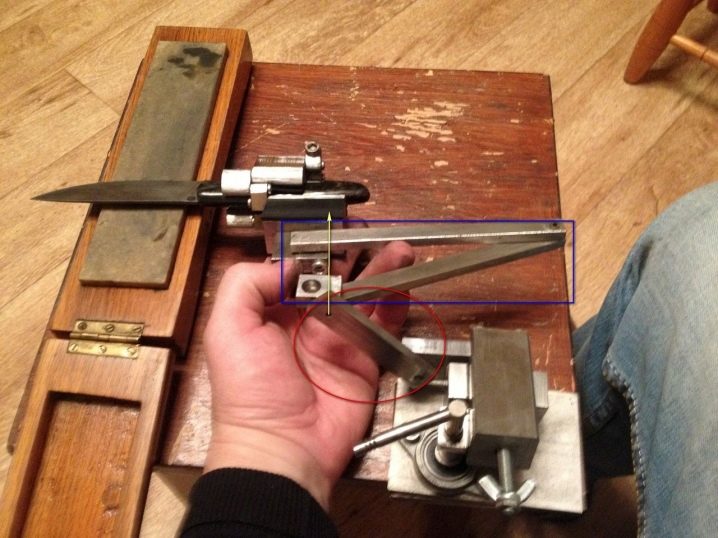
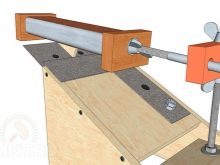
Separately, it is worth describing the adjustment system of such a machine. This is a vertical stud in a bar's foot, a support block, a lower and an upper retaining nuts. The assembly of the system looks like this: the hairpin is screwed into the sleeves, a washer is put on it, a nut is screwed on. The tightened nut prevents the pin from turning around the axis. 1.6 cm recedes from either edge of the support, a hole is drilled along the shorter side along the diameter of the hairpin. And the second hole is made perpendicular to the axis of this hole with an indent of 4.5 cm. Only with a diameter twice the diameter of the bar carriage. The lower adjustment nut is screwed onto the pin, the shoe is put on, the upper clamp nut is screwed on.
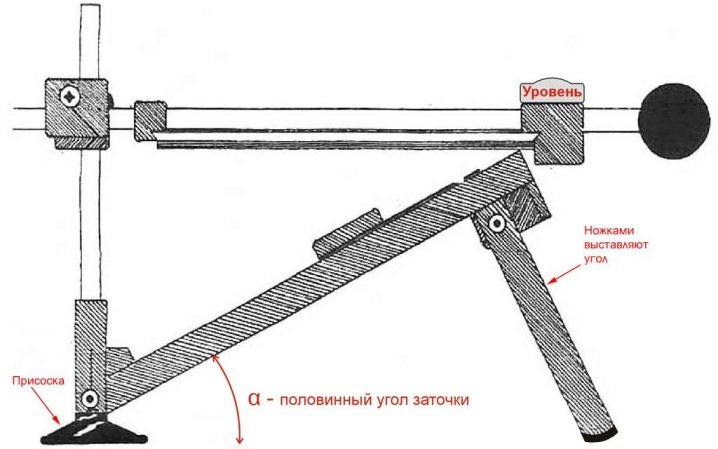
And the sharpening carriage is a metal pin with a sharpening stone. A nut is screwed on from one end of the stud, both hold-down washers are put on, the second nut is screwed on.And they are positioned so that the whetstone fits between the washers. On what is left of the hairpin, a piece of plastic tube is put on (you can just do with electrical tape). The opposite end of the stud is inserted into the hole in the support block.
How to make an electric machine?
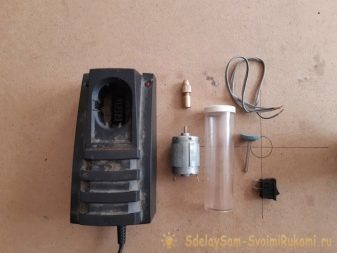
To make, in fact, an electric sharpener yourself, you need to prepare everything you need.
This list will include:
- unnecessary charging at 12 volts;
- 12 volt motor;
- switch;
- a small piece of two-core soft copper wire;
- round stone for a drill, 2 cm in diameter;
- collet chuck for the motor axis;
- a tight piece of pipe for a motor;
- 2 screws.
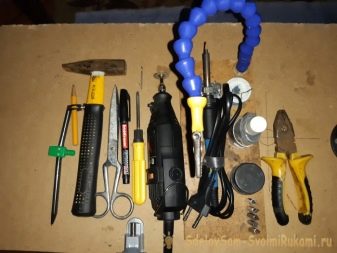
Of the tools, a soldering iron, a drill, a screwdriver, scissors, a file, a marker, a hammer, and pliers are useful.
The process for making a homemade power tool sharpener is described below.
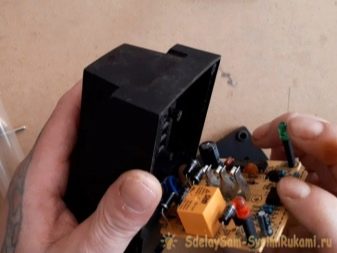
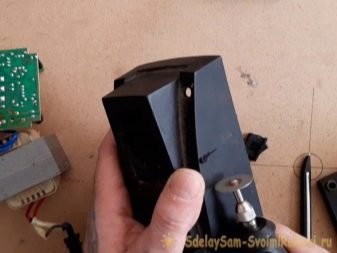
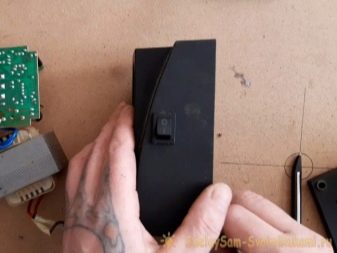
- Disassemble the charger, choose a place for the switch on the case, mark it with a marker. Use a drill and a cutting disc to cut a hole. Align the edges with a file, try on the switch.
- Cut the copper wires of the required length, remove the braid from the ends, plunge the ends with tin, solder to the switch.
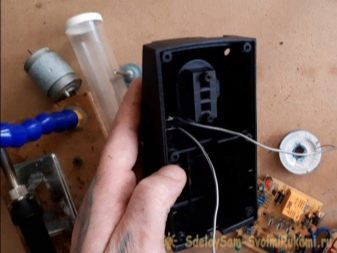
- Solder one wire to the charging contact terminal, the second lead out through the housing hole. The wire is soldered and to the second terminal of the charger, respectively, lead out through the second hole for the terminal. You can assemble the case.
- Solder the output wires to the motor terminals. Straighten the edges of the metal insert with pliers, drill 2 mm holes in the corners. It is used as a clamp to hold the motor against the housing. The motor is secured to the body with a clamp using suitable screws.
- It is necessary to make a protective cover from sparks, it will also fix the blade - in this case, a tube from composite glue is used. The collet is assembled together, a flat stone is installed in it for sharpening, all this is tightened with pliers. A suitable pipe is put on the top of the engine, the place where the grindstone ends is marked with a marker.
- A slot is made with a drill and a cutting disc, always at an angle that is relevant for sharpening a knife.
It only remains to make a rubber mat for the mini-machine, because it will rattle during operation.
Operating tips
How to use the machine so that the knives are sharpened correctly, and the person using it does not hurt himself - everything is covered in 5 basic tips.
- All movements with a knife should be only smooth, no jerks, nothing fast, without haste.
- You need to press on the blade evenly, and what exactly the force will be is decided in each case individually.
- The blade is sharpened evenly along its entire length.
- If necessary, the knife will have to be cooled by immersion in water.
- After sharpening is completed, the blade can be sanded with sandpaper (grit - no more than 800).
You can test the quality of sharpening as follows: put a sheet of paper on a standard cutting board, draw a knife over the sheet.
If sharpened poorly, the sheet will tear or bend. If it is good, it will be motionless, and at the same time a smooth cut will appear on it. Everything is simple and clear.
Let the homemade machine tool be perfect from an engineering point of view and do its job for a long time and efficiently!
How to make machines for sharpening knives with your own hands, see the video.


The comment was sent successfully.