Subtleties of mounting a rack ceiling
The variety of materials for finishing ceilings is great on the modern market. They differ significantly among themselves in features, advantages and disadvantages, price. You can choose the most budgetary option for finishing work: whitewash, paste over with foam, or, conversely, spend a rather large amount on fashionable 3D compositions. This article discusses the original method of finishing ceilings - rack and pinion.
Peculiarities
The appearance of slatted ceilings has been designated quite recently, but they have already won the love of many Russians. The explanation for this is their high strength, simple operation, durability, which makes the installation of ceilings affordable for everyone.

The advantages of slatted ceilings include:
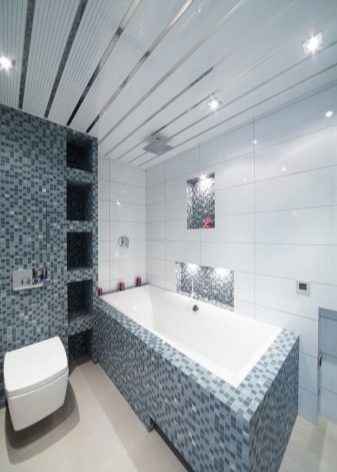
- moisture resistance, which allows them to be installed in a bathroom, bath, laundry, kitchen, where high humidity often occurs;
- thanks to the use of non-combustible materials as a coating, the ceilings are protected from the effects of fire;
- saving electrical energy: since the surface layer of slatted ceilings reflects light, it is therefore possible to use lighting of lower power;
- environmentally friendly materials, so no hazardous substances are released into the environment;
- easy maintenance of ceilings. To clean them, wiping with a damp cloth is enough;
- the strength of the materials used, due to which they are suitable for outdoor use;
- ease of installation work;
- aesthetics of ceilings;
- durability - the service life reaches up to 50 years, and they have a warranty period of only 20 years;
- it is possible to replace damaged areas without dismantling the supporting parts;
- The suspended ceiling looks attractive and stylish.
It should be noted that the rack structure is a suspended structure. This makes it possible to level the ceiling surface without the use of special compounds, for example, plaster.
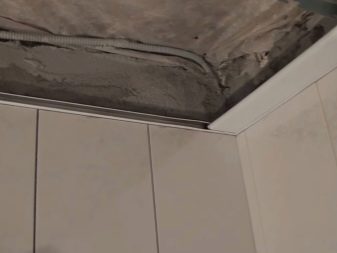
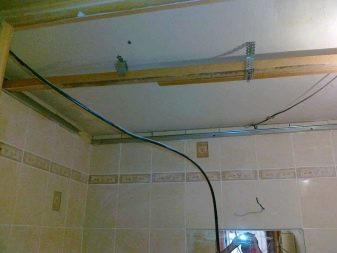
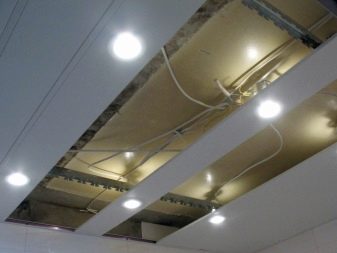
Also, under such a ceiling, you can easily hide home wires, and this is an important point.
There are practically no drawbacks to rack structures. These can only be attributed to the fact that repair work is carried out in a not entirely practical way. If one panel breaks during operation, you will have to disassemble the entire coating to replace the defect. Another drawback: when installing a rack suspended structure in any room, its height will slightly decrease. This is an insignificant minus, if you do not place any engineering devices under the structure.
Construction device
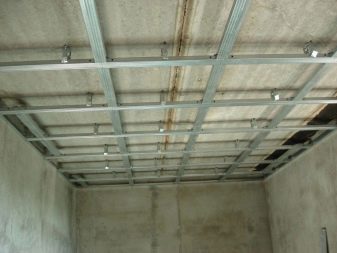
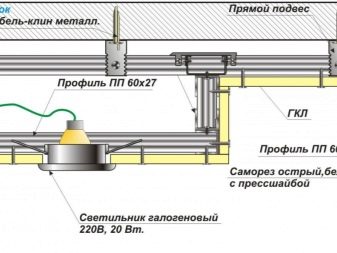
The suspended aluminum ceiling design allows the device to be securely fixed and fixed to ceiling tiles.
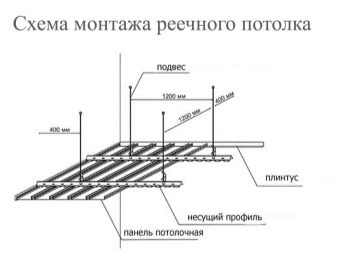
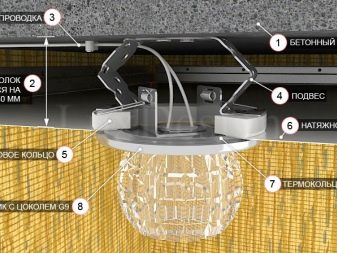
The ceiling consists of the following main components:
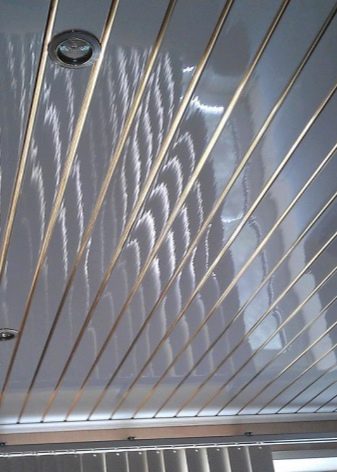
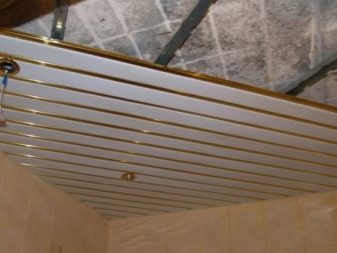
- The metal alloy rail is the surface finish. The springy design of the rails contributes to the formation of joints that are durable and reliable;
- The comb (traverse, stringer) looks like a bent channel profile with teeth. Small elements of the plank pass through the groove, and the comb is attached to the suspension springs through the profile. It comes in aluminum and steel, 1.5 mm thick;
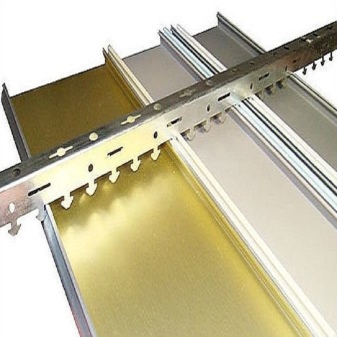
- The interfluvial insert is used to seal the planks. She is chosen to match the lath or with a contrasting design, thanks to this it became possible to use design work in the design;
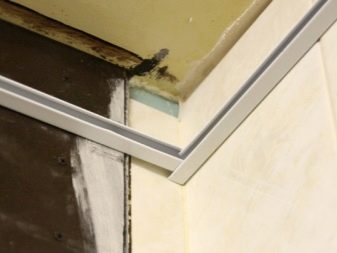
- Corner wood profile is used to decorate the perimeter ceiling.It is not always possible to cut the rail exactly in length, and sometimes it also becomes possible to trim parts in width. Decor is often used to hide irregularities and inaccuracies; it is fixed on the wall.
Correct installation includes drawing up a room diagram and determining the type of lighting. The installation of the suspension directly depends on the height of the lighting device. Most often, the suspended surface is located a couple of centimeters below the used lighting fixtures.
After drawing up the diagram, it is necessary to calculate the amount of materials for the installation of ceiling panels. Here, an important role is played by the correct calculation of the length of each rail, with the help of which the coating will be mounted. Usually manufacturers offer products of 3 and 4 meters. For covering ceilings in a small room, a 3 m long rail is perfect.In this case, repair work will be performed with a minimum amount of waste.
For a room with a large perimeter, slats with a length of 4 m are used. Having drawn up a diagram of the room in advance, you can determine the required number and length of parts.
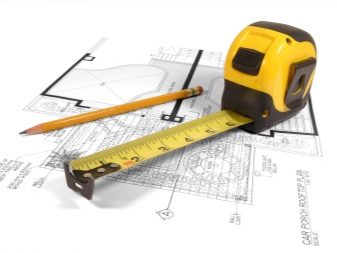
The calculation of the false ceiling includes the measurement of the perimeter of the room, which corresponds to the entire length of the profile.
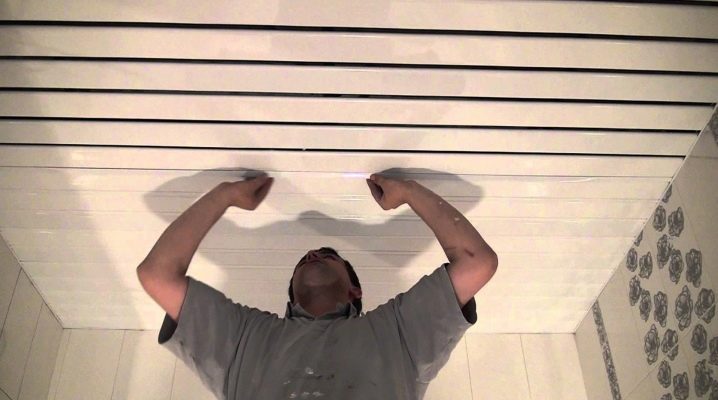
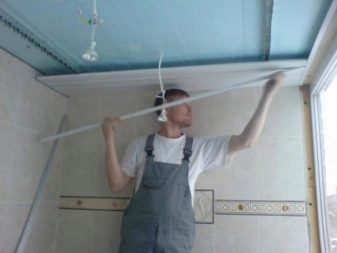
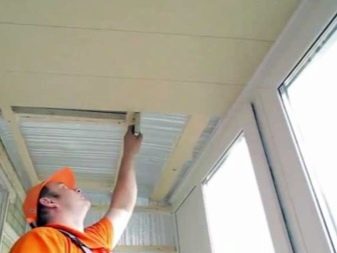
Step-by-step installation instructions
After all the calculations and the purchase of the necessary materials to install the ceiling, arm yourself:
- construction knife;
- hammer;
- drill or hammer drill;
- screwdriver;
- pliers;
- level;
- scissors, hacksaw;
- pencil;
- tape measure, square.
In addition, dowels, protective clothing, goggles and gloves are required.

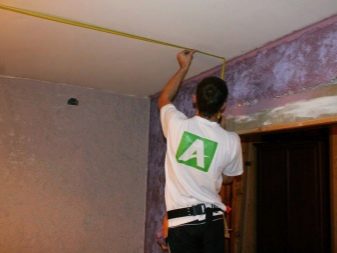
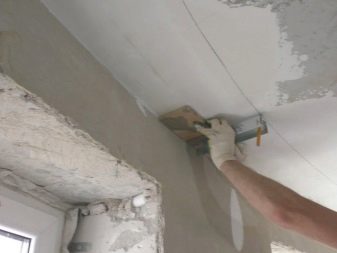
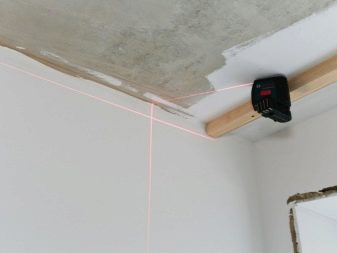
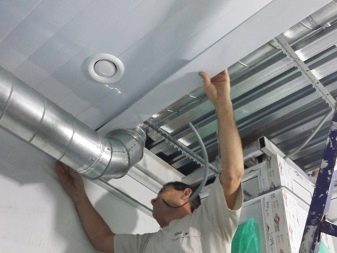
To install a rack covering with your own hands, you need to make a ceiling marking. To do this, it is enough to draw a perimeter for the profile surface. If the ceiling is horizontal, then a horizontal line must be marked. This is where the comb will be installed.
For the installation of complex multi-level structures, calculations are more complicated. In this case, instead of a tape measure, a laser level is used for measurement. The possibility of making a mistake is excluded here.
Installation technology:
- cut metal parts according to the required cuts;
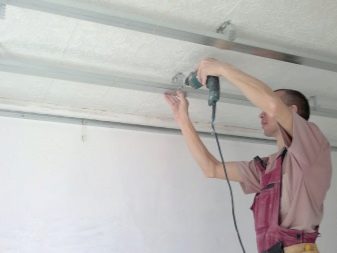
- drill holes on the profile cover if there are no ready-made holes on the profile for fixing the product.
It is also necessary to make fixing holes in the wall. For this, a drill, a perforator is useful. Then self-tapping screws are attached at 45-degree angles for the outer corners and end-to-end on the inner ones.
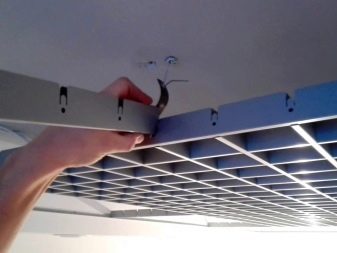
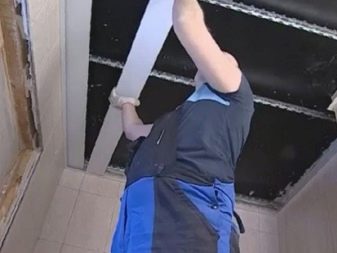
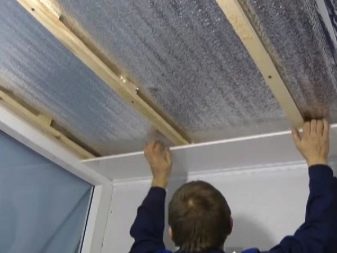
Guide parts are installed on the surface of the wall, indicating the place of the future suspended structure. It should be 20 cm lower from the old one. The lines should be horizontal, for this, laser levels are used. Profiles will be attached along these lines.
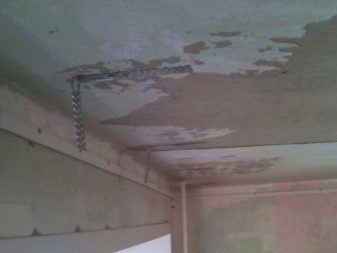
You need to install the suspension using dowels in the holes drilled in advance. In this case, it is imperative to check the correct location of the guide parts using a level. After that, you can start attaching the panels. To do this, you need to consistently cut a certain size of the rail.
A tape measure should be used to mark the areas where the carrier tires are located.
The first mark should be at a distance of 30 cm from the wall itself, and all the others should be parallel to each other every 90 cm.
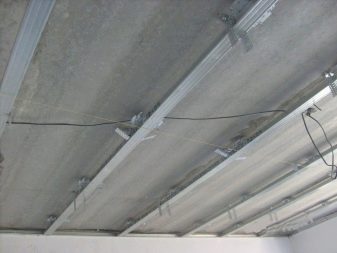
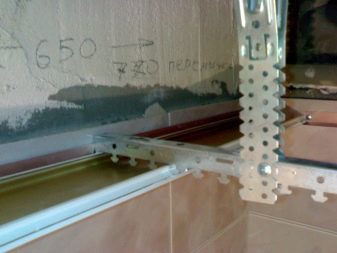
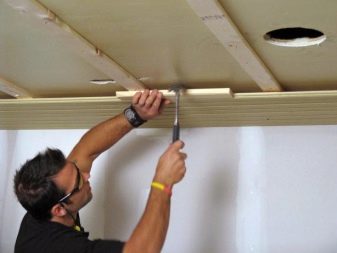
Installation of support rails:
- the interval between them should not be more than 1 meter, and they are installed at an angle of 90 degrees to the rail;
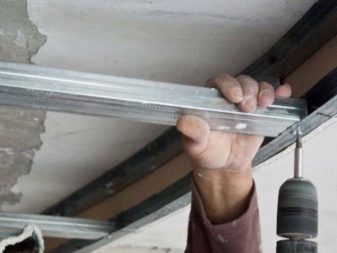
- using a screwdriver, the tires must be screwed to the suspension. For perfect evenness of the structure, you should try to avoid the slightest error;
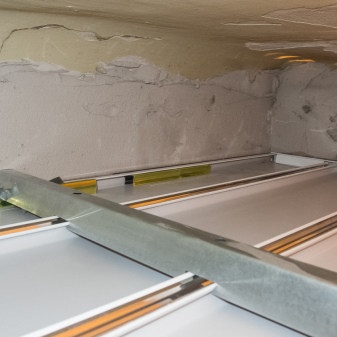
- the corner profile and the rail must be 10 mm apart. In the event that the tire is shorter than the specified value, you can simply add on, fixing the suspension in the next tire.
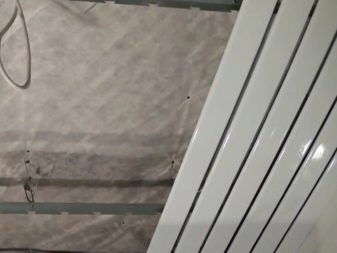
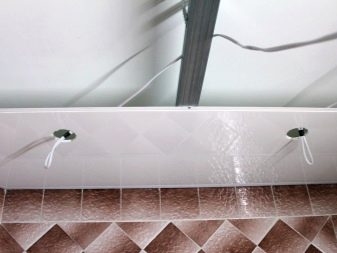
At the beginning of work, the protective film is removed from each slat and cut off depending on the size of the ceiling. The length should be 10 mm less than the wall spacing.
First of all, it is necessary to bend and mount the panel on the corner profile, then straighten and snap onto the tire clips. The second rail is installed next to the previous one, and the third is located opposite. The explanation for this is that the first row has a much shorter length than the others, and the rail will need to be repaired. This problem occurs quite often. It is possible to correct the height of the tires by changing the screw-in depth of the screws. If the width at the extreme rail does not match, then it can simply be trimmed with a knife. Then you need to secure the trimmed rail with a wooden spacer, a piece of an angular profile.
After assembling one pair of panels, you need to install additional profile parts (intermediate). In the future, it will not be difficult to assemble the parts. The main difficulty arises when securing the outermost panel. It must be installed very tightly. To do this, we adhere to one little trick: it is necessary to fix a pair of tree stakes between the extreme rail and the wall. This ensures that the fastening is sufficiently tight. The stakes can be hidden under the skirting board.
Assembling a false ceiling with your own hands does not cause much effort, if it is not a work of a complex configuration. Then you should entrust the installation of the structure to experienced and skillful specialists.
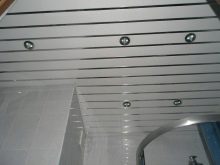
Lighting
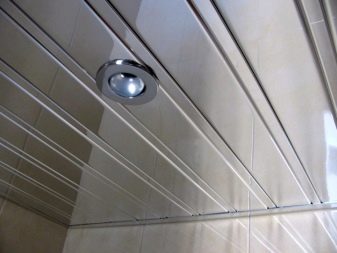
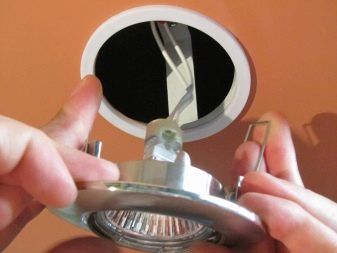
Installing lighting fixtures is the most painstaking work. Before starting all work, you should consider the location of all lamps, lamps and other devices, depending on the required level of illumination in the room.
As pendant lighting equipment, they will be an excellent option:
- LED lamp. They will illuminate individual details of the decor, as well as create an atmosphere of comfort and modernity;
- Fluorescent lamps create classic lighting;
- Small lighting fixtures will create a warm, homely atmosphere in the room.
Lighting can work in two ways:
- All lights turn on at the same time. In this case, one wire should be pulled from the switch, and only then branches are made from the two-wire wiring to the places where the lighting is installed;
- The lighting equipment is switched on in groups. One wire has the number of cores, how many groups are provided for lighting. Usually 2-3 groups are used. In addition, two-button and three-button switches are used here.
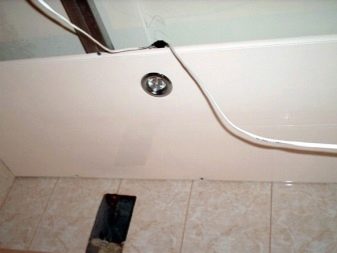
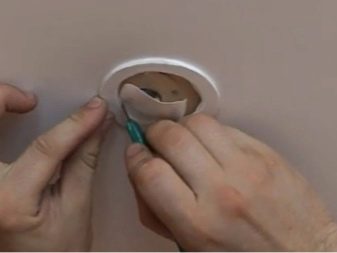
Also, before starting work, you should draw a diagram of the location of lighting fixtures, specifying the distances between each lamp. The wires from the electrical panel are bred with special plastic sleeves. At the locations of the devices, the wires are removed at a distance of 20 - 25 cm from the installed rails. Copper wires are used with a stranded cross-section corresponding to the power consumption.
With the help of special brackets, the sleeves are fastened to the wires.
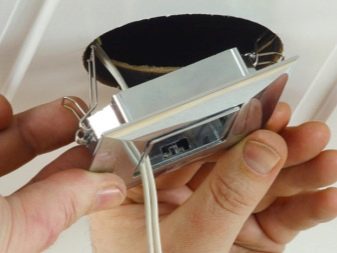
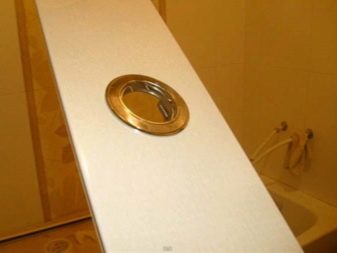
For lighting equipment, slots should be made to avoid burrs. The work is done at the same time as the slats are laid. It will not be superfluous to check the correctness and reliability of the equipment connection.
Planks should be placed along the line of light. Their direction depends on the features of the incidence of sunlight.
Repair of suspended ceilings involves the dismantling of the ceiling surface, and in the case of dismantling - only partial. At the beginning, one edge of the ceiling is disassembled - the corner profile must be pry off with a sharp object, then bend the edge so that it is possible to stretch the end of the rail. The end piece is released from the lock and removed.
The rest of the slats are subjected to another processing - it is necessary to open all the locks, while the panel moves to the edge. After that, it will be easy to remove it from the system of the whole structure.
Operating tips
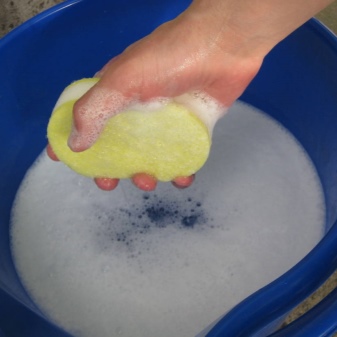
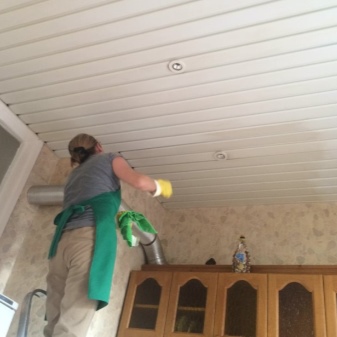
Rack ceilings can quickly become covered with dust and get dirty.Suspended ceilings are easy to maintain. Metal or plastic structures are not afraid of moisture, so they can be easily cleaned with a damp cloth soaked in detergent.
The aluminum suspended ceiling can easily withstand temperature differences and high humidity, which makes it the best option for the kitchen. In addition, the installation of ceiling surfaces is simple: no surface preparation is required.
Also, such a ceiling tends to hide all imperfections and looks fashionable and modern.
When choosing a ceiling material for rooms, you should prefer high-quality products that are covered with a protective film. The film will perfectly protect the coating from temperature extremes, high humidity and dust. A correctly installed slatted ceiling will allow you to preserve the original appearance of the structure for many years.
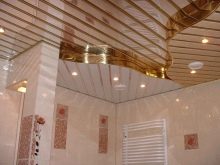
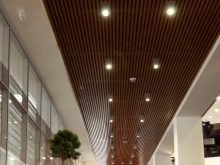
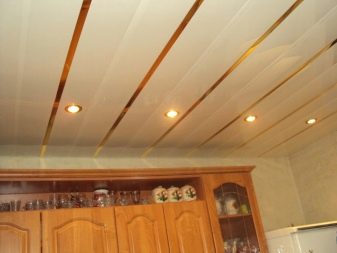
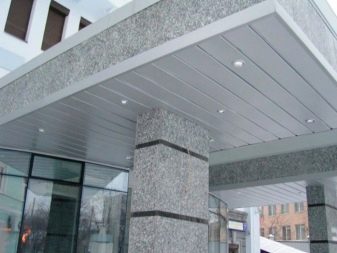
Beautiful examples in the interior
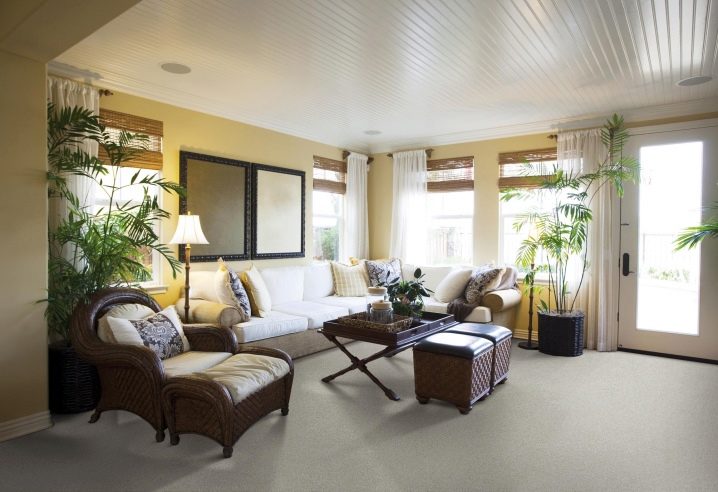
Rack suspended ceilings in the living room look simple and interesting. However, not everyone likes this option for finishing ceilings, because everyone has their own taste and preferences.
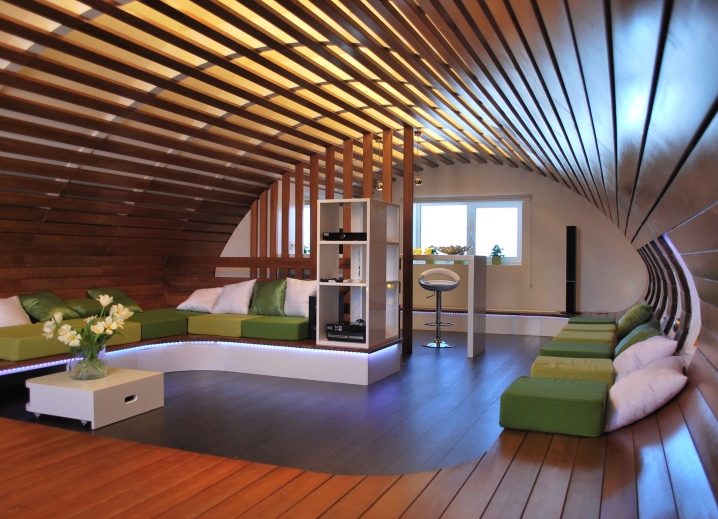
The slatted ceiling and slatted wall look intricate both in the living room and in the bedroom. Such an interior will appeal to many connoisseurs of a modern interior.
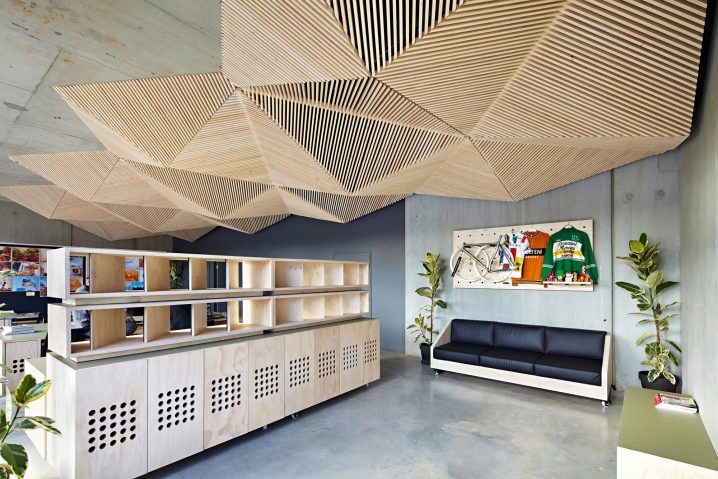
Thanks to the wide range of slatted ceilings, there is no need to look for suitable design ideas. The choice of the owner of the apartment - thousands of original models of finishing materials.
For information on how to install a slatted ceiling, see the next video.


The comment was sent successfully.