The subtleties of the ceiling insulation process
With poor thermal insulation of a private house, first of all, the budget and the health of the family suffer. It also happens that home insulation works are carried out independently and unprofessionally. In this case, the owner of real estate often loses money twice. The materials are wasted and do not perform their function properly.
It is possible to insulate the ceiling today with high quality, cheap and different materials. The main requirement for them is environmental friendliness and good heat transfer rates. Insulation materials should allow the house to "breathe" and protect it from the loss of precious heat in the harsh Russian winters. However, the average person, as practice shows, pays more attention to the pricing policy of manufacturers.
If you properly understand this area, you can find any material at an affordable price and with good heat conservation rates.
Peculiarities
If you understand the issue in detail, you can insulate your own ceiling in the apartment without buying special equipment, which is not cheap at all. The main thing is to know how to do everything right. The owner will always find the basic tools for this in a private house.
There are also many options for insulating the ceiling on the top floor of an apartment building. All work on the insulation of the ceiling is carried out in the attic, so there simply cannot be any garbage in the rooms. It is very convenient and does not distract from work.
Types and materials
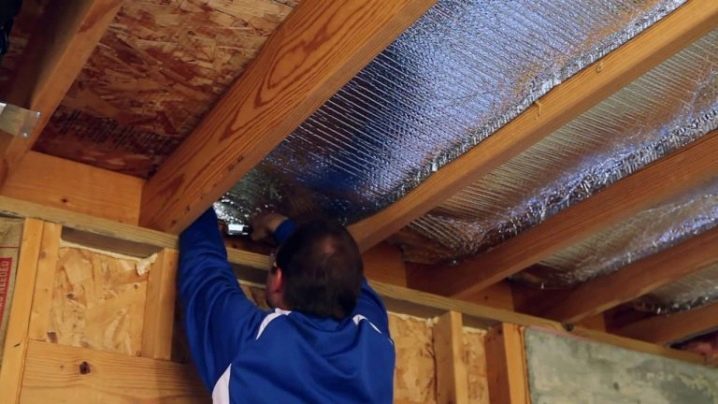
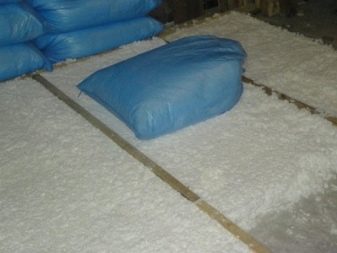
One of the insulation options is a technology using extruded polystyrene foam, isospan or foam. This option is very popular. Styrofoam reduces the cost of the expenditure side of the budget. The use of extruded materials guarantees a long service life and good insulation. Styrofoam is easy to work with, lightweight and comfortable. Most often, the house is also insulated with penoplex, penofol or expanded polystyrene.
Materials you need to purchase:
- Styrofoam;
- glassine or vapor barrier membrane;
- polyurethane foam.
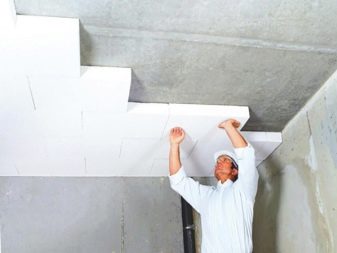
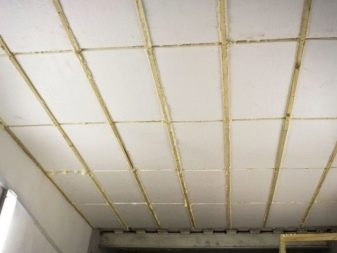
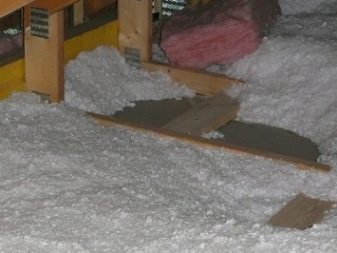
Now about foam. Best of all, 100 mm thick foam sheets are suitable for ceiling insulation. As for the density, 15 kg per cubic meter is enough. If possible, then such foam can even be laid in two layers. But it should be remembered that in this case, each joint should not be the same (the principle of brick laying is used) in order to prevent cold air from penetrating. All cracks and joints are also "sewn up" with foam.
It is simply impossible to “fit” the foam perfectly.
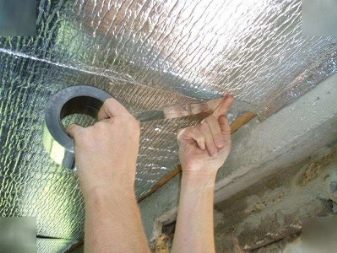
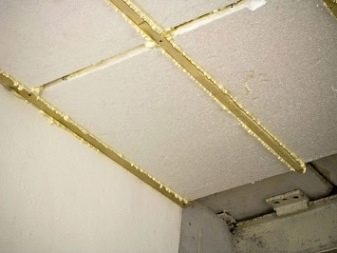
A special polyurethane foam is used to seal the cracks. For its installation, it is recommended not to save money, it is better to buy a professional pistol. It will allow you to place foam even in the narrowest slots, and besides, it is much more convenient to use it. As for the vapor barrier, many roofers do not insist on using it. The wood does not need additional insulation. But even if you are going to protect it, then use membrane materials. In this case, it is strictly forbidden to use the film in order to protect the wood from rotting and the spread of fungus. It is very difficult to fight him.
The order of work on the insulation of the ceiling can be deduced into the following algorithm:
- we lay the foam;
- preparing the surface;
- we lay the heat-insulating material;
- we place a vapor barrier;
- we lay the foam;
- we fill all joints with polyurethane foam.
The entire technological workflow follows the following principle:
- The entire work surface must be cleaned of all kinds of debris and unnecessary items. The space between the girders should not be wet. It must first be dried well (you can use powerful fan heaters).
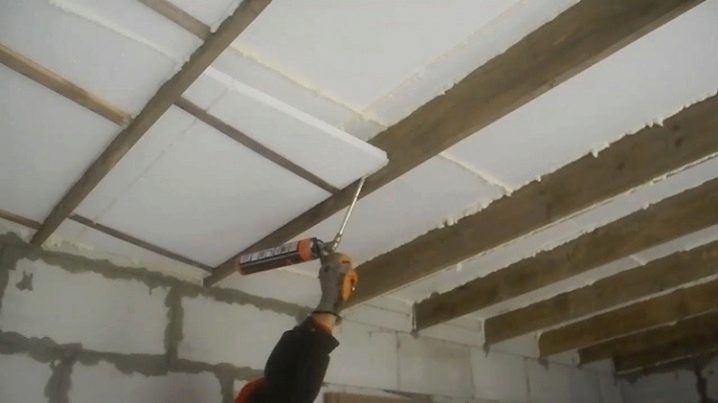
- After cleaning, you should prepare the foam sheets. Cut them so that their size is about 10 mm larger than the size of the element into which they will be mounted. Thus, the foam will fit snugly to all structures. For trimming, experts advise buying a special hacksaw. It will allow you to cut it faster and better.
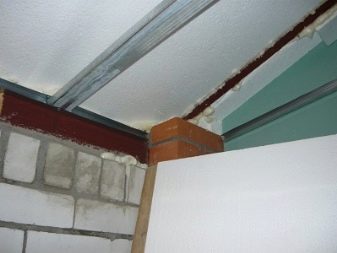
- The next step is laying the vapor barrier. It must be overlapped onto a vertical surface. The vapor barrier is fixed by using a construction stapler.

- Measure the frame of the structure accurately (it is better to double-check than to spoil the expensive material). The foam must be packed very tightly. In the event that you decide to lay it in two layers, then the top sheet of foam must be laid with an offset (approximately half a sheet) so that there are no gaps. During installation, it should be remembered that polystyrene is a rather fragile material and can be accidentally broken. At this stage, take your time and be extremely careful not to buy additional material.
- After all structures are filled with foam, we proceed to "blowing" the joints and cracks with foam. When it hardens, the protruding mass can be cut off with a clerical knife. To avoid unnecessary work, fill the gaps carefully so that the foam does not come out. If the attic will be used as an attic in the future, then additional foam protection is not needed. He simply does not need it and will perfectly perform the thermal insulation function.
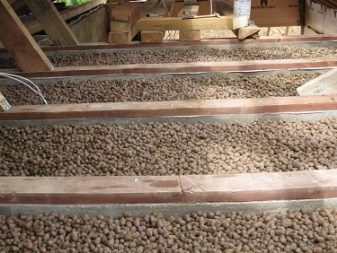
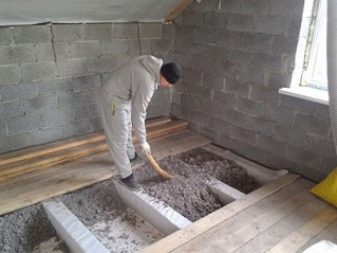
Granular polystyrene very similar to the above described foam. Only it is not produced in the form of sheets, but as small balls. But granular polystyrene is very rarely used for ceiling insulation, although it is very easy to use. The balls do not burn, quickly and well fill the entire structure, perfectly perform the function of thermal insulation.
The first thing that needs to be done when insulating the ceiling with polystyrene is rough preparation, cleaning the area from various debris. Then polystyrene is poured into all structures and distributed evenly. He does not ram. Experts recommend to fill it with a layer of up to 20 cm. The material will not weigh down the structure, since it is very light.
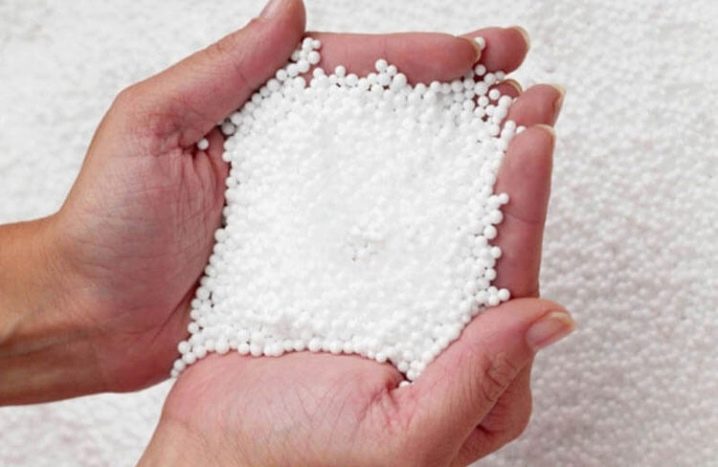
The filled-in polystyrene is covered with a vapor-permeable membrane. Any other material that is breathable can be used.
This is a necessary condition, since the balls can fly away when the slightest wind blows.
This technology is quite effective and gives a fairly high rate of thermal insulation in a private house. Another reason in favor of granular polystyrene is its price. You can buy it at a price of 5500 rubles per cubic meter. It is easy to calculate that if the ceiling is insulated with a layer of about 20 centimeters, then 1 cubic meter of polystyrene will cover 5 squares of the ceiling.
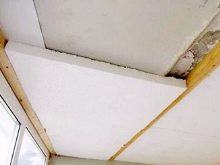
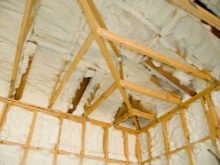
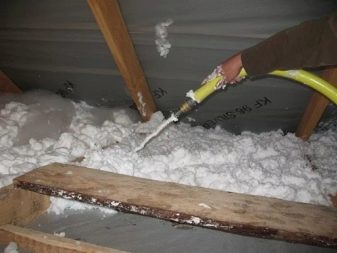
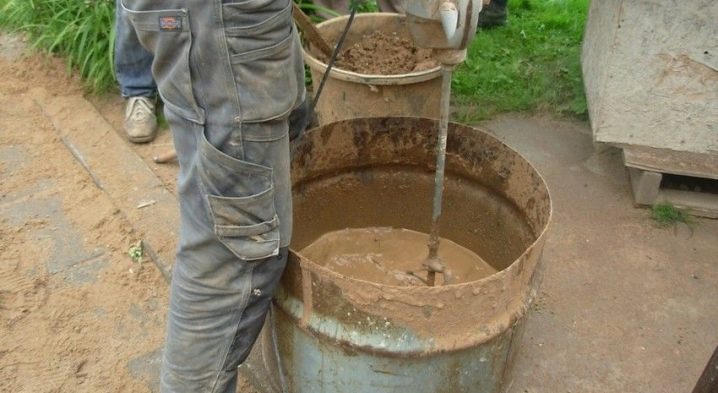
Another option for ceiling insulation is penoizol. This is the latest material. It is produced in liquid form. By filling the structure, you can fill all the cracks and voids. The service life of the material is up to 30 years. The only drawback is that you need special equipment, special knowledge and skills for its installation. If you opt for this material, then you need to attract specialists and additionally pay for their work.
But specialists will do everything for you, your function is only to control their work. You only need to complete the preparatory work - to clear the insulated areas from various debris, remove interfering objects, things.
The next step is the preparation and installation of the vapor barrier membrane itself. It protects wooden structures from moisture that will be released during the process of filling the ceiling with foam insulation.The membrane will create a barrier and release all vapors to the outside.
Now the specialists can get to work. They will apply penoizol with the required layer over the entire area. This work is done pretty quickly. As for the drying of the material, then this requires a certain time.
It is not necessary to cover (insulate) the surface insulated with foam insulation. Even if penoizol "protrudes" higher in some places, then this, if necessary, can be solved using an ordinary construction knife.


Now you need to figure out the cost of the material itself. One cubic meter of penoizol will cost you 1700-1800 rubles. This is a fairly reasonable price. As a result, you get minimal headaches and excellent results.
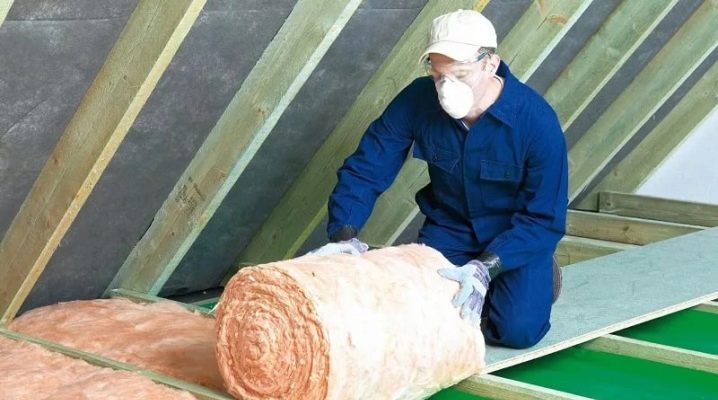
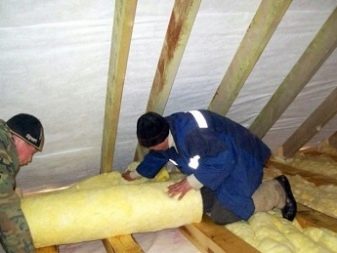
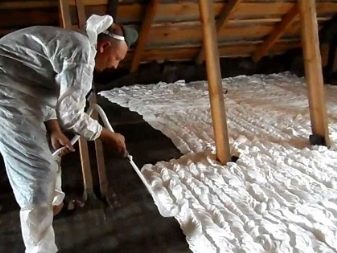
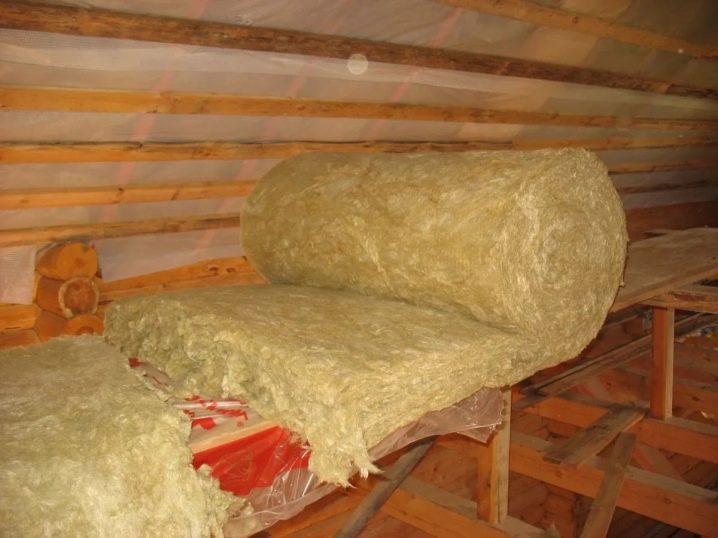
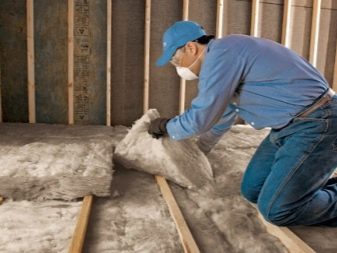
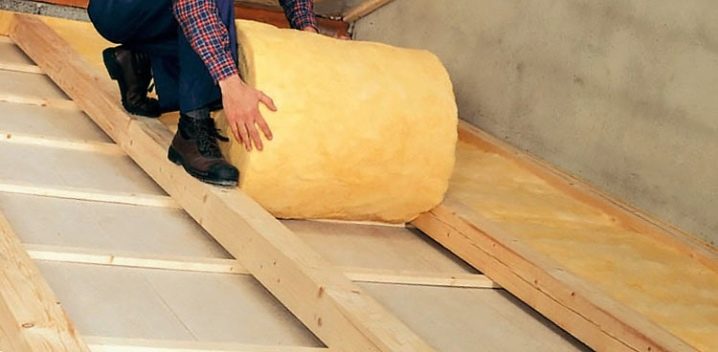
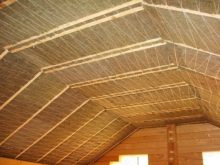
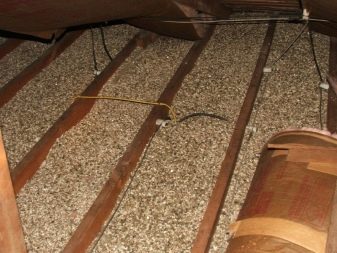
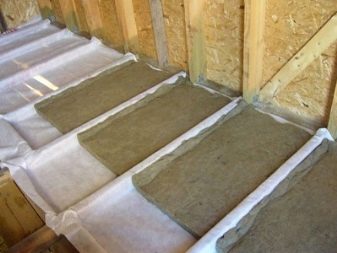
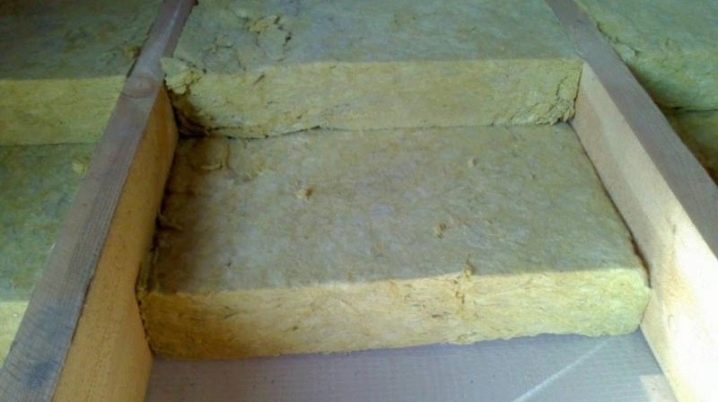
Another option is ceiling insulation mineral wool... It can be noted that this is the most popular technology for insulating not only the ceiling, but also walls and floors. The work can be broken down into several stages.
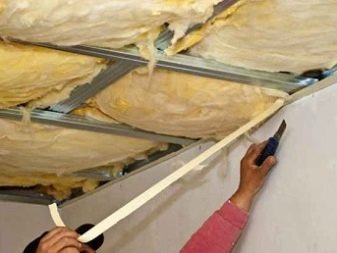
As in all previous versions of thermal insulation work, the area is cleaned, all debris is removed. Then the material is laid that allows steam and water to pass through. The hydro-barrier is mounted with a stapler. In order for everything to be done reliably, it is necessary to make overlaps up to 15 cm. To strengthen them, use adhesive tape.
Remember that a well-made vapor barrier is an important stage in this technology.

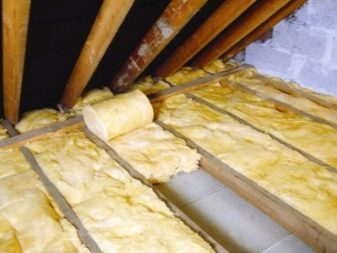
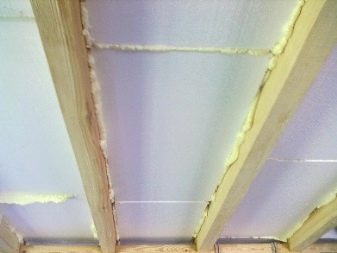
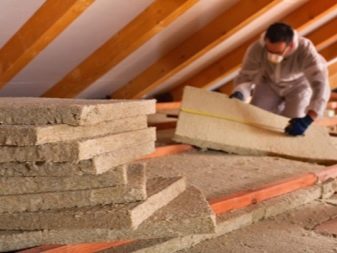
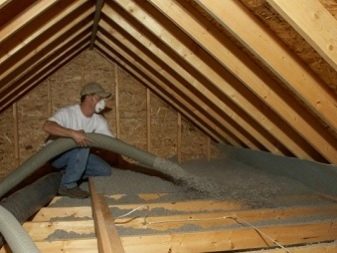
When the vapor barrier is done, you can start filling the interbeam space with mineral wool. It is delivered both in rolls and in small sheets. The material is comfortable and lightweight. If you bought rock wool in rolls, then it can be easily cut into pieces you need, put between the beams. Fill the space between the girders so that there are no gaps. The materials must fit snugly together. In order for mineral wool to fulfill its purpose well, it is necessary that it be laid with a thickness of at least 10 cm. Only under this condition will it be able to properly fulfill its purpose.
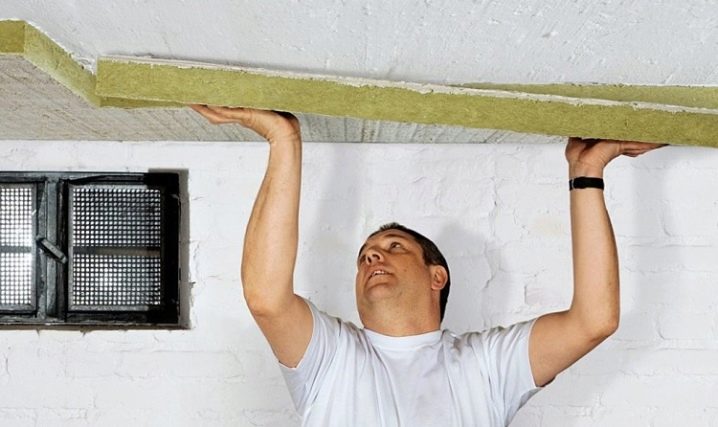
When installing rigid slabs, you should pay attention to the fact that the lathing must be solid. It is very important to properly waterproof the entire surface. Only after that the plates are laid. Also remember that hard rock wool will be much better at protecting your hearth from heat loss.
When working with mineral wool, you need to take care of your own protection. Purchase a respirator and gloves in advance. After all the insulation work, mineral wool will not pose a danger to you and your family members. But in the process of laying, when the material needs to be cut and taken by hand, small particles of cotton wool will get into the lungs and irritate the mucous membranes, if they get on the skin of the hands, they will cause itching and redness.
Despite such a minor minus, mineral wool is great if you need to insulate the attic yourself, without hiring specialists.
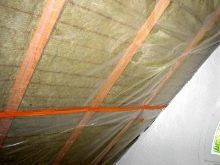
Mineral wool insulation technology
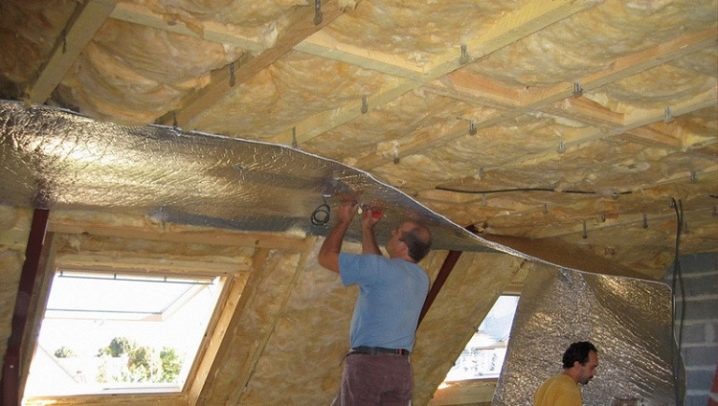
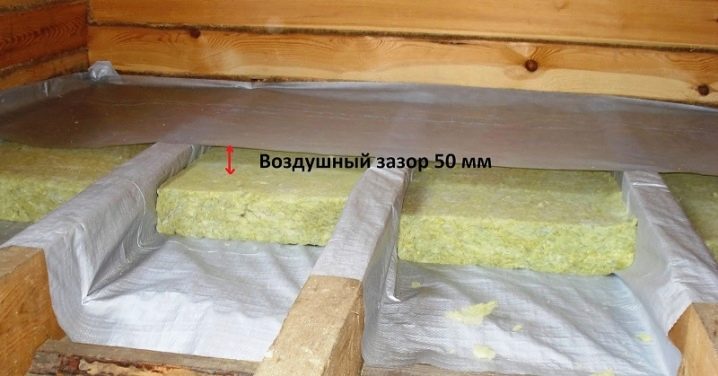
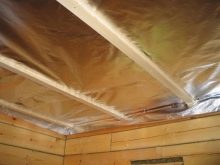
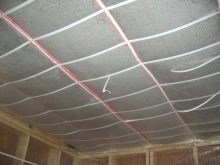
The entire surface to be insulated must be covered with a special windproof membrane. She will also close from moisture from the outside, ensuring the removal of excess moisture from the inside. Installation is carried out as standard - using a special stapler. All joints are securely fixed with a special tape.
Then the cotton wool fills in the space between the lines. The most optimal option for the thickness of the material is up to 20 centimeters. Cotton wool needs to be laid tightly, not to allow cracks. Due to the fact that the attic is protected only by a roof, it must be insulated with high quality. Don't skimp on the thickness of the mineral wool. In order for the sheets of mineral wool to hold tightly, they must be well fixed. You can use one of several methods for this procedure.
In the first case, you need to fill the slats over the insulating layer. In the other, pull the twine on the surface. It will perfectly hold mineral wool, it will not go anywhere.
Then comes the vapor barrier. The choice of this material is yours.After it is attached, you can start finishing. Sheets of plywood are used; it is good to use drywall or lining for the attic.
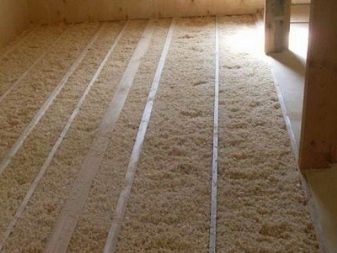
The next technology for insulating the ceiling of a private house is thermal insulation sawdust... Very often, such material is used in summer cottages.
If you do not want to spend large sums of money to insulate such buildings, budget options are quite suitable.
What is needed to insulate the ceiling of a country house:
- Sawdust from any wood species. It is important that they are dry and not rotten. Such material can be found on the sawmill. They will gladly sell them to you for a pittance.
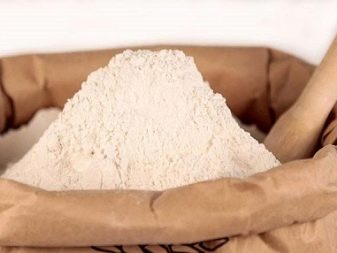
- You will definitely need lime. It is used to protect material from mold and all kinds of pests. It is added in a ratio of 1: 10. Buy finely ground lime (fluff lime).

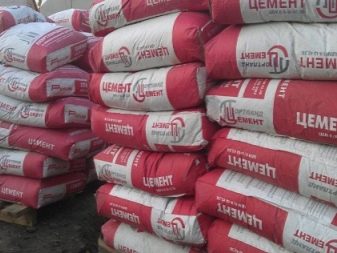
- In order for the composition to be strong, many experts recommend adding cement (one part of cement and 10 parts of sawdust).
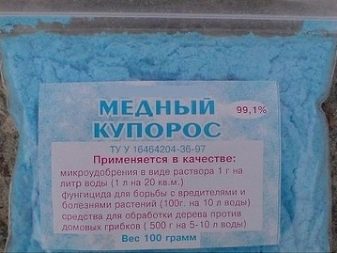
- It is recommended to use copper sulfate as an antiseptic.
The work algorithm is approximately as follows:
- A convenient container for mixing is taken, which you have at your summer cottage. It mixes 10 parts of sawdust, part of cement and lime. It is necessary to mix everything so that the mass is homogeneous.
- After this procedure, add water. The water should already be with copper sulfate. It must be poured in carefully, the entire heat-insulating mass should not be damp or wet, but only slightly damp.
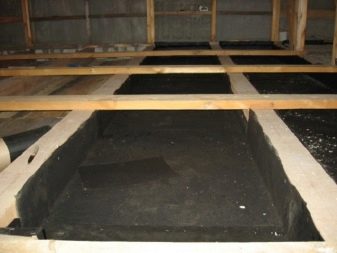
- Then you need to move on to the next stage - preparing the ceiling. The entire surface of the ceiling should be covered with a layer of glassine. Lay this material with an overlap so that the next one goes on the previous one by 15 cm. Glassine will perform a waterproofing function and will not allow moisture to penetrate into wooden structures. To fasten the glassine, the already mentioned stapler is used.
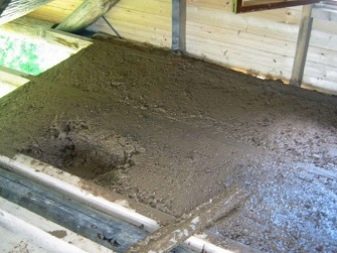
- Further, the prepared mass of thermal insulation must be evenly distributed over the entire area. The thickness of the insulating layer is recommended from 10 cm. The material does not require compaction.
- It takes a certain time for the laid layer of sawdust to dry completely. As a rule (it all depends on the weather), it takes up to two weeks to dry. But you can also speed up the process with available means. Make sure that the attic is well ventilated when the sawdust dries. It is impossible to walk on such thermal insulation. If you plan to use the attic for domestic purposes, then you will have to spend money on a board or plywood that will protect the thermal insulation material.

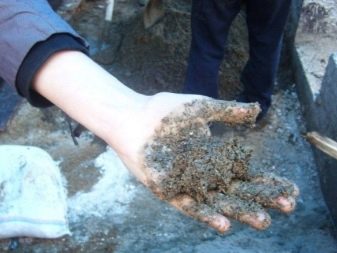
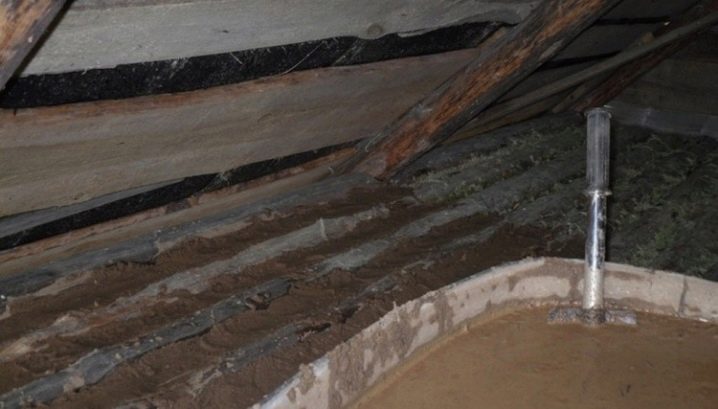
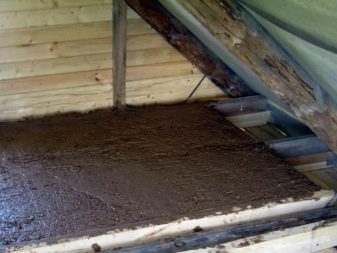
Another available material for insulation is a mixture of clay and sawdust... This mass will perfectly protect the house from the loss of precious heat. Another bonus is the absolute environmental friendliness of this option.
To work on insulation, you will need:
- directly the clay itself, which you can get yourself with a shovel;
- sawdust (use the services of a sawmill);
- some cement. Buy it at a rate of 1: 10.
You can prepare a sawdust-clay mass as follows:
If there is a concrete mixer, then it is necessary to pour several buckets of clay into it, gradually add water so that there is a liquid mass at the exit. Then sawdust is added. You need to fill up until the solution becomes relatively dense. Make sure that the mass is not very wet. This is an important point. When these conditions are met, cement can be added. He will thoroughly dry out such a composition.
Also, instead of sawdust, straw is often used. In this case, you will get adobe.
The following material suitable for roof side insulation is expanded clay. It has quite good thermal insulation performance, is rather light and does not make the surface to be insulated heavier. It is easy to attach. It is also a refractory material. In order for the use of expanded clay for thermal insulation to be effective, you need to make a layer of about 20 cm.Otherwise, there will be large heat losses. Roof beams must also be of the same height.
Expanded clay is very widely used for thermal insulation. The technology for insulating a private house with it is quite simple. The backfill surface is cleaned of foreign debris, a vapor-permeable membrane is mounted. The material is poured over the entire surface, covering the beams. You will need a stapler to strengthen it. Such work will be performed by any housekeeper with a minimum set of tools.
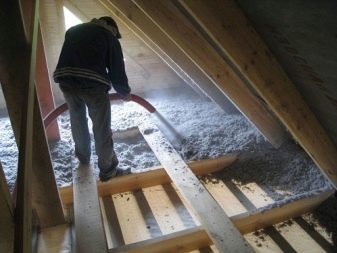
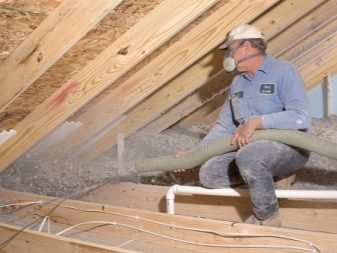
Ecowool - another common way to insulate the ceiling of a private house. They began to use it not so long ago. This is a relatively new material for thermal insulation. Ecowool contains cellulose. Flame retardants and antiseptics are also added to it. They are needed so that the material is non-combustible and safe. Due to the fact that ecowool has a capillary structure, moisture evaporates well from its surface. Antiseptic additives prevent mold and mildew growth.
It is not recommended to work with ecowool on your own. This is its only significant disadvantage. Its layer should be laid by specialists using special equipment. Without such equipment, it will poorly perform its functions.
Trust the experts if you decide to use this kind of insulation.
Algorithm of work:
No special surface preparation is required. Cellulose is “friendly” with wood. It is necessary to clean the surface of debris, to rid the room of unnecessary items.
Ceiling insulation works can be performed both dry and wet. For the dry method, the material is applied under pressure to the insulated surface. With the wet method, a wet mass is fed. After it dries, the adhesion of the material is very high quality. The wet method is more often used due to the fact that it increases the sound insulation rate.
Reviews
According to the reviews of the owners of private households, who carried out insulation work from various materials inside buildings, the insulation of the ceiling and roof is an important stage in the thermal insulation of the room, without which it is impossible to achieve the comfort of living. Most of them highly praise expanded polystyrene and mineral wool, noting their undoubted advantages. These materials are easy to use, do not require special skills and expensive equipment for insulation. All work can be done with your own hands and improvised tools.
The main thing is to do everything according to a certain technology and carefully.
If the insulation of the ceiling is carried out in the country, then most of the owners of such buildings perfectly insulate their homes with sawdust and clay. The result of such work, as a rule, pleases the owners very much. But when working with these materials, one should be very careful about fire safety, since heat insulators of this type are highly flammable.
The main thing is to realize that ceiling insulation is a very responsible matter. About 25% of the heat can be lost through the roof. Therefore, it is very important to do everything efficiently and correctly, and the costs of materials and tools, if purchased, will quickly pay off, especially when inexpensive and widespread insulation technologies are used.
In any case, video tutorials, tips and advice from roofing experts will always help the owner of a private house. There would be a desire. When insulating a house, it is necessary to carefully calculate the thickness of the material and take into account the climatic features of the region in which the building is located. Many materials can also be used to insulate the walls of the loggia in winter. You will need a diagram of their attachment and a little effort on your part. Many professionals, when reconstructing balconies and loggias, definitely recommend insulating the loggia from below, under the floor covering. This allows you to make it comfortable to stay on it until the coldest days. Of course, provided that it is glazed.
How to properly insulate the ceiling with mineral wool in a private house, see below.


The comment was sent successfully.