Samsung TV remotes repair
Repairing remotes from Samsung TVs will not be difficult, even for inexperienced home craftsmen. In this article, we'll show you how to disassemble the remote and what to do if it stops working. We will show you how to check and repair your remote control yourself.
Common malfunctions
It's a shame when the remote control fails. This can be understood in several ways.
- The TV does not respond at all to button presses. Does not turn on and does not adjust the volume.
- Only some of the buttons are functional.
- You need to press hard on the keys.
- The remote control works only at very close range.
In the latter case, the batteries are likely to run out. Such a "breakdown" is very likely, even if you changed them recently. Batteries can be stored for a long time and lose charge or be initially defective.

By the way, 80% of problems occur for this reason. When the remote control stops working, it is better to start repairs by checking the batteries.
Their minimum allowable voltage is 1.3 V. If after replacing your remote control does not work, you need to take action.
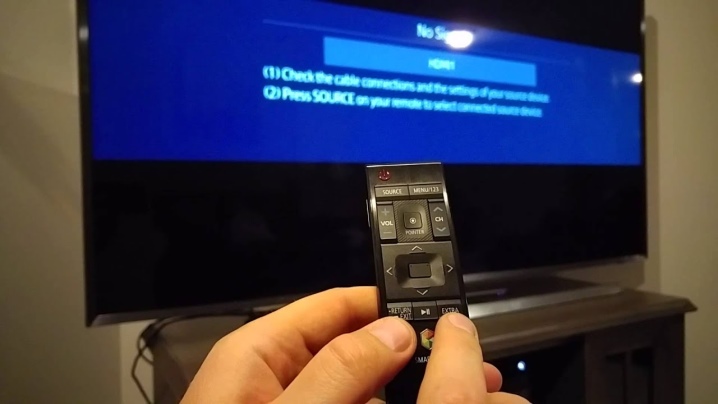
Check the remote control - to do this, aim its infrared diode at the smartphone camera and press any button. If a flash appears on the screen, the remote control is working properly. So you need to check each key. If this is not the case, the remote control needs to be repaired.
How to disassemble the remote control?
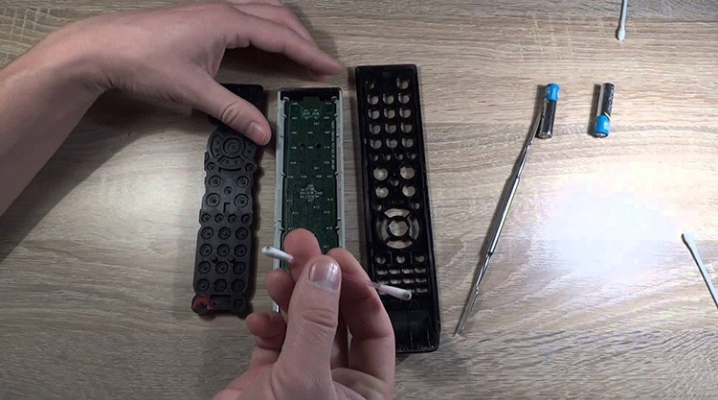
Correct disassembly is half the repair. Pay attention to the work, especially when unscrewing small screws. It is better to disassemble the remote control over a sheet of paper or cloth, so as not to lose its important parts. And most importantly, provide enough light.
To work, we need the following:
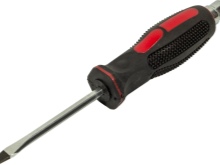
- small Phillips screwdriver;
- sharp pocket knife or blade;
- a pick, plastic card or flat screwdriver;
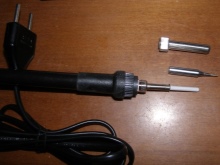
- soldering iron with a thin tip, solder, rosin;
- powerful magnifier;
- flashlight.
The remote control is disassembled according to this principle.
- Remove the battery compartment cover. It is usually fastened with a latch.
- Remove the batteries.
- Examine the remote carefully for any bolts, especially under the cover. If there are any, unscrew them. Sometimes they hide under rubber plugs.
- If there are no bolts, the halves of the remote control are held together with latches and glue. The task gets a little more complicated, then when you work, do not show much effort and do not rush. On some models, the latches are disposable and will inevitably break when disassembled. After that, the device is assembled only with glue.
- Sometimes a combined mount is used, that is, screws together with latches. The main thing when working is not to make too much effort. If the remote does not disassemble, look for the remaining screws.
- Pry up the seams on the body with a pick. If the body halves are glued together, use a blade to cut the glue line. Start work on the side opposite to the diode. If the pick or screwdriver slips off, scuffs may appear on this side.
- Go around the entire contour of the console, paying particular attention to the corners. If you hear light clicks - the work is going well, it is the latches that unfasten. But don't overdo it, as the plastic case can crack easily.
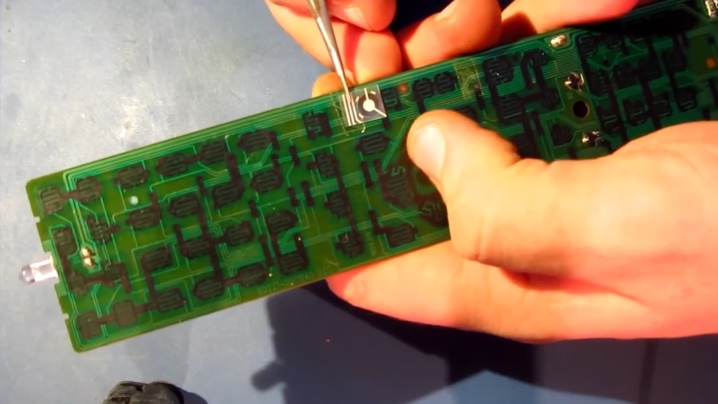
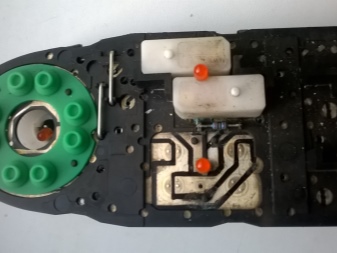
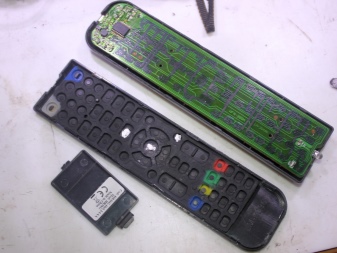
- Open the remote. Remove the board and keyboard. Attention: the board can catch on the case with the battery contacts, so remove it carefully.

Be careful. On some models, the center buttons may fly out. Especially if they are plastic and fixed separately.
Besides, there may be rubber washers between each key and the microcircuit. They are usually glued to the keyboard, but sometimes they come off and get lost. If the remote control is touch-sensitive, carefully disconnect the cable that connects the display to the microcircuit. It is usually fastened with snaps. To dismantle, pull on both sides at the same time. Then you can start cleaning and restoring.
Repair rules
The basic rule is to follow safety precautions and work in a well-ventilated area.
Recovering from a fall or impact
On impact, most of the energy is absorbed by the body. Inspect it for cracks, especially around the bottom cover latches. If there are cracks, they need to be sealed with super glue. If the remote control does not work after a fall, the board is probably damaged. When examining, be sure to use a lens with a high magnification, since it is impossible to notice damage to the board with the naked eye. They can be identified by several criteria.
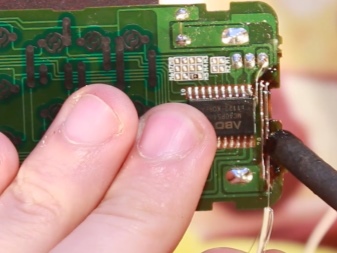
- The battery contacts have fallen off or are cracked. The contacts need to be re-soldered.
- The attachment of the hinged elements to the board is broken. These are capacitors, infrared diode, resonator and so on. If the elements come off or cracks are visible, they need to be soldered in place. Be careful and work quickly - these elements do not tolerate overheating.
- Defective quartz resonator. This is an intelligent unit that must be replaced when a malfunction occurs. You can determine the breakdown by shaking the board. If you hear a rustle, the part needs to be changed, preferably from a specialist.
- Conductive tracks may come off after impact. To restore their functionality, you need to try to re-solder them. If this is not possible, then connect 1 core from a stranded copper cable instead. After attaching it must be fixed with glue. Ideally, use a special varnish.
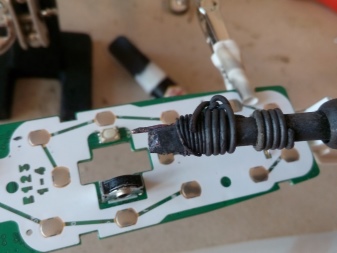
Do not use acid when soldering. It cannot be removed from the board; it will lead to the destruction of contacts in the future. Better to use rosin or other acid-free flux.
Sticky buttons
Usually the bottom of the keyboard stops working. There are several reasons for this malfunction:
- careless handling of the remote control;
- liquid spilled on it, especially if it contains sugar;
- operation of the remote control (and TV) in the kitchen;
- prolonged exposure to direct sunlight;
- switching channels with dirty hands.
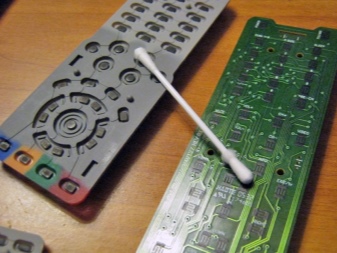
To eliminate this problem, you need to clean the microcircuit and the keyboard. Fat under the buttons accumulates even in very neat owners. This gave rise to the myth that initially the board is coated with grease from the factory. This is not true. To resume correct operation, you need to do the following.
- Remove the batteries and disassemble the device. Remove the microcircuit.
- To clean the board, wipe it with a cotton swab dipped in alcohol. It doesn’t require much effort, and the tampon should not be too wet. Do not forget to wipe the infrared diode, as it will also be covered with a film.
- Degrease the battery contact pads. With prolonged use, they become covered with a layer of oxides. Visually, this can be seen on a green or white bloom, and sometimes black. Remove dirt with a screwdriver, knife or sandpaper. Contacts should be brilliant.
- The body halves can be washed in soapy water or detergent. The presence of abrasives is unacceptable, as it will leave scratches on the glossy surface. You can use a toothbrush for better cleaning.
- It is not prohibited to use alcohol or thinner. But make sure that it does not react with plastic.
- Pay close attention to the keyboard. The contact pads on each key are graphite-coated, do not accidentally clean it off. It is black.
It happens that even after that, some of the buttons do not work. In this case, inspect the problematic buttons on the keyboard.
Resuscitation keys
When the remote is used for a long time, the graphite coating on the keys will wear off. Because of this, the TV stops responding to pressing.This is especially true of the volume buttons and other frequently used ones. To fix this problem we need:
- Super glue;
- paper-based foil (packaging for cigarette packs works well);
- scissors, sharp knife or scalpel.
The sequence of work is as follows.
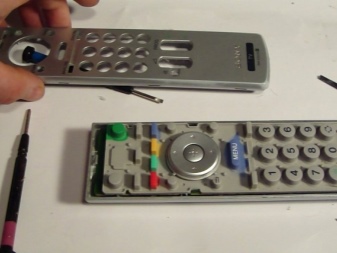
- Find invalid keys using your smartphone or work monitoring.
- Disassemble the TV remote and remove the rubber keyboard.
- Remove dirt from it.
- Remove the remaining graphite coating on the required keys. This can be done with a knife or scalpel and then finished with sandpaper.
- Cut out new contact planes of the required shape and size from the foil. They should clearly correspond to the pads on the keyboard.
- Degrease problem areas with thinner or refined gasoline.
- Glue the new pins with super glue. Follow the guide to use it.
- Trim off excess edges, if any, they will not be useful. To do this, use a knife or scalpel.
- Check the functionality of the buttons.
On sale you can find special kits for resuscitation of the keys. These include adhesive and conductive pads. Advantage - you do not need to cut out the contacts yourself. Disadvantages - the pads can be of a different shape and size, and since there are a lot of them in the kit, it is impractical to buy such a set for 1-2 keys. So fixing the remote control with your own hands is not so difficult. The technique is suitable not only for Samsung TVs, but for most others. And if the job isn't successful, it might be the TV.
How to repair the TV remote control, see below.


The comment was sent successfully.