LED strip kits: set composition and connection
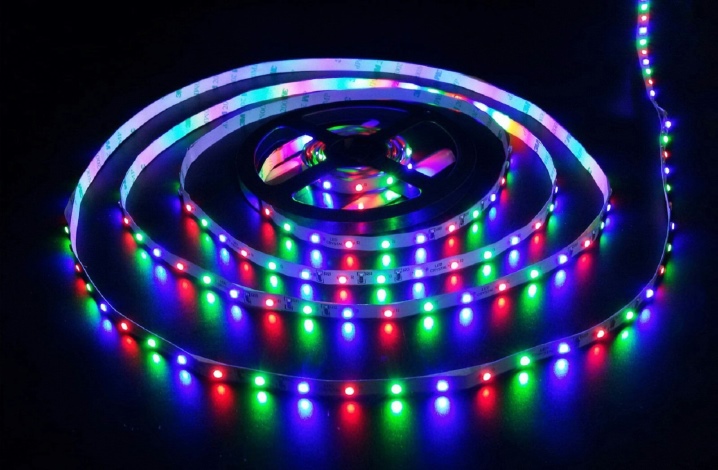
LED strips are available in the form of one-, two-, three-color and white light strips. Three-color ones are controlled using a special controller that allows you to smoothly change the color and glow level of the light elements. White does not require any additional control.
What does the kit consist of?
In general, 220-volt LED strips include, in addition to the light tape itself, a power cord with an AC rectifier, without which this tape would flicker, bothering people with its high-frequency blinking. They are not supplied with a power supply and are sold in reels that rely on a rectifier-cord connector.
Diode strips for 12 and 24 volts are sold in the form of a coil of the same (or similar) length, one cluster in which is not equal to 60 or 120, but only 3 or 6 LEDs.
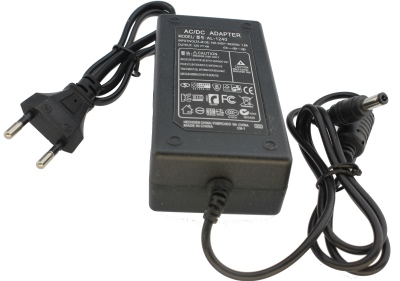
This applies exclusively to white LEDs. If we are talking about red, blue or green light strips, then there the clusters are located somewhat differently - 5 or 10 LEDs, respectively, for each such sector. The reel of the tape relies on a power supply that converts an alternating voltage of 220 volts into a direct voltage of 12 or 24. Cords with a mains plug can be fixed or detachable.
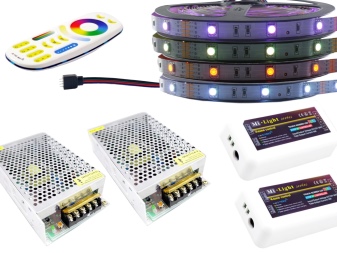
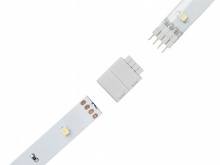
In both of the above cases, connectors are included in the complete set. More often, connectors and power supplies are sold separately.

Overview of ready-made kits
Sets in 2 m, 3 m, 5 m, 15 m - only options for the length of the spools, on which one tape is wound. These kits include several types of LEDs.
-
Pure tricolor - red-green-blue polycrystals connected by thin paths.
- Luminous - covered with a yellowish phosphor. But the phosphor comes in different colors depending on the color of the uncoated LED. So, you can put a green-blue phosphor on the red ones. In all cases, the color is close to white. Color mixing is enhanced by a lens-like head (protective element housing), which has a directional pattern. Some phosphor LEDs also emit ultraviolet light, which is extinguished by the same phosphor.
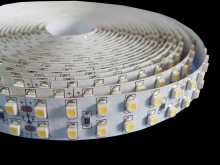
The most common surface mount LEDs in strips are SMD, 3 *** and 5 *** series. According to the parameters from the table, tapes of the required power and current consumption are selected.
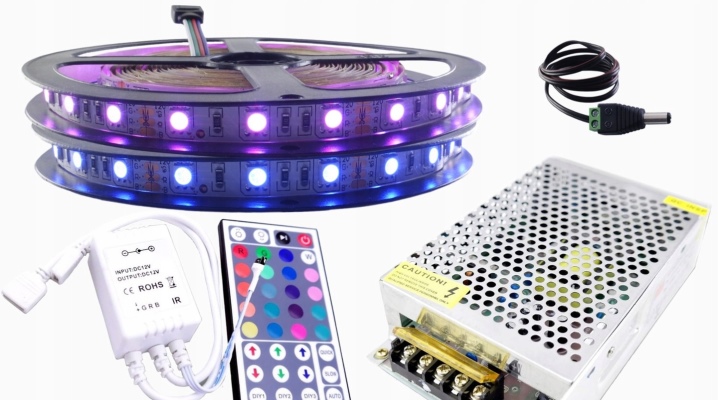
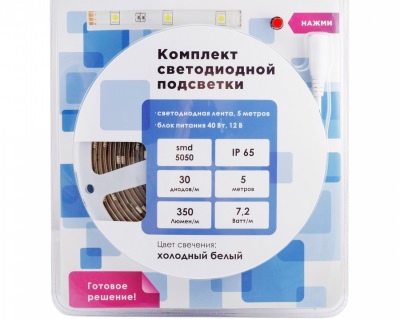
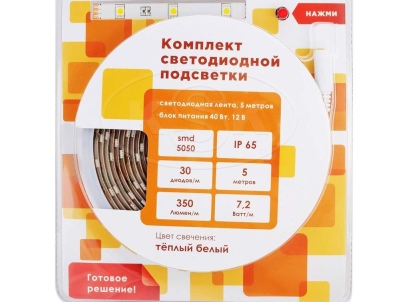
Set based on SMD-5050 LEDs, 7.2 W / m, 30 diodes per meter strip, 12 V, 360 lm / m, two-layer white base, switch on a cord, waterproof class IP-65, 48 W unit, 5 - meter light tape, color temperature - 6400 K, cold white glow color.
Before purchasing an LED backlight, check which LEDs are used in the strip.
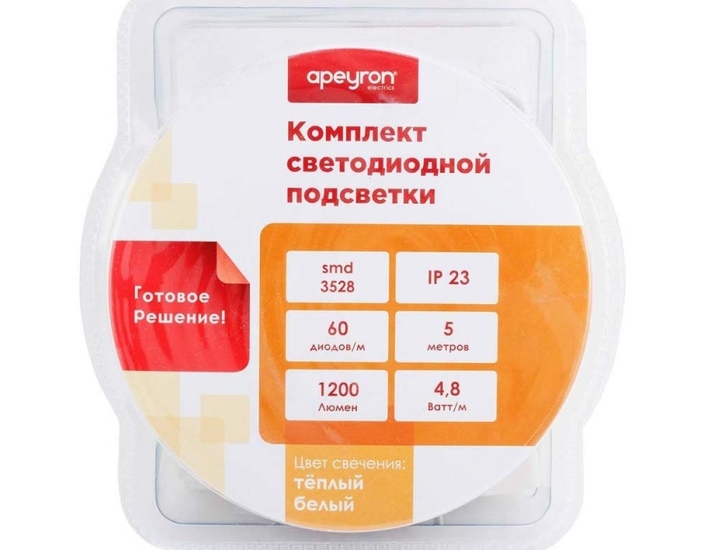
This information is indicated on the box, spool, and also printed on the tape itself (the number of the product reproduced in the tapes). The color temperature is also indicated there - often with a temperature scale (from 1000 to 100,000 Kelvin). So, 1000 K corresponds to a reddish-orange glow color, 6000-7000 K - to white without a tonal color, 100,000 - to bluish-blue. Sets of LED strips are individual in each case. Here are some examples.
-
Light tape on diodes SMD-5050. Almost all parameters are the same as in the previous case. Warm white glow (3400 K).
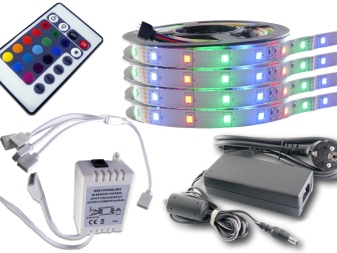
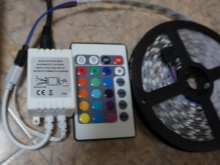
- LED set (for tape), similar to the previous two. There is a remote control for controlling red, blue and / or green light, an IR receiver (controller) as part of the power supply.
How to connect?
Connecting a light strip, just purchased or assembled by yourself, is carried out in several stages.
-
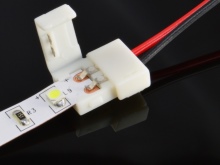
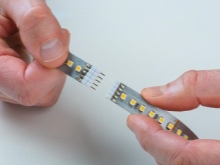
Solder wires (or a solid 2-, 3-, 4- or 5-wire cable) with a conductive copper cable of at least 0.75 mm2. Cable - because it is better to use stranded wires (mono wires, on the contrary, are harder to lay). For soldering wires there are contacts - "plus (s)" and "ground" (minus, "ground"). It is recommended to use soldering flux for quick tinning and soldering. Solder - mainly standard, tin-lead compositions (POS-series). If necessary, if you are not "friends" with soldering, use connector wires (wire with a special terminal block and plug-in terminals), already soldered at the factory.
-
Connect the other end of the cable to the outlet of the power supply.
-
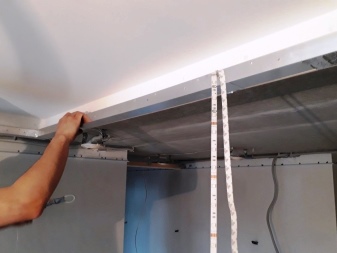
Place the power supply in a designated area. In desperate cases, a niche in the wall is made for the block.
-
Connect a cord with a switch to the unit (to its input).
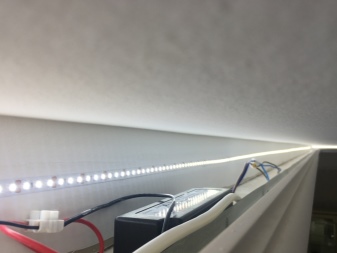
If necessary, perform a full installation in boxes, or using hidden wiring (cables plastered into the wall gates). Check the tape operation. If you have a remote control, switch between the glow modes.


The comment was sent successfully.