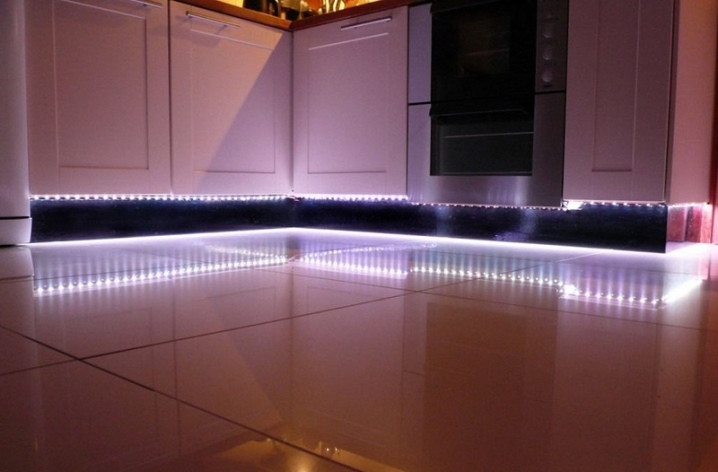
How to connect LED strip without power supply?
LED strips without a power supply have an important advantage: saving on heat loss due to its absence allows you to reduce power consumption to the limit. The space required for its work is freed up.
What do you need to consider?
You can connect the LED strip directly to the 220 volt network, but with reservations. The following theses follow from each other.
-
Don't skimp on LEDs like manufacturers do. They, as a rule, deliberately violate the calculation in the direction of higher luminosity. The operating voltage range for one white LED is 2.7-3.2 volts. The peak is 3.8 - but it shouldn't be overused. So, we take a voltage of 3 V per white LED.
In the case of using red, green and blue, this parameter changes within 1.8-2.2 volts, the average is only 2.
-
To assemble a series garland, it is necessary to select the number of LEDs with a margin. In the specifications of many household appliances, an operating voltage of 220 V was indicated - with an accuracy of 10%. That is, this is a range of 198-242 V.
We take the upper limit, since often the voltage in the network is slightly more than 220 V.
-
For white LEDs, dividing 242 - and approximately 240 - by 3 volts, we get 80 LEDs. Manufacturers often include only 60 in one high-voltage tape. The calculation is simple - saving on the number of LEDs. With a normal calculation, there should be a lot more of them. Manufacturer's calculation: 240 volts is divided by 60, which is equal to 4 volts per LED. This is clearly a lot: each of them glows more than in peak mode, hence overheating and frequent (after several months of operation) failure of the entire tape. This is done so that consumers buy LEDs more often, and their manufacturers get super profits. Remember: it is better to do it once every 25 years than to change it every 4 months.
A properly loaded LED will last the declared 25-60 thousand hours, as the advertisement promises, and will not burn out after 1.5-3 thousand.
-
Many users are frightened off by the fact that there will be high voltage at any point on the tape., inflicting painful electric shocks when accidentally touching live contacts.
Accordingly, such a light tape must be carefully insulated (sealed) in order to protect itself from high voltage.
-
LEDs connected to a household network with a frequency of 50 hertz flicker. In a short period of time - seconds and minutes - the eyes do not respond to flickering. It becomes a little more noticeable when the user looks with peripheral vision - as if by chance, in passing - at the flickering of the LEDs. The fact is that, compared to an incandescent lamp, an LED, like a fluorescent vacuum tube, is a low-inertia device. That is, for the flash produced by the semiconductor crystal to go out, it takes less time, which cannot be said about the slower glow and extinction of the tungsten filament of the incandescent lamp.
Gas-discharge devices also do not require more time when alternating half-periods of alternating current - they go out almost instantly.
-
To soften the flickering effect, the LEDs turn on in pairs - before picking up a garland, they are distributed into pairs - counter-parallel. That is, the second LED in the pair is turned on in relation to the first "backward".This makes it possible to reduce the "jumps" of the reverse current and voltage, which, when the latter is thrown in the network, can "break through" any of them. The pairwise opposing elements from which the tape is assembled will double the ripple frequency - up to 100 Hz.
In parallel with the tape, you can connect a variable (non-polar) capacitor with a margin of 400 V.
-
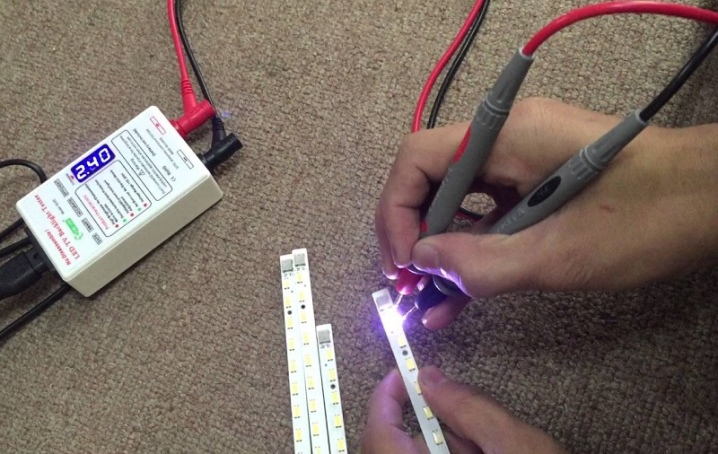
Even LEDs from the same batch differ slightly in the optimal supply voltage and current. You probably noticed that connecting the LEDs from different lighters led to the fact that they also glowed slightly differently, and went out completely at different voltages: one was enough 2.39 V, the other faded out at 2.34, and so on. ...
Do not use LEDs from different batches - you may get a different glow.
-
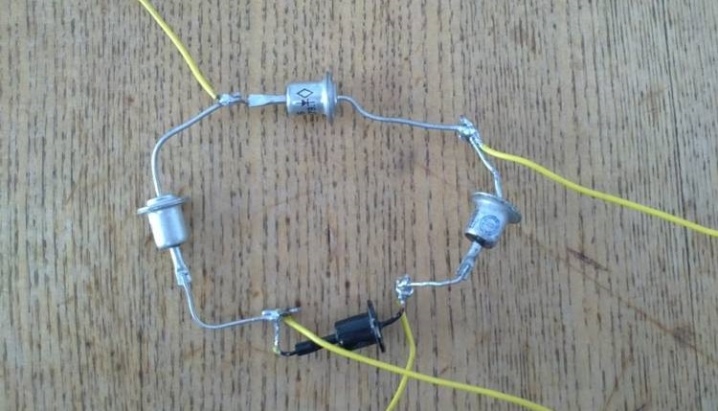
To completely eliminate ripple, a high voltage diode bridge is required., it is connected directly to the network, and a constant voltage of 220 V is supplied to the LEDs, which completely eliminates ripple. Parallel to the LED strip, a capacitor is switched on with a margin of up to 400 V.
The counter-parallel, pairwise connection of LEDs is no longer required here - half of them would be useless because of the reverse polarity for them.
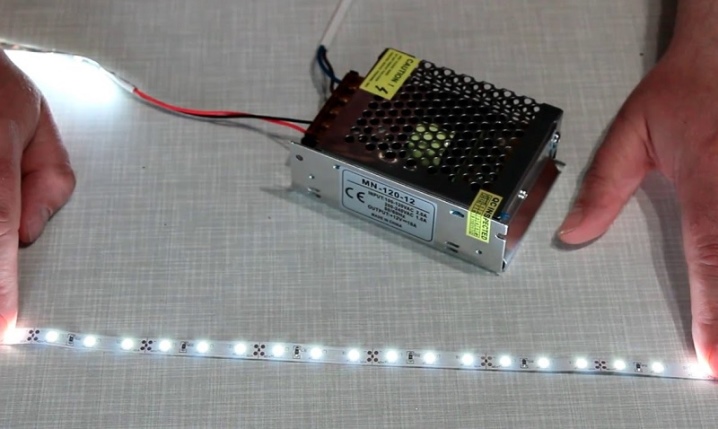
AC power supply for LEDs is possible. They will not suffer from it. The main thing is to provide a margin in case of a voltage surge. However, the pulsation of light after the first hour of being in a room with such light will tire not only the eyes, but also the user's brain. It's like working on an old CRT monitor at 50Hz - a serious headache with this approach.
Connection stages
The stages of installation and commissioning of the diode tape include the following: cutting the tape of the required length, attaching the connectors (if they are included in the kit), electrical assembly of the entire circuit and testing for leaks before switching on. Improper performance of work at any stage threatens the belt failure, electric shock to nearby people or accidental fire.

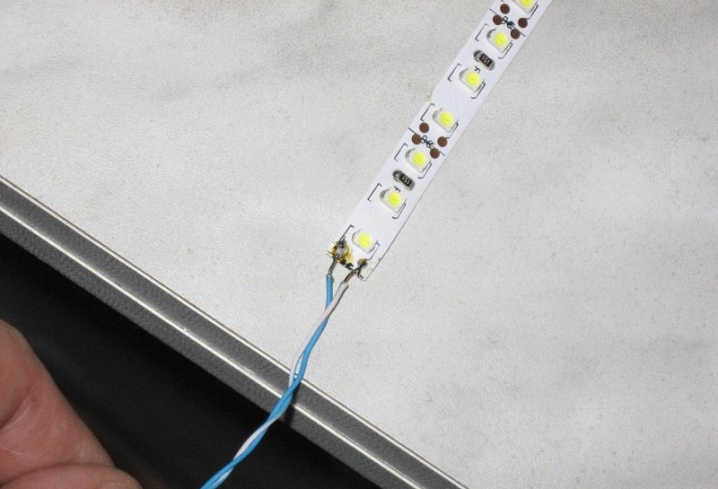
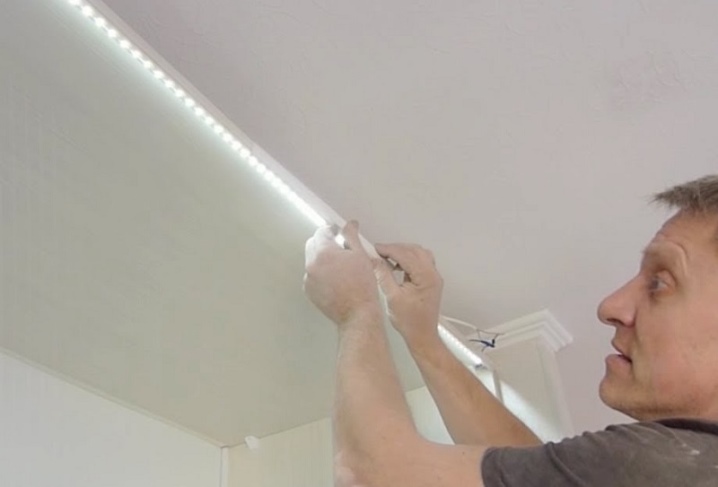
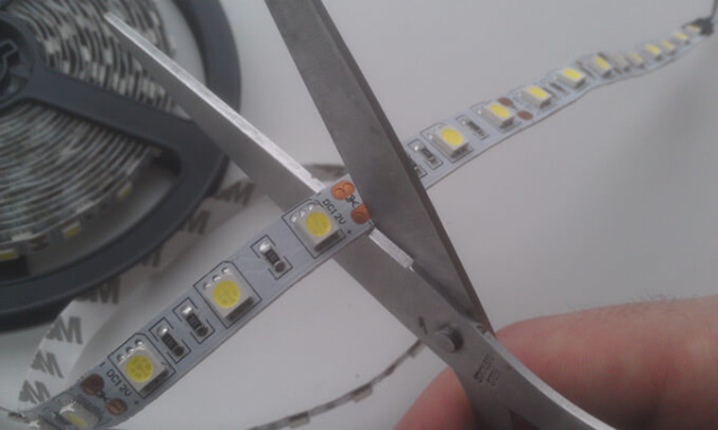
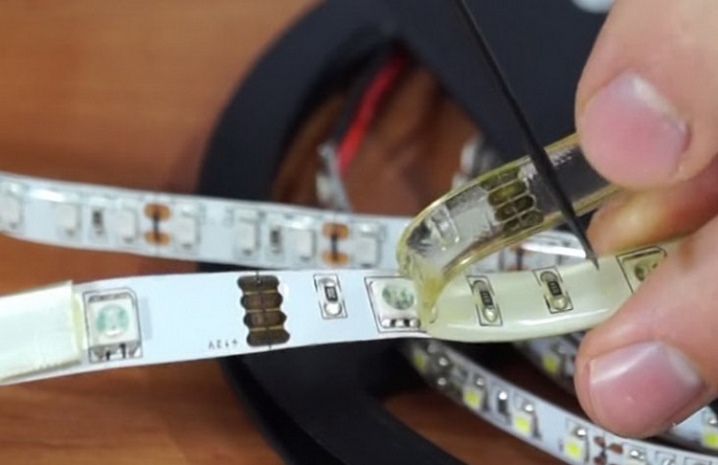
Cutting the tape to the desired length
The 220-volt tape has an important difference: the length of the cluster, due to the large number - not just one, but dozens of LEDs - forces the consumer to cut off significant sections. When connecting the tape directly to the outlet, manufacturers leave at least 60 LEDs per fragment. If the LEDs are double (serial, not parallel pairs), the number of LEDs can be reduced to 30. This means that 7.5-8 volts are allocated for each of them (correctly - no more than 6.6). This daisy-chain connection predominates in finished base lamps, in which the driver outputs 40 to 80 volts DC (6-12 double dc series LEDs).
Each manufacturer follows its own tactics, but the conclusion remains the same - LEDs are connected in series. Parallel connected sequential groups are absent here, since the rectified (constant) voltage of 220 volts is taken as the initial one, obtained from the alternating one, on which the household lighting network operates. For this purpose, the tape has special marks on which the sealant layer is reduced so that it is convenient for the consumer to cut the tape and strip the soldering leads from the insulator.
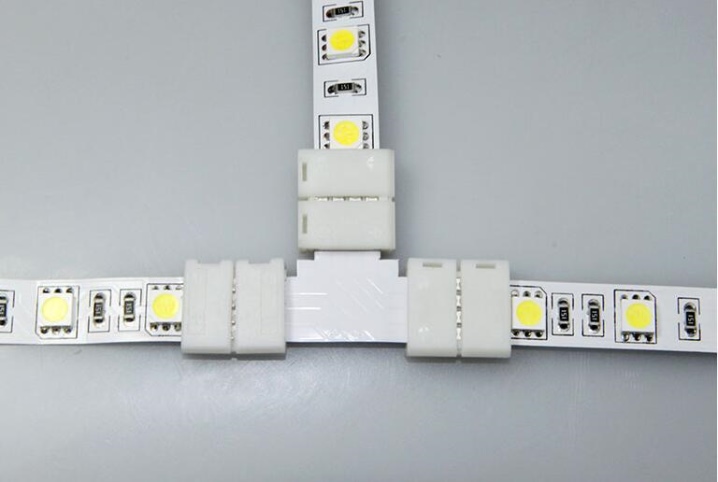
Installing and securing the connector
For convenience, light assemblies are equipped with connectors. This allows, without breaking the soldering and without biting the wires, quickly transfer the suspension with the tape, the cable with the power plug to another place. For tapes that are installed for a much longer period, you can also use "blind" soldering - the tape will not move to a new place, which means there is no point in inserting connectors. Soldered (non-removable) connections along the entire length of the wiring and light assemblies are considered the most reliable - unlike loosened terminals, they do not spark, since they are connected most thoroughly and are not removable when turned off.Connectors are soldered to wires or crimped using a special tool, such as the one used to strip and crimp twisted pairs in computer and server networks that operate according to the protocols and standards of local computer systems.
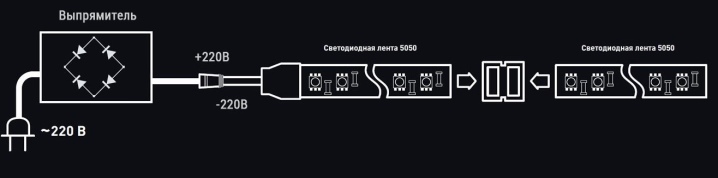
Connecting wires to the rectifier
The wires from the LED assembly to the outlet must be connected to a rectifier. If you ignore the rectifier, then the light from such a light tape will flicker. The wires from the light tape are connected to the "plus" and "minus" of the diode-rectifier bridge. The latter includes 4 high-voltage diodes, designed for power from tens to hundreds of watts. According to the diagram, even a cast bridge (assembly of a rectifier in a one-piece, waterproof case) involves connecting oppositely connected diode cathodes and anodes to the LED strip (two points on the schematic sketch), and switching on the diode leads "out of order" (the cathode of one to the anode of the other) - connection to source of alternating voltage. You can also use a half-wave rectifier (one diode), but then the ripple will occur at a frequency of 50, not 100 Hz, since the negative half-wave (half-cycle of the alternating current) is cut off. A full-wave rectifier (two diodes) will also lead to unnecessary loss of power, so a diode bridge (4 rectifier diodes) is considered the best option. A capacitor connected in parallel to the "plus" and "minus" of the rectifier serves to smooth out the ripple.
Leak test
Industrial tapes are placed in a silicone or polyethylene shell, in the thickness of which the tape itself is located. It looks like a flattened tube. There should be no punctures or damage on it. The fact is that when a constant voltage enters, for example, a pool due to damage to the protective shell of the tape during its operation, this can lead to the death of people who came to swim. Despite the fact that the water as a whole does not conduct current, it is not forcibly distilled, which means that it contains impurities, and contact of contacts with water under voltage is dangerous for the life of people in the pool. Many owners of pools and water parks use waterproof IP-68 light strips to illuminate the water - this creates a beautiful and presentable look, but such an initiative requires a thorough re-examination of the lighting technology before submerging the latter under the water column.
Possible mistakes
Do not use IP-40 light strips in damp places, and even more so under water. Installing light tape in the bathroom will require the installation of a residual current device that can save the life of the person taking the bath.
If you assemble light strips yourself, count the number of LEDs according to the above parameters. Do not do it in a hurry, starting from the manufacturer's methods - many, especially Chinese ones, save on the number of LEDs so that their products burn out and change completely more often. Remember the simple truth - 3 volts for white and 2 for colored LED. Infrared and UV LEDs are powered by a completely different voltage, you will not need them in this case if you are not using night vision devices. The best option is 80 white or 120 red, green, blue LEDs. You can take a little more if your voltage is often increased (almost up to 250 volts, which is explained by incomplete loading and maximum proximity of the transformer substation). Better to get a little less light than to change the entire tape every season. To power the tape at 12, 24 or 5 volts, a similar calculation approach is used.
How to connect an LED strip without a power supply, see the video.


The comment was sent successfully.