How to replace a bearing in an Indesit washing machine?
The bearing is an important part of the washing machine. Thanks to this detail, the drum rotates silently. As a rule, bearing breakage is difficult to notice at first. However, later (most often during spinning), sounds that are too loud can be heard. It is worth reacting to this as soon as possible and installing a new bearing.

Malfunction symptoms
In the Indesit washing machine, bearing replacement is not an easy task. However, you can change this part yourself if you prepare in advance. Of course, first it is worth determining that the malfunction lies precisely in worn out or damaged bearings. This is easy to understand if you are careful.
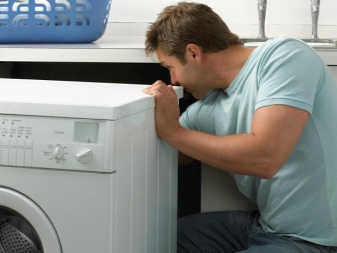
It is worth paying attention to the bearings, if the washing machine is noisy, buzzing and rattling. Moreover, the unit emits excessively loud sounds during the spin mode. You can also understand that the failure is related to the bearing by the behavior of the drum. It is enough to twist it away from yourself to feel the presence of backlash. You can also visually notice the skew of the drum.
Malfunctions with bearings are immediately visible if water leaks and there are no problems with the sealing lip on the hatch door. Also, various extraneous sounds coming from the drum of the washing device should be alerted.
Breakdown reasons
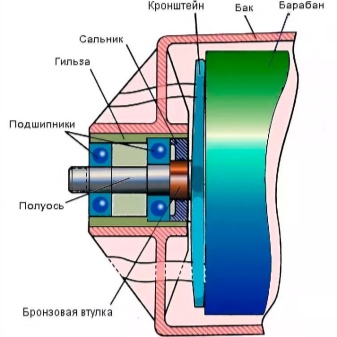
The standard assembly of the machine includes a pair of bearings connecting the drum to the pulley. One of the larger bearings is located next to the drum. It has a pretty heavy load. The smaller bearing is located at the other end of the shaft and is less loaded. Thanks to the bearings, the drum of the washing machine moves evenly during the wash cycle.

If the machine is used according to all the rules, then it will be necessary to change the bearings only after five to six years of its operation. As a result, replacement is needed due to the natural wear and tear of the part. A breakdown can happen at any time, and there are many reasons for this.
Often, housewives constantly overload the drum with things, not realizing that this can disable some parts. To avoid this, you should not load more kilograms of laundry than the maximum weight indicated in the instructions. Of course, the ideal bookmark is 2/3 of the total volume of the entire drum... Otherwise, a heavy load will fall on the parts of the washing machine, and after a short period of time they will fail.
When the case is installed incorrectly, that is, without taking into account the level, then during spinning the device vibrates strongly and makes loud sounds. As a result, all the moving parts of the washing machine are negatively affected. To avoid this it is necessary to correctly install the Indesit clipper.
The oil seal has its own service life, which does not exceed five years. This part becomes leaky over time. As a result, water penetrates inside and washes away the grease. This leads to the fact that the internal assemblies located on the shaft become rusty and fail. It should be clarified that if the bearing is faulty, the oil seal is also changed to a new one.
A practical guide
When it becomes clear that the cause of the malfunction is precisely in the bearing, then the question of its replacement becomes. You should be prepared that repairs can take not just hours, but even days. Therefore, it is advisable to think in advance where this process will be conducted so as not to create unnecessary interference.
Of course, this problem can be addressed to a qualified specialist. However, if there is time and desire, then you can fix the washing machine yourself. This is easy to do if you break the task into several stages and conduct thorough preparation for each of them.
It is important to carefully read the instructions before repairing, because even a small mistake during the repair can lead to even more serious malfunctions. Do not delay replacing a defective part, as a broken bearing can cause failure of the shaft, drum, tank and many other spare parts.
Preparation
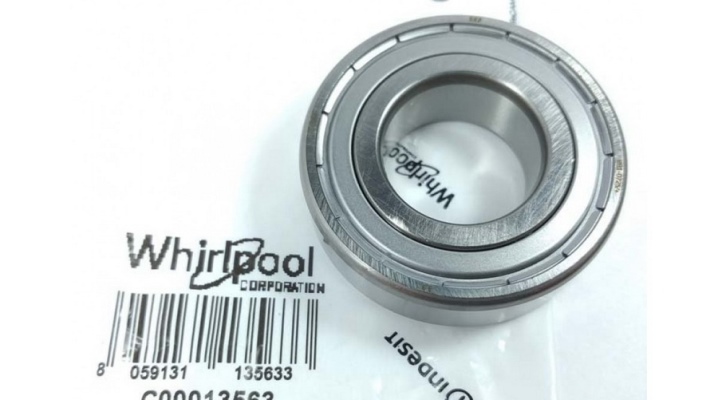
The process of replacing a bearing should begin with the acquisition of its new counterpart and the preparation of all the necessary tools. It is very important to select the correct replacement part. It is advisable to select the bearing and seals from the original manufacturer. If the parts are of high quality, then they will definitely fit a particular model of the machine.

It should be noted that one bearing or one oil seal cannot be purchased. It is important that the repair kit is complete, since it must be changed all at once. If you replace only one of the four parts, then soon the repair may be needed again.
When replacing bearings and seals, the most difficult step is to remove them., because for this it will be necessary to disassemble the entire washing unit, which is quite difficult. This will require certain tools and, of course, a huge amount of patience. So, you need to prepare:
- screwdrivers with Phillips and flat tips, and it is desirable that the rods are of different lengths;
- a set of open-end and socket wrenches;
- small hammer;
- chisel;
- pliers;
- key with six sides;
- a bar of wood;
- hacksaw, preferably for metal;
- high quality glue;
- WD-40 grease for fasteners that have become attached.

Also, before replacing, it is worth preparing enough space for work, since you will have to disassemble the entire washing device. It is most convenient to do this in the center of the room in order to lay out all the removed parts around. During the repair, it is important not to confuse anything and, of course, not to lose. All fasteners, wires and contacts should be in a certain order, so that it will be easier to assemble them later.
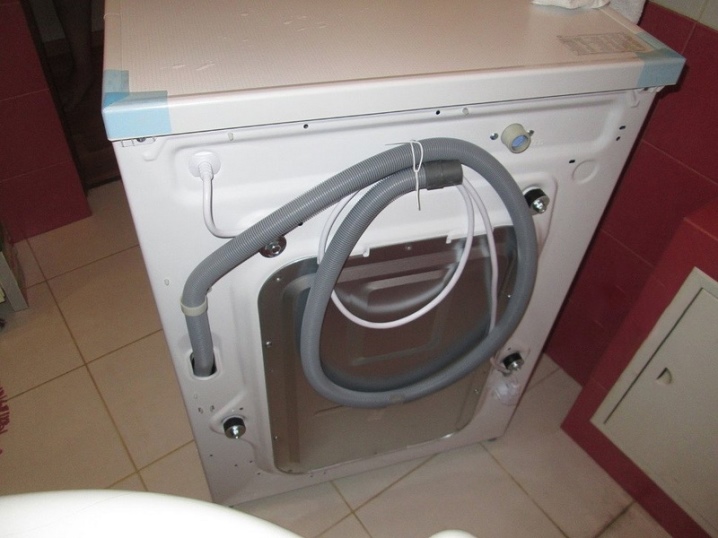
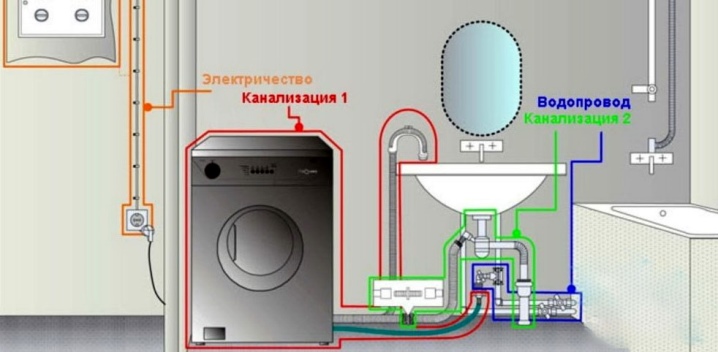
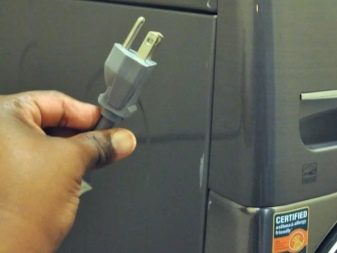
The washing unit also needs preparation. Disconnect the machine from the mains by pulling out the plug. It is also worth shutting off the water supply with a valve. Next, you need to disconnect the inlet hose from the device and lower it into a sink or other fluid container.
Disassembly and dismantling
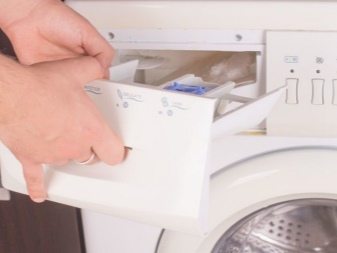
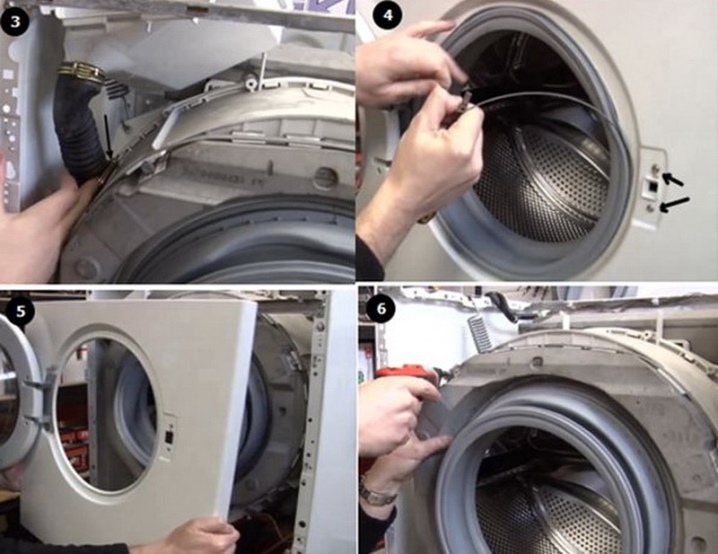
When all the preparatory work is completed, you can proceed directly to disassembling the washing device. You can start this procedure by removing the detergent dispensers and the drain filter. The latter is located under the loading hatch. In this case, you should wait until all the liquid is drained.
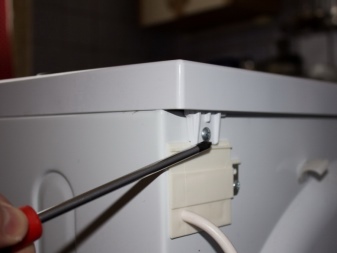
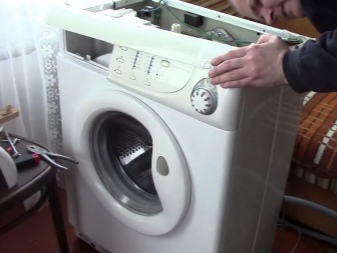
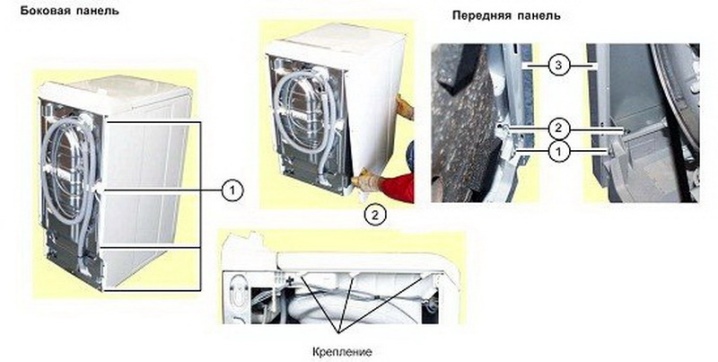
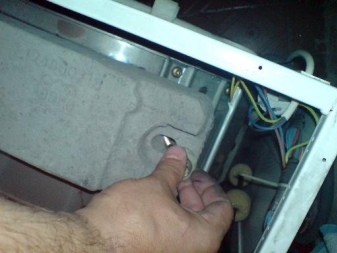
Next, you need to remove the cover, which is on top, for which you need to unscrew a couple of screws from the back. The lid then slides back and retracts to the side. Wherein it is important not to damage the rubber bands that serve as seals. After that, unscrew the screws that hold the control panel. It can be laid on top of the case or left hanging from the wires.
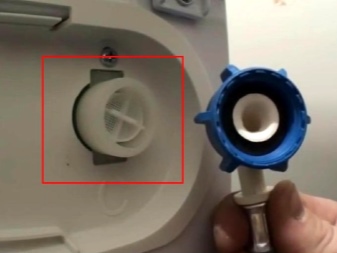
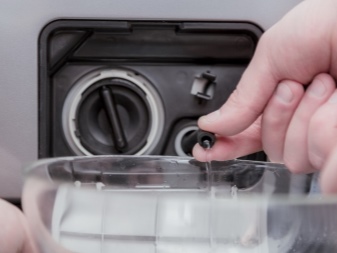
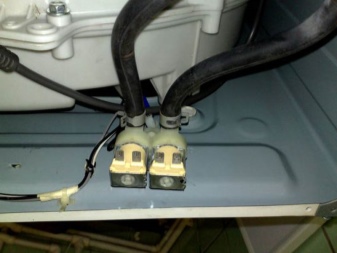
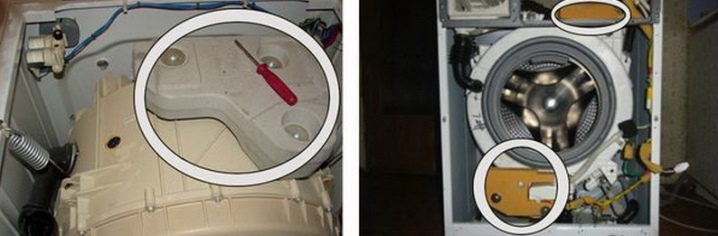
At the back, you need to unscrew the bolt holding the solenoid valve. It should be obtained together with a container for detergents. You also need to unclench the clamp on the flexible hose and remove it from its place. Then you can twist the rear mount and detach the filter.
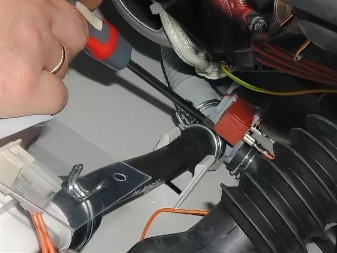
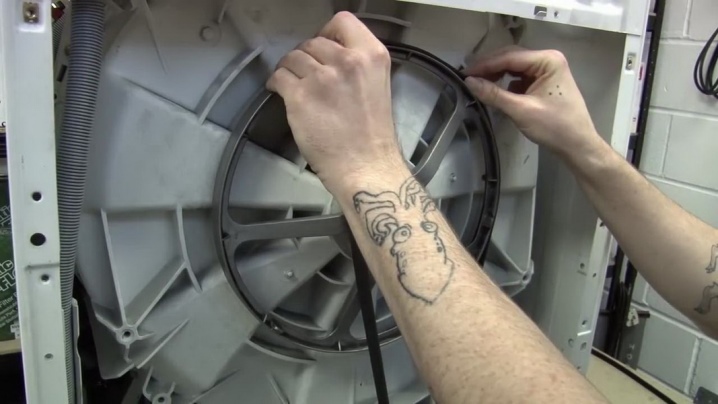
On the back, unscrew all the screws and remove the panel. This will ensure that the drum, pulley, motor and drive belt are accessible. The pulley on the drum shaft and the motor drive must be freed from the belts. Next, you need to secure the pulley using a bar, and then unscrew the main element that holds the pulley.
After that, with the utmost care, it is necessary to rip off the drum pulley, which is tightly attached to the axle.It is undesirable to use improvised tools for this, so as not to damage anything. When the pulley has been removed successfully, you can dismantle the spacer bar. The next step is to detach the counterweight fasteners.
The fasteners will also need to be removed from the moving drum unit. It happens that during the use of the device the screws become covered with rust, so they should be lubricated with WD-40.
It is important to remember that you cannot apply force to screws that do not loosen well, otherwise it is easy to damage the threads.
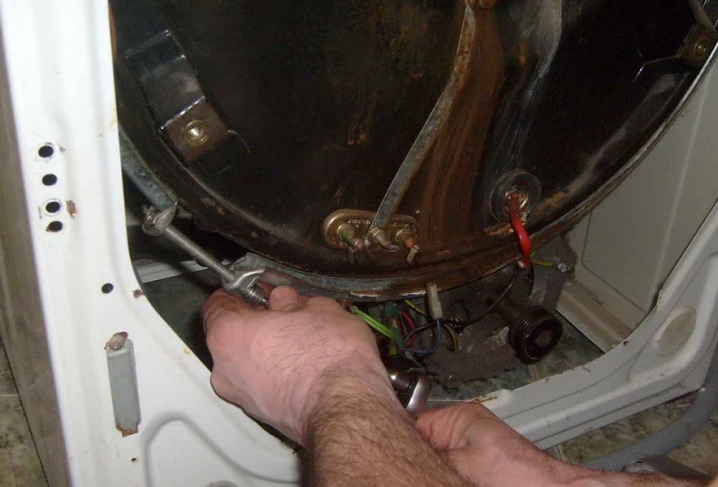
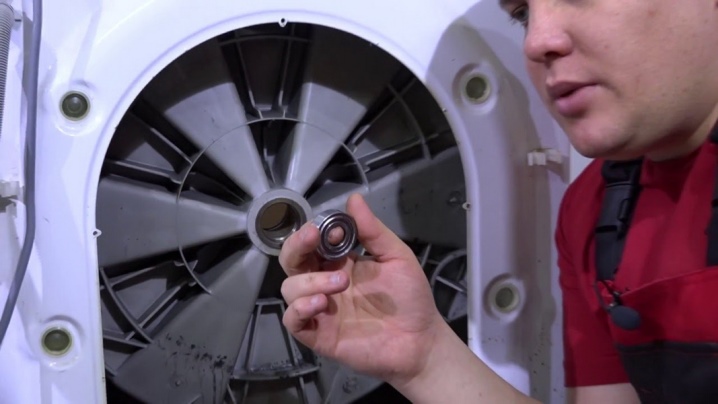
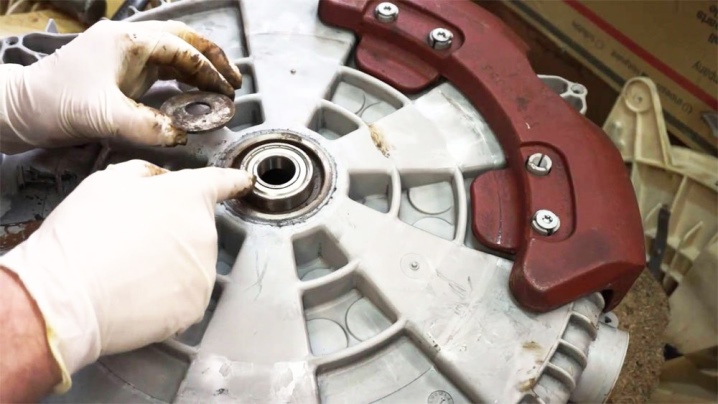
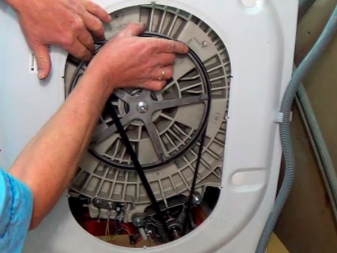
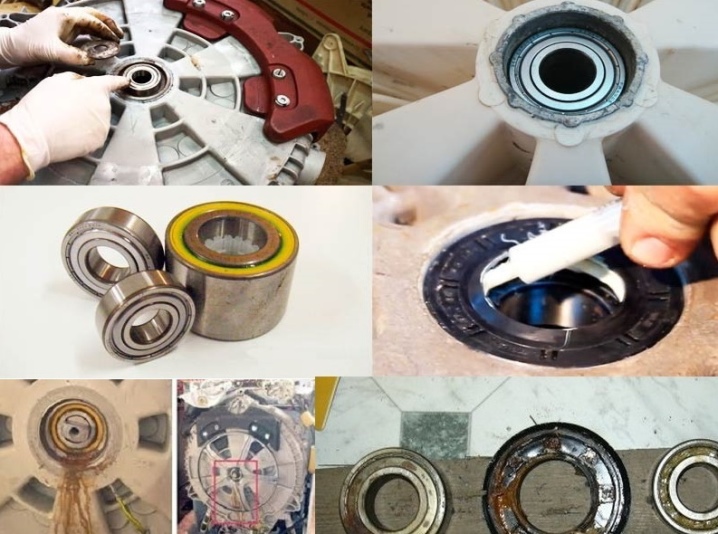
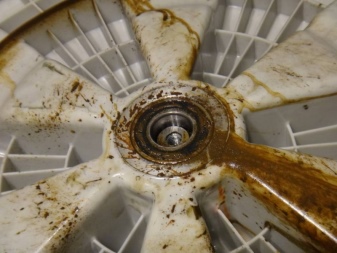
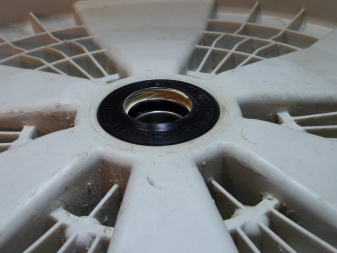
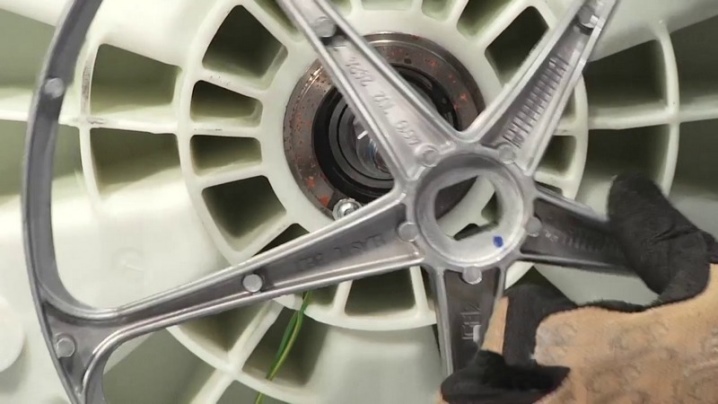
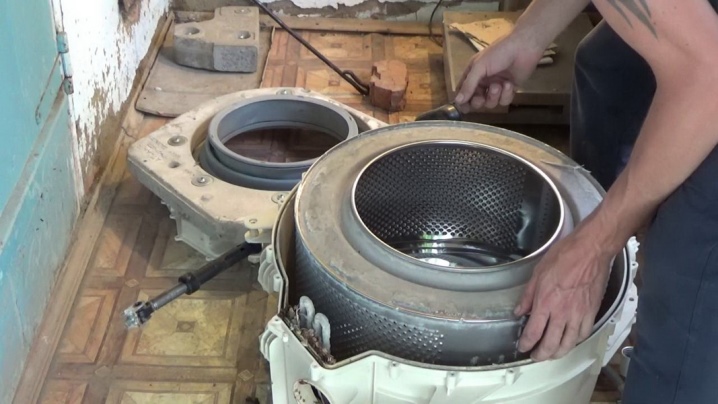
To take apart the drum you should start by removing the clamps that hold the tank cap... Then you need to remove the seals and the lid itself from the tank. After that, you can pull out the drum with the movable unit. It is on the latter that the bearings are located. There is a gasket under the assembly which is best replaced with a new one.
The rubber seal must be lubricated and then removed with a slotted screwdriver. After that, you need to knock out all the bearings with a chisel.
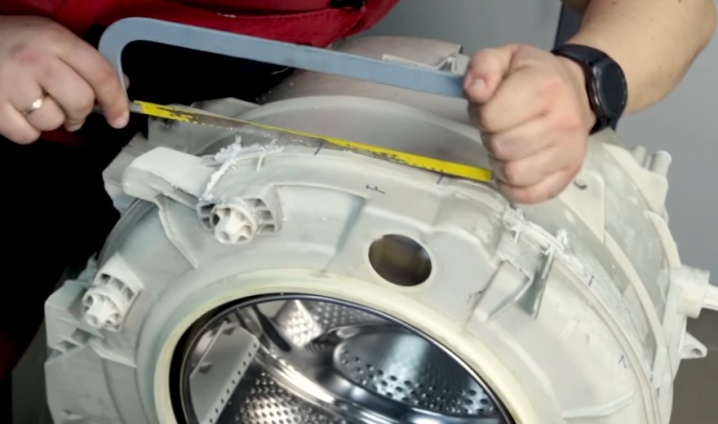
In some models of Indesit washing machines, the tank cannot be disassembled, so you will have to take out the drum with a hacksaw. In this case, the cut should be done from top to bottom by half, and then you should start again from the top and make a cut on the other side. It is important to set the hacksaw straight to prevent possible leaks.
Before you start cutting the tank, it is worth noting the places for the holes for the self-tapping screws. Drilling should be done using a drill. After removing the drum, it will be possible to remove the bearings as described above.
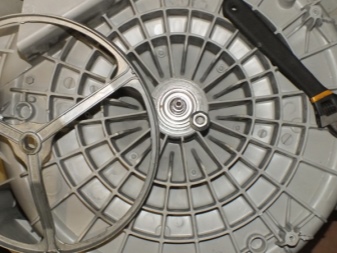
Bearing repairs are easier on top-loaded models... In these washing units, the configuration allows you not to disassemble the entire washing system. In them, you only need to open the side panel from the side where the drum pulley is located.
Next, the pulley is dismantled. After that, access to the hub becomes open. It is made as a detachable part. The hub is bolted to the tank body. When they are removed, everything can be removed and simply replace the bearings with oil seals.
Installing new bearings
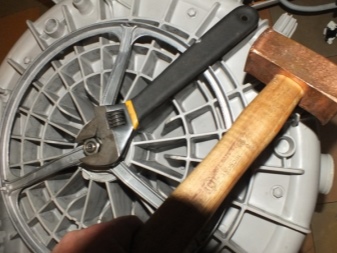
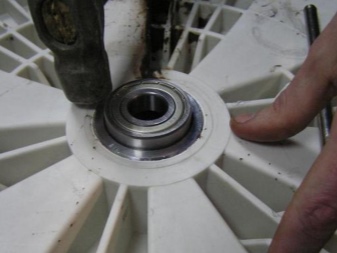
Before installing a new bearing, you should clean the seat from dirt and scale. For perfect bearing shrinkage, wood pads and a hammer are used. Thanks to light tapping, the part will fall into place.

A special point is the fit of the cuff without any deformations and weak adherence. In order for the cuff to sit as neatly as possible, you can also put a wooden bar on it and knock lightly. As a result, it will evenly fall into the right place.
To help the bearings slide better, you can lubricate the cuff with a thin layer of dish soap. However, do not overuse excess lubricants. After that, you need to install a new oil seal, pre-treated with grease. It is worth considering that it must be invested from the inside.
There are situations when the bearing in the drum is completely destroyed. In this case, it is not changed as a separate part, but as a one-piece hub. It already has new bearings and seals. This option is more practical, as a broken bearing can damage other parts as well.
Assembling and checking the engine
After the new parts are installed in the assembly, put the cover on the drum shaft and start assembly in the reverse order. Before returning the drum to its place, you need to check the heating element. It must not interfere with the movement of engine parts. If everything is moving normally, then you need to clean the edges of the tank. This is done in order to better fit the gasket and better tightness.
Next, a pulley must be installed on the drum shaft, and then this entire structure must be placed in the tank. After that, the tank is fixed with a rim and tightened with a screw. The engine is now completely ready for installation. It is also important to connect all wires in the correct sequence, install a counterweight and arrange grounding.
When the tank is in place, turn the drum.If the bearings are replaced correctly, there will be no backlash and noise. Now you need to put the top panel of the washing unit back in place. The pulley connects the drive belt to the motor. It is important that it fits exactly into all grooves.
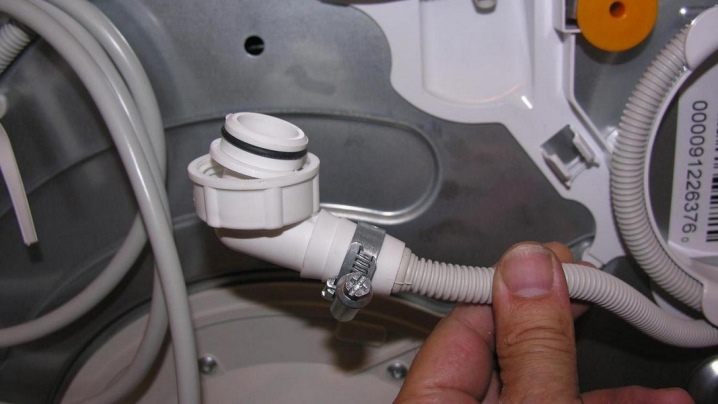
Then you need to install the back panel, filter and water hose. Before installing the filler pipe, the opening in the tank must be sealed with silicone sealant.
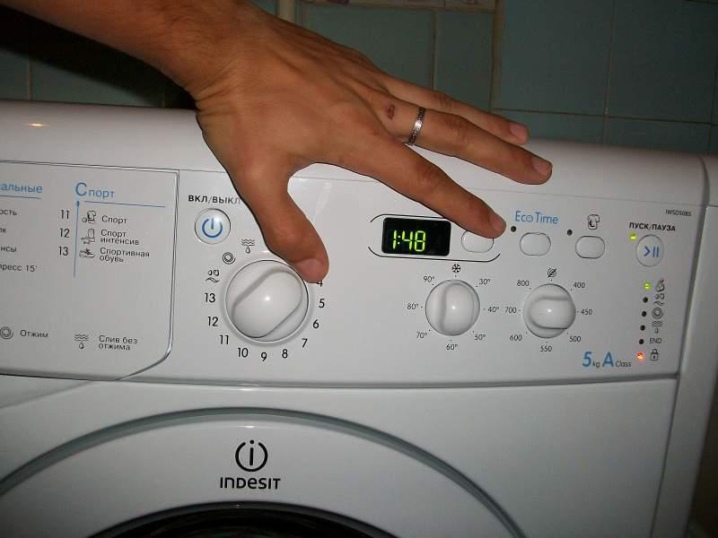
On average, repairing a washing machine will take about three to four hours. When the unit is fully assembled, it is imperative to start a wash cycle to check how it works. Separately, it is worth turning on the spin mode. This will allow you to understand if there are extraneous noises or they are gone. If the machine runs quietly like new, it means that the bearings have been replaced successfully.
It is worth noting that most Indesit models are made in such a way that replacing hubs and bearings is almost impossible. According to the manufacturer, the equipment should be replaced if the declared resource is exhausted. However, practice has shown that, if desired, any model of a washing machine can be repaired.
For information on how to replace the bearing in the Indesit washing machine, see the following video.


The comment was sent successfully.