Replacing bearings in a Hotpoint-Ariston washing machine
Hotpoint-Ariston is a renowned brand for high quality washing machines. The manufacturer's products are famous not only for their multifunctionality, but also for their attractive, rich design. There are times when bearings need to be replaced in branded equipment. You can carry out such work yourself. In this article, we will learn how to do it correctly.
When do you need a replacement?
The fact that Hotpoint-Ariston household appliances are famous for the highest quality does not mean that they cannot be broken, and the parts in them are not subject to wear and tear. So, bearings in branded devices are designed for a long service life - from 6 to 10 years. When the specified period expires, the parts must be replaced, since the gland loses its original elasticity and water from the tank is sent directly to the metal elements, washing the lubricant composition. As a result, the bearing is deformed.
A bearing malfunction can occur even earlier than the deadline, which is initially assigned to its full operation. This happens if you overload the machine's tank too often during washing.
It is not excluded and manufacturing defects the considered part of the device.
If you notice that at the time of spinning, the drum of the unit hums or creaks, this signals that the bearing needs urgent replacement. In this case, the machine may vibrate too much. In cases where such signs of breakdown are noted, you should not waste time - you need to repair the equipment either yourself, or seek help from professional repairmen. Defective equipment will not work well. The main problems will be related to spinning.
What bearings are in the Hotpoint-Ariston washing machine?
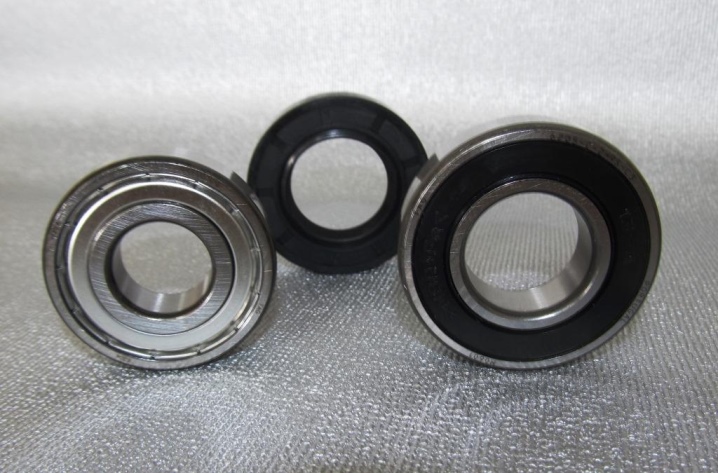
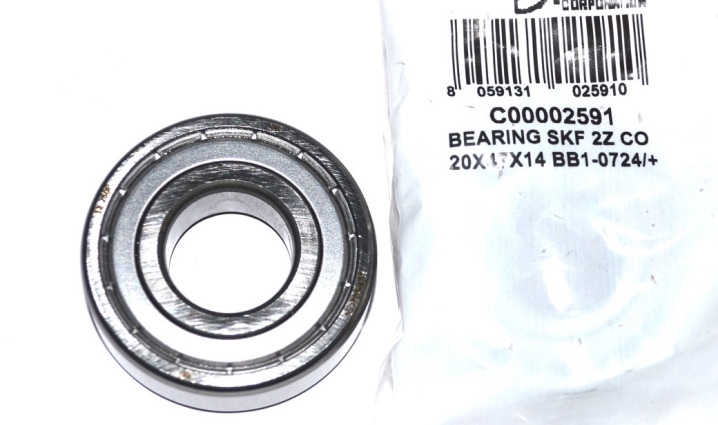
The specific type of bearings and seals depends on the model of the Hotpoint-Ariston washing machine and its serial number. The element can be single-row or double (double-row), depending on the model. For example, for popular units AL 536 TX, ABS430TX, AB1450TXNL, ADS1200EX and many others, double row bearings will do. In any case, you need to know the correct serial number of the required parts.
To purchase suitable parts, it is recommended, after disassembling the machine, to take the old bearings and go to the store with them. Knowing the serial number of the required parts, you can purchase exactly the repair kit that was produced specifically for a particular device.
In search of suitable parts, it is better to enlist the help of sales consultants.
Required materials and tools
Repair of a washing machine of the famous brand Hotpoint-Ariston can be done by hand. It is important to use the right tools. In this case, you will need:
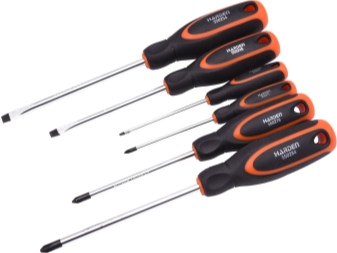
- Phillips and flathead screwdrivers;
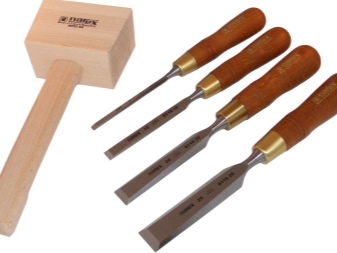
- impact screwdriver (a chisel is suitable instead);
- hammer;
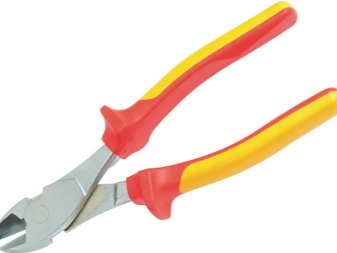
- nippers;
- puller (it is not necessary to use it);
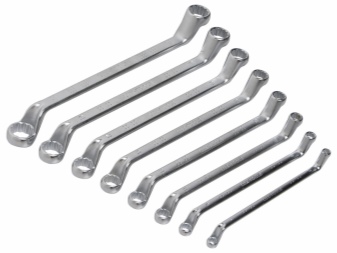
- socket wrenches;
- WD-40 grease;
- high-quality adhesive;
- sealant.
Use only quality tools and lubricants to repair your washing machine.
Do not skimp on these components, otherwise it may be more difficult to carry out all the necessary work.
It is not recommended to go shopping for new bearings and seals until you know exactly all the data and numbers of the old parts that you planned to change.
Stages of work
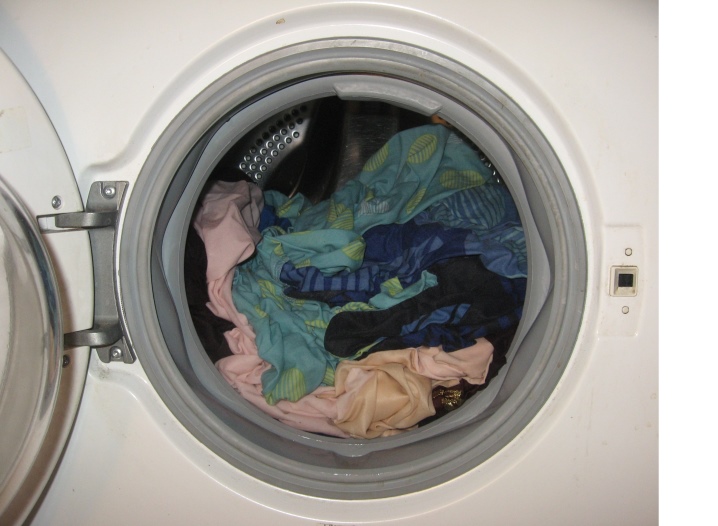
If you have prepared all the necessary tools and spare parts, then you can proceed directly to replacing the bearing with your own hands. Before starting work, it is recommended to prepare a place for the washing machine. You can move the equipment to a garage or other similar room. If the owners do not have one at the disposal of the owners, it is possible to do repairs at home, but to protect the flooring under the typewriter, it is worth laying an unnecessary sheet or other material.
Let's consider step by step how you need to independently replace bearings in equipment from Hotpoint-Ariston.
Emptying the tank
First, let's find out how to empty the tank of the Hotpoint-Ariston washing machine.
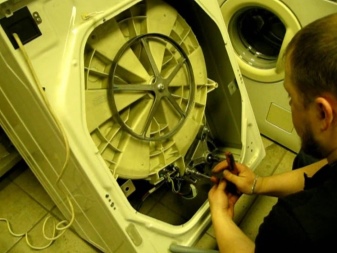
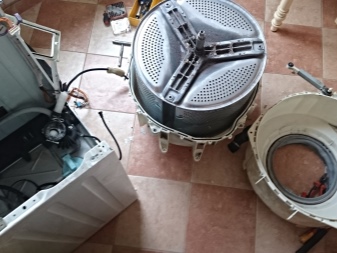
- The body of the washing machine is disassembled starting from the lid.... To remove it, you need to unscrew 2 bolts. They are at the top on the far side. You can remove them with a Phillips screwdriver.
- After removing the bolts, the cover should gently push forward, and then completely remove.
- To remove the dashboard of the car, you will need to open a compartment for adding detergents. It can be removed easily by pressing a button.
- In the opened niche and on the opposite side of the panel, you can see a few more bolts. They are also unscrewed, and then all the plastic latches are opened. After that, you can disconnect all existing wires, and the panel should be removed to the side so that it does not interfere.
- Next step remove the back panel... To do this, unscrew the bolts around the entire perimeter. Once done, the cover can be removed and set aside.
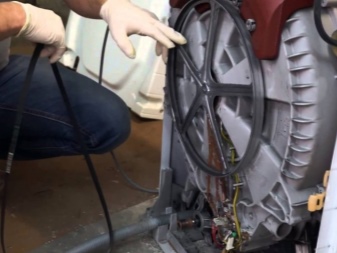
- After that, by rotating the pulley wheel, it is necessary to remove the belt connecting the engine shaft and the cabinet that is installed in the tank.
- Next, you need to move on to freeing the top of the machine's tank. Having disconnected the branch pipe leading from the powder compartment to the tank itself, it is required to remove the contacts of the valve that admits the liquid. The branch pipe and valve can be removed.
- The next step is unscrew the bolts on which the counterweight is fixed... The latter is also removed. It is necessary to disconnect the hose that holds the pressure switch and the tank together.
- Next, you can dismantle the front panel. A rubber cuff is taken out of the hatch of the machine, the bolts next to the locking mechanism are unscrewed, and its wiring is turned off.
- The hatch door of the machine is removed by unscrewing the screws... It remains only to unscrew the bolts located around the perimeter of the front panel, and then remove it.
- The next step is to disassemble the rear half of the unit. It is necessary to disconnect the heating element and engine wiring. The heating element can be left in its place, but the engine must be removed by removing all the bolts. Then remove the counterweight fixed at the bottom.
- Then detach the shock absorbersto which the tank is attached. It needs to be removed from special hooks.
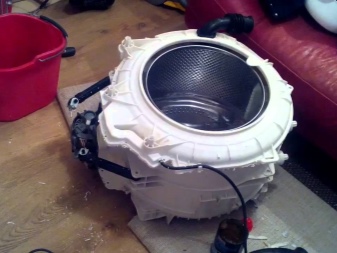
- After that the tank can be removed from the body of the unit, unscrew the bolts and remove its front half.
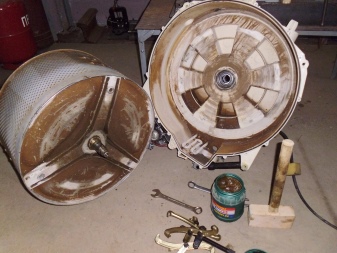
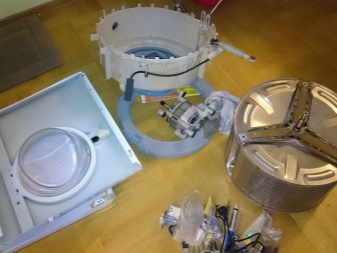
Drum parsing
Let's take a look at how to disassemble the drum of a Hotpoint-Ariston by yourself.
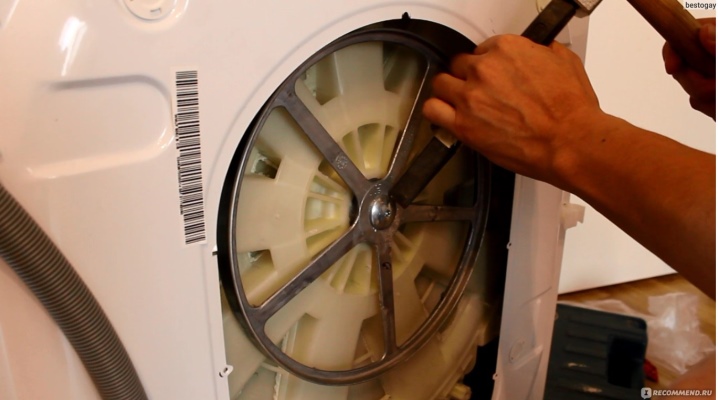
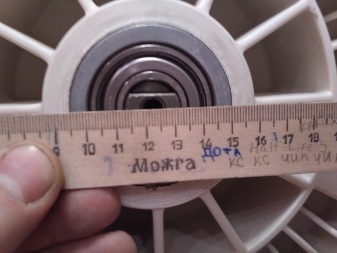
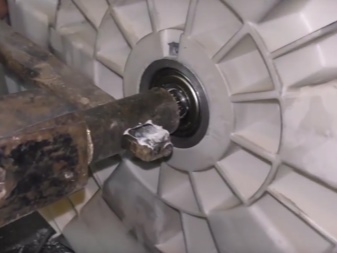
- A shaft is inserted into the back wall of the removed drum, which follows through the bearing, the walls of the tank. This element is also connected to the pulley. To get to the bearing, you need to carefully detach the pulley.
- In most cases, the bolt that holds the pulley in the construction of the machine is not only screwed in, but additionally sits on the glue. Before unscrewing this fastener, it is recommended to spray it with a special WD-40 compound. If this technique does not work, you can use a chisel and a hammer.
- After removing the pulley, you need to unscrew the bolts that adhere the drum of the machine to the tank. Then unfasten the latches and remove the tank bulkhead. After that, you can proceed directly to replacing the bearing in the drum of the unit.

Replacing a part
After completing all the above work, the master can do the main thing - change a faulty or badly worn bearing. Let's figure out how to do this.
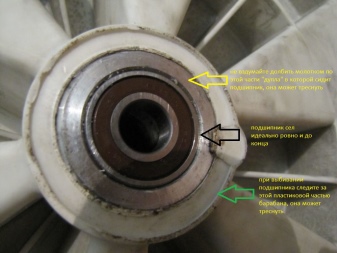
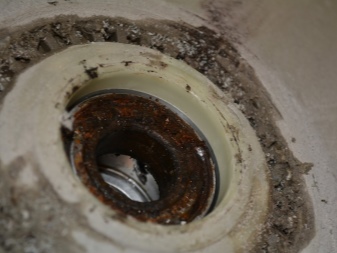
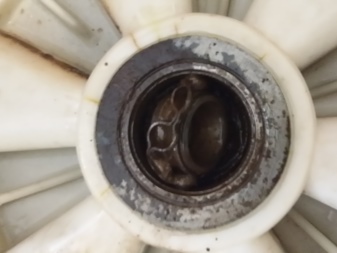
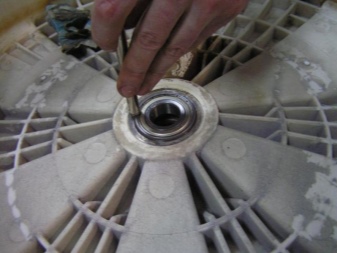
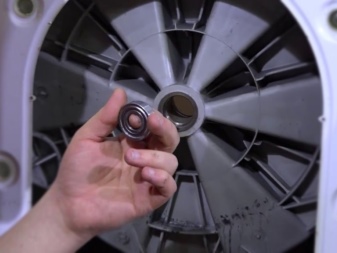
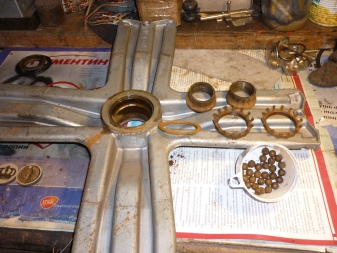
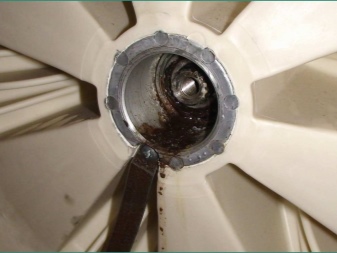
- When you get to the damaged element, most likely you will see that there are traces of deformation and dirt on it. We need to remove the old parts.
- You need to start with the bearing, which is located near the outer half of the drum.
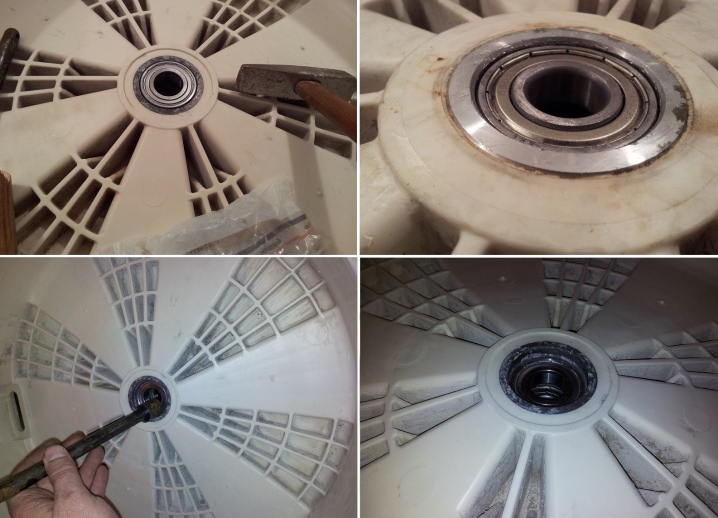
- Next, the inner bearing is removed. In both the first and second cases, it is worth using a chisel and a hammer to remove parts. The chisel is exposed to the outside of the metal ring and then hit with a hammer.
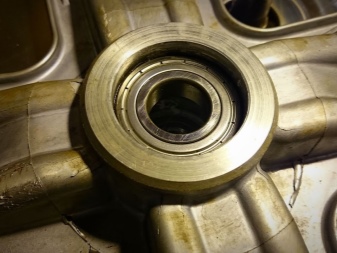
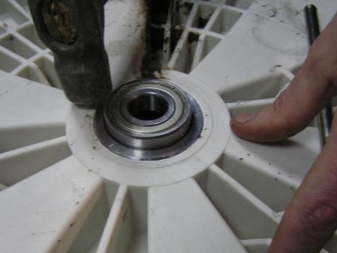
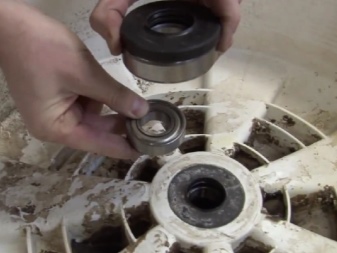
- It is recommended to finish the bearing seats with WD-40. All substrates should be cleaned of dirt and rust and then lubricated with grease.
- A fresh part must be driven into the appropriate socket, striking exclusively on the outside. The bearing must fit into the seat until it stops.
- The oil seal must be inserted from the inside of the tank, not forgetting the pre-treatment with a lubricant.
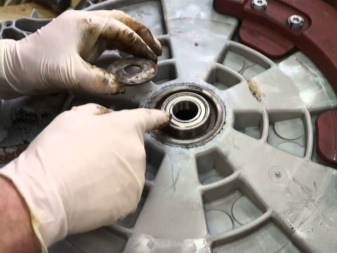
- Having installed the bearing, you can start reassembling the equipment. Before installing the drum, check the bushing for rust and scale. If there are any, it is imperative to get rid of them.
Useful Tips
Self-replacement of a bearing in a branded automatic washing machine seems very difficult to many users. To make it easier to complete such a task, you should heed some useful tips and tricks.
- When disassembling the design of household appliances, be careful. Proceed with care and attention to avoid accidentally damaging important parts of the device. Fold all small fasteners in one place or put them in a bag so as not to lose them later.
- During the disassembly of the equipment, it is recommended to photograph the location of all contacts, bolts and parts. Upon completion of the repair work, you will have before your eyes an exact diagram of what parts and in what places should be located. In this way, you will protect yourself from many mistakes.
- When knocking out an old bearing, you need to carefully monitor the position of the bit. If the tool accidentally slips or slides off and the inner ring is hit, it risks flying out. Removing the remaining bearing from the seat will be an extremely difficult task.
- It is important to correctly install not only the bearing itself, but also the oil seal... If the installation of the latter is neglected and frivolous, then it will quickly begin to let water through, which ultimately will surely provoke bearing deformation.
- Suitable bearings for any model of Hotpoint-Ariston washing machine can be found not only in specialized stores, but also in various services. When you go shopping, grab the old parts that were present in your technique.
- When installing a new bearing, make sure that it fits as tightly as possible to the bushing. Otherwise, the parts will leak water, and it will return back to the drum. You also need to pay attention to the cross-piece of the fastener.
- Before rushing to reassemble the drum, it is recommended that you replace all old seals and apply sealant. These procedures will be needed so that in the near future you do not have to resort to repair work again.
- After completing the repair work and assembling the washing machine, it is recommended to carry out a test, trial wash. There should be no things in the tank, a not very high temperature should be set - 60-70 degrees is enough.
- If during work you are afraid of accidentally damaging the glass of the hatch door, it is recommended to remove it completely beforehand. To do this, carefully unscrew the screws that attach the door hinges. After that, it must be removed to the side.
- Before starting all work, it is recommended to ensure that household appliances are accessible from all sides. Then it will be much more convenient to repair it.
- After removing the drum, it is best to place it on the cuff. Otherwise, you can accidentally damage the fasteners and plastic components of the structure.
- Before you start changing a bearing in a Hotpoint-Ariston washing machine yourself, you need to know that to carry out such repairs, you will have to disassemble the equipment almost completely. If you are afraid of making a mistake and do not have even the slightest experience in such matters, it is better to entrust the procedure to specialists. Otherwise, you risk causing even more damage to the device.
How to replace bearings in a Hotpoint-Ariston washing machine, see below.


Hello. Tell someone about assembling the Hotpoint-Ariston ARSF100 after replacing bearings. Thank you in advance!
The comment was sent successfully.