DIY LG washing machine repair
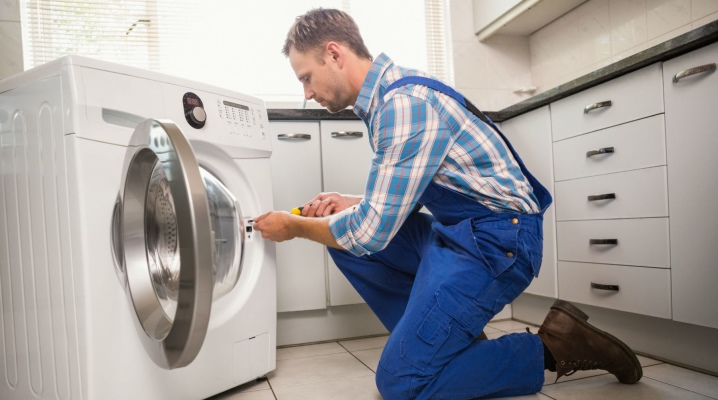
Washing machines LG - these are reliable units that are always in demand. However, nothing is eternal, and any technique can break. In this regard, many users are interested in how to determine the cause of the breakdown and how to make repairs with their own hands.
Causes of breakdowns
LG washing machines are products of the South Korean brand, which has gained wide popularity among users. Buyers appreciate the reliability and functionality of the devices, thanks to which the equipment works for a long time without failures and breakdowns. However, automatic machines are a complex technical device, in which there are many units and parts that in the absence of proper care and improper use, they can fail.
In order to prevent irreversible consequences in a timely manner, you should know the main causes of breakdowns and their symptoms.

The device does not turn on
If the machine does not start working after it has been plugged into the socket, there is no light indication, a musical greeting, this may indicate several reasons. Some of them can be eliminated by hand, while others can only be solved by a professional technician in a service center. The reasons for such a breakdown may be as follows.
- There is no power supply. This is the most common reason. Sometimes there may be an operation of a machine or an RCD, a defective outlet, a surge protector, a malfunction of the mains wire.
- Problems in the power button. It should receive a signal after it is connected to the power supply. You can check the button using the tester, which is in the buzzer status. At this point, the machine must be disconnected from the network. The working condition of the part will be confirmed with a multimeter.
- Turn-on problems may be due to a defective noise filter.... It is aimed at damping electromagnetic waves that emanate from the unit. The electromagnetic pulse interferes with the functioning of other units. When such a filter fails, it is not able to pass current through the mains, so the machine stops turning on. You can diagnose the problem by ringing a multimeter.

Doesn't spin the drum
If such a phenomenon is observed, turn off the unit, drain the water and open the door, trying to spin the drum yourself. If you cannot scroll, this indicates that it is jammed. There are several reasons for this.
- Opening a door that catches on parts. Only possible in top-loading machines.
- Sliding drive belt. In this case, the replacement is carried out together with the bearing.
- Bearing failure, the performance of which is influenced by the stuffing box. He starts to leak water.
- The presence of a foreign object between the drum and the tank... This prevents the drum from spinning.
If you can turn the drum by hand, but the motor does not rotate, the reasons may be as follows.
- Defective control module. You can restore performance by resetting the program. Sometimes it may be necessary to repair the board or replace a part.
- Drive belt that is out of order. It could have been ripped apart or simply weakened.
- Motor brushes that are out of order. The motor can suffer from power surges or fluid leakage.
- Faulty tachometer or a Hall sensor.
The presence of extraneous sounds during operation
Users often complain that during operation the machine emits extraneous sounds, creaks, crackles and other noises. The reasons may be hidden in the following.
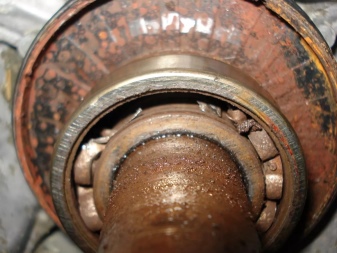
- If there is a humming vibration, then the bearings are worn out. They are influenced by the gland, which is responsible for tightness. As the oil seal loses its elasticity, water begins to enter the bearings, which leads to a corrosive process. It is recommended to immediately replace the bearing together with the oil seal.
- If there is a crackling and whistling sound, it symbolizes that the pulley is loosely attached to the drum. You will need to unscrew the bolts and reinstall the part, not forgetting about the sealants. This solution will avoid attenuation a second time. If the pulley is deformed, it must be replaced.
- Extraneous noises with squeaks can be heard due to the fact that there are some foreign objects between the drum and the tank.... They should be removed through the heating element hatch. The heating element itself must be pulled out in advance.
- The presence of a rumble indicates a shock absorber or problems with the springs that secure the tank. The spring mount or the fixing bolt may be damaged. You can observe the displacement or tilt of the drum, due to which it begins to knock. In any of the situations, you will need to disassemble the washing machine and replace the faulty components.
- If the machine starts jumping during operation, this may symbolize that the tank counterweight mount has collapsed or weakened. It will require an examination of each fixation node and tightening of each weak point. If a collapsed counterweight is present, it must be replaced.
- You should also check the legs on which the machine stands. They should be located on a strictly horizontal surface. Another reason for the rumble may be hidden in the unremoved shipping bolts.
Slow water flow into the tank
This can be due to several situations:
- insufficient pressure level in the water supply system;
- condition of the valve and water hose.
If these indicators are normal, you should check the following points.
- Clogged inlet valve.
- Clogged auxiliary filter. It is installed in front of the inlet hose, therefore, a high-quality cleaning should be carried out using a sufficient water pressure.
- The door does not close properly or there is a malfunction in the blocking of the hatch.
- Incorrect operation of the water supply valve. This can be caused by a coil malfunction, a weakened rod spring, or insufficient elasticity of the cuff.
- The control module is defective. A flashing or replacement will be required.
Water does not drain
If the correct washing mode is set, you need to check the drain hose, siphon, filter, pipe. Also, the reason may lie in a broken pump. In this case, it will work much quieter when compared with the usual mode.
There is a water leak
This is a serious malfunction and should be taken seriously.
The main reasons for the leak are as follows.
- If a leak is near the filter, this indicates that it is not tightly tightened, the O-ring or the thread is in good condition.
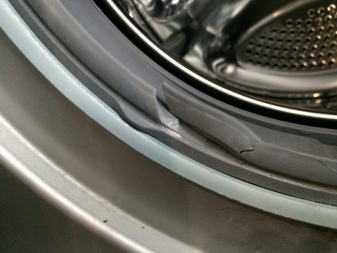
- If it leaks in the front of the unit, you should pay attention to a loosely closed door, damage to the sealing lip.
- If fluid leaks out when draining, a check of the drain hoses is required.
- Internal pipe, depressurization of the connecting components, malfunction of the drain pump manifests itself in a water leak in the central part or closer to the front.
- Leakage near the back symbolizes that the bearing, the oil seal has failed.
- A leaking water supply indicates the powder tray.
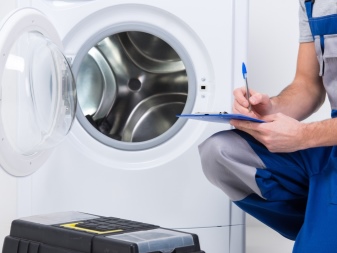
Diagnostics
LG washing machines are not very different from each other, therefore each user can check the status of their unit using the instructions below. First of all, you need to diagnose. It is a bad idea to start replacing parts right away without making sure that it really is in them. To understand that a component has failed, you can use special signs.
Modern cars can signal a malfunction using codes that appear on the display, or light indicators of the device.
Here is the meaning of the main error codes.
- FE... Informs that the machine cannot drain the used water after a certain period. The reason may lie in a malfunction of the electrical controller or in the malfunctioning of the drain pump.
- IE is a common error that occurs when the water level sensor is defective. This leads to the fact that the amount of water in the tank will be distorted, and the machine will not be able to collect the correct level of liquid. Also, the reason may lie in the filler valve, insufficient water pressure in the water supply system. If the water supply is not carried out at all, in addition to the code, the user can hear an audible alert.
- OE. During it, there will be an excess amount of liquid in the tank. It is necessary to check the condition of the pump and electrical controller.
- PE. There is a deviation from the norm of the liquid that enters the tank. Look for the cause in a pressure switch or a strong / weak pressure in the water supply system. In some cases, the accumulation of excess fluid may be associated with a short circuit in the electrical network.
- DE. This indicates that the door is not properly closed. Sometimes the reason can be trivial and lie in the stuck linen, which prevents the door from closing. In some cases, you should pay attention to the sunroof sensor. Or on the lock itself, a malfunction of the hatch handle.
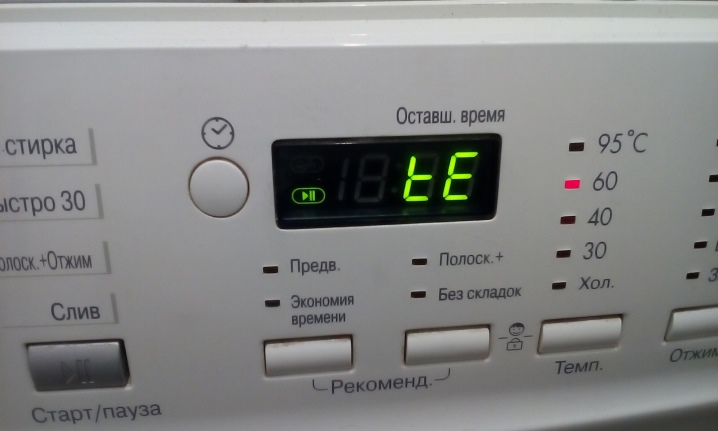
- TE. An error that indicates there are problems with the sensors. When such a code appears, the unit will not heat the water to the desired value, or, conversely, will start to overheat it. The thermal sensor should be checked. You can also face a situation where there is no heating of the liquid at all. In this case, pay attention to the condition of the heating component.
- SE. The engine is defective. This code can only appear on a direct drive washing machine. If the reason lies only in the sensor, the motor will still be in a locked state until the broken component is replaced.
- EE. This is a service code that comes on when the washing machine is turned on for the first time.
- CE. The error indicates that the tank is overloaded. The machine has a fuse that controls the weight of the laundry. When the weight of the loaded items is exceeded, the drum is blocked by a signal from the sensor. The problem can be eliminated by unloading the tank.
- AE. The washing machine is not being used properly. With this code, constant automatic shutdowns are observed.
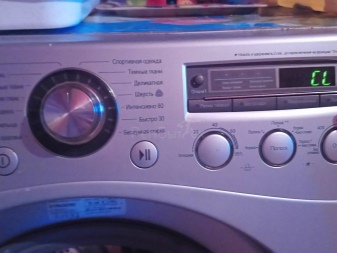
- E1. This error indicates a leak.
- CL. This is a blocking code that protects the machine from children's button presses. You can unlock the lock using a special combination of buttons. You can find out the combination by reading the user manual.
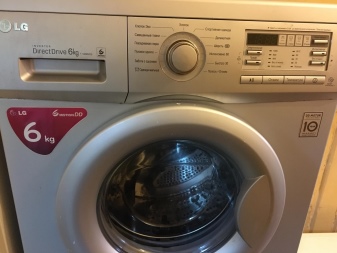
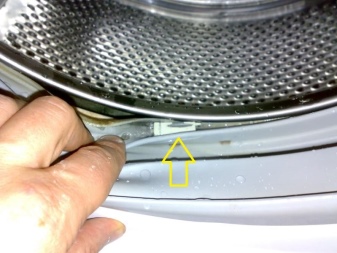
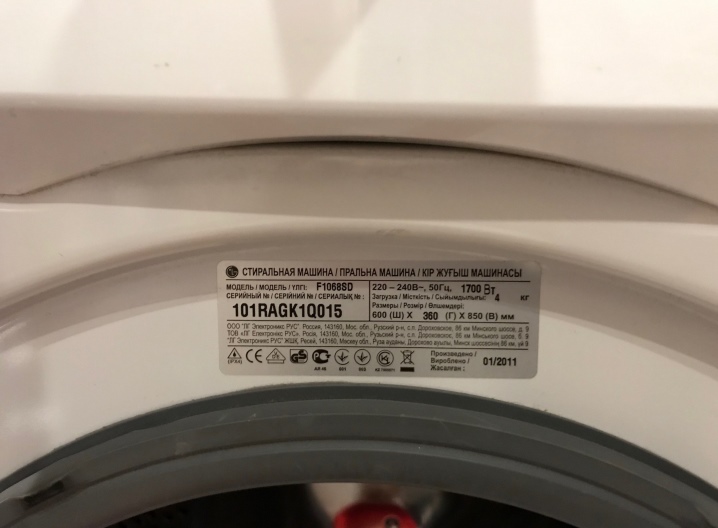
Preparation and selection of spare parts
To choose the right accessories for your washing machine, you need to know the model of the device along with the serial and product numbers. You can get acquainted with the necessary data using the stickers. On LG units, this information is located under the loading door. It is also recommended to take an old part with you to the store so that the seller can accurately select the desired option.
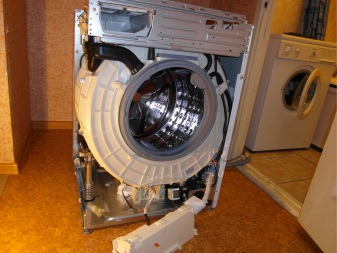
Troubleshooting the main components of the machine
You can do it yourself if you have the necessary knowledge to repair your LG washing machine.
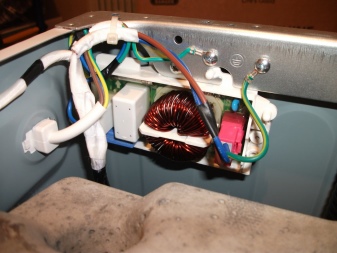
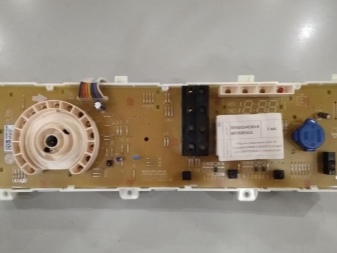
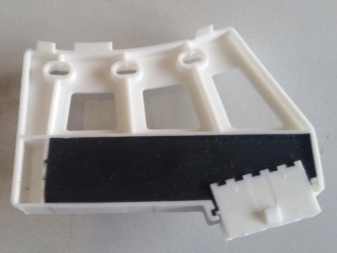
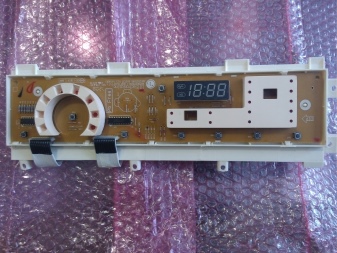
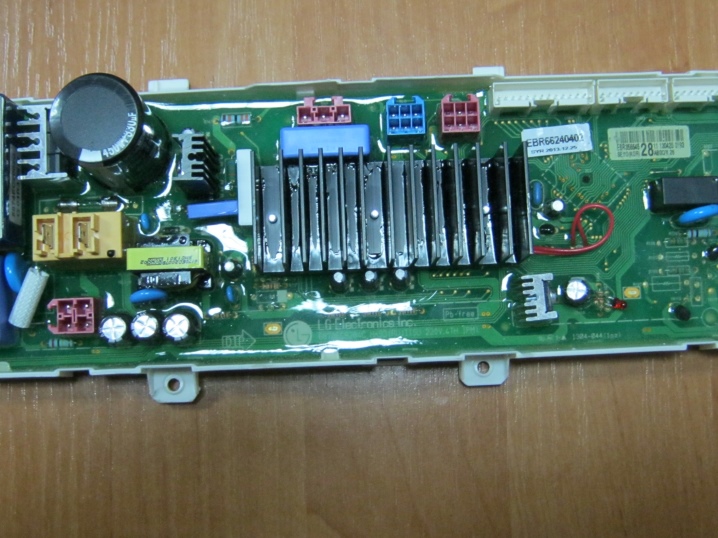
Control block
Only those users who are familiar with the functionality of electronic circuits can repair this part of the house.Otherwise, the part may be broken completely. The repair is accompanied by the following actions:
- cleaning the part from the sealant;
- removal from the compartment;
- then the remnants of the sealant are removed;
- now you should start repairing, for which you will need to know how the board is arranged and how to restore it;
- after repair, a protective varnish is applied.
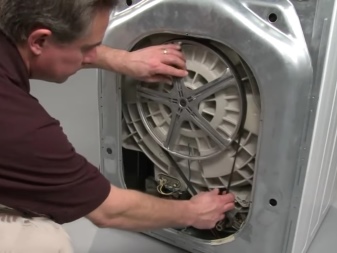
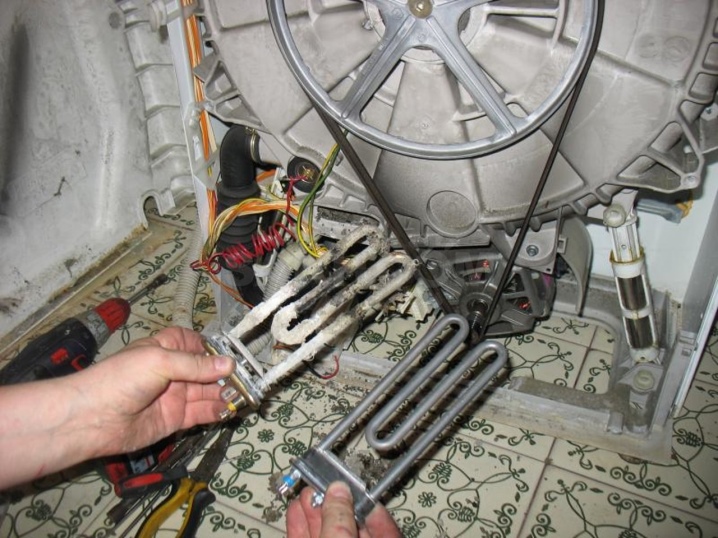
Heating element
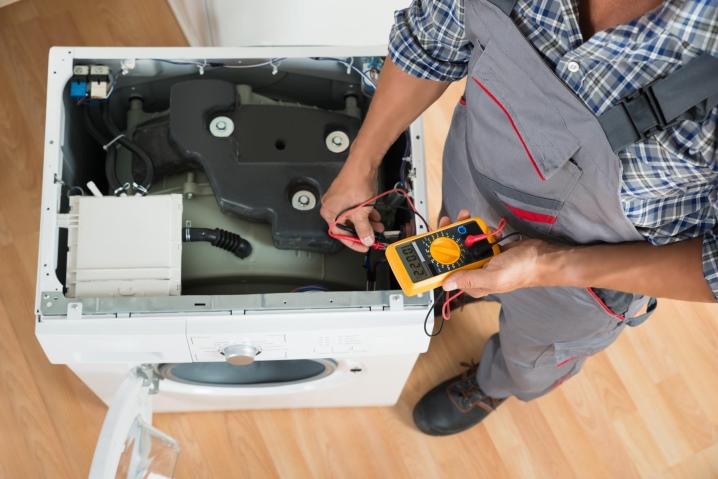
To repair the heating element, you need to get to it... To do this, first dismantle a few bolts that fix the rear housing part of the "washing machine", and then remove the wall itself. Near the very bottom there is a pair of contacts, in the middle of which there is a screw. Several wires are connected to these contacts - they are the heating element.
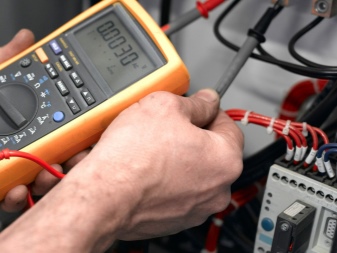
You will need to check the contacts with a multimeter... If the value on the screen of the device is less than 20 ohms, this indicates that the heating element is in a malfunctioning state.
If the heating element is faulty, it will need to be dismantled. To do this, unscrew the screw that was described earlier, pry the O-ring with a screwdriver and pull out the heating element.
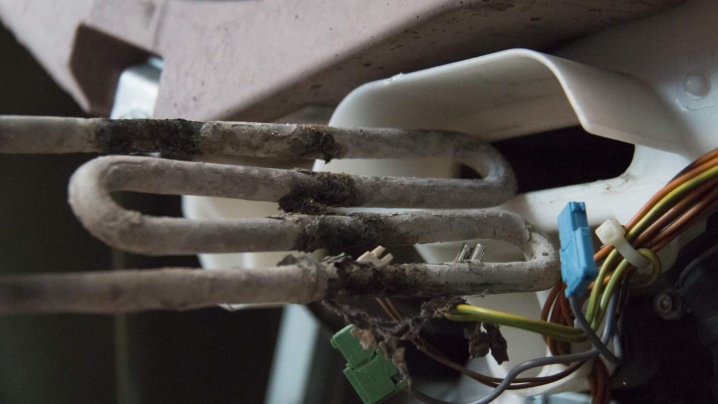
Burned-out heating elements will have burning spots. Typically, the heating element fails due to scale, voltage drops or water contact on the contacts. In any case, the part cannot be repaired; replacement will be required. To change the heating element, you will need to purchase an original part from the manufacturer. After the spare part is installed in its place, it is imperative to put on the sealing rubber.
It should be lubricated with machine oil so that it is guaranteed to sit in its place and does not leak water.
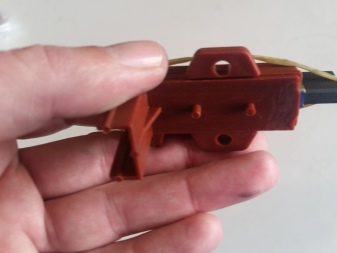
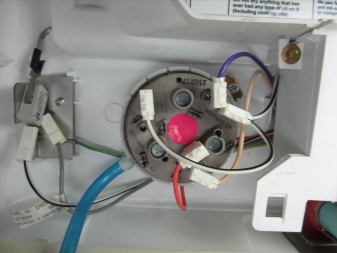
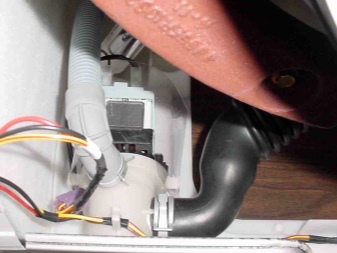
Pressostat
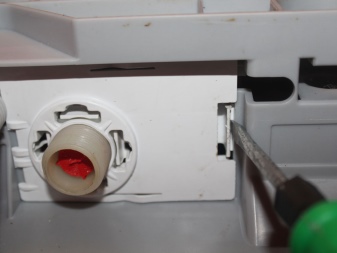
The part is located under the cover, which in most cases is in the right corner. A thin hose with wires is supplied to it. To remove the component, you will need to unplug the plug, remove the top cover and unscrew the two self-tapping screws. Then the cover slides back. The pressure switch itself is fixed with one self-tapping screw. It is necessary to remove the terminal, sensor and disconnect the hose. The performance of the part can be checked by blowing.
If you blow on it, you should hear a click. This indicates that the device is in normal condition. Otherwise, a new sensor should be installed.
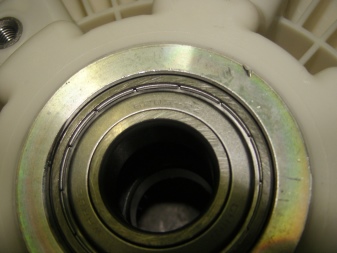
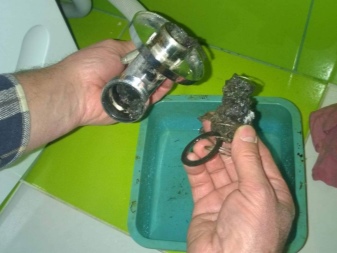
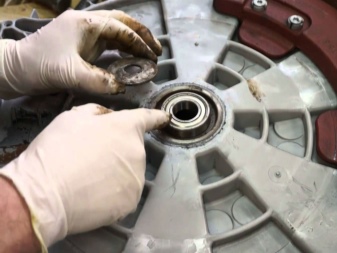
Bearings
Repair work should be carried out carefully, using a special hammer, the striking part of which is bronze, and there is also a rod made of metal of small thickness. The component is pulled out by blows along the edges. Initially, you need to install the rod on one edge of the bearing and hit, then move to the opposite.
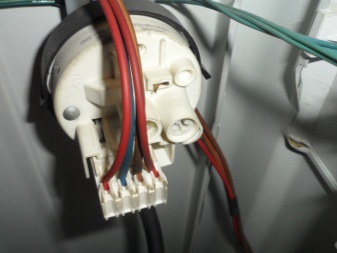
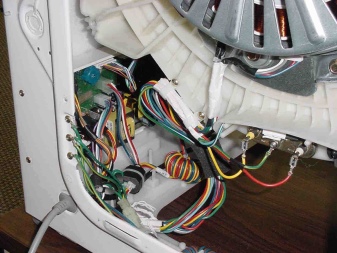
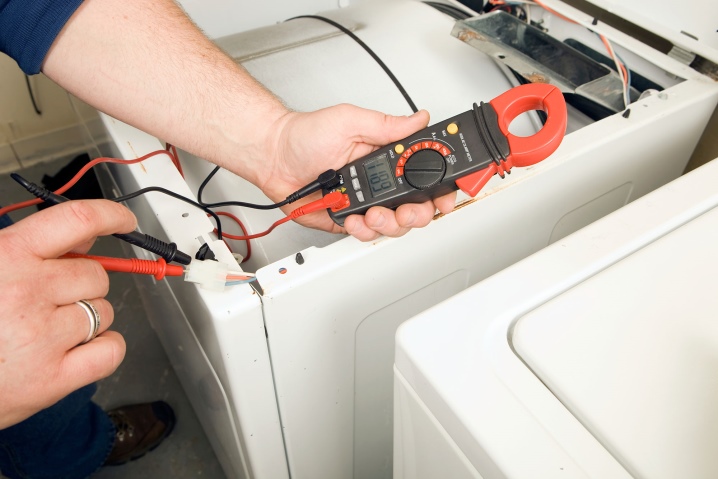
Wires and Terminals
A visual check is carried out for the presence of torn clamps, lack of insulation, the presence of burnt areas and melted contacts. You will also need to ring the wiring with a multimeter. All damaged terminals and conductors must be replaced.
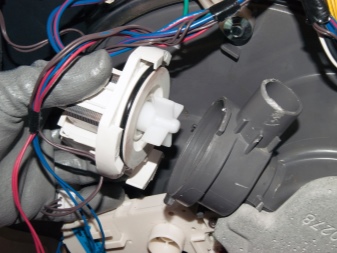
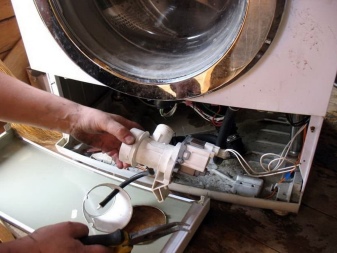
Drain pump
To get to the pump, you need to disassemble the machine. This requires the following steps.
- Typewriter de-energized.
- Take out the dispenser... You should tilt the machine, because water often remains in the dispenser - it may spill out.
- Now follows dismantle the bottom plastic panel. It is fixed with a pair of self-tapping screws.
- Since the pump is located in most cases on the right, you need to put the "washing machine" on the left side.
- Wires with hoses are connected to the pump. The terminals must be pulled out by hand and photographed so that the diagram of the correct location is in front of your eyes when assembly is required. To remove the hoses, open the clamps.
- Around the filter plug self-tapping screws are unscrewed. There are only 3 of them.
- Now you can dismantle the pump.
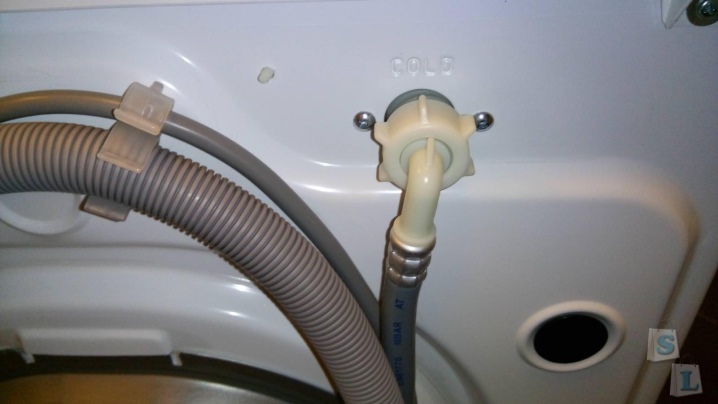
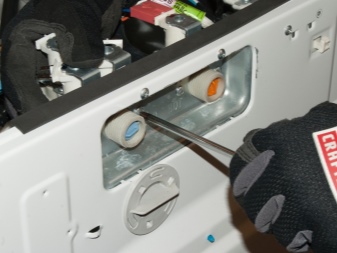
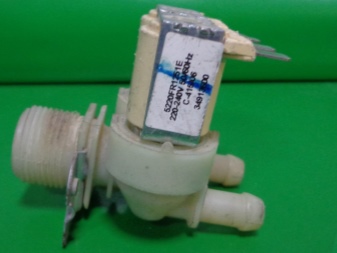
Filling valve
Usually, the filler valve is changed as it is an inexpensive part. It is located where the inlet hose is screwed on. In total, there are up to 5 components in the machine.
- It is required to remove the terminals from the valves. Before proceeding with the task, you need to check that the machine is de-energized and the water supply is turned off.
- The intake valve itself is fixed with self-tapping screws or held by latches.
- Resistance must be in the range of 2.5-4 kOhm.
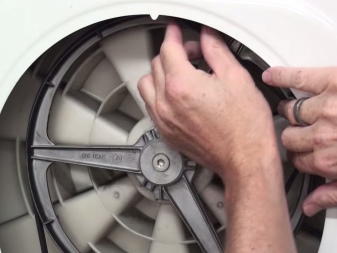
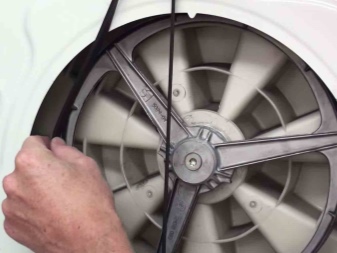
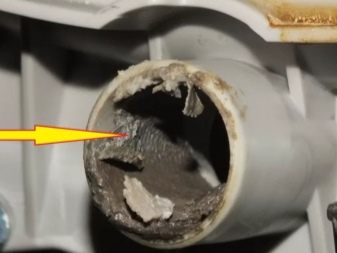
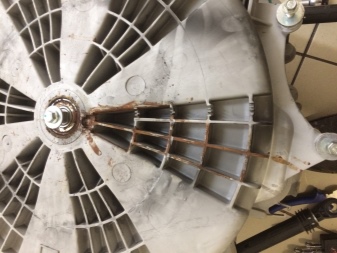
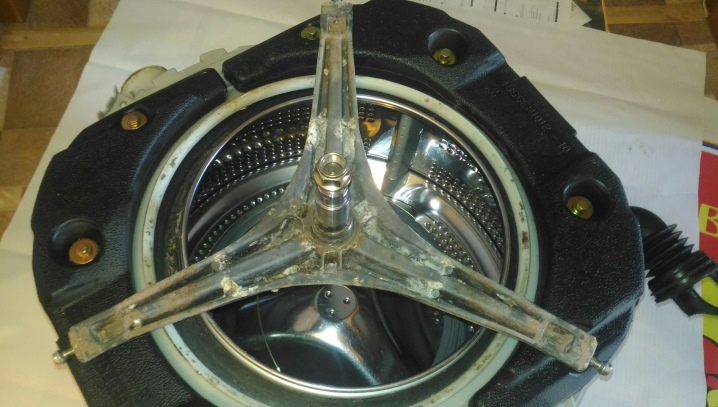
Crosspiece
If the crosspiece breaks down, its repair is advisable only in a situation where the bearings, which are located in the bushing of the tank lid, are damaged. In all other cases, replace the damaged part. To replace the spider bearing, the following steps are required.
- Removing old bearings from the shaft... They almost always stick to it.
- Removing old oil seals with the subsequent setting of new ones.
- Pressing in new bearings.
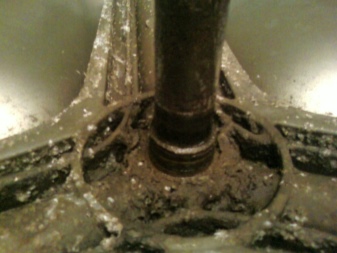
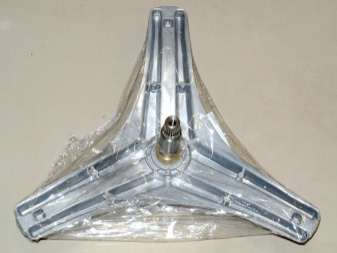
Bearings from the cross must be removed very delicately. They usually adhere very strongly to the shaft, so it will take a lot of effort to remove, but hammering on the part is strictly prohibited. If you hit the bearings with a hammer, there is a great risk of ruining the shaft, which is made of soft metal. You need to work with a grinder or a drill. With its help, cuts are created on both sides of the bearing, after which a chisel is installed in the groove, and the part is knocked off the shaft.
Old oil seals are even dismantled. Leaving them is strictly prohibited, regardless of the state of the component. If the new bearing fits tightly into the bushing, you can resort to heating with a blowtorch followed by careful pressing.
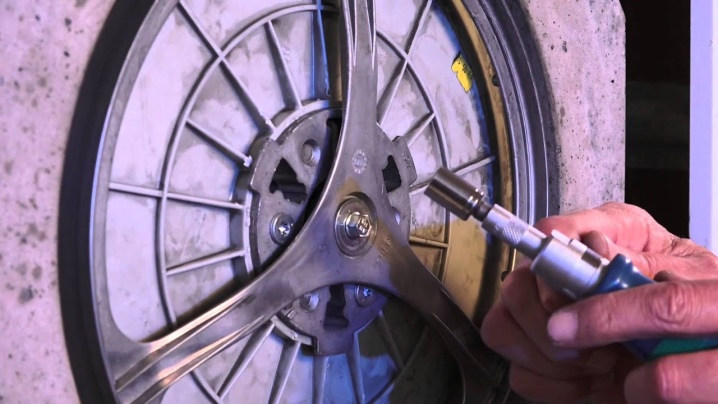
The crosspiece itself is attached to the outer wall of the drum with 6 bolts. Some models only have 3 clips. To remove a part, you will need to unscrew these bolts and install a new part. There are models in which the cross is welded to the drum. In this case only replacement with the drum is possible.
Other
Also, the owner of the LG washing machine may be faced with the fact that the machine is shocked. If the grounding is good, check the condition of the wires - they must be isolated. To correct such an error, knowledge of the circuit is not required, since a visual inspection of the wiring will be sufficient.
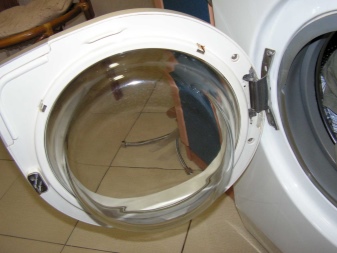
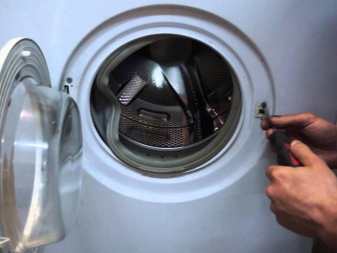
Sometimes users experience door loosening due to backlash. In order to solve this problem, you will need a medium-sized Phillips screwdriver. With its help, you should dismantle the door. Removal is carried out on a fully open sash. It doesn't take too many steps to adjust the door.
- Two screws are unscrewed, which are located near the hinges.
- Then you can close the sash halfway.
- Now the door is pulled towards itself and slightly upward. With the help of this technique, she is removed.
- It is necessary to visually inspect the loops: they contain small plastic components that are outwardly similar to coils. They should be checked for abrasions. This is usually the main reason for backlash.
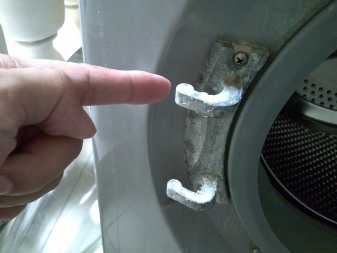
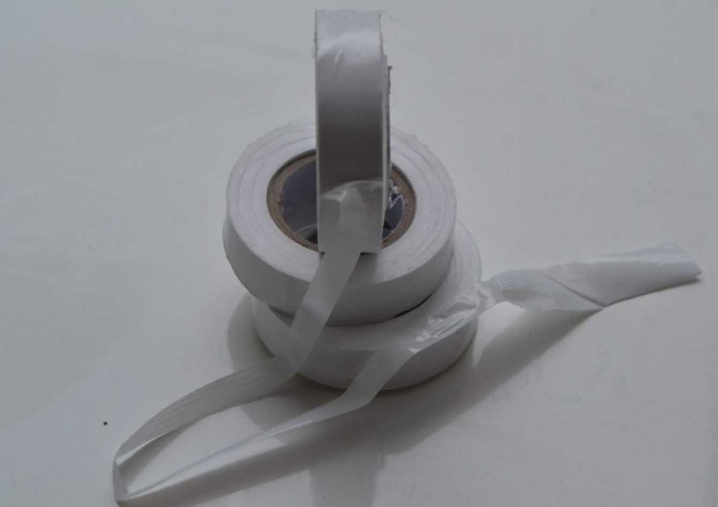
Shabby parts are not available in every store, so craftsmen have adapted to the FUM tape. To replace the bushings with FUM tape, you need to take the tape itself, wind it around the loop with a middle layer and return the door to its place.
You do not need to screw it in right away, you should first test the operation of the hatch. If there is still a gap, more FUM tape is added.
Helpful hints
In order for the machine to serve for a long time, it is necessary to carry out diagnostics in a timely manner, listen to the sounds that the machine emits during operation, and also observe the weight standards of the loading linen. You cannot ignore the signals that come from the device, since a timely solution to the problem will not cost so much when compared with the consequences of neglecting the signals of the car.
If the user does not know how to repair "washing machines" or is not confident in his abilities, you should contact the service, where professional masters will be engaged in the repair.
Next, watch a video with the features of repairing an LG washing machine.


The comment was sent successfully.