How to make a do-it-yourself grinder from a washing machine engine?
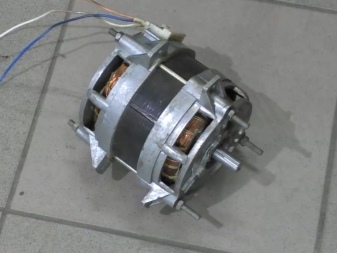
An automatic washing machine that has served its purpose and is not suitable for repair will always be used. After disassembling the unit, the user has many useful parts. Of greatest value is the engine, from which a large number of practical devices, such as a grinder, can be made.
What is a grinder and what is it used for
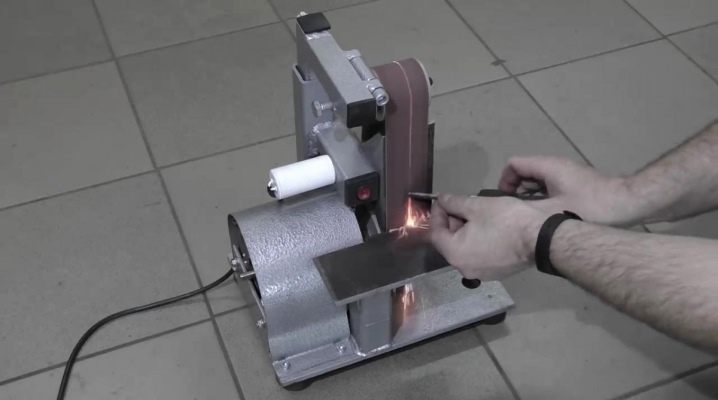
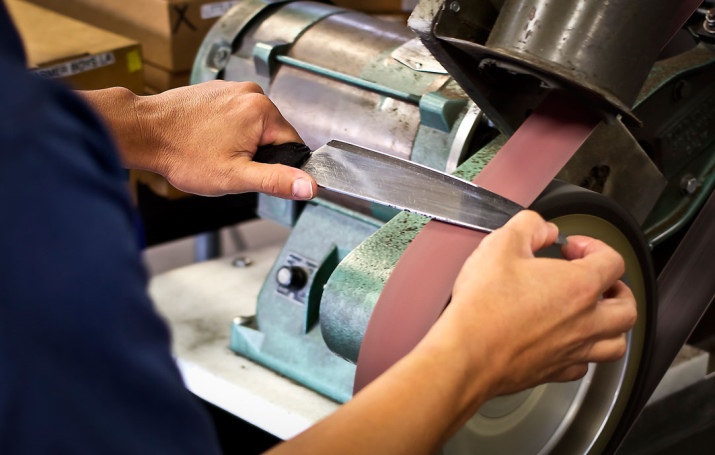
Grinder is a grinding and sharpening machine that is equipped with a belt abrasive. This design is indispensable in home workshops, and in any garage there is a worthy application for it. Homemade grinder surpasses grinders in its functionality. The main feature is the ability to process the ends of the products and the high convenience of working with small parts.
A grinder is necessary for finishing the surfaces of parts, when it is necessary to remove various kinds of roughness and minor defects. Such preparation is carried out before painting or varnishing the part.
The grinder can be used with belts of different grain sizes, which significantly expands the scope of its application. By changing the belt on the machine, you can work with wood, steel and non-ferrous metals.
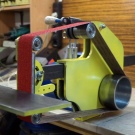
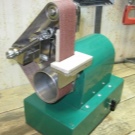
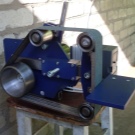
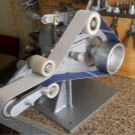
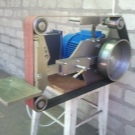
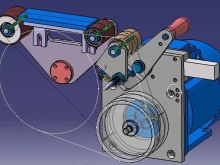
Design and functional features This self-made machine allows you to easily process surfaces of various shapes. You won't be able to do this job with a hand tool.
Design features
Homemade grinder characterized by a special designwhich will use the sole from an old belt sander. This solution makes further operation of the machine convenient and cost effective. This is due to the possibility of using ready-made sanding belts and the absence of the need for self-adhesive.
It is convenient to use belts and rollers taken from the drive systems of cars as a transmission mechanism.
The desktop is taken as a basis. Its design can be changed at the request of the user, who will be guided by the set goals and the desired result. Grinders can be screwed to the floor, which makes the machine more stable, although it deprives it of such an important quality as mobility. But in this case, the grinder will not move and vibrate during operation. Also wheels can be added to the table, making it easy to move around the workshop.
The beauty of a homemade grinder is the ability to change the design at your own discretion, add structural elements or remove what is not useful in further work. Anyway before starting work on the creation of a grinder, it is necessary to think over the drawings of the future machine... It will be much easier to make corrections on paper than in the process of creating a setup.
Crafting tools
You should not rush to get down to work on creating a grinder - it will always succeed, and rush will be a bad helper. First you need to think about a list of the required tools and parts. We provide a general list, which can vary at the discretion of each master:
- the main element of the future design is an engine from an automatic washing machine;
- starting capacitor from the motor;
- trim and two pairs of legs from the machine;
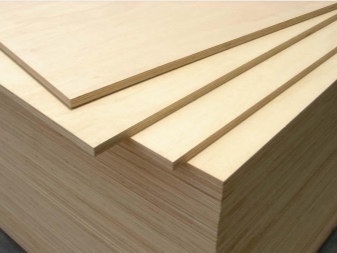
- plywood with moisture resistant characteristics;
- a thick-walled tube with a length of about 5 cm and an internal diameter of about 14 mm;
- a pair of bearings with the same diameter;
- sealant;
- a sheet of thick metal with a cross section within 8 mm;
- corner with dimensions 63x63 mm;
- two profile pipes (40x40 and 30x30 mm);
- long nut;
- a strip of steel with a cross section of about 10 mm;
- gas shock absorber used in furniture assembly;
- button to turn on / off;
- plugs, bolts, nuts, screwdrivers and other little things.
When all the parts and tools are at hand, you can proceed to creating a grinder with your own hands from a high-speed motor from a washing machine.
A practical guide
The work is not easy, but everyone can cope with it. You just need to follow the instructions and follow some rules.
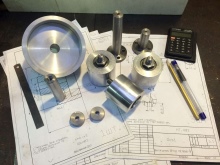
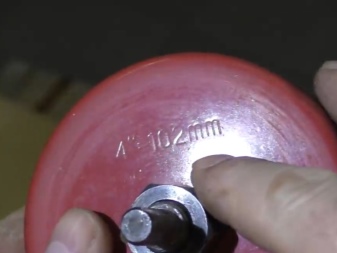
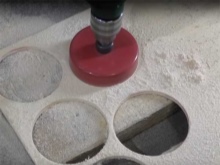
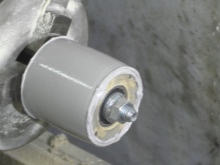
- The process begins by creating tension rollers from plywood, which is highly resistant to moisture. In this case, the thickness does not matter much. Using a drill with a crown for processing wood, we make 9 plywood pancakes with a diameter of 10.2 cm. They will be used for the drive roller. The number of plywood circles can be changed based on the thickness of the plywood and the width of the tape.
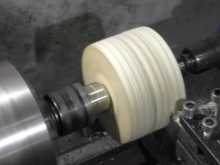
- The resulting circles are sanded, greased with glue (PVA can be used) and glued together. This creates a wide, multi-layer bead. To obtain a strong connection, the workpiece is placed under the press. In the same way, a driven bead is created, but the crown changes by 6.4 cm.
- To prevent delamination of parts after the glue dries, it is necessary to make 2 holes on the sides and fasten with screws.
- On a lathe, we balance the rollers, remove irregularities and make the surfaces perfectly smooth.
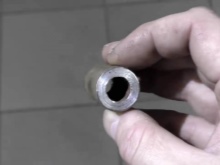
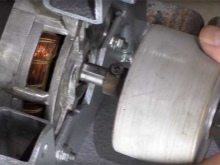
- To create an adapter for fixing the drive roller, we use a piece of pipe, the inner diameter of which should be 1.4 cm.To press the tube on the motor shaft, it is necessary to make a hole and thread M From the opposite side of the tube, we weld an M12 bolt.
- The hole on the drive roller needs to be widened halfway to install the tube. The rest of the pipe with the narrow part is retracted under the thread from the M12 bolt.
- We take the driven roller and place one bearing on both sides. Their size should correspond to the inner diameter. Bearing seats must be made on a lathe.
- We coat the details with glass glue, which will allow you to achieve good smoothness.
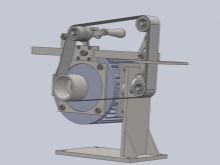
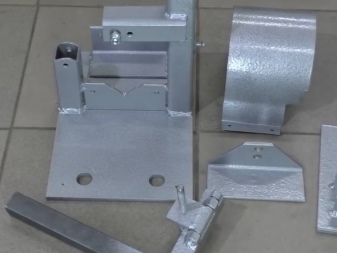
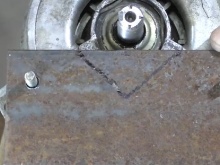
- To position the grinder, you need to make a bed of sheet metal by cutting out a rectangular blank from it.
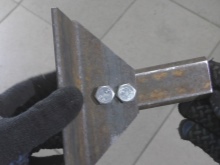
- To secure the motor, you need a pair of corners and a plate. We lay the steel plate, the corner and the engine, mark the future holes for the fasteners. Using four M6 nuts, we fix the corners on the motor. We mount the power unit with corners on a metal sheet, make markings and, using welding, fix the corners on the basis of the future machine.
- From profiles (40x40 and 30x30 mm) we make blanks with a length of 30 cm.


At this stage, you can deal with the creation of an adjustment mechanism for the tape. This work is carried out according to the following scheme.
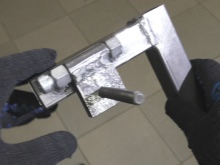
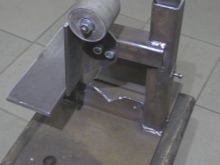
- We grind the edges on the elongated nut, after which we weld it to the steel strip. In the strip we make a hole with an M10 thread, which will be used for a bolt with a driven roller. From a square pipe 30x30 mm, we make a part with an L-shaped shape, weld on the nuts that fix the steel strip.
- We select the perpendicular side of the square, weld the nut with the bolt so that it is located opposite the bolt with a driven roller. We weld a 40x40 mm profile pipe on the base in a vertical position.
- For smooth stretching of the tape, a gas shock absorber is installed between the 40x40 mm profile and the L-shaped part. We collect the support from the profile and the corner.

A more detailed and visual overview of creating a do-it-yourself grinder from a washing machine engine is presented in the following video:


The comment was sent successfully.