How to make a flowerpot from newspaper tubes with your own hands?

Newspaper planters are often made for potted flowers. One of the most interesting ways to use a newspaper is to create a flowerpot on the wall in the form of any figures or pictures with your own hands.
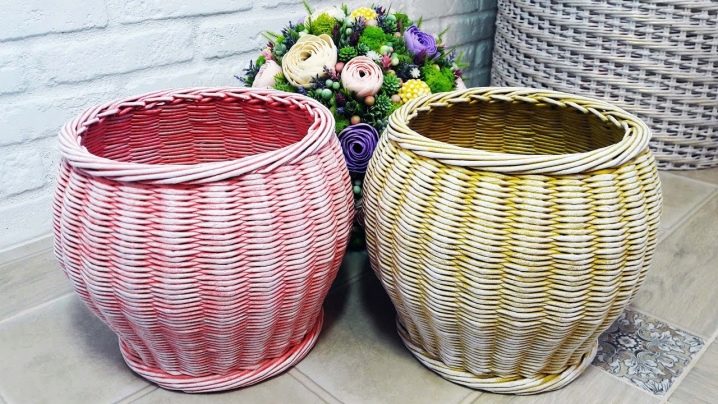
Planter for flowers without bottom
- We cut out a circle from cardboard or thick paper, choose the diameter yourself, for your pot.
- We make holes on the contour after 2 centimeters. You can make them with an awl or knitting needle.
- We twist the tubes from the newspaper, insert them into the holes of our workpiece.
- Leave the "tail" under the circle 3 centimeters in size - it must be bent, but not glued.
- We put the pot on the cardboard and start to weave. Weave in a checkerboard pattern. We choose a three-tiered weaving, when we weave 3 sticks through 3 into the workpiece.
- We braid to the top edge of the pot, even a centimeter higher.
- We remove the pot. We close the top and bottom with a regular fold. We cut off all unnecessary.
- We cover with a mixture of PVA glue and water in a 1: 1 ratio.
- Then we cover with varnish.


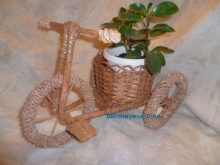
Flowerpot bike
For the product we need:
- A4 newspaper;
- knitting needle or skewer with a diameter of 2 mm;
- scissors;
- glue, better than PVA;
- clothespins.


Newspaper sticks
- Cut a sheet of newspaper into 3 equal parts vertically.
- We put a knitting needle on one "strip", an angle of 20 degrees.
- We wrap the paper around the knitting needle, glue it.
- It is necessary to make as many of these tubes as possible so that there is enough for the planter.
- For a bicycle it is necessary to "build up" several tubes. To do this, take two tubes, insert one into the other, glue.


Rear wheels
Wheels need to be made 2 pieces. For them, you need to make a zigzag tape.
We use 2 sticks. For informational content: 2 colors - blue and red.

Step weaving:
- We put the red stick inside the blue one.
- Spread the edges of the blue tube to the sides at the same distance from each other.
- We wrap the right side of the red stick towards us, lay it on top of the blue one.
- We wrap the left side of the red tube away from us, put it under the blue one.
- We put the red sticks one under the other.
- The left half of the blue tube must be wound behind the red tubes.
- Let's wrap the right side of the blue stick. Raise, then lay on the red one.
- The blue tube must be brought out from below under the red one.
- Then we wrap the red one with the same tube, on top of the blue one and in the middle.
- The red tube down for both blue ones, but on the far right red stick.
- The same tube is displayed in blue.
- The right red tube should be placed in the middle between the blue ones.
- In the same way we put the left blue stick on top of the red one.
- We stretch the left blue tube down under the red ones and then place it on top of the far right one.
- Then we do everything according to the same scheme, to the length we need.
- We connect and get a circle, which we grease with glue.


Wheel spokes:
- it is necessary to take 5 short tubes, fold them in half and connect so that there is a hole in the center for the bushing and the axis;
- wheel diameter - 7 cm;
- insert the spokes inside the wheel;
- grease with glue;
- insert the axles for the wheels into the bushings - they connect the wheels and the basket.
Axle for wheel:
- take 2 short sticks;
- lengthen the tubes, twist them like a spiral;
- glue, dry.


Front wheel
We do only one thing, it should be larger than the rear ones. Diameter - 14 cm.Number of needles - 12 pcs. The wheel manufacturing technique is repeated.When the axle is inserted into the bushing, it is necessary to add another tube - a simulator for the pedals. Take 2 more short tubes. We break each one so that it looks like a pedal or a triangle, we insert them into the simulator. We glue.


We connect all parts of the bike
- Lift the right and left axles up, bring them together. Wrap the frame with a stick and glue it.
- We make 4 turns, add a tube, fold in half. This will be the bike frame.
- Pull the main stick forward and wrap the frame with it. Technique: the first row - the working stick from the bottom, the second row - from the top, etc. There should be 6 turns on both sides, then we make the rows wider.
- We glue another stick for the saddle.
- Weave 7 rows.
- Add a stick to the bike frame, wrap it like a saddle. Weave 8 turns.
- Add a horizontal steering stick.
- We braid the steering wheel with a working stick.
- Make 4 turns. Cut and glue the tubes on the frame.
- We put a worker on the frame and also glue it.
- Glue three sticks to the saddle, weave a spikelet. It is needed to connect the saddle and seatpost, and attaches to the rear wheels.
- We insert a basket for flowers between the wheels, we put their axles inside the pots and glue them.
- The 4 seat posts should be brought together and wrapped with one stick. Cut off the ends. We glue and dry. We cover with varnish.


For information on how to make a bicycle planter from newspaper tubes with your own hands, see the next video.


The comment was sent successfully.