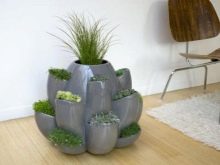
How to create a planter for flowers with your own hands?
It is difficult for owners of private houses to imagine their front gardens without flower plantings, which are a striking addition and an integral part of the design of the entire yard. Hand-made compositions look very impressive. In this case, not only standard plant pots are used, but also any household items awaiting disposal. The very procedure for creating a pots is not only useful, but also very exciting, especially if you do this with young children.
How to choose a material?
Today, almost all specialized hardware stores offer a wide range of different home decor and garden decorations. However, even in this abundance of the offered product, not everyone will be able to choose the most suitable models for their site or home. The only way out of this situation is to create an original and unusual product with your own hands.

Whoever says anything, everyone can make the brightest decorative flowerpots from the most common materials. It is enough just to connect your wit and give free rein to your imagination.
Using improvised items, you can translate the most daring ideas into reality. To decorate the garden area, old household items will do, in which there is home comfort and the warmth of a family hearth. This is the very zest that attracts the eyes of others.


In almost all closets, there are old household items that no one uses for a long time. But you shouldn't send them for recycling. It is best to look, perhaps they will still fit for creating composite pots for flowers. For example, using an ordinary plastic bottle and thread, you can create unusual bright pots for growing any type of plant. The same goes for old clothes.


Don't get rid of worn and washed T-shirts, T-shirts, or shirts. They can serve as a basis for creating a unique design of pots.
Before choosing the material for the decorations, you need to decide in what conditions the pot will be located. For outdoor use, it is preferable to use materials that do not interact with a humid environment.

People who are exclusively engaged in the cultivation and breeding of indoor plants often create decorations for their pets from the most common materials. In addition, they try to choose a special design of the pots for each individual flower. For example, orchids or succulents will look very laconic in a pot with decorations made from vines or pumpkin seeds.


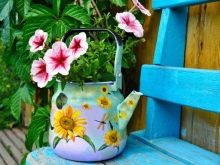
You can create an unusual flower arrangement from a variety of objects., for example, from an old teapot, a leaky watering can and even a torn shoe. Rags for cleaning floors will make the most daring fantasies of a self-taught decorator come true.


How to make?
The most striking, unusual decoration of each window sill and garden plot is a handmade pots. Of course, you can buy them in the store, but in the purchased models you will not feel that tenderness and feeling of home warmth. In addition, handcrafted planters have several important benefits.
- The options presented in the store can be made at home. At the same time, financial costs will be reduced several times.And if the materials used are available, then there will be no investments.
- Each individual planter decoration design is created taking into account the taste preferences of the owner.
- The uniqueness of the finished product.

Relying on his own imagination, every gardener should remember that beauty must be accompanied by the strength and reliability of the future masterpiece. The manufactured item must be safe and practical to use. When designing a decoration, it is very important to take into account the variability of the climate and possible precipitation. External factors can negatively affect the finished product.

Several materials are by far the most popular and readily available.
- Wood. In this case, we mean planks of different sizes, bamboo and dry branches.
- Cement. After drying, it becomes durable. It can only be broken with a strong blow.
- Rope. Twine is often used. It is she who gives color to the design of wicker pots. In some cases it is used as a suspension.
- Textile. Any shirts, T-shirts, sweaters that have lost their presentation. From these fabrics, you can create an unusual basis for the design of floral decorations.


It is not necessary to run to the store and buy the necessary materials to create pots, just look around and see things that have long gone out of use. By connecting imagination, you do not need to study various master classes of experienced designers.
From plaster
As mentioned earlier, gypsum is one of the most common materials for making pots. The technology for creating containers is quite simple, the main thing is to follow the step-by-step instructions.
First you need to prepare tools.
- Two containers of different sizes. One is larger, the other is smaller.
- Wooden stick.
- Gypsum.


You can start the sequence of execution.
- A larger container must be carefully lubricated with oil. To make it easier to remove the dried product, a small incision should be made on the side. A connection in the rupture line will allow to avoid leakage of the gypsum mixture. For this purpose, ordinary scotch tape will do.
- Initially, the gypsum mixture is poured only on the bottom of a larger container. The resulting layer needs to stand a little to harden. Then a smaller container is inserted.
- A wooden stick will help get rid of air bubbles.
- The workpiece should be left to dry completely. This may take one day, but it is best to leave the set alone for a day.

It is important to remember that during the manufacturing process described above, one must not forget about the drainage holes, otherwise the water will stagnate at the bottom of the pot, and the root system of the plants will begin to rot.
Having understood the technology of making plaster decorations, you can start creating unusual elements, for example, the "Swan" planter. To create this unusual flower garden, you should prepare a small list of materials and tools:
- gypsum mixture - 5 kg;
- plastic five-liter bottle;
- twine;
- thick wire;
- standard size bandage;
- reinforced mesh;
- paint - you need white in large quantities, as well as red and black;
- putty knife;
- brush;
- roller.


Having prepared all the necessary materials, you can start making pots.
First you need to make a foundation.
- To do this, you need to take a plastic bottle, cut off the upper part from it, pour wet sand into the resulting bath.
- Insert a wire into the hole for the cover and wrap it with twine, bending it in the shape of a neck.
- On the prepared dummy it is necessary to apply a primary layer of gypsum. Use a spatula to evenly distribute the mixture. The maximum layer thickness should be 2 cm.
- After applying the plaster base, it is necessary to supplement the structure with a reinforced mesh.This flexible material is applied to the entire surface of the workpiece and pressed into the gypsum mix.


- Then a layer of bandage is applied.
- He also creates the shape of the head and beak.
- After carrying out these manipulations, a second layer of gypsum should be applied.
- In places where there are irregularities and roughness, brush and smooth.

- Gypsum and mesh are also used in the formation of the tail of the swan and the wings. The order of their manufacture is identical to the creation of the base. The result is the intended shape of the bird.
- The construction must be put aside for several days so that the material is completely dry.
- Then the surface is sanded with sandpaper or a sander and covered with a primer.
- After the primer has dried, you can start painting the swan. The body is painted white, the eyes and beak are red and black.
- After waiting for the coloring composition to dry completely, sand must be poured from the base of the bottle.
- It is important not to forget to make a drainage system. Drill a few small holes in the bottom of the decoration.

From twine
To create an unusual planter, you can use a variety of threads and ropes. The most popular material in this case is twine. With its help, original design options for pots are created with the addition of various elements. And you can do all this at home.
First you need to prepare the tools:
- you need a rope
- pot holder,
- a piece of foam
- skewers of the same size,
- glue,
- 50 centimeters of aluminum wire.


Having prepared all the necessary tools, you can start the production process.
- A circle of the required diameter is cut from a piece of foam. It must be glued to the stand and wait for the glue to dry. After that, skewers are inserted along the edges, the tips of which are dipped into the glue mass. The gap between the skewers should be about one centimeter.
- The next step is to wind the structure. A rope is tied to any skewer, and weaving can begin. The rope must pass the skewers in a certain order: first the outer winding, then the inner winding - a snake is obtained. As soon as the rope has reached the initial skewer, it must be wrapped and continued to work, but the direction of the thread changes. Thus, the winding takes place up to the required height of the decoration.
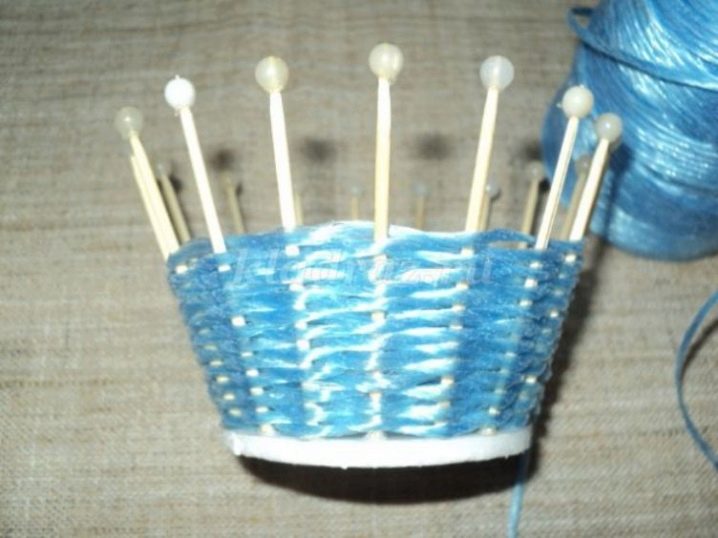
- The same rope must be wrapped around the pot holder, having previously greased the material with glue. It is important to ensure that the threads fit snugly together.
- It is necessary to cut three ropes of the same length, two meters will be sufficient. A pigtail is braided from them. The middle of the resulting weaving is glued to the outside of the planter, a bow is tied. Use glue to fix the knot.
- The final stage is making the handle. The wire must be bent, using a rope to make a winding along its entire length. The ends of the thread are fixed with glue, after which the handle is attached to the base of the planter.
The finished product can be used for its intended purpose only after the final drying of the glue mass.

From buckets
In the pantries of every private house, you can often find plastic buckets used to store any items, often dry animal food. But if you connect your imagination, then you can make unique decorations for growing flowers from an ordinary plastic container. The design, by its characteristics, will be floor-standing, but rather high.

To implement our plan, you need to prepare tools and materials:
- Plastic container;
- glue "Titan", as it is more durable;
- fabric - thin and thick textiles;
- scissors;
- knife;
- cord, instead of it a thick thread will fit, in some cases it is allowed to use twine;
- thermal gun;
- brushes for paints and varnish;
- foam sponge;
- paints;
- beads and any similar items;
- acrylic lacquer.


Having collected these elements, you can start creating a masterpiece.
First you need to create a base.
- The container must be cleaned of all inscriptions and pieces of paper. Rinse thoroughly and degrease.
- If the bucket has a rim, it must be removed by using a knife.
- The outer surface of the bucket needs to be pasted over with a thin cloth.
When measuring fabric material, one important nuance should be taken into account. The length and width of the textiles on each side should be two centimeters larger than the dimensions of the bucket.
- Then the glue mass is evenly spread over the entire surface of the plastic container, after which the cloth is applied. Textile joints are overlapped. The bottom edges of the fabric are folded over the bottom of the bucket and glued to the middle. The upper edges are glued inside the future decoration, while being tightly smoothed.

After creating the base, you need to start executing the conceived design.
- In this case, the use of twine is suggested. It is located in a chaotic manner around the entire circumference of the plastic container, fixed with glue.
- The thick pieces of fabric create delicate flower shapes and are also fixed with glue.
After decorating, you can start priming and painting the product.
- The primer is applied with a thin brush, evenly distributing the mass over the entire surface.
- Then you can start painting.

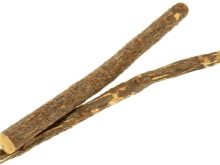
From the branches
To create a rustic style, you need to pay attention to pots made from twigs and sticks. Such decorations most harmoniously fit into any interior of not only apartments, but also summer cottages. Each person can create such a wooden miracle, the main thing is to decide in advance on the required size of the material.
To make pots from twigs, you need to prepare the following blanks:
- sticks or twigs;
- twine;
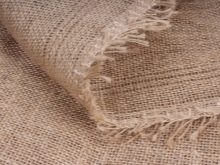
- sackcloth;
- glue;
- an ordinary flower pot.

Quite often, such decorations are used to frame pots with indoor plants. It turns out very beautifully, gracefully, most importantly, unique.
- The selected branches are cut to the same length, depending on the height of the selected pot. On the upper and lower sides, the branches are tied together with a thread, one after the other, thereby creating a single wooden canvas. A knot is tied on the first branch, the next is laid side by side, and the same knot is tightened again, thus, it is required to weave a cloth capable of hugging the prepared container.
- A piece of burlap is pulled over the selected pot. The ends of the material are fixed with a glue gun.
- The prepared wooden canvas is wrapped around the burlap. The remaining tip is connected to the original branch. Thus, the wooden frame is ready, the product can be used for its intended purpose.
- In some cases, such pots are endowed with a rope handle, due to which the structure can be hung on the window.

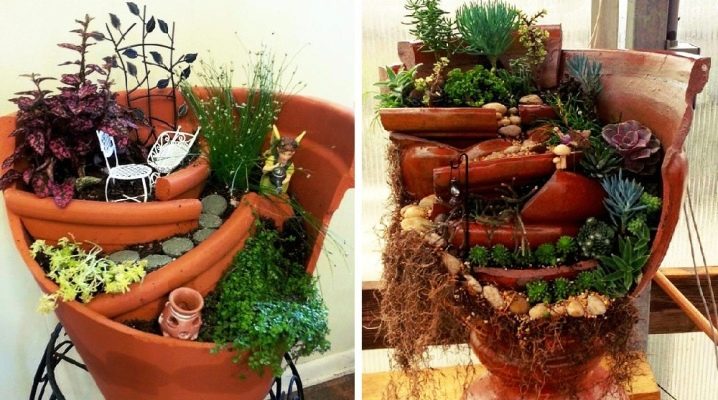
Of stones
A flower pot made of stones can add a bright touch of nature to the interior of any house and apartment. This is a very original idea, thanks to which you can create the most unusual and rather beautiful shapes. Its production takes no more than half an hour, and the result will exceed all expectations.
Accordingly, you first need to prepare the required materials, namely: pebbles of the same plane and tile adhesive.
You can take any container as a basis, it can be a plastic or metal bucket, or an ordinary old flower pot.
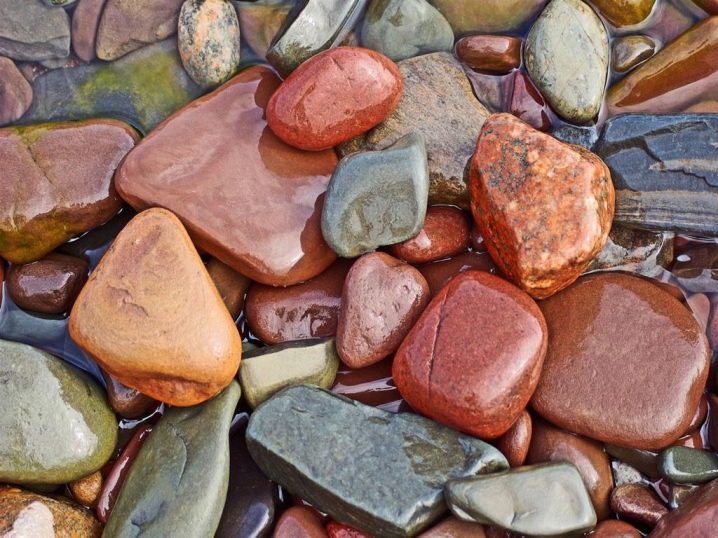
- The outer surface of the base is thoroughly cleaned from dirt and dust.
- After that, tile glue is applied to it.
- It is advisable to frame the glue mixture with a reinforcing mesh, and put stones on it.
It is worth noting that the stones must be deeply inserted into the glue mixture. And the resulting excess is removed with a sponge.
- The finished pots must be set aside for complete drying, and then used as directed.

Decorating
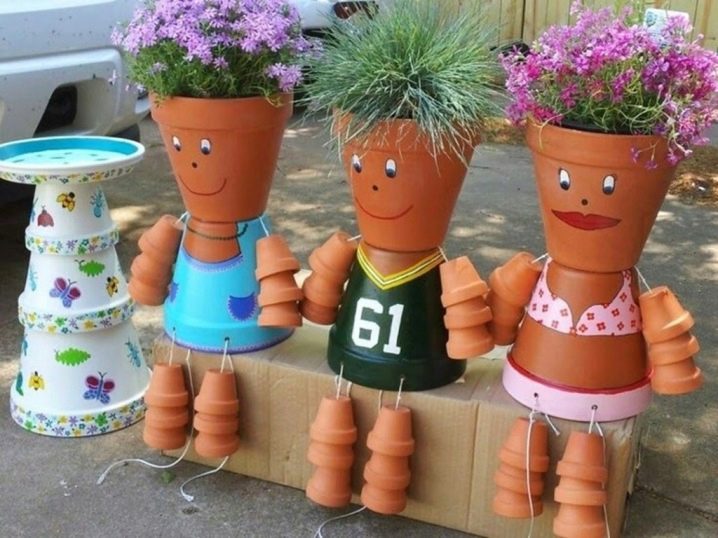
As mentioned earlier, making pots is a very exciting and interesting activity. The whole family can be involved in this process. The creation of unusual decorative elements contributes to the development of children's imagination. It will be especially interesting for kids to decorate the house on the eve of the New Year holidays. The very New Year's mood makes everyone remember the main features of winter. It will be very original to decorate a planter for a live pine tree with cones and snowdrifts.

The cultivation of flowers at home is mainly carried out by women. And each of them does not mind creating a separate unique planter for their indoor plants. Creative ladies will use the decoupage technique with great pleasure. Retro lovers will try to create an old-fashioned image of the decoration. High-tech connoisseurs will invest in the creation of decorative elements all the most unusual inventions in the style of Leonardo Da Vinci. The main thing is that it all looks tasty, juicy and with a twist. In no case should we forget about the main technical characteristics of decorative pots, where a drainage system must be present with the possibility of an excess amount of water coming out.


You can find out even more original and interesting ideas for making pots with your own hands in the next video.


The comment was sent successfully.