Diy ideas and techniques for decoupage flower pots
How often do we have to go around thousands of stores in search of the very part or accessory that perfectly matches the interior. Ideas and techniques for decoupage flower pots will help you create unique and soulful items with your own hands.
Preparation of materials
Decoupage is a technique for decorating various household items, be it a casket, a flower pot or a kitchen set. Its meaning is to stick various patterns and patterns on the surface and fix them with varnish. Such a revival of familiar interior details is within the power of every novice needlewoman.
Any surfaces can become the subject of renewal, however, masters advise starting with small objects with smooth textures. Decoupage of flower pots is often the first experience in this technique. Note that any pot materials are suitable for decoration, such as:
- clay;
- plastic;
- ceramics.


In addition to the base pot, another important detail of the process is decoupage cards, pieces of fabric or napkins. Their image should match the flower pot and be bright. The size of the image can be any, however, decoupage masters advise starting with small patterns that are easier to stick evenly. Large drawings bubble more often and require special dexterity.
Additional materials:
- glue for decoupage or PVA, glue stick, egg yolk;
- acrylic primer or acrylic white paint;
- acrylic paints for decoration;
- sandpaper;
- soft brushes (thin and wide);
- stationery scissors;
- file;
- additional decor in the form of beads, rhinestones, ribbons.
When everything you need is ready, you can begin the most interesting process of renewal and breathing new life into your usual life.


Choice of base and image
As mentioned earlier, the pot can be of any material, but it is best if it is smooth and with a minimum amount of bends and roughness.
Plastic decoupage pots are considered a good solution for beginners. Their surface is smooth, and the cost is very affordable. Ceramic also lends itself well to decoupage. However, to decorate a ceramic pot, you will need special acrylic paints for ceramics.
Unlike decoupage of a plastic pot, you will need more paints and glue to renew an earthen pot. The fact is that clay tends to absorb moisture, and therefore the consumption of materials will increase along with the drying time.
To make the selected items in the decoupage technique look really stylish and professional, you should take care of the material on which the drawing is performed.
Less expensive is the drawing, separated from the three-layer napkin. Its advantages:
- a large number of designs on various topics;
- low cost;
- subtlety.


They are good for beginners and are also found in every home. It should be noted that the drawing on napkins is a very fragile instrument, it tends to stretch and bubble. In addition, without surface treatment with white paint, the pattern of the napkin noticeably fades and fades, becoming inconspicuous.
Decoupage cards made on special paper, for example, rice, are considered another popular material. Product advantages:
- the brightness of the picture;
- subtlety;
- tensile strength;
- a huge number of thematic designs.
Such drawings and patterns look great on any surfaces, having a special stylistic focus. However, the cost of rice paper is quite high, and therefore the attitude of the masters to it is controversial.
Reduces the cost of decoupage cards by using plain paper. Its thickness is several times greater than the thickness of rice, but if the master wishes, it becomes a good material for decoupage. It should be noted that professionals in their field even use photographs on standard printed paper in their techniques, diligently cleaning and thinning the edges of the image.

Another possible material is beautiful pieces of fabric with printed or printed patterns. With patterns printed on fabric, the technique differs little from paper, while printed patterns open up more room for imagination. So, the volumetric embroidery can be painted over together with the pot in a single color, observing the transformation of a plastic pot into an object of art with a complex texture.
You can achieve an interesting texture and volume by performing decoupage with stockings. Today they are one of the most popular materials for decorating flower pots, vases and bottles. Kapron, impregnated with glue, can be put on the pot or wrapped around it, creating luxurious folds, as if copied from the robes of the goddess Athena. In addition, interesting details for decoration are created from nylon. For example, to create a bouquet of roses, you just need to grip a nylon stocking with a needle and thread on one side.
Among the drawbacks of the fabric, a long drying of the product is noted, and as a result of this, the process of work is equal to several days. Each stage of painting here requires attention and complete readiness, but the result is worth the time.


Stages of work
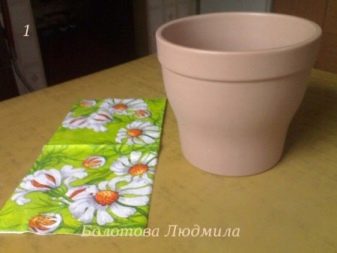
To update a flower pot step by step in a few hours, you need napkins or decoupage cards.
Algorithm of actions:
- peel off the top layer of napkins or carefully cut out the decoupage card pattern with scissors.
- the surface of the pot on which the image will be applied should be thoroughly cleaned with sandpaper and applied with a primer or white acrylic paint;
- apply specialized glue or PVA glue solution in a ratio of 1: 3 to the cut image;

- gently attach the image to the pot, delicately smooth out all folds and gathers with your fingers or a foam sponge (roller);
- on the front side of the image with a hard flat brush, apply an adhesive composition, as if driving it into paper;
- process the borders of the picture with acrylic paint that matches the color of the pot or by cleaning the edges with fine sandpaper;

- you can apply additional decor in the form of sequins or rhinestones;
- fix the image with several layers of acrylic varnish;
- let the product dry.

Tricks
Despite the apparent simplicity of this decoration method, many beginners face certain difficulties. So, often when applying a pattern from a napkin, it is stretched and distorted. This can be avoided by first moistening the layer separated from the napkin with a spray bottle and smoothing it with an iron. The action will help to make a good decoupage card out of an ordinary napkin, which in the future will not be afraid of getting wet and stretching along a flowerpot.
Another secret of this neat technique is the use of dense polyethylene file to overlay the pattern on the surface of the file. To do this, put a file in a deep and wide container and pour a small amount of water onto it. A drawing is placed face down on wet polyethylene, processing its back side with adhesives. In the future, the drawing with the file is applied and carefully smoothed onto the surface of the pot.When adhered to the surface, the file is detached, leaving a perfectly smooth image without bubbles.
Also, experts recommend in the technique the use of not only neatly cut images, but also hand-torn drawings, especially if the ornament on the flower pot will be duplicated. Torn edges make it easier to tie multiple patterns together.


Creative ideas
In addition to a stylish image, you need the right surfaces for a successful decoration. As mentioned earlier, it is easiest to work with smooth pots, but textured flowerpots look more impressive.
You can create a relief with eggshells, crushed into small pieces and carefully glued to a fat-free surface. Subsequently, the shell is coated with varnishes and paints and prepared for further drawing according to the standard algorithm.
Drawings for decoration can have a different focus, but the most appropriate and win-win motives are:
- delicate provence with lavender sprigs;
- plant motifs in the form of curved flowering stems;
- repeating geometric ornament;
- the image of soft ruffles and flounces in vintage style;
- birds;
- images in Gzhel and Khokhloma art technique.
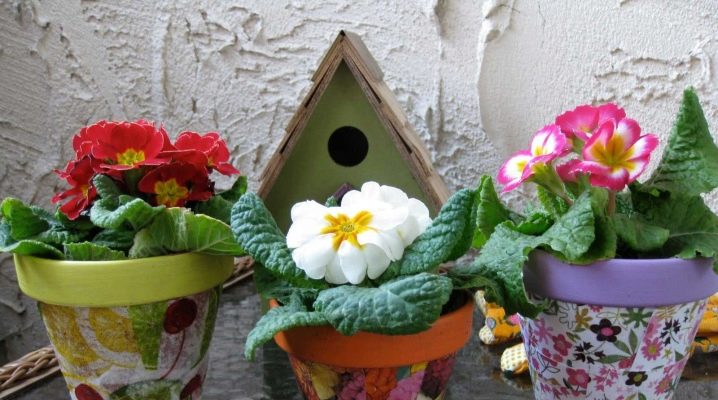
Whichever option is chosen, the product looks cozy, captivating everyone's attention, because handicraft has been highly valued at all times.


See below for a few more ideas for decorating flower pots for the piggy bank of our housewives.


The comment was sent successfully.