Gutters: technical characteristics and installation rules
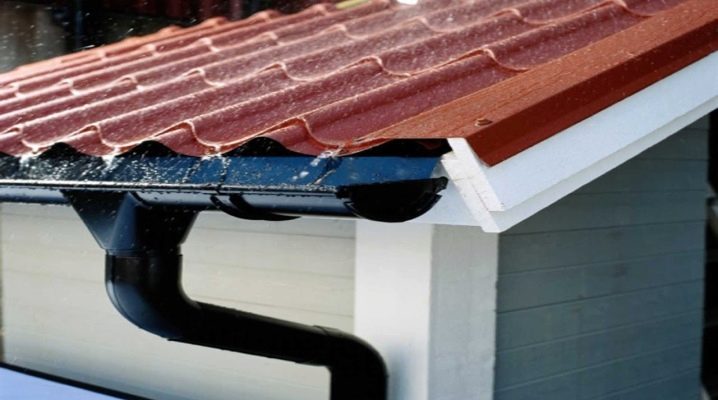
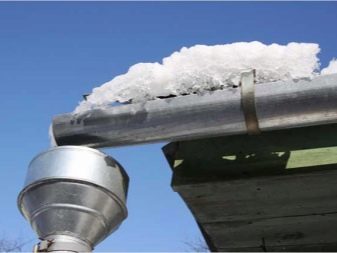
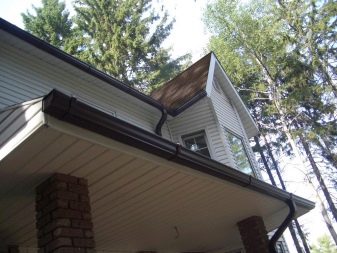
Rainfall and snow melting will pass without consequences only if a reliable and compliant drainage system is prepared. Not only must it be created from reliable elements, the quality of the installation of individual blocks and their connection with each other are of great importance. Every homeowner and developer is obliged to take into account all these subtleties when building, designing, overhauling.
Device and purpose
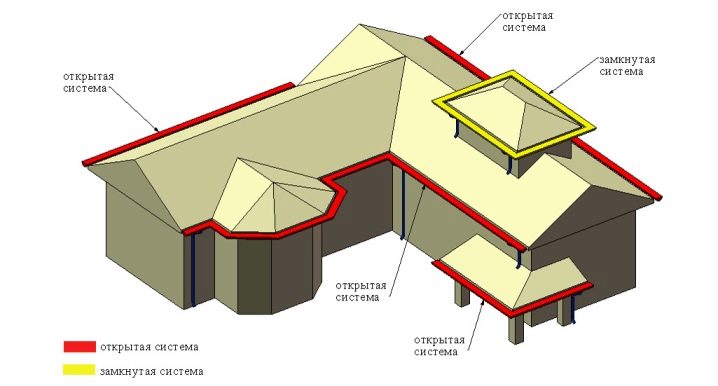
The gutter does more than just dump the water flow down (this could be handled with a simple roof slope). Its task is to direct the water along a certain channel. When the drainage system is not configured or is disturbed, the flow is chaotic, as a result, wet walls appear, and the foundation of the house also damp. The main structures cannot fully fulfill their purpose, they quickly fail. Channels for water drainage are divided into different types, and the classification can be carried out both by the structural material and by the type of system used.
Among the materials that are used in the arrangement of gutters, absolutely leading positions are taken by:
- plastic (PVC);
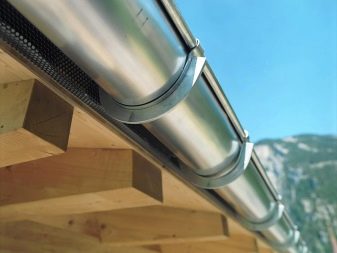
- steel in the form of tin;
- alloy steel.

It is these materials that have proven their practicality and high efficiency for a long time. Structures made of durable wood, concrete or natural stone used in the past turned out to be irrelevant against their background. Metal channels for drainage of rain and melt water from the roof are now in demand more than their polymer counterparts. The reason is obvious - it is they that make it possible to achieve the highest protection of buildings against flooding of foundations and ingress of moisture on the walls.
Also, the advantages of metal over plastic in terms of rigidity and strength are very important for outdoor conditions.
The technical characteristics of steel gutters allow them to:
- serve from 30 years (with high-quality installation and care);
- successfully resist various mechanical influences;
- easy to tolerate the action of aggressive and caustic substances.
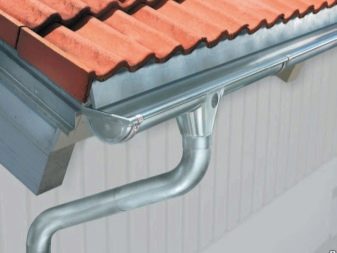
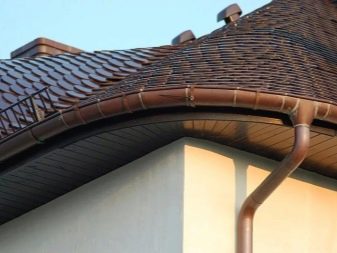
But for all its advantages, the metal is heavy, which does not allow its use on buildings with lightweight foundations. Copper structures are better than steel in terms of resistance to corrosion, but the load created will be even higher. According to GOST, galvanized material in the form of thin sheets, hot and cold rolled steel sheets, low-carbon cold-rolled strips and steel strips can be used to obtain steel drainpipes.
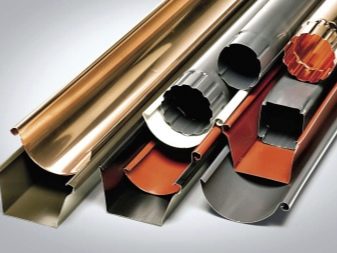
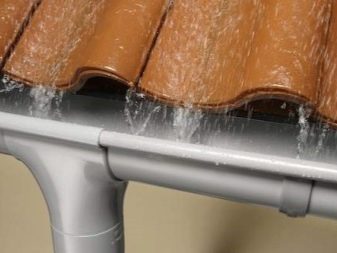
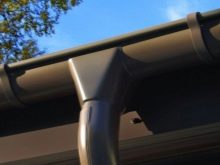
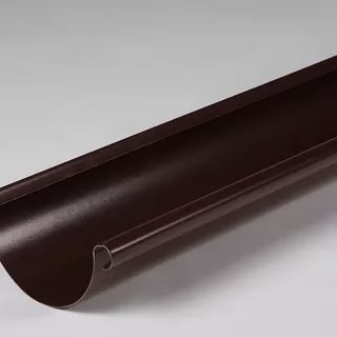
The geometric configuration of the drainage system is also of some importance. So, a rectangular gutter:
- is able to improve the appearance of the house, regularly performing its function;
- allows much more water to pass through than alternative forms;
- requires a relatively small amount of materials;
- surpasses other forms in resistance to ice bursting.
The only problem is the increased installation fee, which is not very significant against the background of such advantages.
A square gutter can handle a lot of rainfall slightly worse than a rectangular counterpart. Basically, for the manufacture of such parts, steel with a polymer protective layer is used. At the same time, the total cost is not much higher than that of traditional round pipes. Radial gutters should be installed mainly on towers and other structures with a round roof.In all other cases, they are not needed.
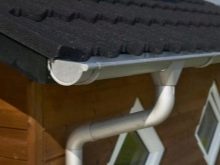
Variety of materials
The severity of the copper gutter structures forces, despite their technical merits, to choose the galvanized metal type in most cases. Speaking about the plastic (PVC) version, it should be noted that it is immune to corrosion (like copper), moreover, it is much lighter. But the widespread distribution of such products is hampered by the occurrence of strong noise when droplets hit the plastic. In addition, if the water in the plastic drain hardens, it will simply burst the pipe. To increase resistance to acidic water, many companies apply a polymer coating.
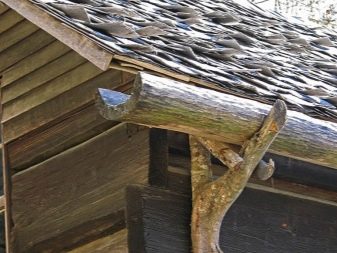
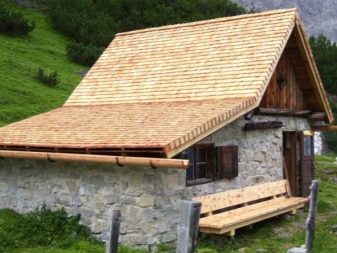
Wooden structures are still used in some places, because such a structure looks very attractive. But calling it practical is unlikely to work, because wooden gutters:
- destroyed in 5-7 years maximum;
- quickly become overgrown with fungi;
- are expensive;
- differ in complicated service.
In multi-storey buildings, concrete gutters can be found, but such elements are not suitable for private housing construction. In addition to a significant mass, the cement block quickly collapses from water (it does not corrode, but there is not much difference in practical terms).
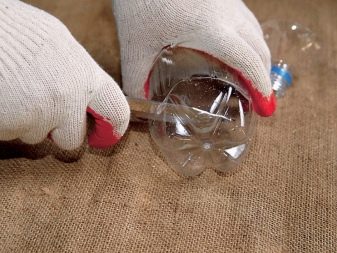
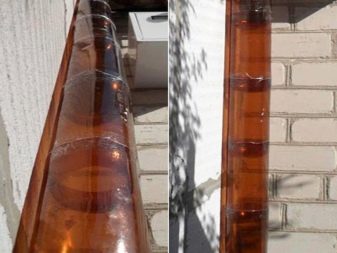
Among the available options, not the last place is occupied by the manufacture of models from bottles... Particular durability and high performance cannot be achieved in this way. But, at least, such a drainage system successfully copes with its task on secondary buildings.
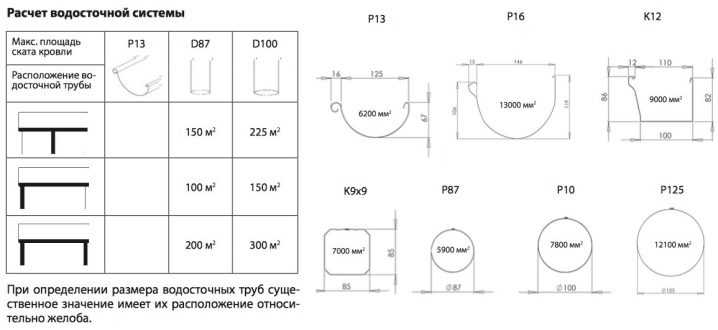
Calculation of dimensions
The section (pipe diameter) determines the effectiveness of the use of the gutter in a particular situation. Thus, a large rectangular structure is economically ineffective where the amount of drains is small. The exact dimensions are determined depending on the effective areas of the pitched structures. To determine them, you must first multiply the gap between the eaves and the roof ridge by half the total roof height. The result is then multiplied by the centerline length of the roof slope.
When the total area is 57 sq. m and less, you can limit yourself to a 10 cm gutter, along which a pipe with a diameter of 7 cm will go.In cases where the slope varies from 57 to 97 sq. m, the width of the gutters is increased to 125 mm. With a further increase in the roof (but not more than 170 m2), you can limit yourself to a drain of 15 cm. Both of the latter options are equipped with pipes with a section of 10 cm. Diameter 200 mm or more is practiced mainly on very large roofs of apartment buildings.
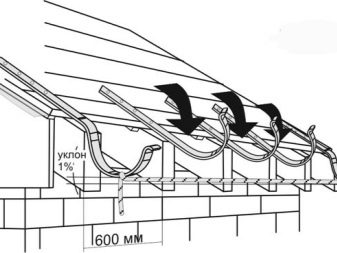
According to the norms of SNiP, the angle of inclination of the drainage system can be taken from the standard reference literature. The average value, suitable for almost all cases, is 2 mm per 1 p.m. But there may be situations when such an indicator is insufficient. It is necessary to clarify this when choosing a specific type of roof and the method of its organization.
The maximum length is always taken equal to the lengths of the eaves, the number of gutters is calculated for all slopes separately.
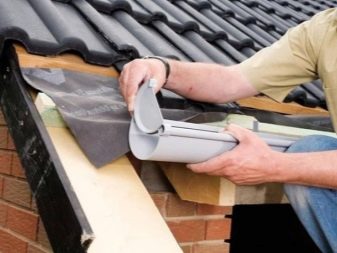
Installation steps
Installation work can be carried out both with the help of professionals and with your own hands. Regardless, the manufacturer's instructions must be strictly followed.
- If the gutter is made to order, it is advisable to prepare drawings to facilitate installation work.
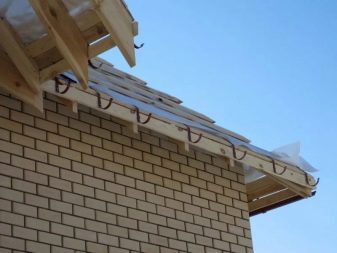
- Fastening is often done with hooks. The final success depends on the size of the brackets chosen. The holders should be slightly larger in diameter than the gutter circumference, but at the same time free movement of the pipe should be excluded.
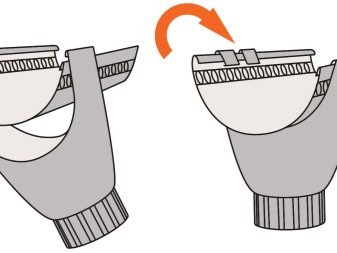
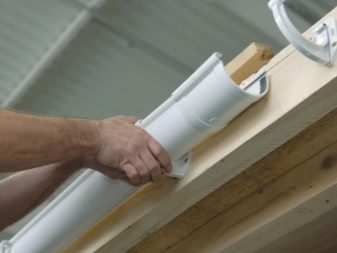
- The installation of the wall joint assemblies is carried out at intervals of a maximum of 900 mm.... This requirement is based on the state standard, and it cannot be evaded, no matter what system is installed. When the installation of the fasteners is over, it is the turn of the funnels. Their arrangement is determined by the external or built-in version of the drain.The slope of the roof and its total area are also taken into account.
- As follows from the standards, on a roof area up to 10 sq. m. there should be a single corner funnel. If this indicator is exceeded, at least two parts are put. When the trays are mounted in the center of the system, the plastic or steel part is cut off, the hole is used for installing the ebb. It is mandatory for any pipe system to attach plugs that correspond to the drain in shape. Wall-mounted gutters are mainly connected using pipe locks, the connection points are treated with sealants.
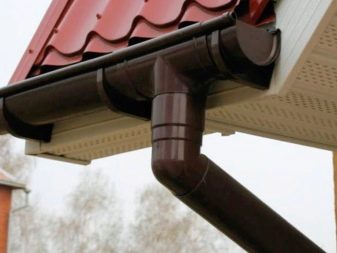
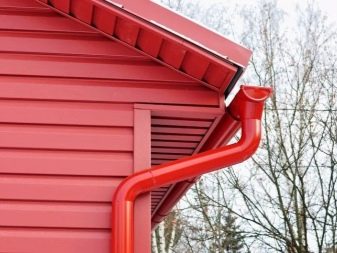
- It is necessary to fasten the drain on vertical planes with clamps. For your information: first, the clamp is attached to the wall, and only then a section of the pipeline is created, and not vice versa. In some cases, you will have to install turning parts; making them is important because it saves the area of water flow and increases the efficiency of the entire system as a whole. The final step is attaching the finishing knees. If it was decided to collect rainfall flowing from the roof, gutters are supplemented with special containers.
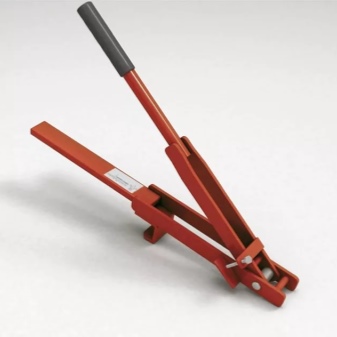
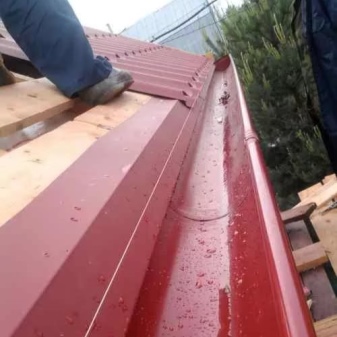
- Fastening of gutters to the profiled sheet is carried out using copper elements, zinc coated steel or plastic. Steel structures are recommended for large roofs. When the building is small, it is permissible to use plastic, which is not susceptible to rust and is relatively inexpensive. Semicircular grooves are made with a rolling tool, because all other methods do not allow obtaining a flat surface.
The gutter retaining brackets are attached in such ways as:
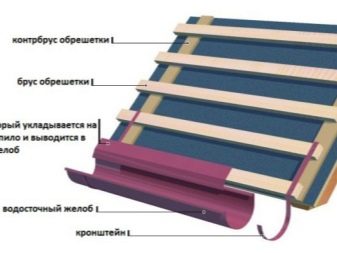
- attachment to the crate;
- retention of the lower lobe of the flooring;
- pressing against the rafters;
- installation on a frontal roof board (simultaneously with the rest of the roof);
- installation on steel pins driven into the wall (when there is no frontal board); implies the use of studs.
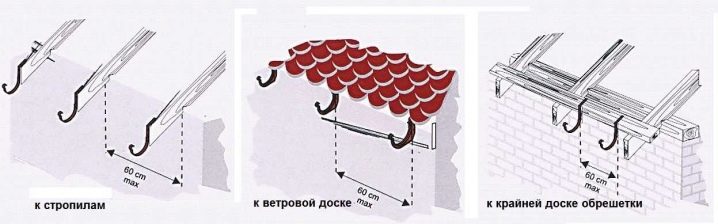
The method is chosen based on the specific situation and installation conditions.
The gutters themselves are fastened with clamps, taking into account the fact that the insulating layer of the rear wall should exceed 50 mm, and the fasteners must be inserted into the wall by 50-60 mm. Smaller indentations are impractical and unreliable. In any case, it is required to leave a gap from the pipe to the wall. When a PVC drain is made, the clamp should not adjoin it closely - as soon as the temperature changes, cracks and changes in dimensions will begin to appear.
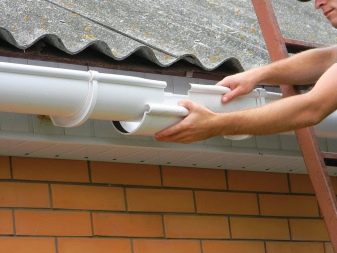
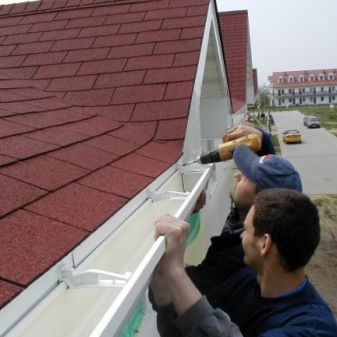
The first step during work is to measure the perimeter of the roof along the cornices. The gutters are placed, carefully considering the angle of inclination. The vertically oriented parts of the drain are fixed from the bottom up. The mark must be attached to the lower clamps. Each piece, which is longer than 200 cm, must be installed on its own special clamp.
It so happens that the roof has already been laid and there is no frontal board. This does not mean that it will be necessary to disassemble the entire roof and redo the work again. The board will have to be set very low, attaching the brackets exclusively to the crate. The problem with such a solution may be due to the destruction of the structure under snow and ice loads. Only to the board itself you need to fix the drain when completing an unfinished house and when using a waterproofing film with an anti-condensation effect.
If the renovation or construction is still in progress, you can simply place the boards under the covering to be installed.
They will help, without crushing the material, to remove the fasteners with pliers. This technique ensures the subsequent installation of the gutter even long after the end of the roofing work. In another version, the frontal board is designed as a part of the roofing ensemble, and hooks are already attached to it. On metal surfaces, relatively short hooks are taken, but from an identical material.
Plastic gutters go well with frontal structures made of wood. In the complete absence of such structures, the equipment of "crutches" made of metal or wood comes to the rescue. Already on these parts, the gutter is attached using bars or pins. On small ancillary structures, the hooks are simply screwed into the profiled sheet. Another solution is the brackets that hold the gutter not from the top, but from the bottom, and therefore are invisible.
If the roof is made of metal, approximately the same approaches are used for fixing downpipes.
The amount of understatement is selected individually, taking into account what the visual properties of the resulting structure are. The maximum spacing of the holders is 90 cm, but it is recommended to limit it to 75 cm. The edges of the gutters should be 20-25 mm below the roof edge. The minimum slope for 1 linear meter in this case fluctuates from 3 to 5 mm; the smoothness of the slope is ensured by setting the brackets strictly at a given height.
For information on how to install the drain yourself, see below.


The comment was sent successfully.