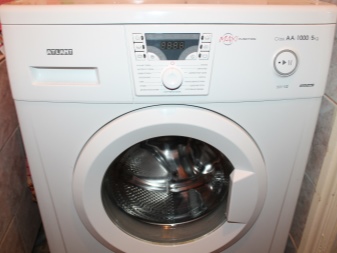
How to replace a bearing in an ATLANT washing machine?
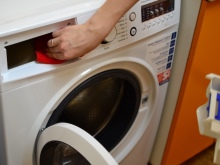
Washing machines from the Belarusian manufacturer ATLANT are firmly entrenched in the market. It cannot be said about them that they fail more often than other units. All breakdowns are typical for this household appliance. The most common problem is bearing wear. If you have a desire to fix this problem yourself, then in this article we will figure out how to do it correctly.
Breakdown reasons
There may be several reasons for this breakdown.
- Overloading during washing, when the weight of wet items exceeds the permissible load weight. At the same time, there is an excessive load on the bearing assembly, which, in turn, reduces its service life.
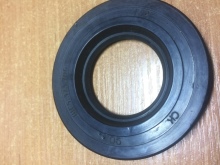
- Water-permeable oil seal. If water enters the bearing through the oil seal, severe corrosion will occur, which will destroy the structural part in question.
- The machine is not level. Many are faced with the problem of the machine "running away" from its place during washing. This is due to the fact that it is crooked. This causes imbalance during high revs, and excessive vibration of high force causes the clipper to move out of place. This vibration negatively affects the bearings, since it is through them that the vibrational movements from the drum are transferred to the housing.
Malfunction symptoms
No matter how high-quality your washing machine is, this does not mean that it will never break down, and its mechanisms are not subject to wear and tear. Any technique has its own service life or its individual units. So, for bearings of washing machines, the period of operation is 6-10 years. When the period expires or there is a need to replace them, it is necessary to make it and thereby extend the service life of the device.
Bearing malfunction can occur much earlier if the machine is subjected to the harsh operating conditions described above. If this was not the case, and the bearings still broke, in this case a factory defect is not excluded.
Waste parts can be heard during spinning... They start hum and with heavy wear - creak. Such sounds indicate an urgent replacement of the bearing. In addition, you can check the drum for backlash. You just need to shake it up and down. The backlash will make clicks.
If you find these problems, you must replace as soon as possible... Otherwise, after the drum shaft breaks the bearing itself, it will start breaking its seat.
If it is not possible to repair the equipment yourself, then contact the specialists. Otherwise, it can be brought to the point that a simple replacement of bearings will result in the need to replace the machine with a new one.

Preparing for repair
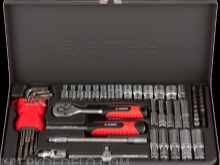
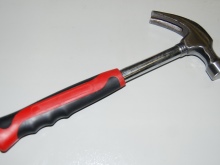
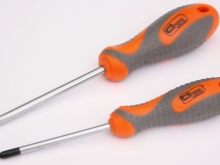
To carry out repair work, it is necessary to prepare all the necessary tools and new spare parts, this will reduce the repair time. You will need a simple set of tools, namely:
- Phillips and flat screwdriver;
- set of socket heads;
- set of open-end wrenches;
- hammer.
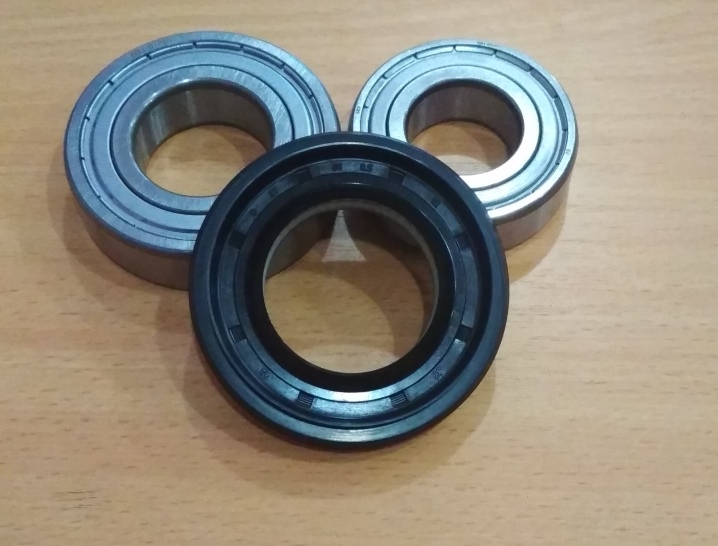
It is good if at the time of the repair you have the necessary repair kit for bearings and an oil seal.
You can purchase the necessary repair kit in a specialized store or in a service center for the repair of household appliances. To do this, you need to know an exact model of your ATLANT washing machine, so that the seller can find exactly the parts you need.You should not try to save money on spare parts. There will not be a big difference in price between good and not so good bearings, but a product of dubious quality can lead you to the need to re-repair in the near future.
The bearing assembly carries a heavy load, so be sure to inspect it when choosing. It should not wedge and spin tight.
When everything is ready, you can begin to disassemble the device for repair. Before starting any manipulations with household electrical appliances, you must unplug them from the outlet.
- The first step is to remove the top cover. It is attached with 2 self-tapping screws at the back and is removed from the machine by sliding it towards itself by 2-3 cm. After it comes out of the grooves, it can be removed.
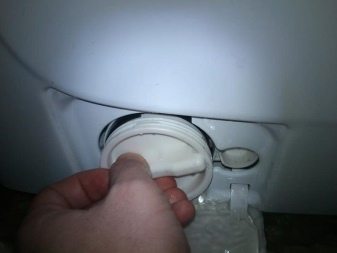
- Next, we dismantle the hatch for detergents. Below it are the screws for securing the hopper, which must be unscrewed.
- Now you can remove the front panel.
- Unscrewing the transverse spacers, remove them to the side.
- On the inside of the case on the right you need to remove the control unit, having previously disconnected the small hose from it.
- Further it is necessary remove the upper concrete weight... It is secured with a long bolt that runs through the entire weight.
- Now you can completely disconnect the hopper and move it out. To do this, it is necessary to disconnect from it all hoses that are fixed on self-clamping clamps.
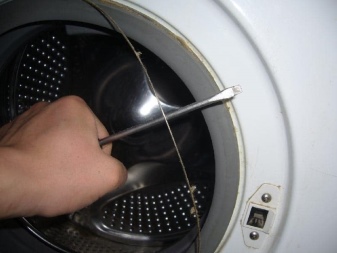
- Dismantle the outer clamp on the cuff of the hatch and fill the sealing gum inside the body.
- To continue work, you must remove the back panel of the machine.
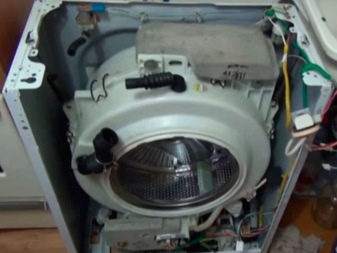
- The next step in disassembly will be to disconnect the attached electronics, namely the heating element and the temperature sensor. In order not to make a mistake with the connection during assembly, it is necessary to mark the wires or photograph them.
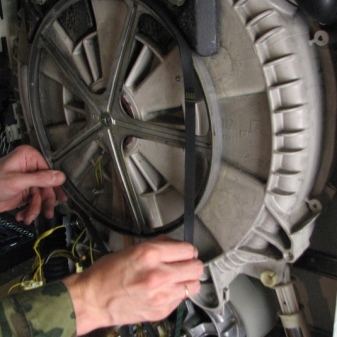
- Now you can remove the engine itself, after removing the drive belt. Removing the engine is not difficult - it is bolted, and the wiring is assembled into a single terminal that can be simply unfastened.
- Next you need loosen the clamp securing the hose to the pump.
- The shock absorbers can be unscrewed, but you don't need to do this, since the rod will come out of the tank by itself when you start removing it.
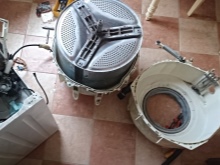
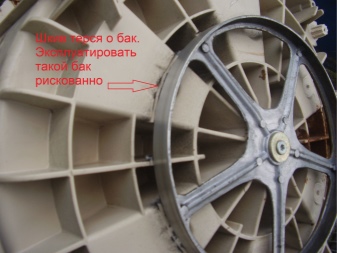
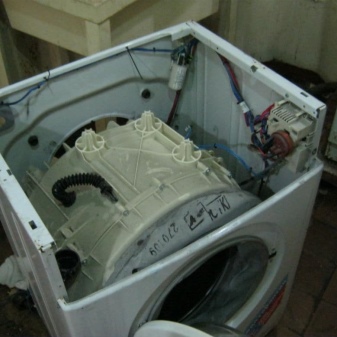
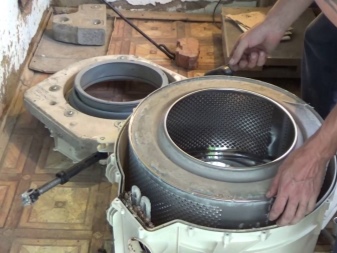
When everything you need is dismantled from the case, it is necessary to check that the tank is held in the body base only by the springs. Now you can completely remove it from the washing machine (in which the drum bearings are located) for further repair.
In the described washing machine, the tank consists of two halves, in which the possibility of disassembly and repair is provided. In order to disassemble the tank, you will need to unscrew the 20 bolts located around the perimeter. Now we divide the tank into 2 parts. The manipulations will take place with the rear part, on which the bearings are located.
How to change?
After successfully disassembling the machine, we proceed directly to replacing the bearing. This requires the following steps.
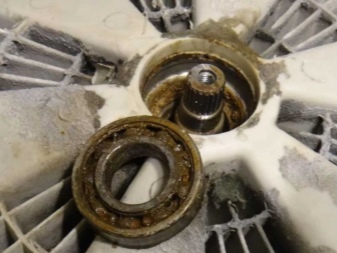
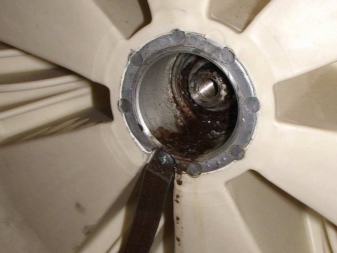
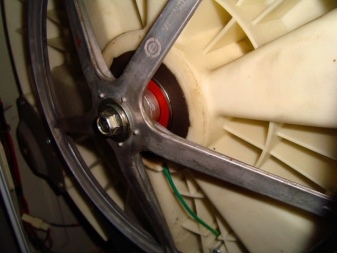
- Unscrew the pulley fixing bolt on the drum and remove it with staggering movements.
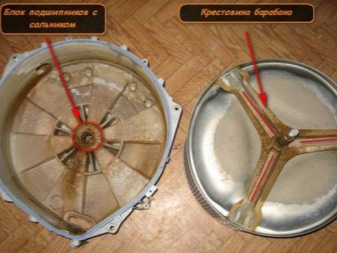
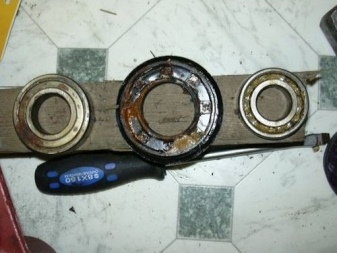
- Replace the fixing bolt you will need to screw in anotherand knock the drum shaft out of the bearing with a hammer blow. After dismantling the drum, it is necessary to inspect the shaft and the brass bushing on it. The bushing and shaft must be free of damage and smooth and even. If one of these elements is damaged, the entire cross must be replaced.
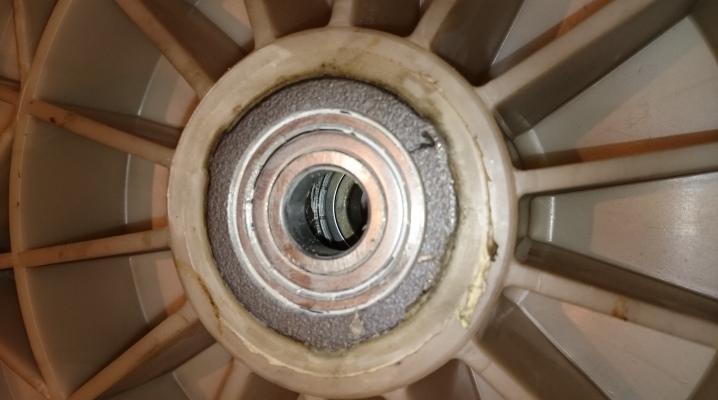
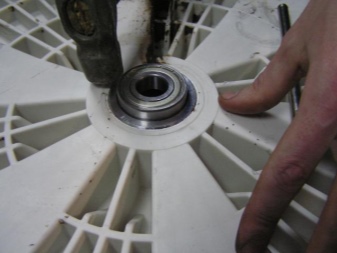
- Now remove the old oil seal from the hub with a screwdriver.
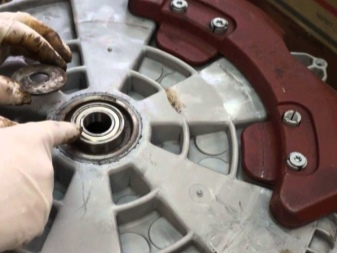
- Further it is necessary knock out the old bearing... Any tool can be used for this. It is important not to damage the seat while doing this. If the blows are made pointwise, then it is necessary to apply them crosswise - this will avoid skewing the bearing cage and damage to the landing area.
- After removing all worn out elements, it is necessary to clean the hub and tank halves from dirt and foreign particles.
Before installing new bearings, lubricate all seats to facilitate the clogging of new parts.
Now we start installing fresh mechanisms.
- The smallest bearing is installed first and locks in place by gentle hammer blows on the outer ring. When installing a new bearing, you only need to hit the outer race to avoid damaging the new part.
- Now it's the turn of the big... It installs in the same way as the small one.
- We fill the oil seal with water-repellent grease and install it in its place... This can be done by hand without using a tool.
- Now carefully (so as not to damage the oil seal) install the drum in the bearings, on the reverse side, installing a pulley and tightening it all with a fixing bolt.
- Before assembling the tank, its half need to be lubricated with a special sealantthat can withstand high temperatures and aggressive environments.
Prevention measures
In order for the bearings in the ATLANT washing machine to serve for a long time, there are some rules to follow.
- Do not overload the drum. The instructions describe in detail what kind of linen and how much you can load into the machine as much as possible.
- Use good quality detergents when washing. This will reduce deposits inside the washing machine and extend the life of the machine.
- When installing the machine in its place using a level, try to align it as much as possible on all planes... This will avoid unnecessary vibration.
A video about replacing the bearing in the ATLANT washing machine is presented below.


The comment was sent successfully.