Everything you need to know about turning tools
Professionals know everything about cutting tools for lathes, but the uninitiated can easily get lost in the variety of types, shapes and manufacturers of tools. And it is even more difficult for them to approach the topic of creating incisors with their own hands. But there are still rules for sharpening and installing. It is worth paying attention to this.
Peculiarities
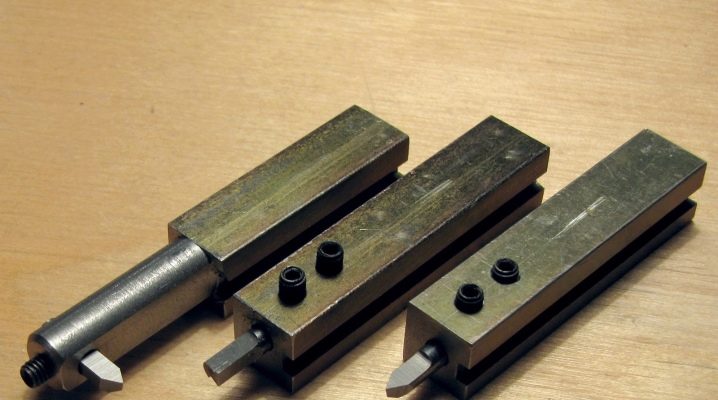
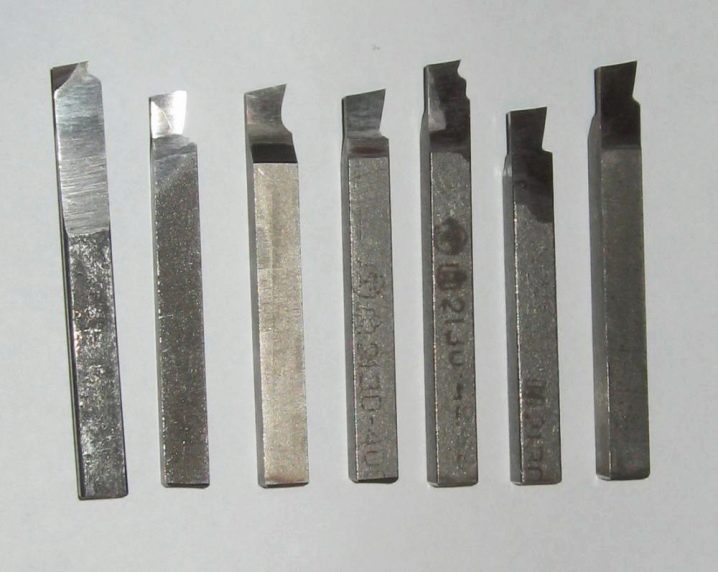
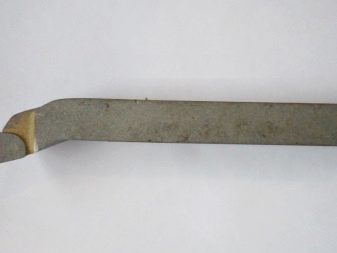
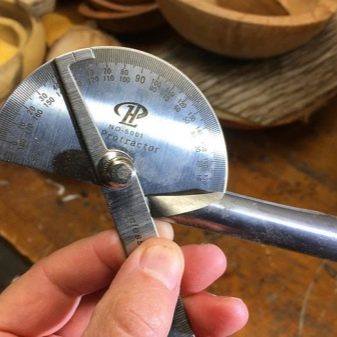
What is a turning tool is an element that includes a holder and a working head. The first helps to fix the cutter on the machine, and the second - to work with the workpiece. The section of the holder can be square or rectangular. The working part includes several adjacent planes and cutting edges, and the sharpening angle is associated with the characteristics of the material that is being processed at the moment, and with the type of processing itself.
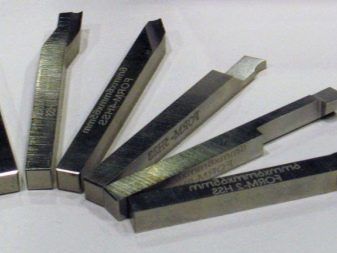
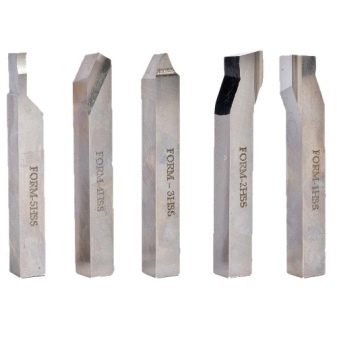
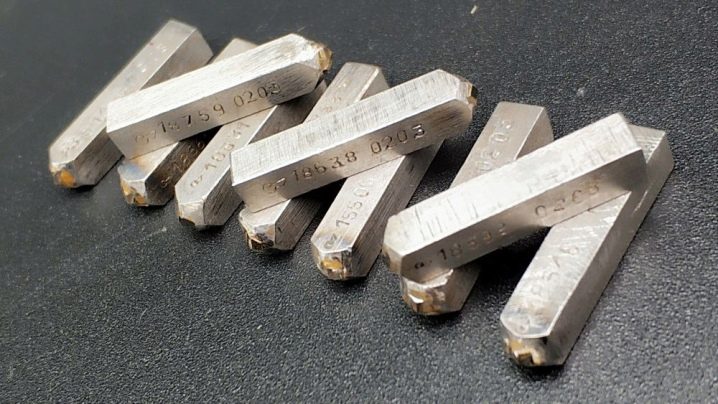
A little about the working head: it can be solid or with plates that are welded to it (or soldered). And even today there are cutters for a lathe, which operate with replaceable plates, which is very convenient. Cutters with solid elements are less common, but welded / welded ones are much more common. They are made from high speed steel or from a carbide alloy with tantalum, titanium or tungsten.
The part can be used to process steel, cast iron, non-ferrous metal products, as well as non-metallic materials.
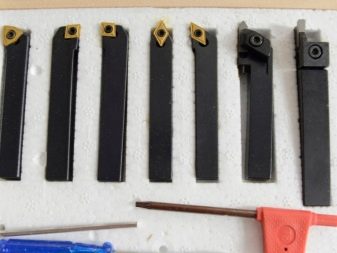
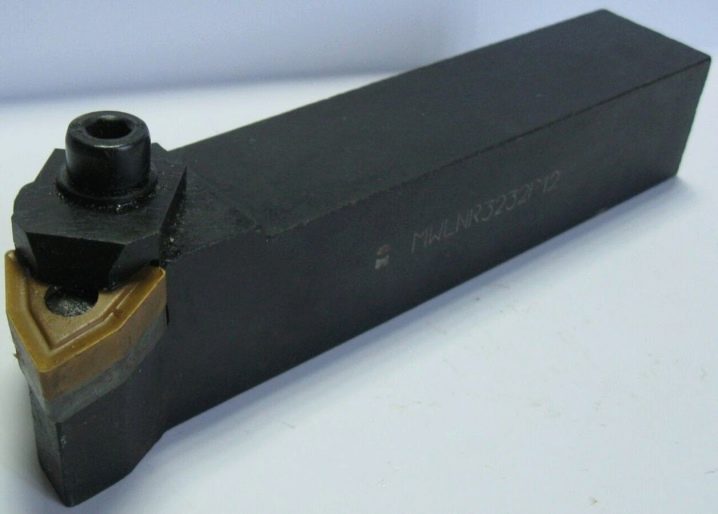
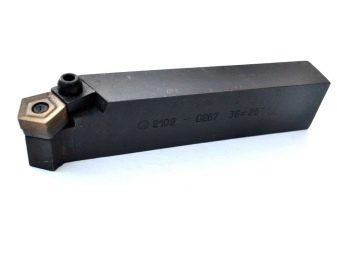
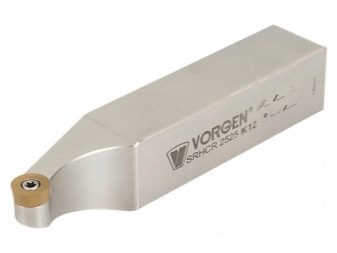
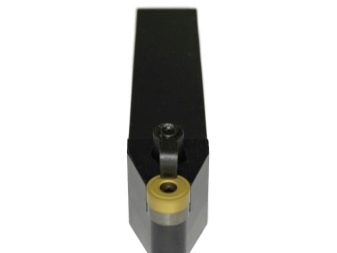
As already noted, turning tools with changing inserts are a convenient thing for a professional. The plate on the head can be held mechanically, with screws or special clamps. And then it is very comfortable to use it. Especially if the plate is made of mineral ceramics (although the cost of the cut-off part in this case will sharply "jump").
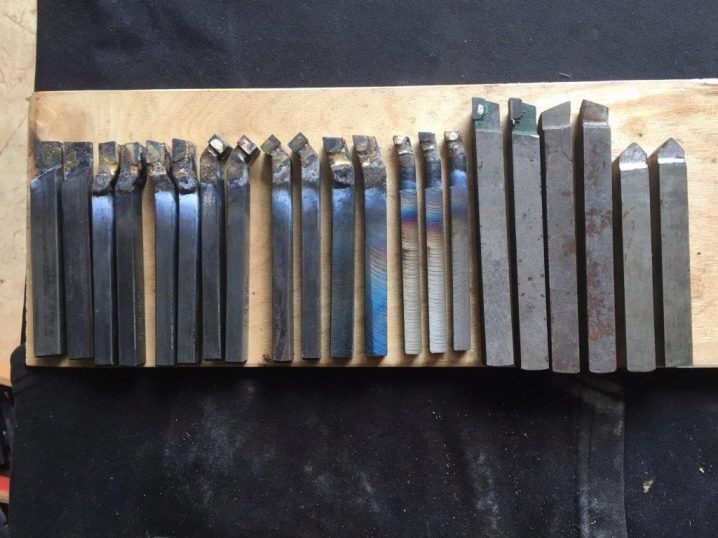
The working part of the lathe cutter can be carbide, it can be made of high-speed steel, or made of high-quality carbon steel. There are a lot of types of incisors, this is a large and complex classification.
Species overview
The incisors differ in functionality, design nuances and other parameters.
By appointment
Here we are talking about the materials with which the cutter works.
-
Wood. In the markets they can be found in sets with rings, combs, reamers, hooks, meisels. The incisors and rotation mechanisms are held together.
-
For metal. When you need to weld or solder a plate, then they talk about the optimal choice for the cutters. Carbide and high speed alloys are used more often in this case. Installation of such cutters is possible not only on lathes, but also on slotting, planing, special purposes and others.
This classification is small, here the choice will not be difficult.
By design
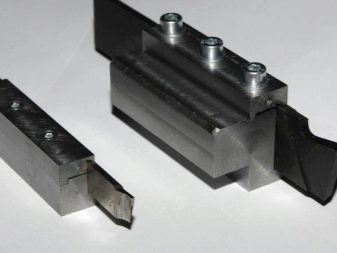
These are solid cutters, in which the shaft and head are articulated by one system. Or it is a tool with welded plates, they are very firmly connected to the head. If the soldering of the plates was carried out without technical accuracy, cracks may subsequently form on the working surface. Such cutters are widely used because they are suitable for a wide variety of machines.
Cutters with mechanical plate fastening are considered one of the most convenient options for metal plates. This applies to prefabricated, and adjusting varieties, and holder.
By type of processing
Here the cutters are divided into finishing and semi-finishing. For finishing, the feed is low in speed; material with a small thickness is removed from the blank.Most often, such tools are represented by a passing cutter. Semi-finishing are very similar to the previous version, but they are weaker in characteristics than finishing ones. But they can be used for the same tasks.
By type of installation
Tangential incisors are a tool that is installed at a certain angle, and, moreover, any, with the exception of a straight one. This is measured relative to the axis of the surface that is undergoing the operation. And the tool is distinguished by a complex scheme of fasteners for internal turning.
The radial cutter is distinguished by the fixation of an exclusively right angle on the surface that is being machined. For industrial purposes, a popular option. And the radial version has a big plus - it is a simplified fastening system.
By type of feed
It is still simpler here: left cutters are called tools with the right side of the cut, it is to it that the metal being processed is turned. At the right cutters on the left there is a part of the cutting, the metal surface is turned on it for processing.
By fastening the cutting part relative to the rod
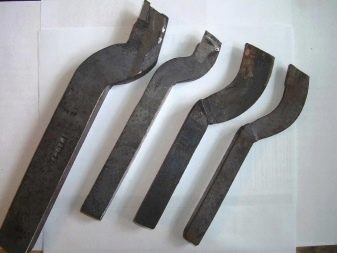
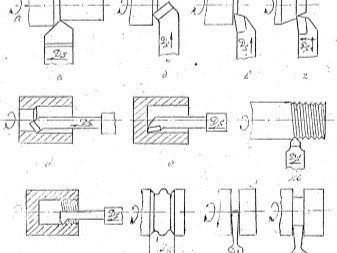
And this characteristic represents 4 types of incisors. The bent ones are distinguished by a special curved line, which is characteristic of the projection axis of the upper position. And lateral localization ensures that the lines are straight. Straight incisors are those whose projection axis maintains a straight line, both from above and from the side.
In drawn incisors, the head part and the shaft are different in size, the head will be smaller. It is attached to the incisal axis. Details are characterized by some displacement relative to the axis of the cutters, in any direction. Well, the curved incisors at upper localization are connected with the projection axis by an even line, while the lateral projection is connected with a curved line.
By processing method
And there are many varieties here.
-
Undercutting. If it is a cross-feed machine, the tool can be easily connected to the equipment. These are either the edges of different surfaces, or stepped elements.
-
Checkpoints. Functional for metalworking with cross and longitudinal feed equipment. This is relevant if the trimming refers to the ends, to cylindrical and cone-shaped workpieces.
-
Boring. Needed for through and blind holes, for recesses and recesses.
-
Round. Here the form determined the name.
-
Threaded. Forms external and internal threads, with a trapezoidal section, as well as round and rectangular. The products themselves can be flat, round, as well as convex.
And the incisors are even (they retain rectangular edges), curved (differ only in shape, slightly), shaped (combined with shaped forms of complex structures).
Materials (edit)
It has already been noted that incisors are made from a wide variety of materials. For example, solid. These are tungsten tools that can process non-ferrous metals and various alloys. Good for workpieces made of cast iron, non-metals. There are also titanium-tungsten cutters that can work with any metal. And tantalum-tungsten-titanium cutters are needed where the task is to process difficult metals, for example, forging and heat-resistant ones, that is, those that are not so easy to take.
If the cutters are made from fast cutting materials, then they can be with norm efficiency and with increased efficiency. But those tools that are made of carbon material are considered, and quite rightly, the highest quality.
Diamond cutters are also used: they work well non-ferrous metals, as well as plastic, rubber, ebonite, fiber. But on ferrous metal, they hardly work, because in their relation diamond cutters are considered very fragile. Elboric elements are considered "fresh" competitors for diamond elements.
Top manufacturers
Russian companies are also among the main manufacturers. For example INIGS, it makes excellent boring through parts at a good price. And also among domestic brands the leaders are "Kanashsky IZ", a popular product of which is straight line. Among the import companies, Czech manufacturers are highly trusted.
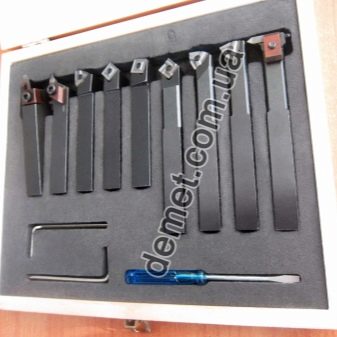
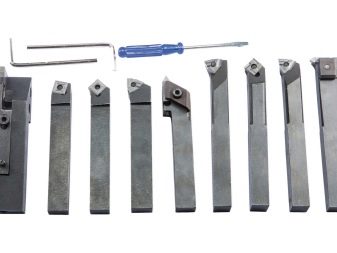
Kits are also popular, for example, a set of tools for wood. Popular products include Enkor, as well as Metalmaster, Proma, Proxxon. However, you need to focus not only on brands, price and country of production.

Selection Tips
The cutter is selected depending on what kind of part is to be processed, on the material of the part, on the shape and the desired surface finish. For example, there is a request for a cylindrical part without an internal hole, which means that the cutter will need a bent through, straight through or thrust cutter.

What else to consider when choosing:
-
material of manufacture (stainless steel or hard alloys, for example);
-
the presence / absence of a set (it is often more profitable to buy just the sets);
-
the possibility of using a universal tool, such a cutter can also be called a modular cutter, since different plates can be attached to the holder in it, and therefore different workpieces can be processed at different angles.
Very often professionals are faced with difficulties in choosing a tool "for themselves". It really should be easy to use and, preferably, inexpensive. And the thought of making a homemade cutter is not such a gamble.
How to do it yourself?
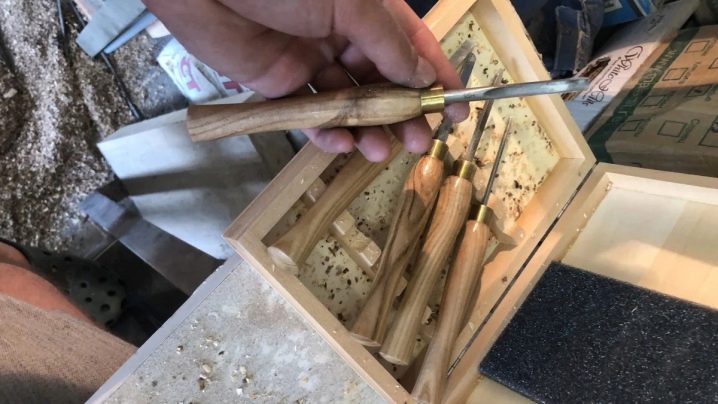
Let's say we are talking about making a wood turning tool. It is these tools that are made on their own more often.
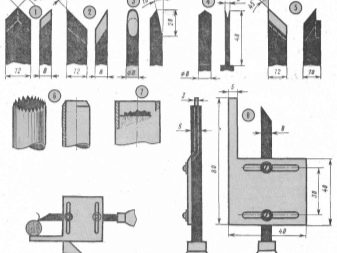
Any type of chisel involves following such a scheme.
-
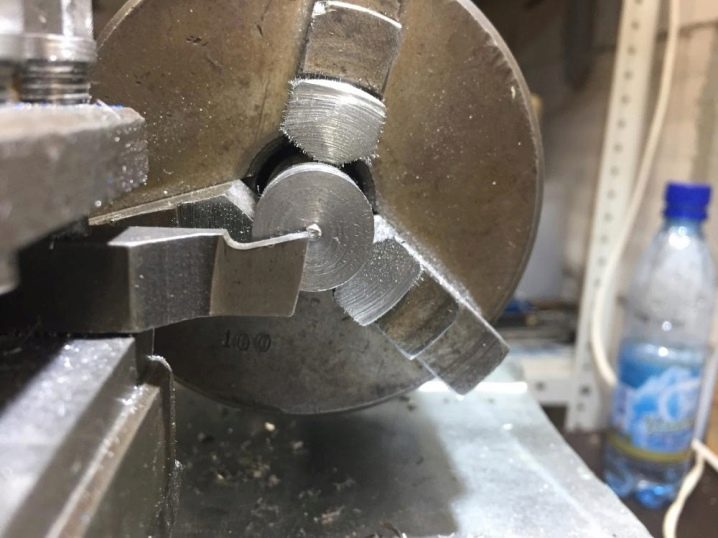
According to the drawings or a photo, a steel workpiece of the desired shape is cut out - this is done on a lathe according to the specified dimensions.
-
The primary sharpening of the future cutter is carried out.
-
The metal part must be hardened so that the cutter can handle different types of wood. First, the metal is heated to the extreme temperature, then it is dipped into engine oil, and there it must cool completely. And you can stand it just at room temperature.
-
This is followed by finishing sharpening.
-
The cutting part of the cutter is pushed onto the wooden handle of the tool.
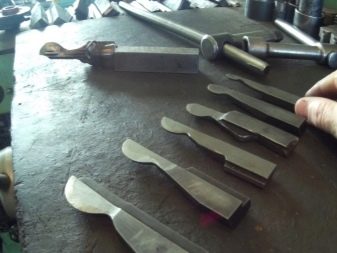
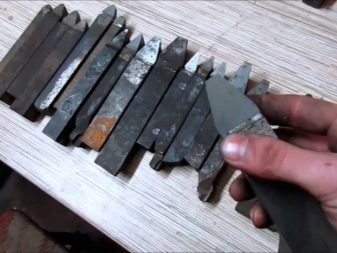
In this process, the most crucial moment will be the primary sharpening. The incisors are very different, they are made from a file, for example, but the point is precisely in the purpose of the tool, it affects the result. For example, to make a cutter with a semicircular cutting edge, a contour is marked on the workpiece, all unnecessary is removed along it and the tip of the desired radius is sharpened. The cutting edge must be sharpened carefully so that it comes out even.
An example of how to make a reyer cutter with your own hands.
-
A workpiece is forged from the file to size.
-
A flat workpiece is placed on a semicircular crimp, which stands in the anvil hole, a semicircular float is fixed on top, and hit with a hammer. This is done so that the canvas is bent around the longitudinal axis. Instead of a trowel, a steel bar is used.
-
Until the moment of hardening, the "draft" is turned at an angle of 45 degrees. After hardening, it will be more difficult to do the same, therefore it is important not to miss the moment.
-
Then the workpiece is hardened, it must be allowed to cool.
-
The canvas is sent to the oven to heat up to 200 degrees. After 20 minutes, they take it out and leave it just in the air until it cools down.
-
The outer and inner surfaces are processed, all deformations must be leveled.
-
The cutting edge must be sharpened by first aligning it perpendicular to the longitudinal axis.
-
It remains only to put the handle on - the do-it-yourself reyer is ready.

The rayer's blade, by the way, can be straight or beveled, curly, depending on the purpose of using the tool, the breadth of its actions.
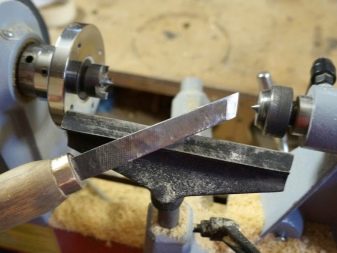
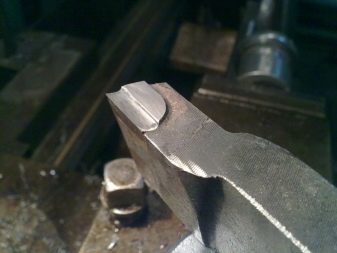
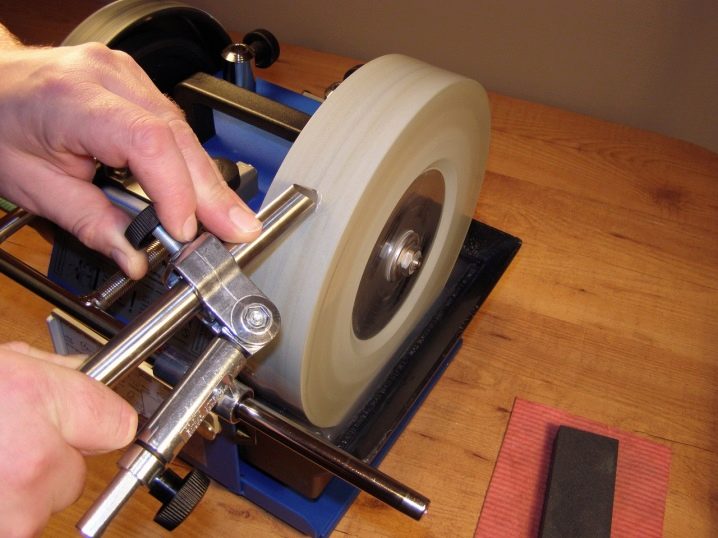
Sharpening nuances
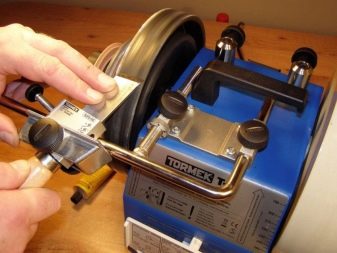
Sharpening the incisors is a more than crucial moment. Without it, it will not be possible to maintain the working part in optimal condition, in shape and with the right angle. It is not necessary to sharpen only the cutter in the form of a disposable carbide insert. If we talk about industrial enterprises, there the cutters are sharpened on a special machine. At home, you have to be creative. For example, chemicals or grinding wheels can be used for this. An abrasive wheel is often installed on a lathe - it can sharpen the cutters with a fairly high quality, bringing the tool to the desired geometry.
If you decide to choose a grinding wheel, you need to focus on the base material. For example, sharpening the carbide cutter correctly, the circle will be green, silicon carbide. If a part is sharpened from high-quality carbon steel or high-speed steel, the wheel should be selected corundum.
Sharpening is carried out with and without cooling, and the first option is much preferable for many craftsmen. Cold water will flow to the area where the cutter comes into contact with the grinding wheel. If cooling is excluded, then after the procedure, it is unacceptable to sharply cool the tool, the cutting part runs the risk of simply cracking.
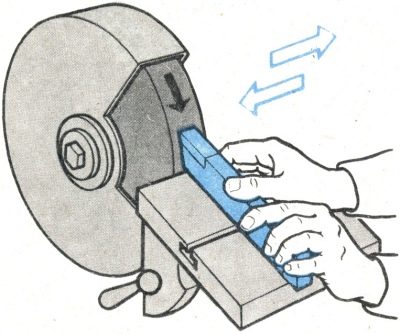
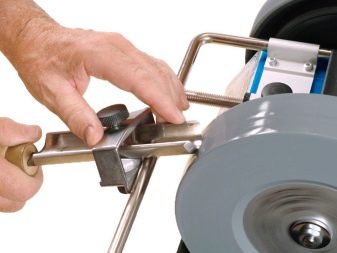
Sharpening also involves exemplary phasing: first, the rear surface of the base is processed on the circle, then the rear auxiliary surface, and only at the finish - the front. Finishes the work of sharpening the cutting edge, taking into account the required rounding radius.
Immediately at the moment of sharpening, the element should be slowly moved in a circle (precisely slowly, haste often disrupts the operation), without pressing it too much. This is important for the organization of uniform wear and the formation of an extremely flat cutting edge.
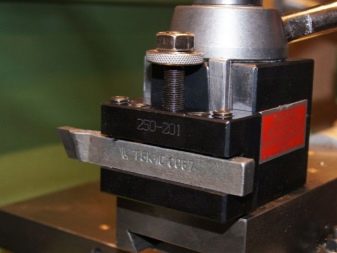
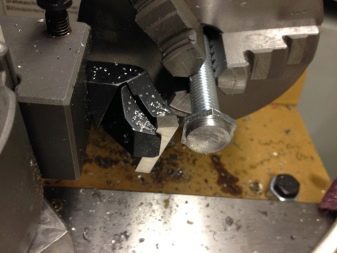
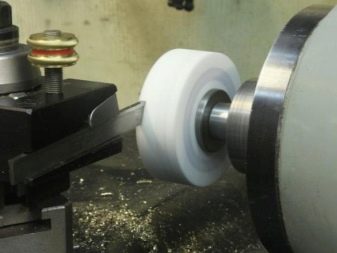
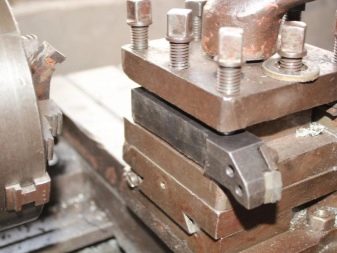
Installation rules
Flawless fixing of the element on the tool holder is the subsequent correct turning stroke. If the tool is set incorrectly, the machine will quickly wear out the cutting edge. Before starting the installation, the holder feet must be cleaned. Basically, rule # 1 is that the tip of the cutter should be at the level of the center line of the lathe (which means centering). If installed below the line, the part will simply be pushed out of the center when running, if it is higher, heating will be unacceptable and wear will be rapid.
What else is important to know about the installation:
-
if it is fixed in the special holder by at least two bolts, this already gives a guarantee of correct installation;
-
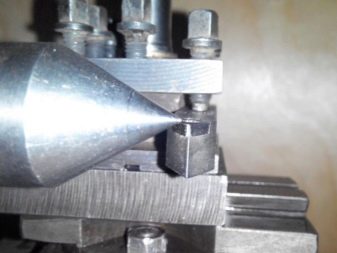
the fixed cutter is brought to the center of the tailstock or headstock, undergoes height adjustment, no more than three pads are placed under it;
-
by the way, the linings are prepared in a complex manner, there is no alternative to them;
-
the shims are placed on the support of the cutter holder with control of the protrusion of the latter (no more than 1.5 rod height), otherwise the machine will work with vibration;
-
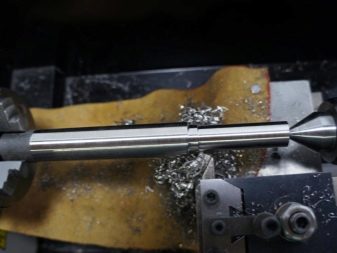
then you can adjust the depth of the cutter with test chips or a cross feed dial;
-
if the first method is taken, the cutter moves tightly until it touches the rotation element, then it goes to the right, and then the cutting depth is determined intuitively;
-
if you missed the sharpening diameter, you need to repeat everything with the required cutting depth until you get the right one.
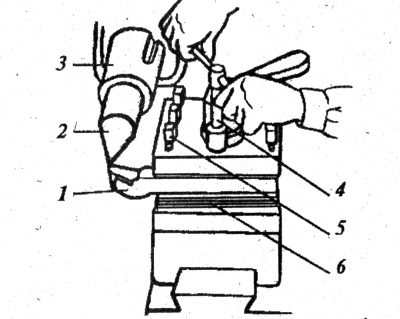
By the way, before installing the cutter in the holder, you should know that 4 elements can be fixed in it at the same time. There are no less than two bolts per mount.
For cutting metal, for carving wooden surfaces, cutters are almost irreplaceable. You can search for the desired item in the singular, you can purchase multi-cutter kits for CNC machines, and some items are cheaper to make on your own. The main thing is to know exactly the functionality of the tool and understand the technology of working with it.


The comment was sent successfully.