Channel bars for sliding gates

A channel is a metal profile, the cross-section of which has a U-shape. This product consists of a wall (cross-sectional bridge) and shelves (legs of the U-structure). Due to the fact that channels can withstand both bearing and axial loads, they are used in the construction of support structures, in the auto, ship and car building industries, in the manufacture of ramps, frames, floors, staircases, doors and windows, as well as for strengthening concrete elements.

In this article, the channel is considered from the point of view of a component of the structure for sliding gates. - the types of this part, its characteristics and operating rules for this type of work are given.

Views
Channels are of the following types:
- according to the manufacturing method - hot-rolled, bent equal flange, bent unequal flange;
- by type of steel - carbon (most often used), low-alloy and heat-resistant, stainless and other (special order).
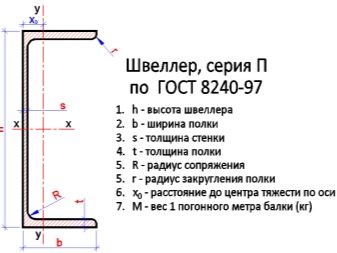
It is recommended to use a hot-rolled channel for sliding gates (GOST 8240-97). This type is produced by rolling a billet at a temperature of about 12000 ° C. Such a profile is much stronger than a bent one with the same initial parameters.

In turn, the hot-rolled channel differs in the type of shape:
- with a slope of the inner edges of the shelves;
- with parallel flange edges;
- light series;
- economical.

For channels of the first type (marking with a number - the distance between the shelves (cm), and the letter "U") there is an internal slope of the opposite shelves (4-10%) - this design contributes to better resistance to deformation, since it is more rigid in bending.
Second type profile shelves (marking with a number (in cm) and the letter "П") are located parallel to each other.
Light series channels (marking with the number (in cm) "L") and economical type (number (in cm) and the letter "E") are used quite rarely.

What size do you need?
Recommended characteristics for a channel for installing sliding gates:
- metal thickness - more than 0.4 cm;
- width - 160-200 mm.
It is important to remember that the length of the platform of the adjusting supports should not exceed this indicator of the channel.

Installation
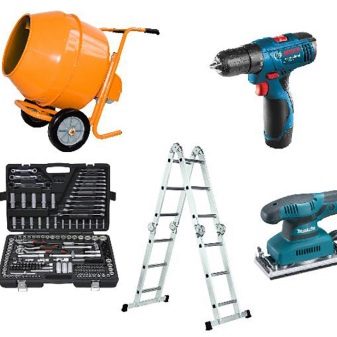
In order to install a sliding gate with your own hands, you need to have the following set of tools:
- welding inverter (or household transformer), current strength - not less than 130 amperes;
- 1 pack of electrodes (3 mm) - this set is suitable for installing a gate with a wicket;
- cutting device of any configuration or grinder;
- 7 cutting and 3 grinding wheels (for a small grinder, 12.5 cm);
- level;
- hammer;
- riveter or screwdriver with attachments for fastening the profiled sheet;
- 200 pcs. rivets or screws;
- a set of necessary accessories;
- about 10 m2 of corrugated board;
- 1 pipe 60x40 mm (20 meters);
- 1 pipe 40x20 mm (20 meters);
- 1 pipe 60x60 mm (7 meters);
- channels (the length is half the width of the opening);
- reinforcement with a cross section from 1.0 cm to 1.4 cm;
- primer;
- dye;
- solvent;
- sealant;
- anticorrosive soil.

The sliding gate kit itself is standard, but it has some modifications, taking into account the length and weight of the opening. So, a typical kit includes the following components.
- Guide bar (cantilever) on which the entire system rests. In fact, this is a rail equipped with wheels from the inside - they provide the movement of the gate doors.
- 2 roller carriages (installed on the foundation).
- 1 top roller - it keeps the gate from swinging, keeping it upright.
- 1 end roller - it fixes the door, preventing it from sagging when closed.
- 1 top catcher - fixes the gate, so that it does not tilt during closing.
- 1 bottom catcher - has the same function as the top one.
- Guide bar plugs - they protect the rail from dust and dirt getting into it.


The comment was sent successfully.