Ceiling repair: subtleties and features of the process

The ceiling is one of the most important functional spaces of any room, which means that, like the walls and floor, it needs periodic repairs. Its frequency will depend primarily on the timeliness of cleaning, as well as on the desire to change the owners of the premises. Ceiling repair is a very simple task, you can do it yourself, you just need to choose the right color and type of finish, and then it's up to the little things.
Peculiarities
Features of the ceiling repair will be primarily determined by the choice of material for decoration.
When choosing a material, you must be guided by the main aspects.
- The type of house to be renovated. The choice of material and aspects of renovation will differ in a private house and in a panel nine-story building, a studio apartment in a new house and in a room in a "Khrushchev" building.
- The choice of material will also directly depend on the amount that is planned to be spent on repair work, since all materials have different costs and require different investments.
- In addition, the initial condition of the ceiling base will affect the progress of the repair. If it has many cracks and irregularities, you will first need to level the surface for applying paint or wallpaper.
- In addition, it is also important to decide on who exactly will be involved in the repair. If you plan to carry out repairs on your own, you can count on a fairly limited range of materials and types of finishes. With the involvement of masters, this circle is somewhat expanding.


The types of ceiling structures can be divided into two large groups. The first of them is the so-called main ceilings, when finishing work takes place directly on the rough base. In this case, paint, wallpaper or textured plaster is most often used for repairs, and whitewashing can also be done. A large group of suspended structures also stands out. This includes all stretch ceilings, regardless of material and color, all suspended and panel structures, as well as all plasterboard ceilings, which are attached at some distance from the rough base.

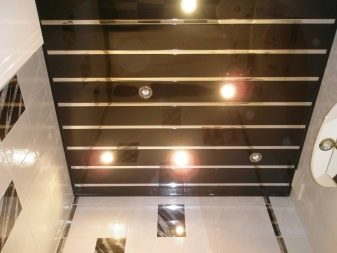
The choice of the material that will be used for finishing the ceiling will be determined by the purpose of the room, its size and functionality. So, for example, for a bathroom, the most common option is slatted ceilings, they can be made of various moisture-resistant materials, and also be of completely different colors. In addition, sheets of waterproof cardboard can be an excellent solution for the bathroom, which can later be plastered, painted or covered with plastic panels of any suitable color. This design is not only very convenient and practical, but also looks quite aesthetically pleasing and beautiful. In addition, this type of repair work can be done by hand without the involvement of specialists.
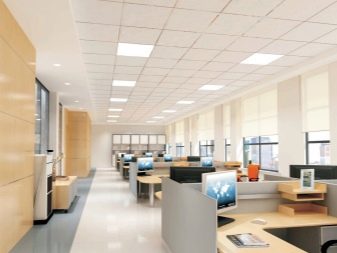
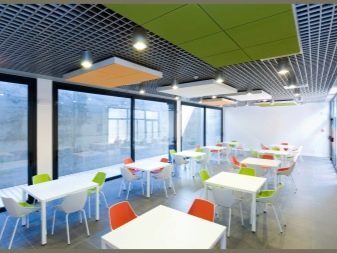
For an office or any other public space, suspended ceilings are most often used. They are very convenient because they have a long service life and are not subject to contamination. In addition, since this type of repair involves the use of individual tiles of different colors, if necessary, individual elements can be replaced at any time, and an abundance of office wires can be hidden inside the structure.
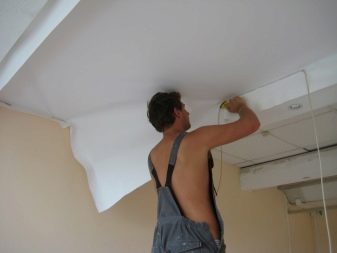
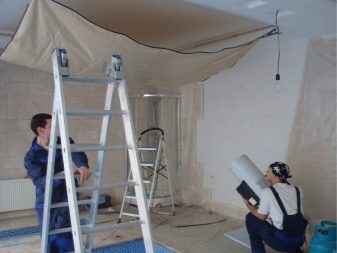
In the rooms of residential apartments, the system of stretch ceilings is increasingly used. This is a very convenient option that does not require any effort at all to level the base, since the canvas is located at some distance. The fabric is used both matte and glossy of any color and texture. The advantage of this type of ceiling covering is that in case of possible flooding from above, such a ceiling will not allow water to enter the apartment, it will collect on the fabric, and if a special valve is installed, the water can be easily drained. However, it is better to entrust the installation of such a coating to specialists, otherwise a disruption of the technological process is possible, which will entail an incorrect installation, and subsequently a reduced service life.
The total time spent on repairs will also depend on the choice of coverage. For example, whitewashing or painting can take several times longer than a stretch ceiling, however, the cost will be strikingly different. So, for finishing 1 sq. meter of surface on average can be spent from 200 to 4000 rubles.


Materials (edit)
The variety of finishing materials today offers many possible options. Each material will have its own cost, suitable for various premises, as well as have a different service life and different complexity of installation.
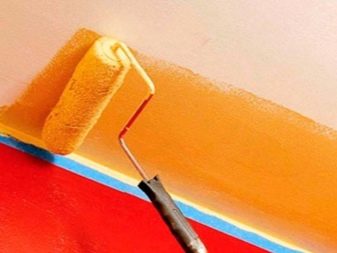
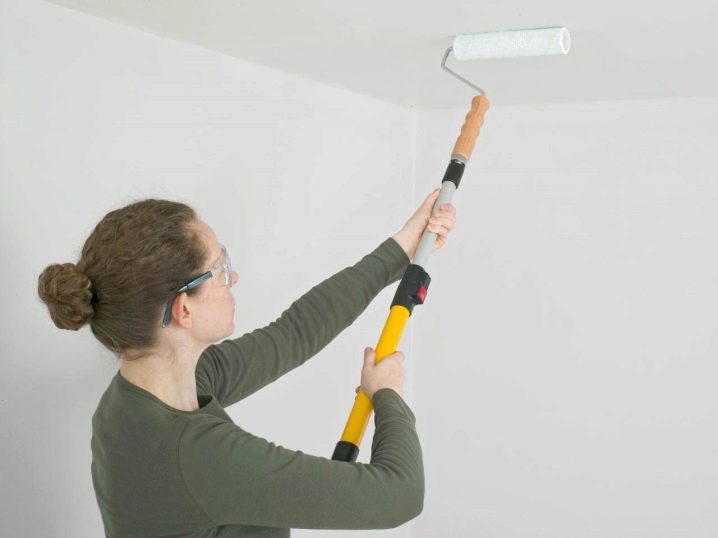
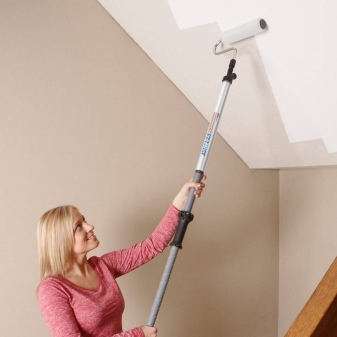
One of the cheapest and easiest to apply options is paint. and various blends for whitewashing. Painting does not change the height of the ceiling, in contrast to tension or hinged structures, in addition, depending on the type of paint, painting can be carried out in rooms that are different for the purpose, including in the bathroom and in the kitchen.


The lifespan of these finishes will also depend on the type of paint, as different types may have varying degrees of sun exposure. Humidity in the room can also shorten the life of some coatings, and light versions of certain paints can simply become dirty quickly. Thus, a properly selected dyeing mixture can serve up to 10 years without any complaints before its renewal is required.

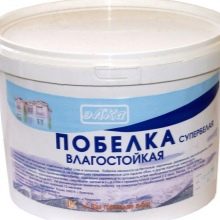
The most popular today are water-based paint, as well as lime or chalk whitewashing. The popularity of these coatings is due to their environmental friendliness, ease of application, the absence of an unpleasant chemical odor, and also a short drying time. In addition, these materials can be tinted in any desired color. This can be done either independently, by purchasing a special tinting paste, or by contacting a specialist in any large hardware store. However, when choosing between whitewashing and water-based painting, it is worth remembering that the paint is still a more resistant and durable material, it excludes peeling and yellowing, which cannot be avoided during service when using lime and coated solutions.


When choosing a finishing method such as painting, it is better to take care of leveling the surface in advance, you can use plaster, attach drywall to the ceiling or stick fiberglass.


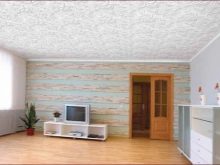
You can decorate the ceiling with the help of various types of wallpaper. Such options, of course, are more suitable for rooms with low traffic and normal temperature conditions with normal humidity. Wallpaper can be perfect for a bedroom or living room.


There are several types of wallpaper that are suitable for decoration.
- Paper - the cheapest coverage option. When choosing paper, it should be borne in mind that they are completely unsuitable for wet rooms, have a short service life, quickly get dirty and fade.


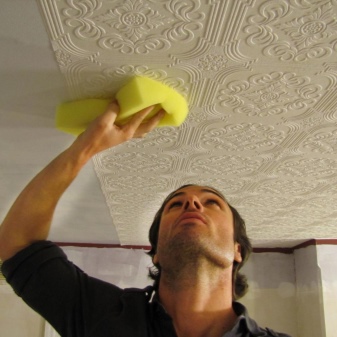
- Vinyl. Such wallpapers can be paper-based or non-woven, they are more durable, however, given their weight, the correct pasting of the ceiling may require quite serious efforts.Due to the moisture-resistant structure, such wallpaper can be wiped with a damp cloth, which allows you to extend the life of the coating and keep it intact for a longer period.
- Non-woven. Such wallpapers have a dense structure and a fairly large weight. It is necessary to choose the right glue and carefully coat the canvases and the ceiling. Non-woven wallpaper can be made in different colors, as well as just white. If desired, they can be painted in any color you like.

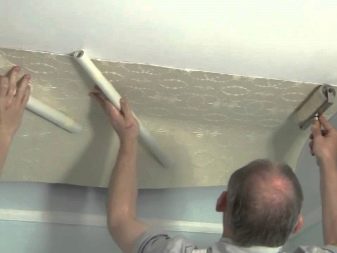
Another fairly common option that does not require special equipment and special skills for self-installation is the use of ceiling panels. Such panels are made of lightweight foam or expanded polystyrene. This option will help create an unusual stucco effect. In addition to panels, caissons can be used. Most often they are made of wood. There is also a plastic analogue of this material for decorating the ceiling group. However, this option is more acceptable for rooms with fairly high ceilings.

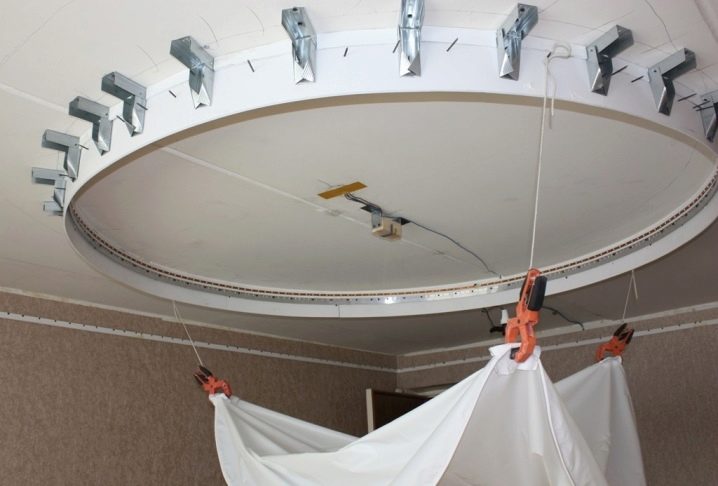
All stretch ceilings are fabrics with special impregnation or PVC films of various thicknesses and colors. The fixing of such a ceiling is always done using a metal frame. The profile, which is most often made of aluminum alloy, is installed around the perimeter of the room, subsequently the ceiling material is stretched onto it.
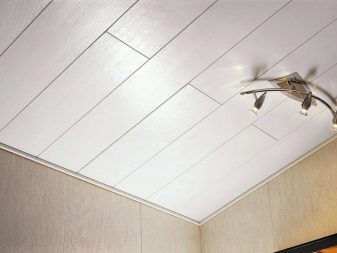
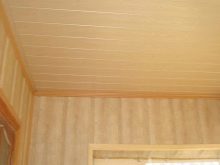
Another finishing option is to fix MDF or plastic panels over the entire area of the ceiling space. Such panels are easy to clean, they are not afraid of moisture and temperature changes, which means that they can be used in the bathroom, in addition, today you can find a huge range of colors of this type of coating on sale. It can imitate various materials, such as stone, wood, tiles.


Design
Choosing a ceiling space design is one of the most important aspects for creating the perfect space. The correct selection of material, and most importantly, the design of the ceiling will help you get the most harmonious and comfortable room.
However, the choice of design will depend not only on the personal preferences of the owners, but, first of all, on the purpose of the space itself. The way it will be used dictates the choice of materials and, of course, design.

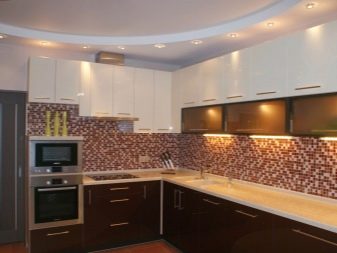
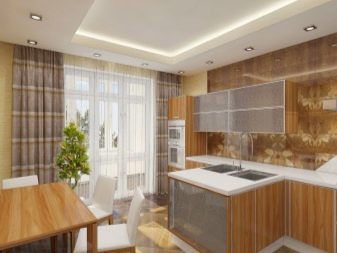
When choosing options for finishing a kitchen, you must always remember that this room is always high humidity, temperature drops and an increased possibility of fire. Splashes, dirty spots are possible here, dust and grease deposits cannot be avoided. Therefore, the choice of finishing will be influenced by the possibility of washing it. An easy-to-clean surface of the ceiling and walls will be the best option for the kitchen. The most suitable coating options for the kitchen would be waterproof drywall, plastic panels, stretch ceilings and slatted covering.


In addition, in the kitchen, it is worth giving up abundant decor, since it is usually the most difficult to remove dirt from it. The best option would be a smooth decorative ceiling in a light color, while it is better if it is a matte coating option, since all dirt will be more noticeable on the gloss. If desired, you can supplement it with built-in lighting. An interesting placement of spotlights can become the main decoration of the kitchen, create a unique design and add volume and air to the space.
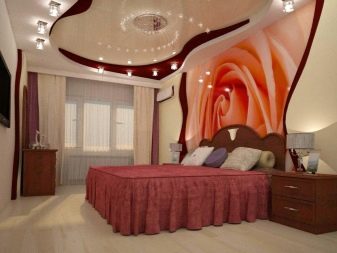
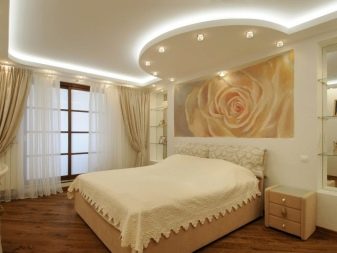
When planning the design of the ceiling in the bedroom, it is worth considering the main purpose of this room. The bedroom is designed to rest, which means that you should not use too bright aggressive colors in the design. It is better to give preference to something pastel, or vice versa, deeper and darker. In addition, the bedroom is exactly the room where you can use any material for decoration.Stretch ceilings and wallpaper are appropriate here, and even paint or whitewash will harmoniously fit into the overall interior. However, it is better to stick to matte finishes without prints. Textured plaster or wallpaper with convex textures would also be an excellent option.


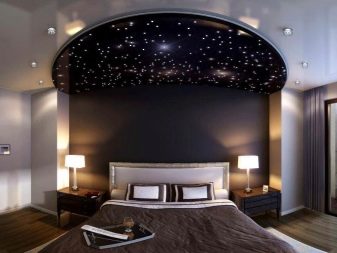
If enough light enters the bedroom from the windows, you can give preference to dark shades: black, deep blue, burgundy, emerald. But darker and too small rooms from dark colors can visually become even smaller, so it is better to take into account the lighter pastel shades and create an interior based on them.
If necessary, zoning space, you can pay attention to coverings with pictures. So, for example, large floral prints will look good in the area of the window opening, while it will have to turn into a light monochromatic cover. Also, the print can be placed over the bed. This will visually highlight it and create a very interesting effect.

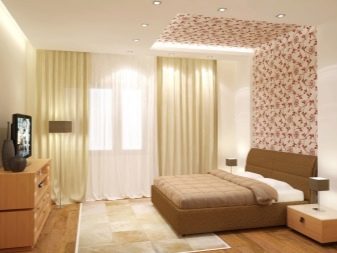


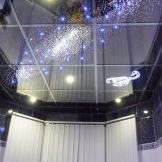
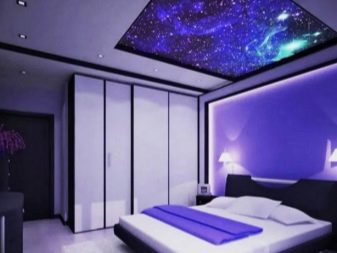
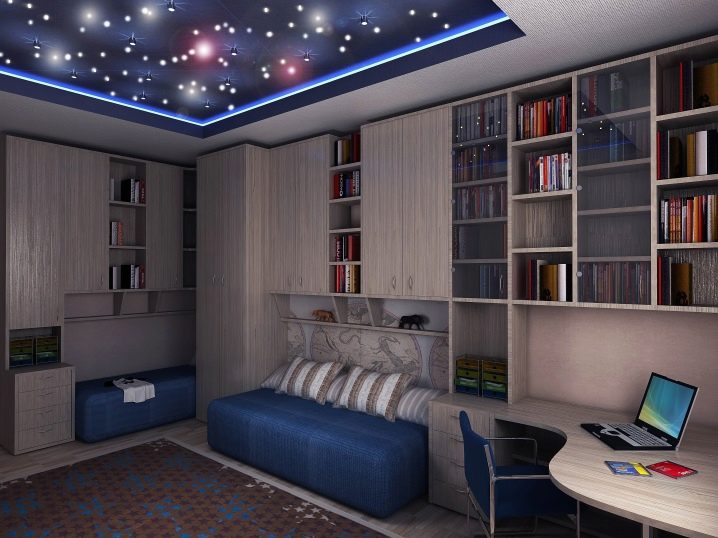
A ceiling imitating a starry sky can also be an excellent solution for a bedroom. To create this effect, there are a huge number of options - from drawing stars with luminescent paint to installing small LEDs directly into the ceiling surface.
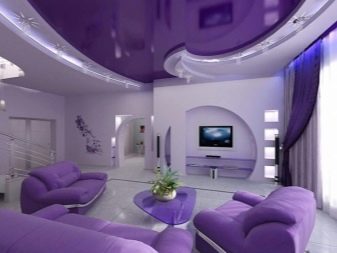
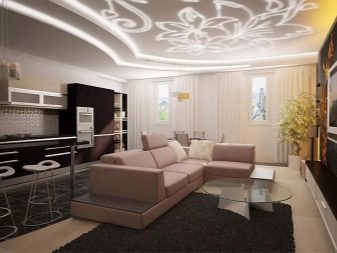
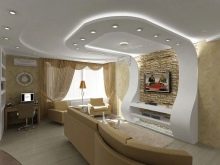
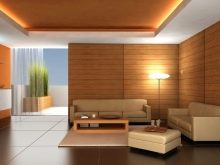
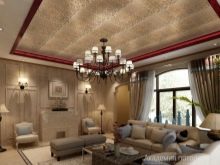
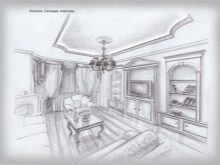
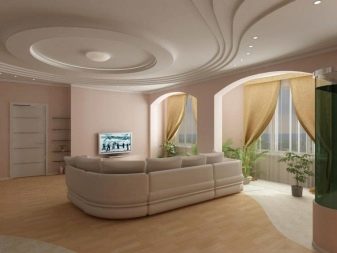
For the ceiling in the living room, multilevel options with recessed spotlights and a dimensional chandelier in the center of the room are the most relevant. However, with all the love for multi-level ceilings, the coating is still most often chosen to be monochromatic, one that can be easily cleaned if necessary and which will visually expand the space. Or 2 colors are used that are in harmony with each other as much as possible.
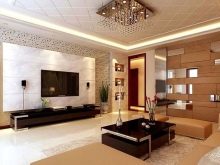
In addition, if options with matte ceilings are more appropriate in the bedroom and kitchen, then glass or glossy surfaces are quite appropriate for the living room. If you choose the right general decoration of the room, such a ceiling will look quite appropriate and harmonious.
There is another type of premises in which the correct selection of material and design of the ceiling covering is extremely important. - a hallway and a bathroom. Here it is imperative to stop the choice on moisture-resistant coatings that are not afraid of wet cleaning. Panels, tiles, slats or stretch ceilings will be the most suitable option. As for the choice of color, this will directly depend on the dimensions of the room and the wishes of the consumer. The surface is also better to use matte, however, mirror options are not uncommon lately.

Project
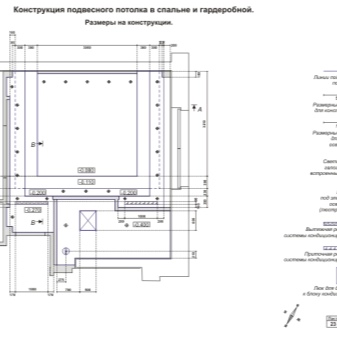
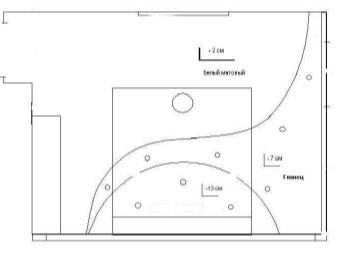
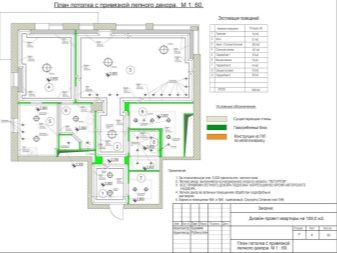
Before proceeding with the design of the ceiling, it is recommended to draw up a design project. This procedure is especially relevant when creating multi-level options. And this means that before creating a project, you need to decide on the type and material of the coating, plan the approximate location of the light elements. With the help of such a plan, you can not only visually represent the future ceiling, but also correctly calculate the amount of materials required for repairs.
Before creating a plan, it is necessary to measure the room and calculate the total ceiling area. To do this, you need to multiply the length by the width. Based on this area, it is necessary to sketch the plan of the future ceiling on the right scale. This will be the base drawing from which further design will be born.
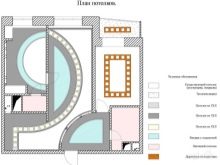
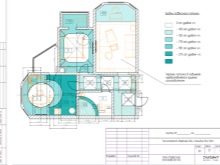
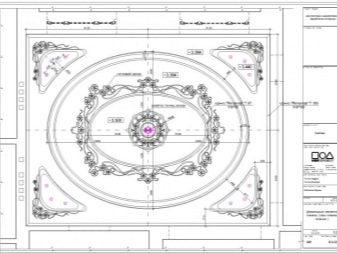
After the scaled base plan has been created, you can proceed to sketching the design, recreating the future real version. So, if necessary, steps are drawn, if we are talking about a multi-stage design, or the location of patterns and various color transitions is noted. On the basis of this plan, in the future, the total amount of material that will be needed to implement a particular project will be calculated.


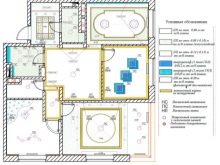
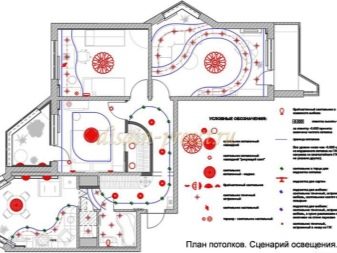
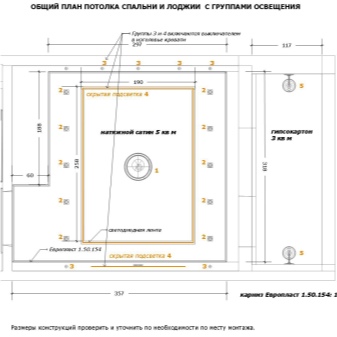
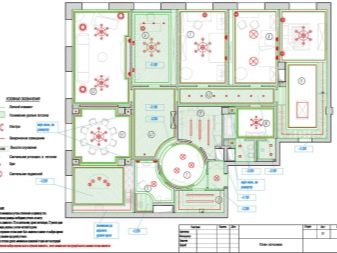
The next step is a plan for the placement of lighting elements, their exact number and layout, if spotlights are used, or just placement points if single light sources are used that cannot be turned into a drawing. With multi-stage placement, it is better to create a lighting plan for each stage, so it will be more convenient to mount them in the future.
As for lighting, it is advisable to create a separate project for the placement of all wiring, because the internal structure and installation is also a rather important aspect when carrying out repair work.
When creating plans, it is better to trust the interior design specialists, however, you can create the most complete and convenient plan yourself, which will facilitate the repair.

Number of levels
If during the renovation there is a need to diversify the entourage of the room, then there is no better solution than a multi-level ceiling.
Moreover, if you choose drywall as the main material, then the installation of a two-level ceiling can be done with your own hands and at minimal cost, as a result, you will get a zest for the space.

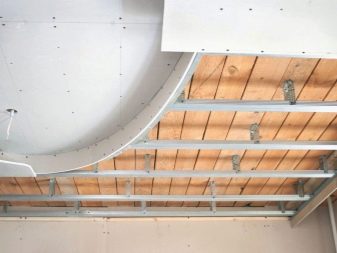
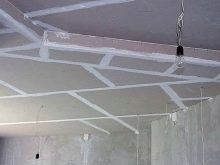
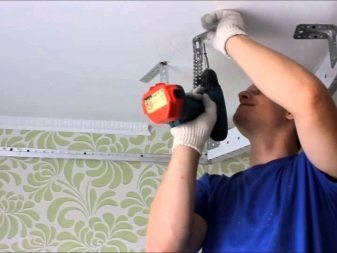
At the heart of the multi-level design, no matter how trite, is an ordinary frame, which is firmly fixed to the ceiling as well as to the walls at the desired height. Most often, a metal profile is used as a base, it is he who is the most durable and easy-to-use material. Alternatively, you can use a wooden base. It is somewhat cheaper, but it is inferior in strength and service life.
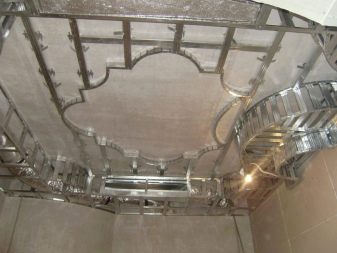
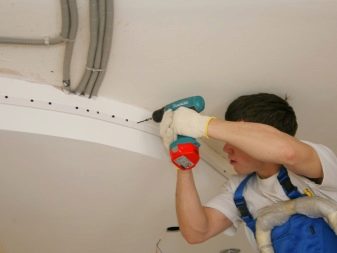
The first level of the ceiling is formed by sheathing the frame with plasterboard sheets. Correct installation of the first level is the most important stage in the installation, since if it is planned to place spotlights in the steps, then all the wiring should be hidden in this first level. Until subsequent levels, only wires will be carried out, to which the lighting elements themselves will be directly attached.
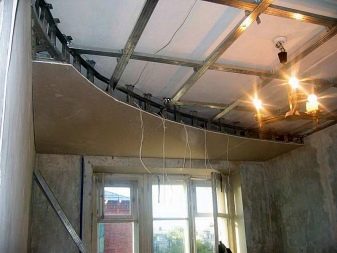
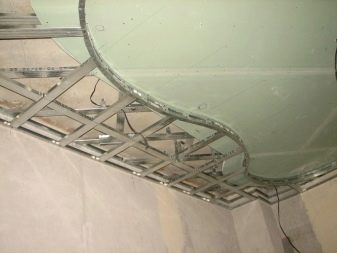
If a two-level ceiling is planned, then the already familiar frame for the second step is attached to the fully sheathed first level, and drywall of the second level is distributed to it, similarly to the first.

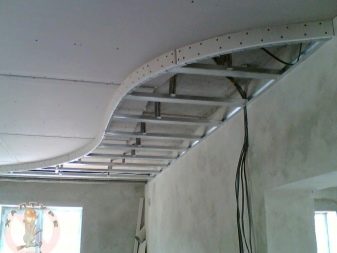
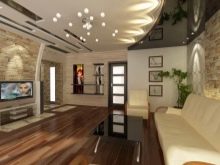
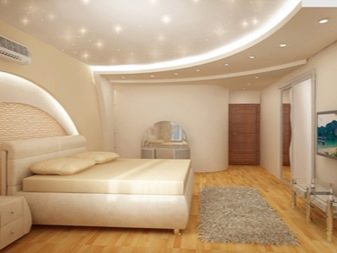
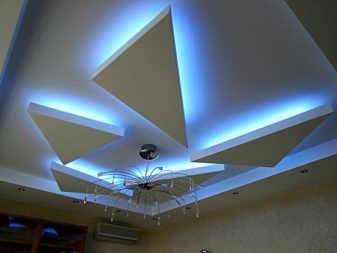
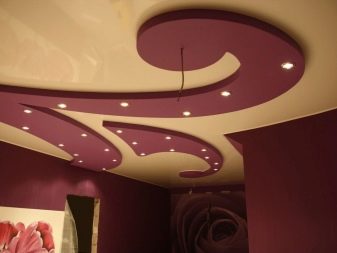
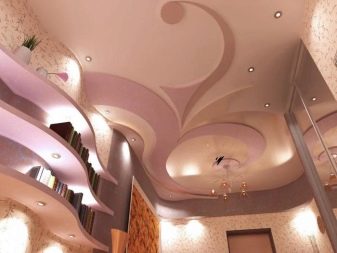
Two-level ceilings can have completely different arrangements and can imitate semicircular steps or steps with right angles, create various geometric shapes and patterns, and complemented by spotlights, they will add even more charm and attractiveness to the room. Most often, the second and third steps do not occupy the entire perimeter of the ceiling, but fill only a certain part of it, so here a pre-created plan-diagram of the location of the steps will come to the rescue.


A special feature of the second step and, if necessary, subsequent steps is that, in addition to the base, it is necessary to sheathe the side space of the step with plasterboard. This technique is used to hide the wiring and other internal components of the ceiling.
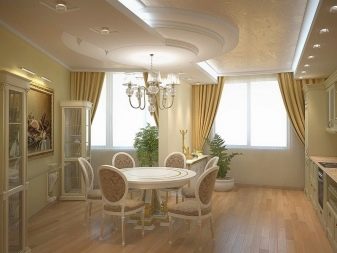
Tiered ceilings are most often installed in the bedroom, dining room or living room., because it is these spaces that usually have the most impressive dimensions, and multi-level structures look best and unfold precisely in spacious rooms with a sufficient height of the rough ceiling.
For different rooms
A ceiling design project may have its own special rules, depending on the purpose of the room and on the type of house. So, the project of a bedroom in "Khrushchev" can be quite different from the same project in a panel house. The consumption of materials will be different, the measurements of typical rooms will also differ, the presence or absence of load-bearing walls will also dictate the possibility of installing one or another coating.
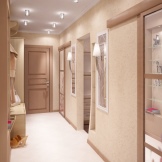
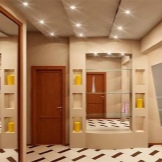
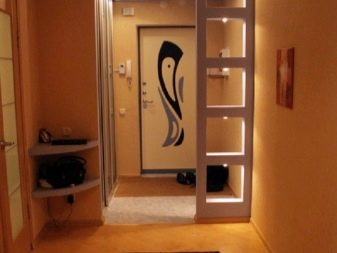
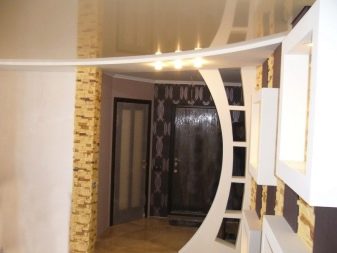
So, for example, the hallway is usually quite small in overall dimensions, which is important to take into account when creating drawings and selecting material.If a multi-level ceiling option was chosen, it can be used to divide the space into two zones - one will be closer to the door, the second will extend the hallway space. And if this division into zones is supplemented with zoning when decorating walls, you can get a rather interesting end result. Choosing the right colors, it is better to stay on white or any other light paint, which will help not only not to distract from the interesting design, but also visually expand the hallway.

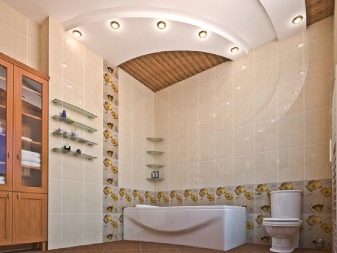
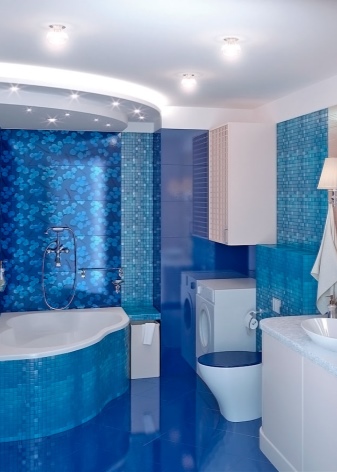
A bathroom with a small size is extremely whimsical to materials and to a lighting device. All wires must be ideally insulated from contact with water, and the ceiling material must be selected with a high level of water protection. He should not be afraid of water, condensation and temperature changes. Otherwise, mold and mildew may form, which are very difficult to get rid of later. Various tiles and plastic panels are ideal here. When choosing a color, you should pay attention to white, all shades of blue, blue, green, sand and soft peach color is also popular.

Without exaggeration, the most close attention should be paid to the choice of the ceiling project in the bedroom, because it is this ceiling that a person sees most often, so most of the time in the bedroom a person spends lying on the bed. One of the most common and simple solutions was and remains the "starry sky". With the help of LEDs, a model of the sky with stars is embodied in the room. This option not only looks very beautiful, but also forms a natural night light right on the ceiling.

An important advice in the case of selecting projects for several rooms at once is that for each room it is necessary to create an individual design project, and only then it will be possible to get a truly unique and interesting final result when creating an interior.
Work technology
Ceiling finishing technology may vary depending on the original surface finish. In addition, the initial surface treatment for finishing will depend on how long the renovation is planned to be maintained. If a long service life is not required, the preparatory phase can be shortened.


Ceiling finishing technology includes several stages.
- Development of a plan-scheme for the type of ceiling, shape, color schemes, placement of wiring and fixtures.
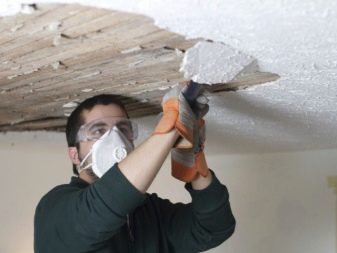
- Preparation of the base for the installation of the ceiling finish directly. This stage may include dismantling the old coating, leveling the surfaces, sanding, priming and other manipulations to prepare the base for the coating. If the ceiling has been painted with oil paint, the recoating will be the most difficult. Other paint will not fit on such a base, therefore, to change the surface, you will have to apply a fresh layer of the same oil paint or completely get rid of the existing layer. In addition, complete dismantling must be carried out on the basis of wallpaper. Experts do not recommend sticking several layers of wallpaper, since an unnecessarily heavy structure will simply pull them away from the ceiling.
- Directly the installation of the selected structure.

It is worth considering the main stages of finishing in more detail.
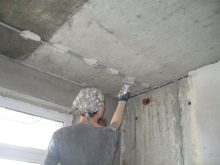
The main stage in the repair is surface preparation. This stage must be approached very carefully, since the convenience of subsequent finishing and the service life of the coating will largely depend on the initial preparation.
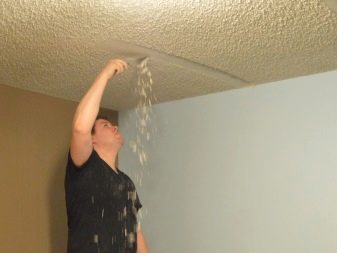
Preparation usually takes place in several stages. The very first step is to isolate the walls and floor from the ingress of building materials, if they are not planned to be updated. This is followed by the most difficult stage. It includes removing the old cover, if any. It is necessary to get rid of old wallpaper, oil-based coatings, for example, oil paints, whitewash layers.To remove paint, you can use special removers, which can be purchased at hardware stores. Their cost is low, but they will help save time and effort for other repairs.
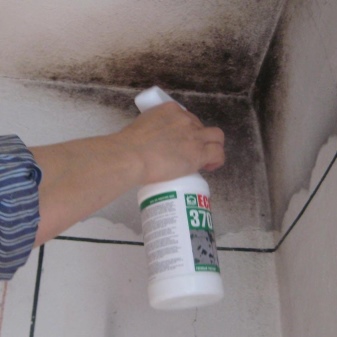
If the repair is carried out in a room with high humidity, it is possible that fungus can be found on the ceiling and walls. If, upon careful examination of the surface, black-brown spots are found, it is urgent to get rid of them with the help of special antifungal agents, which can also be purchased at hardware stores. You can protect yourself from this problem if you add a special agent against the fungus to the material used, which is an excellent prevention of the secondary appearance and spread of the virus. If the lesions are too large and deeply embedded in the concrete, then you can remove it with a puncher or gouge it out with a special tool, and then go through the plaster, covering the holes.

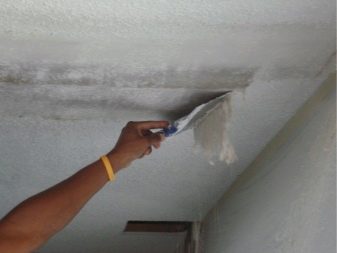
Another important step in the preparation process is to check the surface for evenness. This can be done using a building level, which will show the degree of relief of the ceiling. For capricious coatings such as ceiling panels or, if necessary, glue thin paper wallpapers, it is necessary to level the surface with a special finishing plaster. Alignment may require the use of additional cuts of the plaster mesh, which will help to avoid detachment of the plaster mix.

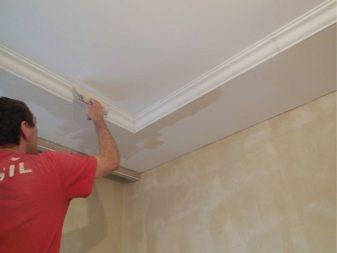
After leveling the ceiling, it is necessary to fix the surface with another thin layer of finishing putty, and then walk around the entire perimeter of the ceiling with a primer, which will help get rid of unnecessary dust and improve the adhesion of the finish and the rough ceiling.
At the same stage and in the case of choosing a multi-level ceiling, you can fix the frame or box, which will be the basis for the fasteners.
Mounting
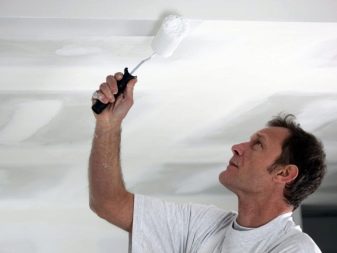
After the preparatory stage is completed, it will be possible to proceed directly to the installation of the ceiling. You can repair the ceiling in completely different ways. Installation methods will depend on the selected material. So, the wallpaper will simply be glued to the primed surface with the glue suitable for their type. In order to glue the wallpaper, you do not need any superpowers, so this type of installation will also not cause difficulties. The paint is also applied over the primer. Each of her words should dry out as much as possible before another layer lies on top of it.
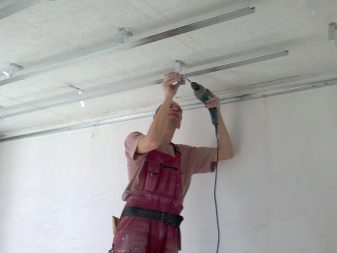
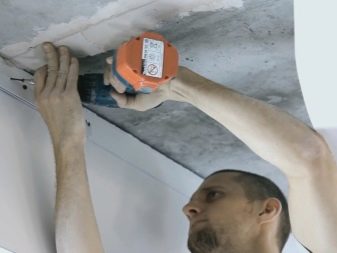
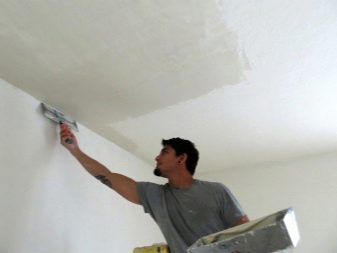
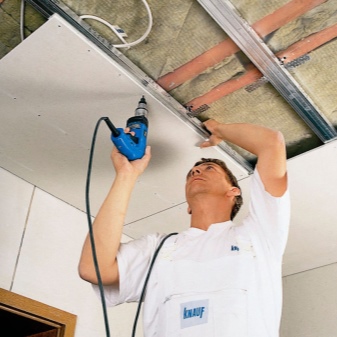
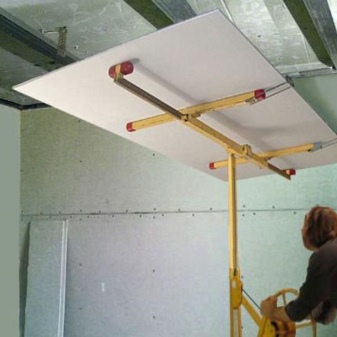
It is better to entrust the installation of suspended and stretch ceilings to specialists., but plasterboard ceilings can be made with your own hands. The step-by-step installation will look like this. Everything will start with preparatory work. The surface must be leveled and free of dust. Grinding can help here. Further, it is important to carefully prime the surface, to make markings at those points where in the future it will be possible to fasten the guides for the frame. Next comes the fastening stage. In this case, a ceiling frame is installed. The design will be different and will depend on the type of ceiling chosen - whether it will be multi-level or regular even.
After the frame has been successfully attached, it is important to slowly, slowly, step by step fasten the drywall sheets over the base. With the first layer, it is necessary to sheathe the entire ceiling, then, if desired, you can fix another frame and create a multi-level structure. You can decorate it with spotlights, easily hiding the wires in the first level of the structure.
Tips & Tricks
- For various premises, it is necessary to select the most suitable material and type of ceiling covering. So, for example, for rooms with high humidity, such as baths and toilets, materials with waterproofing are in the first place.
- The first stage of installation work must necessarily be the creation of a design project that will help not only to correctly place all the guides and the selected type of material, but also to correctly calculate its required amount.

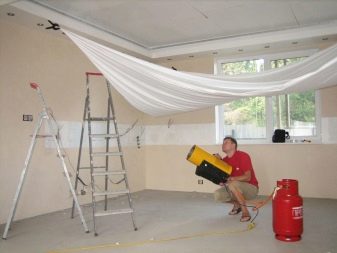
- If you want to make a stretch ceiling, it is better to use the services of specialists. The installer will help you carry out the preparatory work and directly install the desired surface.
- The cheapest repair option is whitewashing and papering.
- When choosing a color scheme, you must focus on the size and purpose of the room. So, for small rooms it is better not to choose dark shades, but for finishing large bedrooms they may well be suitable.
- Textures on light wallpaper and light textured plaster will help to add light to the space.

- To work, you must have the following tools: a perforator and dowels with screws, a level, a stepladder, a hacksaw for metal, a spatula, squares for measuring angles.
- Installation of a stretch ceiling is not recommended when the room temperature is less than 40 degrees.
- It is better to start the installation of the frame for all types of suspended structures from the corner that is closer to the doorway.
- Among the range of stretch ceilings, there are three types of surface: matte, satin and glossy. It is best to choose the type of surface based on personal preference and the purpose of the room. So, for the living room and bedroom, you can choose glossy surfaces, but in the kitchen it is better to choose a matte or satin ceiling.
- Installing any type of false ceiling will help hide small irregularities or scratches on the ceiling surface.
- The lifespan of the ceiling will depend on the type of room as well as the material chosen. On average, it can take up to 10 years between repairs.
- An excellent addition to suspended ceilings will be the use of recessed spotlights .. Also, you cannot do without such fixtures when creating a popular starry sky design.
Beautiful examples in the interior
Examples of beautiful ceilings in the bedroom.
Multilevel ceilings.

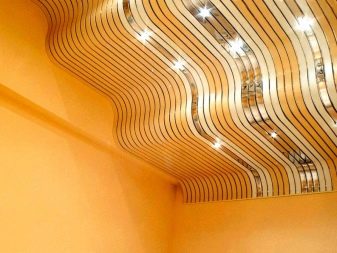
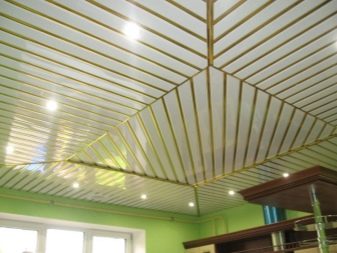
Rack ceilings.
For the installation of a ceiling made of plastic lining, see the video below.


The comment was sent successfully.