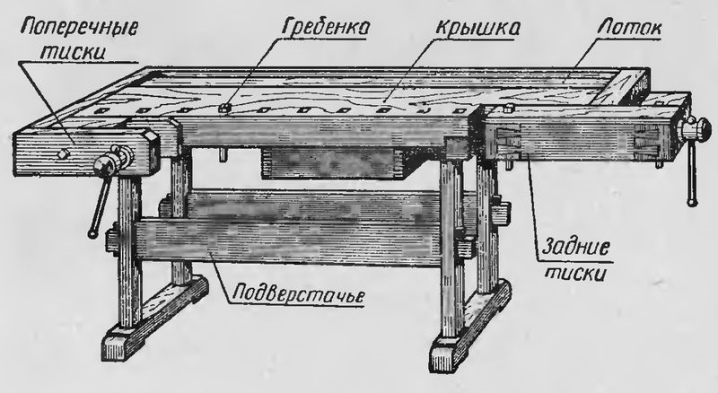
How to make a folding workbench with your own hands?
DIY folding workbench - "mobile" version of the classic workbench. It's pretty easy to make it yourself. The basis of a homemade workbench is a drawing developed taking into account the types of work (assembly, locksmith, turning and others).
Peculiarities
The folding workbench when folded takes up 10 times less space than in the working one.
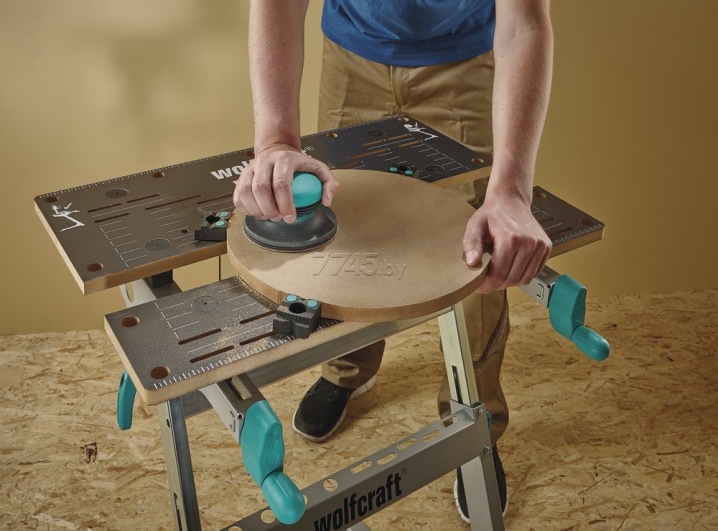
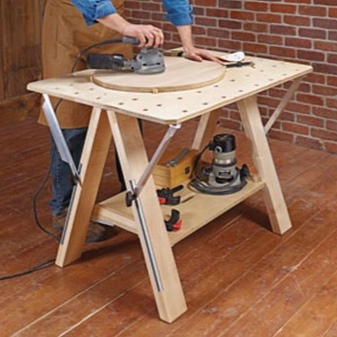
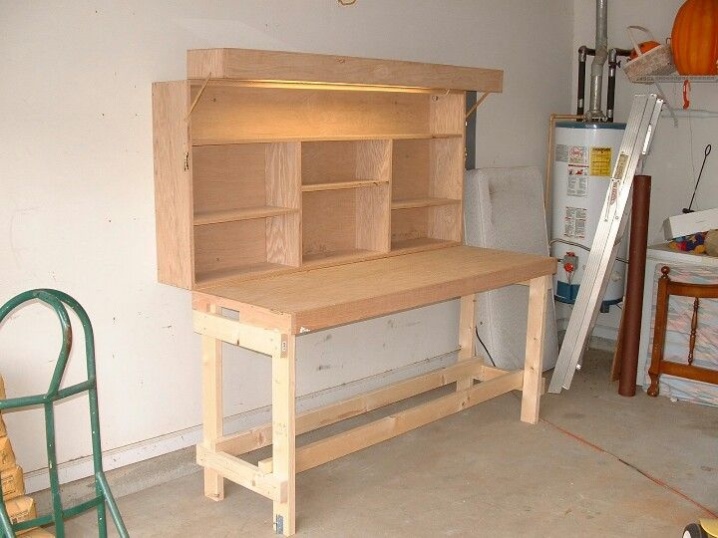
Portable - a version similar in principle to a folding chair or a conventional sliding table, which is easy to carry. The disadvantage is the almost complete absence of boxes that noticeably weight the structure: instead of them there are one or two shelves without back walls, the workbench itself resembles a rack.
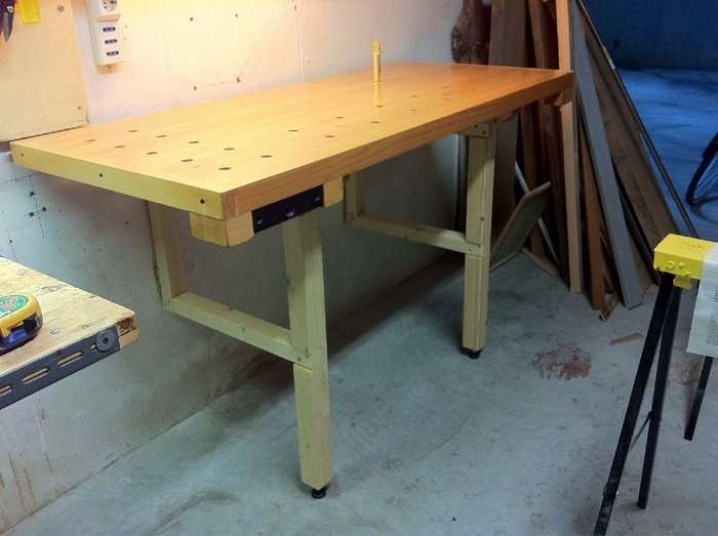
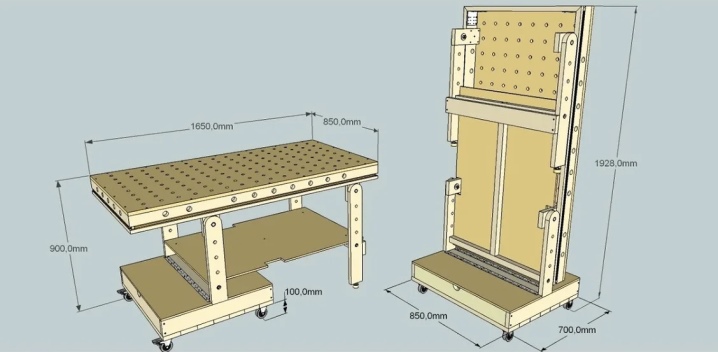
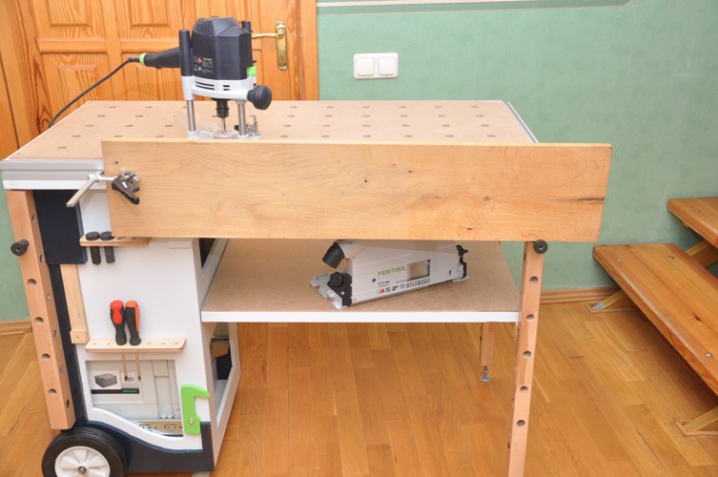
Universal - a structure that is attached to the wall, but unlike a conventional wall-mounted table, such a table has all four legs. The scheme is complicated by retractable wheels that allow you to use the workbench like a cart. This version resembles a mobile hot dog table popular with fast food sellers in the 90s of the last century: there are shelves with back walls (or full-fledged drawers). It can be folded against the wall, lifted and fixed, and rolled to another place. Carrying requires the help of two more people: the weight is significant - tens of kilograms.
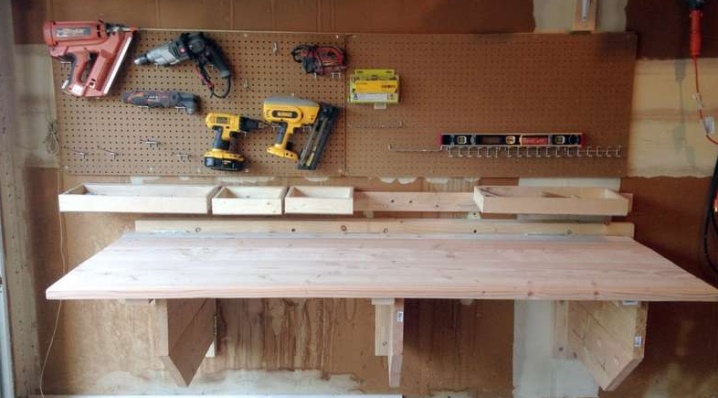
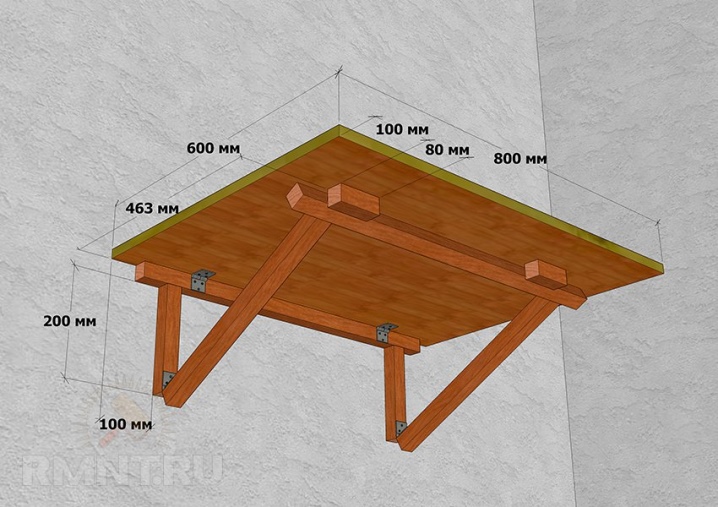
A folding wall-mounted workbench is used in the home "study" or in the back room - outside the house. It is stylized for the general design of the home interior, it can be made as a mini-transformer, by the appearance of which guests will not immediately guess that this is a workbench. A profile pipe can be used for pedestal.
Required tools and materials
In the manufacture of a workbench for a house or apartment, a manual locksmith's kit is used: a hammer, a universal screwdriver with different attachments, pliers, a plane, a hacksaw for wood. Power tools will significantly speed up the work - a drill with a set of drills, a grinder with a cutting disc for wood, a screwdriver with cross and flat bits, a jigsaw and electric planers.
As materials you will need:
- board (timber) with a thickness of at least 4 cm - these are used for lining a rough or final floor;
- plywood sheets - their thickness is at least 2 cm.

Particleboard and fiberboard are not suitable - they will not withstand a significant load: with a pressure of at least 20-50 kg per square centimeter, both sheets will simply break.
Natural wood is a must. Instead of plywood, the best option is also a single-ply board with a thickness of at least 2 cm. Use hardwood - soft wood will wear out quickly.
And you will also need fasteners.
- Bolts and nuts with lock washers - their size is at least M8. Pins are allowed.
- Self-tapping screws - with a diameter of at least 5 mm (external thread size). The length should be such that the self-tapping screw almost reaches the reverse side of the boards to be fastened, but its point does not show or feel to the touch.
- If the workbench is made with casters, furniture casters are required, preferably completely steel.
- Furniture corners.
An even better result can be achieved by using joiner's glue together with the corners - for example, "Moment Joiner", recommended for gluing natural wood and sawn timber.
Manufacturing process
Hardwood plywood, for example, birch, with a thickness of at least 1.5 cm, can also be suitable as the main material.

Base
The production of the base box includes a number of steps.
- Mark and cut a plywood sheet (or several sheets) according to the drawing.
- As a basis - a box with boxes. For example, its dimensions are 2x1x0.25 m. Connect the sidewalls, the back wall and partitions for boxes with a pedestal (bottom wall of the carrier box).
- For the resulting drawer compartments, assemble the drawers - it is advisable to do this in advance. The outer size of the drawers is slightly smaller than the inner dimensions of the compartments for them - this is necessary so that they slide in and out without effort. Install spacer guides if necessary. Also install handles on the drawers in advance (you can use handles for doors, cabinets, wooden windows or others).
- Install the top wall on the box. This is not a tabletop yet, but a base on which it will be installed.
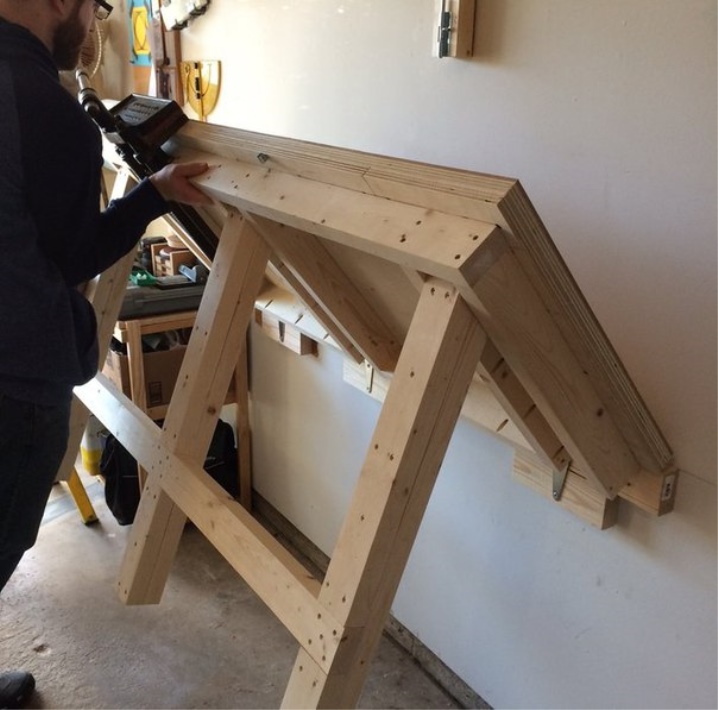
- Use a jigsaw and a sander to round off the leg parts - in the place where each leg forms a knee.
- Place the leg strips in the center of the supporting structure without deviating from symmetry. For example, if the length of the legs is 1 m, then their main and counterparts can be half a meter in length (not counting the roller mechanisms). The legs can be up to 15 cm wide, the thickness - according to the number of plywood layers.
- Attach the swivel castors from the Joker brand furniture to the bottom of the main box. They are placed on bolts of size 10 and give the structure the functionality of a transformer.
- Install the counterparts of the legs on the furniture bolts. Perform a trial assembly, check their clear operation. To prevent loosening of each "knee", large washers are put down (you can use spring washers).
- So that when unfolding there are no difficulties, synchronizing crossbars are installed on the moving parts - like those that are placed on the upper and lower passenger seats, folding tables in train carriages. They make it possible to quickly fold and unfold the workbench without unnecessary movements.
The workbench is ready for further refinement.
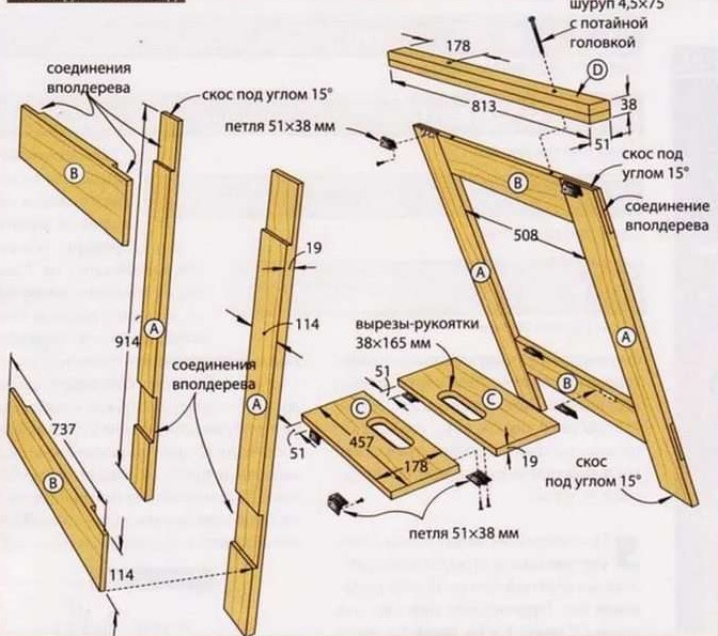
Table top
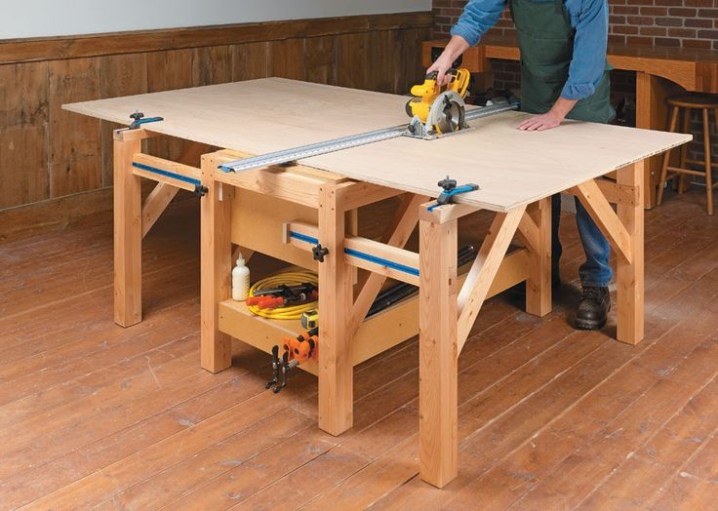
After making the box and the "running gear" mark and cut the table top out of a new sheet of plywood. It should be slightly larger in length and width than the box. For example, if the size of the box (top view) is 2x1 m, then the tabletop has an area of 2.1x1.1 m. The difference in the size of the box and the tabletop will give the latter additional stability.
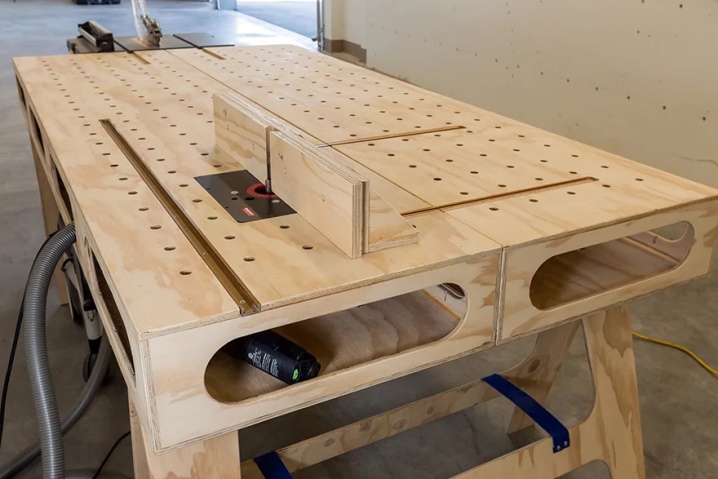
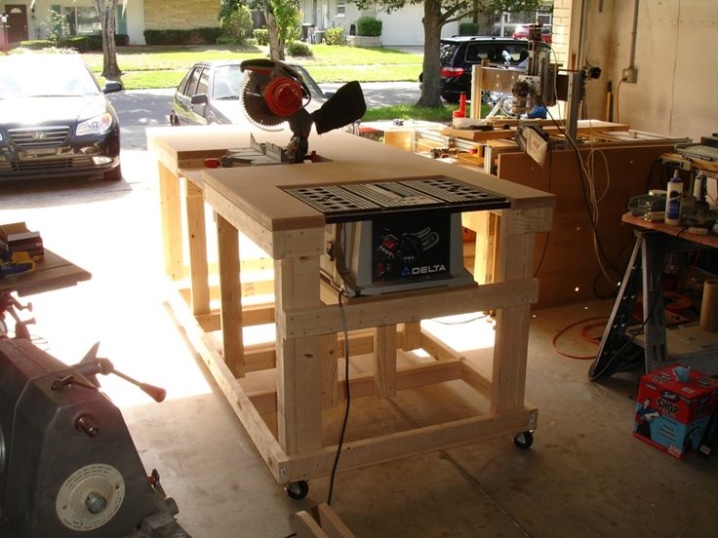
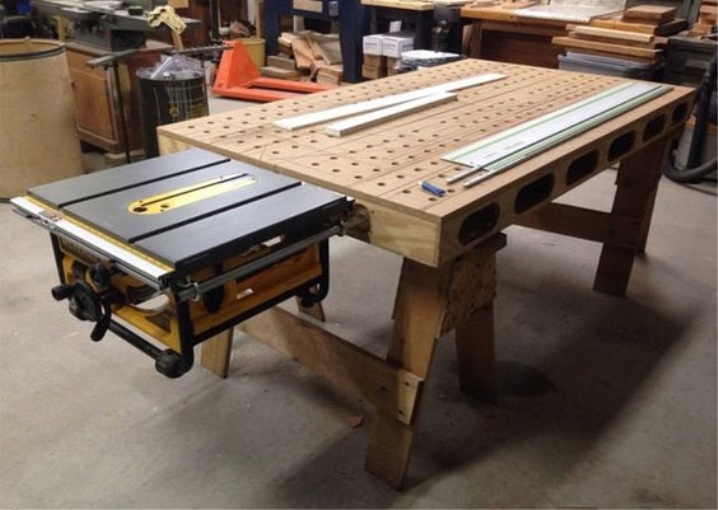
Some power tools, such as a sawing machine, will require a sliding table top made of two diverging halves. The saw blade is positioned so that the part to be cut does not move across the path of the saw blade. In this case, you will need guides (including a metal profile), which do not allow the halves of the tabletop to disperse in another plane. Here, bent pairs of profiles are used in a special way (such as thorn and groove), where the tongue and groove go along the entire length of the profile (and the table top as a whole).
In the simplest case, a conventional corner profile is used: the upper part of the corner slides along the supporting structure, the lower one prevents the diverging tabletop halves from moving across. This table top works as well as a vice. Here, the sliding tabletop partly replaces the vice without clamping jaws.
There is no box with boxes in such a workbench - it would interfere with work, it would be impossible to clamp the workpieces on the tabletop. To fix the halves of the tabletop at a selected distance from each other, use longitudinal lead screws with locking and lead nuts, as in a real vice, or clamps.
Recommendations
For a clearer contact, the contact points of the parts are coated with wood glue. Reinforce glued joints with ready-made furniture corners or cut-off corner profiles. Reinforce corner joints where there is no contact with the drawers with triangular spacers.
It is advisable to immediately mount an extension cord with several outlets on the finished workbench - they will be needed for the operation of some power tools.
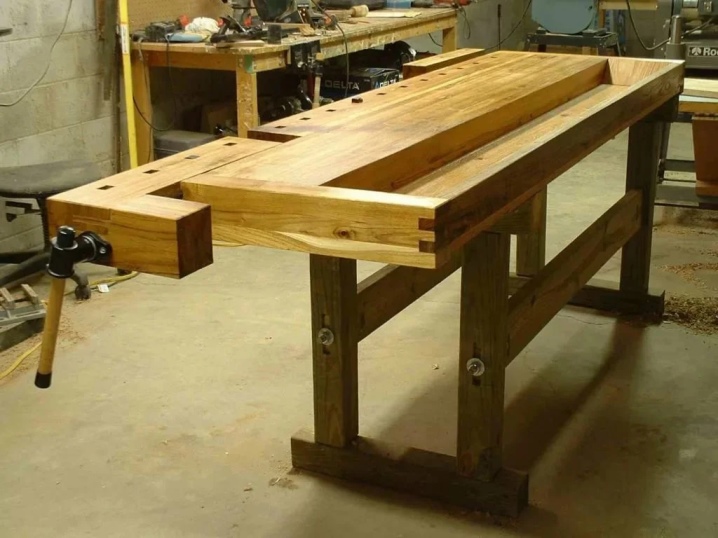
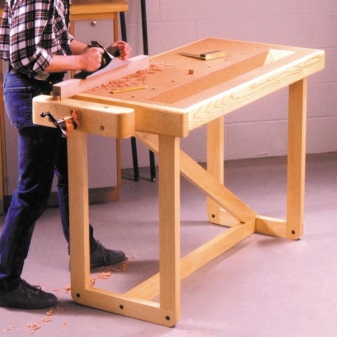
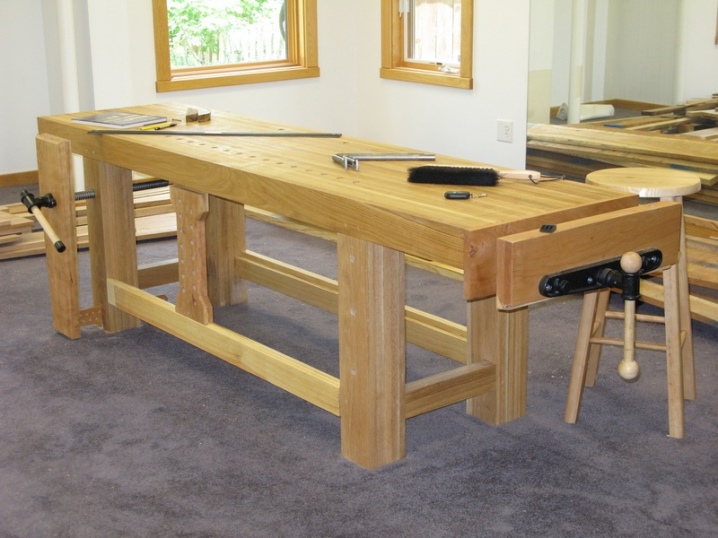
A folding workbench is hardly designed for heavy work like assembling windows and doors. Turning work on the manufacture of massive parts weighing more than a dozen kilograms is difficult on it. For "heavy" work, it is better to assemble a stationary wooden workbench that can withstand a weight of more than one hundred kilograms.
No matter how long the workbench can be folded (including a transformer). A one-room apartment or a small country house of 20-30 square meters is unlikely to accommodate a stationary workbench that cannot be folded. Focus primarily on the size of the living space. The same advice applies to an outdoor utility room or garage.
Do not use plywood less than 15 mm thick or soft wood for the countertop. Such a workbench is suitable only for sewing work or activities where the use of brute physical force is not required.
Do not work on a workbench with strong reagents, especially if they are often splashed. For chemically active work, special tables and stands are used, for example, made of glass.
The video below provides step-by-step instructions for one of the do-it-yourself folding workbench options.


The comment was sent successfully.