Plaster trowels

There are a lot of construction tools for applying plaster on the walls and its subsequent leveling. The most commonly used of these is the wall trowel, or the Venetian trowel.
What is it for?
In order for the plaster to lay flat on the walls, its surface must be smoothed out. For this, special devices are used - spatulas and trowels. This is especially true when the plaster is a finishing layer, the difference in the relief of which is allowed up to 1 mm.
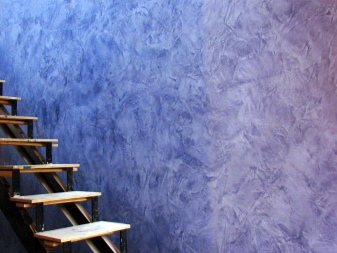
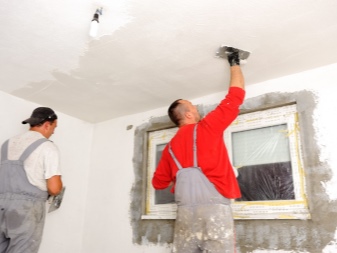
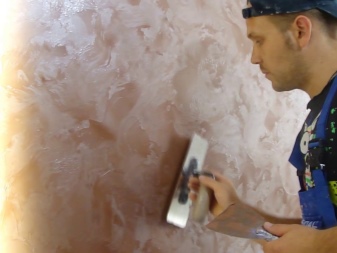
A smoothing trowel, also known as a Venetian trowel, allows you to achieve a smooth and even surface. It is more convenient to work with it than with a spatula, it allows you to work faster due to the girth of a larger area, while also saving material consumption. This is especially important when working with Venetian plaster, the pattern of which imitates marble. It depends on the quality of the work, the walls will look so aesthetically beautiful.
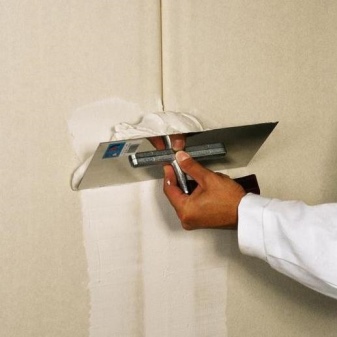
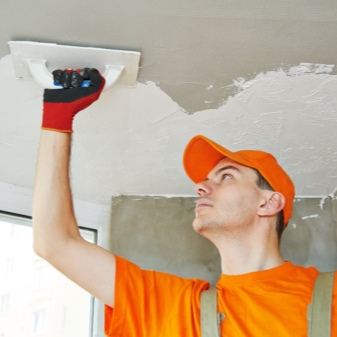
The tool is useful for problematic formulations that require less curing time due to fast curing. The trowel perfectly seals drywall seams. Perfectly copes with the alignment of compositions on the ceiling, where even the slightest irregularities leave ugly shadows.
In addition to its main function, the trowel can be used instead of a trowel for applying tile adhesive or putty.
What happens?
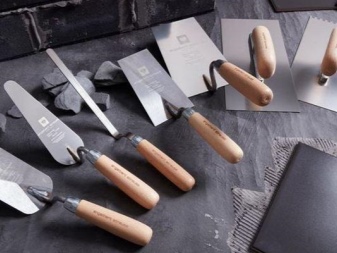
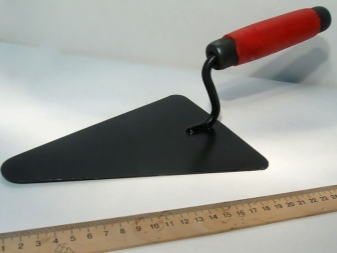
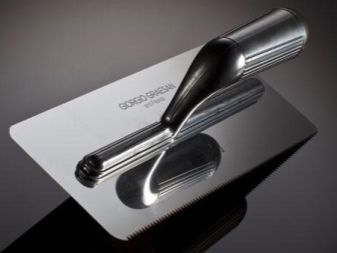
The plastering trowel has a predominantly rectangular shape, since it is the most convenient. But there is also a triangular scapula like a trowel, as well as drop-shaped, oval, diamond-shaped and trapezoidal. Sizes may vary, on average, width - 12-27 cm, length - 20-48 cm.The standard size of a Venetian trowel is 13 * 27 cm.
According to the type of material of the working surface, the float is:
- metal, in particular steel;
- plastic;
- rubber.
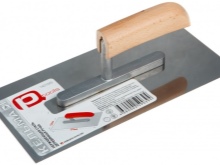
The working surface must be flat and polished. The smoothness of the wall depends on this, since all the jaggedness will immediately become visible. The finishing material itself sticks less to a smooth tool. Therefore, most often you can find metal devices on sale. The sheet of metal must be rigid - if it bends easily, the tool will quickly fail. Alloys that do not corrode are commonly used. And in order not to damage the finish layer, the edges should be rounded.
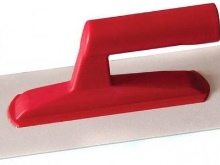
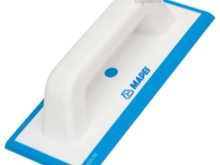
A plastic trowel is cheaper, but deteriorates faster. It is easy to scratch, but lighter in weight. But the trowel made of transparent plastic is perfect for applying liquid wallpaper.
Much less common on sale is a rubber trowel for plaster. It is soft and suitable for smoothing out an already leveled layer. For example, this tool is perfect for Venetian plaster, for which a perfectly smooth surface is important.
She also copes well with minor defects, as she acts more delicately.
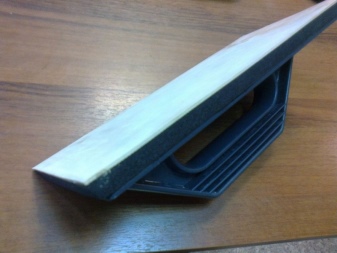
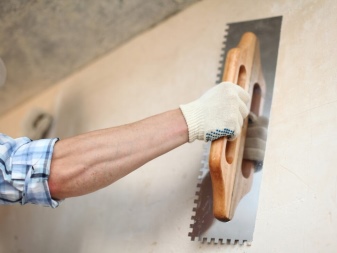
A plastering trowel can be serrated. They allow you to make waves. The greater the angle of adhesion of the trowel to the wall, the stronger the relief of the waves. They are necessary to create greater adhesion, allow the materials laid on top to hold better - for example, when applying tile adhesive. Also, the prongs allow you to create a pattern on the walls for decorative finishing. The height of the prong is usually 4-6 mm.
In addition to the classic version, there may be special trowels for grouting joints, corner joints, processing slopes. These are already professional tools.For do-it-yourself repairs, it is better to purchase ordinary trowels, but in several different sizes, in order to choose the most suitable one during the leveling process. And for small jobs, for example, repairing cracks, purchase spatulas.
You need to choose a plastering trowel under the hand of the worker. It should fit well in the palm of your hand so that the tool is comfortable to hold. Weight also matters, otherwise the hand will tire quickly. Basically, the tool has a mass of 300-400 g. The bend of the handle itself depends on the intended work, it can be smooth or ribbed to prevent slipping. When buying, you should pay attention to the surface so that there are no jags and bends, it should be perfectly smooth and even around the edges.
How to use?
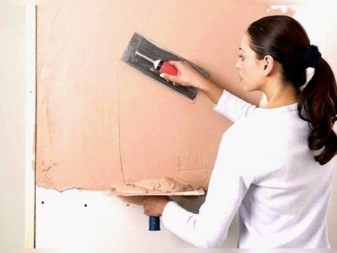
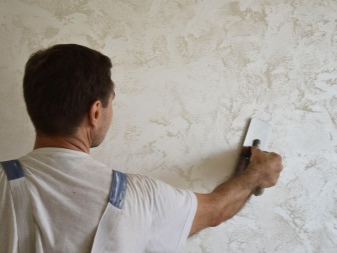
A prepared solution is applied to the trowel, then the tool is pressed tightly against the wall at an acute angle. Then the trowel is led in one direction to the side or from bottom to top, evenly distributing the solution - trimming. It is necessary to smooth the surface after the main layer of plaster has been laid, which is 3-5 mm. The tool should be driven in one direction, in even movements, without circles. The trowel can be used not only for plastering, but also for preliminary puttying of walls.
If the ceiling is leveled, then you should work across the direction of sunlight from the window, and then smooth it along. This will eliminate the shallow shadows that are bound to be seen in daylight, since the light will fall from one side.
Do not press hard on the trowel, as you can ruin the surface by pushing it through. You need to press the tool tightly, but without pressure. It is recommended to smooth out an area of no more than 1 square meter at a time. m. There is no point in capturing more, as the work becomes time consuming. It is better to start from the corner of the room. The direction depends on the leading hand of the master: for right-handers - from right to left, for left-handers - vice versa.
When eliminating cracks, it is necessary to fill them with a sufficient amount of mortar, and then draw from above with a spatula or trowel. Remove excess from the wall in the same way.
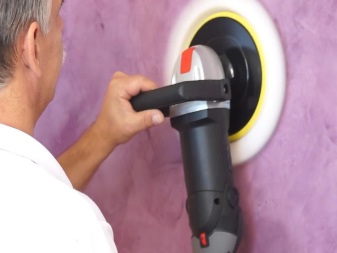
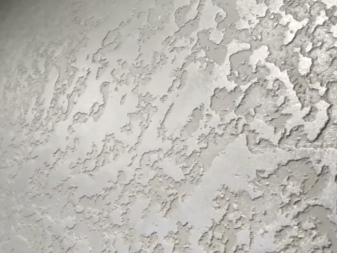
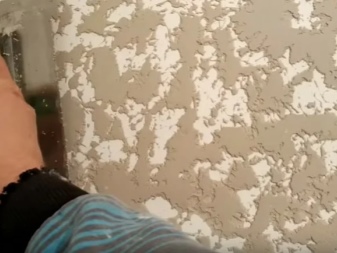
With a trowel, you can create the effect of a pronounced texture, for example, a Venetian stone. To do this, smears with a solution are made on the leveled layer with a trowel in different directions. After partial drying, it is necessary to lightly crush them with the same tool. Next, a thin layer of plaster is applied in a different shade. After complete drying, the walls are polished. The more contrasting the colors, the more expressive the relief appears.
Technique "Grotto"
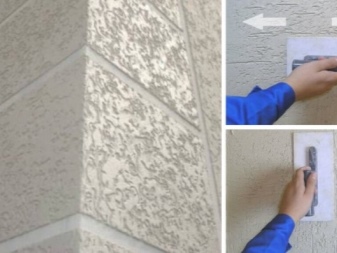
This type of decor looks expensive, especially on dark plaster shades. To do this, the trowel is dipped into the solution and applied to the prepared (plastered) surface so that small burgs, "mountains" are obtained. These should be light, point-like touches. Then it is necessary to allow the material to dry slightly - when pressed with a finger, they should give in. After partial drying with a trowel, it is necessary to smooth out the bumps. Movements should be light, without pressure.
You should not move in one direction, from corner to corner, it is better to make the movements chaotic. Then there will be no clear lines on the wall. After complete drying, the walls are polished.
Technique "Ottochento"
On the leveled layer, the plaster is applied with a trowel in a circular motion, repeating the recumbent eights or the infinity sign. After partial drying, the surface is crushed. Further, as soon as the previous layer dries, it is necessary to apply a new one, but different in color, with an even, thin layer. Then completely dry and polish.
Working with a trowel is not difficult, but requires some skill. The main thing is that all movements must be fast so that the composition does not have time to grab.


The comment was sent successfully.