How to glue drywall to a wall?

One of the easiest and most effective ways to level the surface is to decorate the walls with plasterboard sheets. There are two ways of attaching the material: frame and frameless. The frame method involves the use of special metal profiles, which slightly reduces the area of the room. In certain cases, it is preferable to use the frameless fastening method. Almost any person can cope with frameless installation of drywall sheets, it is only important to know how to properly glue drywall to the wall.
Features of gluing
Fastening drywall sheets in a frameless way allows you to save space in the room and money spent on repairs. However, it is not always possible to glue the material to the wall. For this installation method, three conditions must be met:
- the surface should not have strong irregularities and various defects more than five centimeters in size;
- the walls of the room do not need insulation with penoplex or other material;
- there is no need to hide any engineering systems in the house behind drywall.
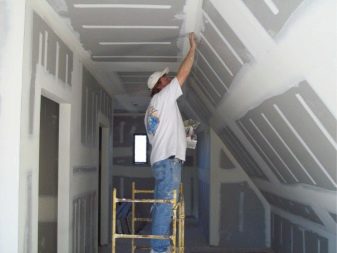
The frameless installation method is great for decorating small rooms. It is possible to align with plasterboard sheets not only walls, but also ceilings. GKL can be glued to the following surfaces:
- brick walls;
- plastered surfaces;
- aerated concrete;
- walls made of foam blocks;
- expanded polystyrene concrete surfaces;
- ceramic tile.

For the successful implementation of repair work, it is important to choose the right adhesive solution, prepare the surface well and follow the recommendations for frameless fastening of the material.
Types of glue: how to choose the right one?
The choice of adhesive mixture for fixing drywall depends on a number of factors. First of all, it is the type of surface material to be finished. Modern manufacturers of building materials are ready to offer a wide range of drywall adhesives. Let's highlight the main types of mixtures that are suitable for gluing material to a surface:
- On a plaster base. The most popular gypsum mixes are Knauf and Volma.
- Polyurethane adhesive.
- Polyurethane foam sealant (polyurethane foam).


- Tile adhesive.
- Silicone adhesive mixtures.
- Liquid Nails.
- Plaster mixes based on gypsum or cement.
- Penoplex plaster.


Universal formulations are suitable for working with almost all types of coatings, be it concrete, foam block walls, brick or aerated concrete slabs. For a concrete even wall, a concrete contact solution would be an excellent option. Silicone based compounds are suitable for attaching material to completely smooth surfaces (for example, plastic or tiles).
In addition to using special adhesives for drywall, fastening can be carried out using polyurethane foam sealant and self-tapping screws. Mounting foam for gluing drywall sheets on the wall is used quite rarely, since the process of such finishing work is not easy.
Tips for difficult cases
The frameless method of installing drywall is much simpler than the frame one. Gluing the material with your own hands will not be difficult. However, even with this method of fastening, in certain cases, some difficulties may arise in carrying out repair work. The complexity of the process of gluing drywall sheets to the wall depends on the following factors:
- surface type;
- drywall quality;
- type of adhesive mixture;
- the level of unevenness of the surface.

Considering some recommendations for working with various surfaces, it is possible to greatly facilitate the installation of the gypsum board. The method of applying the adhesive depends on the type of surface and the level of unevenness in the wall. Let's consider some recommendations for working with adhesive mixtures:
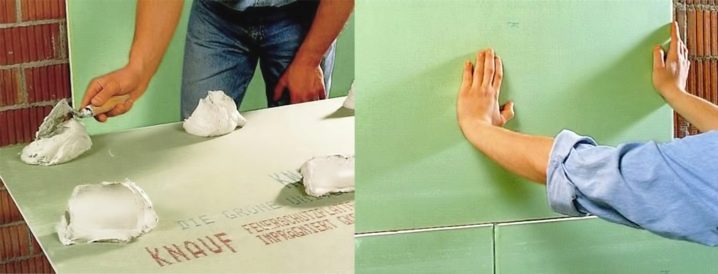
- When working with an aerated concrete base, it is worth remembering that the glue must be applied to the wall, and not to drywall sheets.
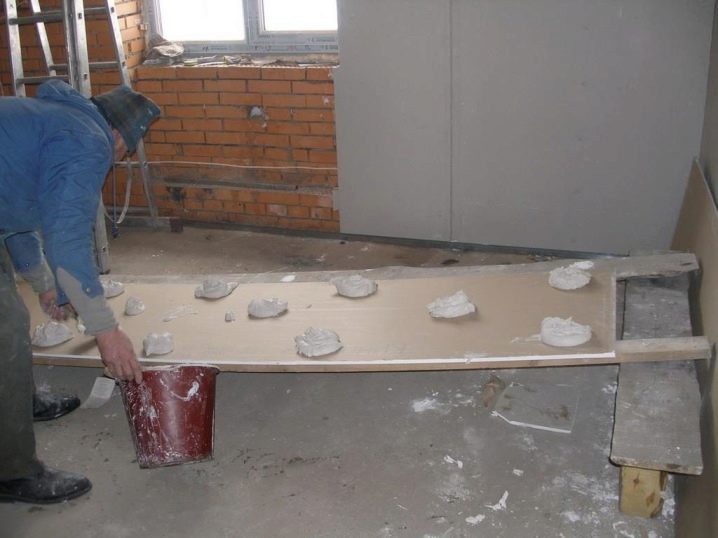
- If the walls are practically flat, the mortar can be spread over the entire drywall sheet. You can also put the glue mixture in separate "piles" around the perimeter and in the center of the sheet. The larger the area covered with glue, the more reliable the fastening will be.
- During installation, you must carefully monitor the level of already glued sheets. If necessary, the surface is leveled with a joiner's hammer.

To decorate rooms with a high level of humidity (kitchen, bathroom, basement, balcony), it is necessary to purchase sheets of drywall with moisture resistant properties. The adhesive mixture should also have good moisture resistance.
Very smooth concrete walls must be treated with concrete contact to increase the adhesion level. If the surface has previously been plastered, make sure that there are no areas of crumbling or peeling plaster on the wall.

Preparation of the base
In order for the drywall sheets to stick reliably to the wall, the surface must be prepared in advance. First of all, the old finishing coating is removed from the base, be it wallpaper or paint. Acrylic-based paints and varnishes are cleaned using a grinder with an attachment in the form of a flap grinding wheel. Water-based paint can be removed from the concrete wall with a stiff metal brush.


After the old coating has been cleaned off, it is necessary to remove dust and dirt from the surface. To improve adhesion, the wall must be primed. If there are serious defects or irregularities on the wall, then it will not work to glue the gypsum board to such a surface without preliminary alignment.
Installation process
Before starting finishing work, it is necessary to prepare all the necessary tools, calculate the required amount of glue and take measurements on the surface. The consumption of glue will depend on the type of solution chosen. One square meter can take five kilograms of solution.
In order not to be distracted during the finishing work in search of the necessary tools, it is better to prepare them in advance.


You may need the following tools to glue drywall to walls:
- building level;
- construction plumb line;
- drywall knife;
- container for adhesive solution;
- construction mixer, which is required to mix the glue;
- joiner's hammer for leveling gypsum boards;
- notched trowel for applying adhesive mixture;
- roulette.


If you purchased the adhesive mixture in a dry form, you must prepare a solution suitable for application. In this case, there are no specific recommendations for the manufacture of the adhesive, since this process depends on the type of glue purchased. Detailed instructions for mixing the mortar can be found on the package.
In addition to the glue mixture, a putty will be required for the final stage of installation. With the help of a putty mixture, grouting of the seams between the sheets of gypsum board will be carried out.


Having prepared the tools, glue and the drywall itself for finishing work, it is necessary to make markings on the wall for the material.
In accordance with the measurements made and the established markings, drywall sheets are cut. It should be borne in mind that the height of the sheets should be less than the height of the walls by about two centimeters. The difference in height is necessary so that during installation it is possible to make small gaps between the gypsum board and the floor, the gypsum board and the ceiling.For all the sockets and switches available in the room, it is necessary to make holes in the drywall in advance.
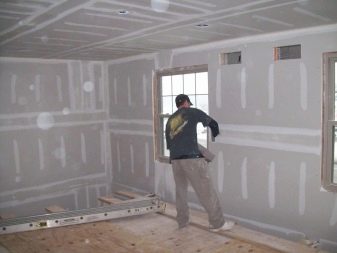
The technology for further work on pasting walls with plasterboard sheets will depend on the level of surface roughness.
Smooth surface
Concrete or well-plastered walls usually have an almost flat surface. It is quite easy to glue drywall onto such a base. The only difficulty that may arise during installation is the installation of electrical wiring.
Electrical wiring is located under the gypsum board. When the design does not allow you to place the wires in such a way that they are not pressed against the drywall sheets, you need to groove holes in the wall for wiring.


After the problem with the wiring is solved, the glue is prepared and the finishing material is cut, you can proceed to pasting the surface. The adhesive solution is applied to the drywall sheet with a notched metal trowel. If possible, glue as much area as possible with glue.
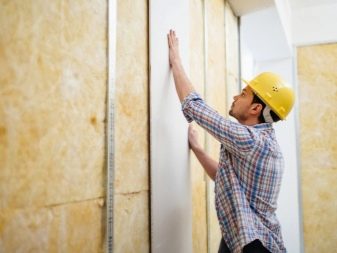
The gypsum plasterboard is installed on wooden beams, which play the role of a kind of footboard. Through the holes made in the sheet, cables are threaded or switches and sockets are pushed through, after which you can start gluing the walls. The slab must be lifted slightly and pressed well against the base. With the help of the level, vertical alignment occurs, then the drywall sheet must be pressed against the wall with even greater force.

Minor defects
Brick walls most often have irregularities within five centimeters of the normal level. Gluing drywall to a surface that has slight irregularities is practically no different from the previous method.
In this case, special attention should be paid to the choice of adhesive solution. For facing an uneven surface, it is necessary to apply glue to the finishing material in a large layer. Some types of adhesive mixtures can be applied in layers of no more than two centimeters, which in this case may not be sufficient.


It is necessary to apply the glue mixture to the material in "heaps". The distance between the glue points should be no more than two and a half centimeters. In the center, the mixture is distributed at intervals of four and a half centimeters. The slab is installed on the beams, lightly pressed against the wall, aligned vertically and pressed against the surface again.
Large deviations
On very uneven walls, it is advisable to fasten drywall to metal profiles. However, it is also possible to glue the material onto a curved surface. In this case, there is no need to cut the wall for wiring. The wires can be easily tucked into the grooves and secured. Further work is carried out in the following sequence:
- Several slabs need to be cut into separate pieces no more than fifteen centimeters wide. Such pieces will serve as the basis for the plasterboard coating. The number and length of stripes depends on the size of the room.


- The cut pieces must be glued to the walls at a distance of no more than sixty centimeters from each other.
- After the base has completely dried out of the plasterboard strips, the plates are glued onto the beacons. An adhesive solution is distributed over the surface of the installed beacons and a whole sheet of drywall is glued to the base.
We fasten the sheets together
There are times when it is necessary to glue one drywall block to another. Gluing the sheets together is not particularly difficult. Surface preparation in this case will not have any peculiarities. First, it is cleaned from dirt, then the surface is primed. If there are seams between the sheets on the old plasterboard covering, they must be repaired. It should also be noted that the seams on the inner and outer layers must not match.

Using polyurethane foam
Polyurethane foam is not often used for gluing drywall sheets.This method takes a lot of time and effort, if only because the slabs need to be well pressed against the wall every fifteen minutes for an hour.
There are several different methods of fixing drywall using polyurethane foam. The most common ways are:
- using self-tapping screws;
- sizing with the foam itself.

In the first case, in the gypsum board, using a drill, it is necessary to make holes in an amount of at least twelve pieces. Then the slab is pressed against the wall and, using a pencil, the locations of the drilled holes are marked on the surface. All marked points on the wall are drilled for plastic plugs, into which self-tapping screws will be screwed for fastening the GLK.
Plasterboard sheets are attached to the wall using screws or self-tapping screws. Several more holes are drilled near the attachment points, through which the space between the plate and the wall is filled with mounting foam.


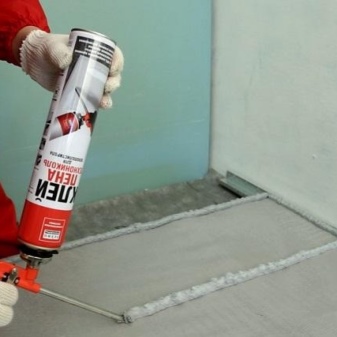
For fixing drywall sheets with foam, it is not necessary to resort to the use of self-tapping screws and drilling. But this method is permissible in the case of facing very smooth walls. Foam is applied to the reverse side of the sheet in a wave-like manner. After distributing the mixture, wait fifteen minutes and then attach the panel to the wall.
Final work
Drywall is not used as a topcoat, but serves as an even base for painting, wallpapering or any other decorative coating. After the material is glued to the walls, you need to a number of final works on surface preparation for subsequent finishing:
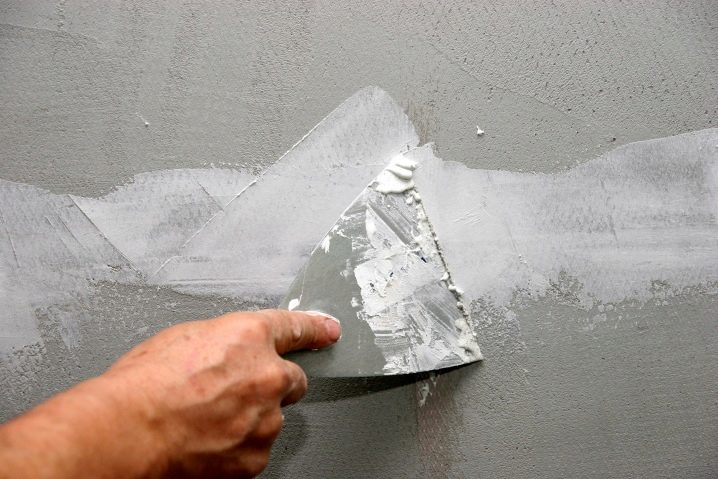
- The joints between drywall sheets must be repaired. To solve this problem, you can use various putty compositions. The joints are rubbed with a narrow metal spatula.
- Without waiting for the putty to dry completely, you need to attach the reinforcing tape.


- The second layer of putty is applied after the previous one has completely dried. Drying time depends on the type of mixture. On average, it is twelve hours.
- After the second layer of the putty mixture is completely dry, the plasterboard must be primed.
- The primed surface is completely putty.


- If the coating is not smooth enough, the surface must be primed again and a second layer of putty must be applied.
- Roughness and unevenness on the finished coating are removed with sandpaper.
- The last stage will be one more priming of the surface, after which it will be possible to proceed with the finishing of the walls.
For information on how to glue drywall to the wall, see the next video.


The comment was sent successfully.