How to make a metal rocking chair with your own hands?
A rocking chair is used to rock the person sitting in it. The swinging effect is achieved by attaching slats with rounded parts in their shape to the chair legs. The chair configuration can be different depending on its purpose and design solution. Individual stylistic features can serve as external differences. The simplest rocking chair can be made at home.
What do you need?
When making a chair, you must follow the production technology and prepare a list of everything you need. This will reduce the percentage of negative factors due to the fact that the work will be done by hand. These factors include increased costs of time, effort and materials. To complete the task, it is necessary to prepare a minimum list of basic tools:
- Bulgarian;
- electric drill;
- welding inverter;
- hammer;
- measuring instruments - tape measure, ruler, square;
- marking tools - pencil, marker, chalk;
- iron brush;
- hacksaw.

For manufacturing, you will need materials such as metal and wood.
Metal blanks:
- iron pipe with a square profile with a minimum section of 30x30 mm;
- furniture bolts with rounded caps and anti-scrolling stops;
- nuts.
Wooden blanks:
- slats with minimum dimensions of 10x45 mm;
- other related wood materials.
It is allowed to use workpieces with dimensional characteristics other than those indicated. This is due to the fact that each chair project is tailored to the individual needs of the user.
To complete the process, you need to prepare the required amount of consumables:
- drills for metal and wood;
- sandpaper of various grain sizes;
- grinder discs - cutting and grinding;
- electrodes;
- paints and varnishes;
- other related consumables.

Consumables are materials that are gradually consumed or worn out during the manufacturing and processing of an item. Their consumable quantity and name depends on the totality of the characteristics of the project.
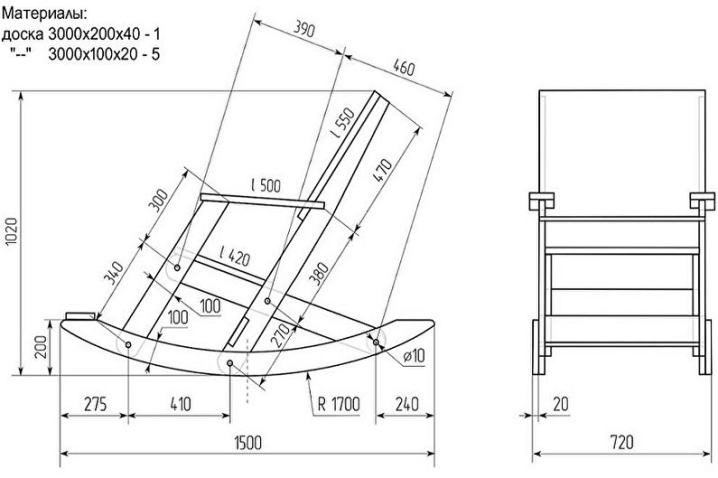
Drawings and dimensions
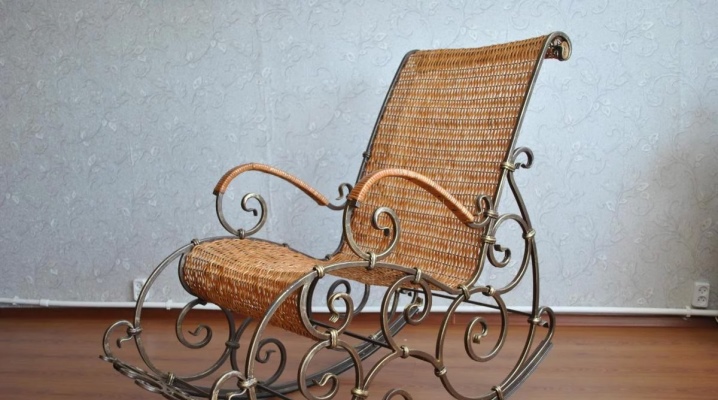
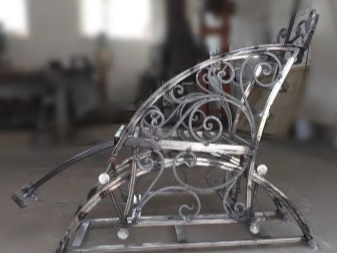
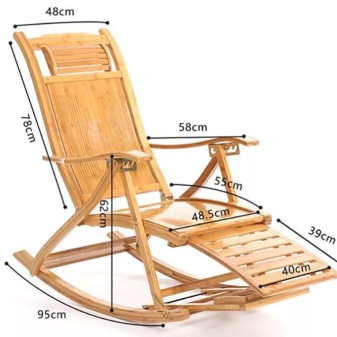
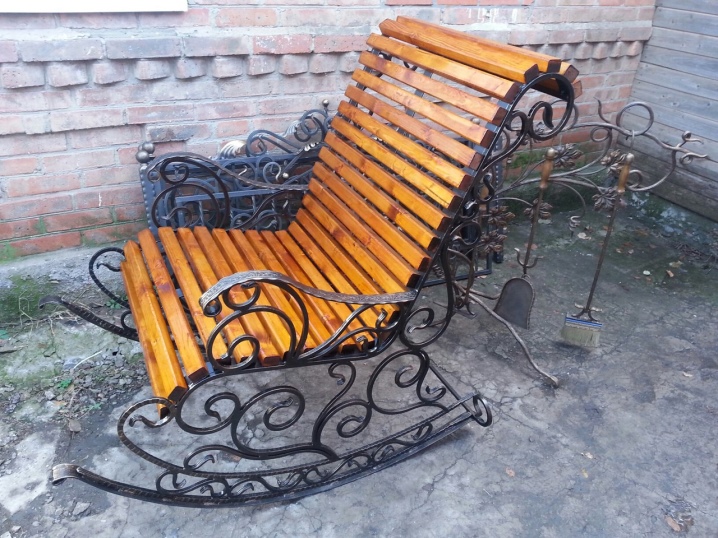
To make a chair yourself, you need to prepare a drawing. This will help to make the product with exact observance of the dimensional parameters and observe the design rules, adhering to the style. The photo shows a modification of the chair, the manufacture of which is the simplest., which puts it in the list of the first models that can be made at home. The general nature of the drawing scheme can be free. However, the parameters of individual parts of the structure must be indicated with maximum accuracy and respect for proportions.
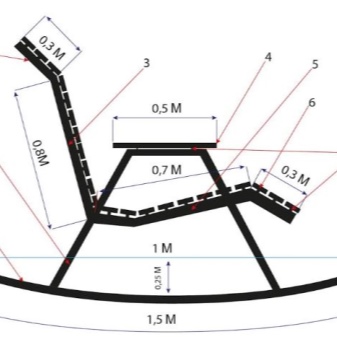
The diagram shows an option for designing an armchair of this model. According to it, the design of a rocking chair can be divided into two main components: a load-bearing or supporting part and a landing part. The sizes of the individual areas of the second part may vary depending on the needs of the user, but their ratio should be harmonious. This drawing shows a diagram of a chair designed for an adult of average height and weight.
Operating procedure
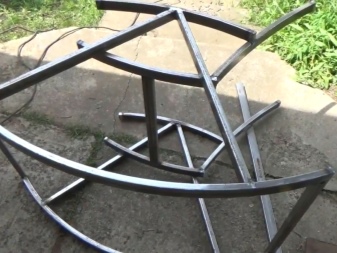
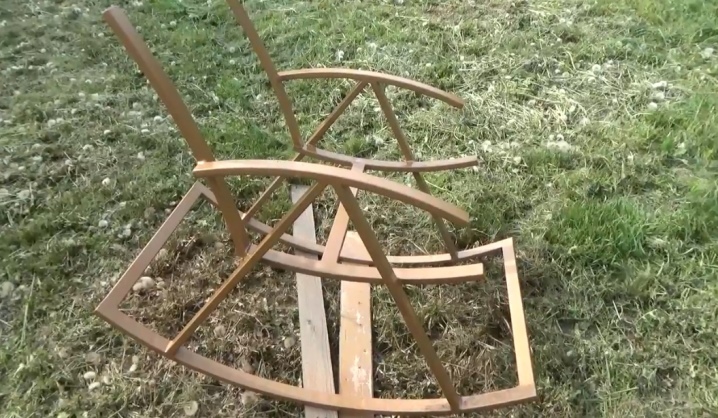
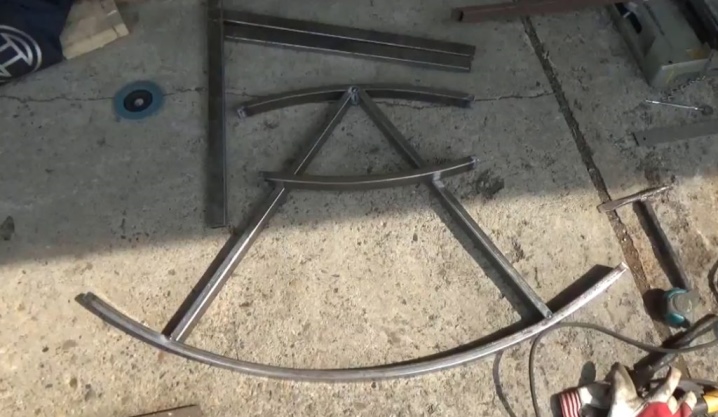
At the initial stage, it is necessary to prepare individual structural elements - details. First of all, the preparation of metal components is performed, since work with them is more time-consuming. For the workpiece, you need to saw off the pieces of the desired length from the iron pipe, the value of which is indicated in the drawing. Since the pendulum chair is adapted for swinging, the lower planks resting on the floor should have semicircular areas, which implies sawing off the primary workpiece with a margin of length, since it will decrease after giving it a semicircular shape.
You can give the strips a bend using a specialized pipe bender. If one is not available, bending can be done by hand. To do this, a piece of pipe must be clamped in a vice or between two stationary objects and begin to bend. To maintain uniformity, it is necessary to perform the actions step by step: apply an effort to bend, move the workpiece forward by 10-15 cm, repeat the effort. This must be continued until the corresponding semicircle is obtained. To achieve identity for both planks, you can tape them together with tape. In this case, they should be located as parallel as possible relative to each other.
When the iron parts are prepared, it is worth cleaning them from rust, oxidation and other deposits. This will increase efficiency during welding and make it easier to paint the frame.
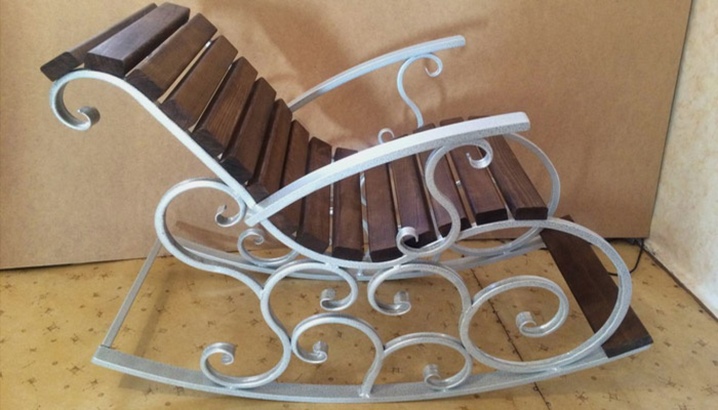
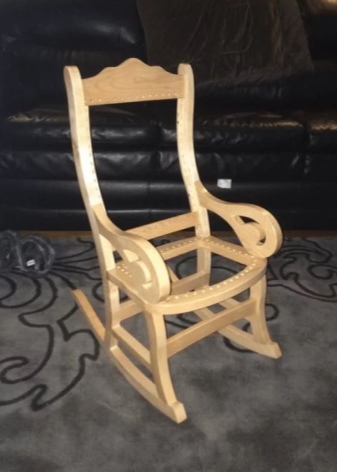
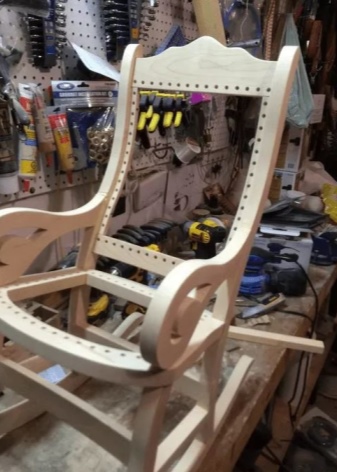
Next, the wooden slats for the seat and back of the chair are prepared. For this, the main workpiece is cut into segments, the length of which is indicated in the drawings. Dimensional parameters of various elements - the main part, armrests and protective inlays on semicircular supports - must be identical for their group. After that, each component of the timber frame is processed for preliminary preparation. As part of these manipulations, grinding, jointing, drilling holes for fasteners, processing with paints and varnishes and other actions are performed.
The next step is to assemble the prepared parts.
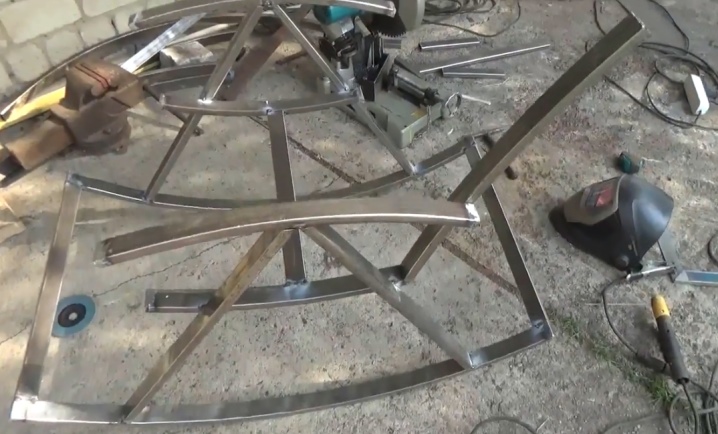
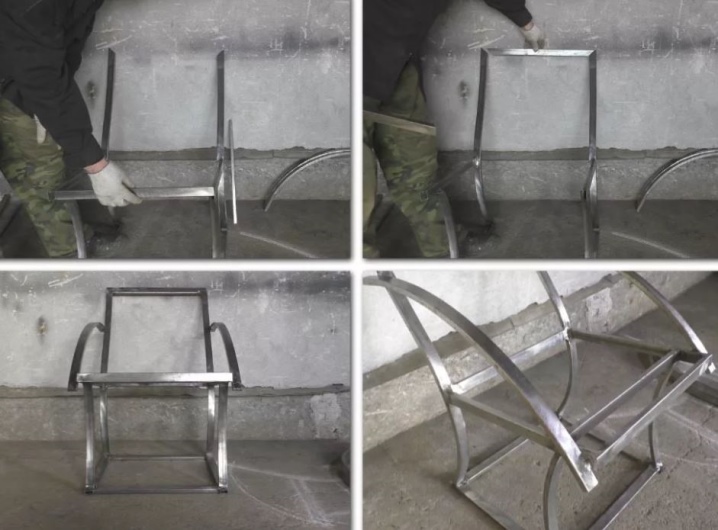
Frame
The frame is mounted first. With the help of a welding machine, metal blanks are connected. The work is carried out sequentially, which allows you to achieve maximum symmetry and even shape. First, one side of the chair is welded. One-piece racks are welded to the semicircular support. In the profile projection, the resulting product will look like a trapezoid with rounded upper corners, and its base will look like a semicircle and edges protruding beyond the perimeter of the figure.
The second half of the chair is made according to the template of the first one. To do this, the first side is laid on a flat surface, and the blanks from which the second side will be cooked are applied to the template in the appropriate places. At this stage, it is possible to correct the discrepancy between the dimensions of the parts and deviations in the coincidence of their shapes. When both sides of the chair are ready, they must be connected by means of jumpers prepared in advance. The length of these jumpers should be the same as the final seat width of the seat. When joining two sidewalls, it is necessary to observe perpendicularity and check the presence of right angles between the workpieces. This will allow the assembly to be carried out as smoothly as possible.
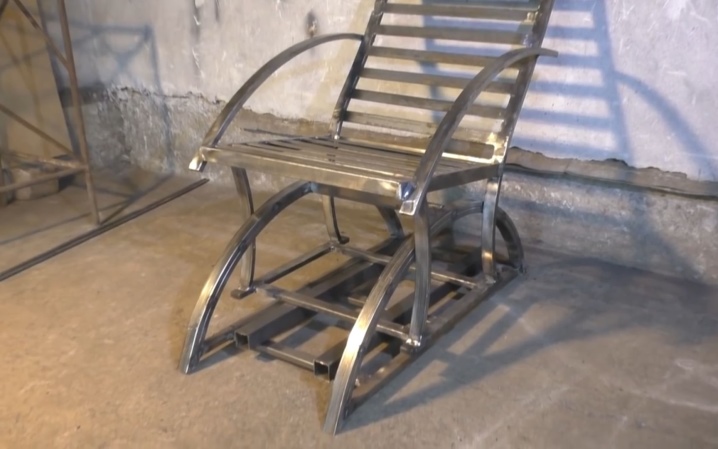
Seat
The wooden slats used to form the seat and backrest are screwed onto the frame. To do this, holes must already be drilled in them at the corresponding attachment points. It is recommended to number the planks in the order of their location. After that, applying each workpiece to its location on the frame, marks are placed on it for drilling holes. You can complete the entire layout and then start drilling. Upon completion, each plank is bolted to the frame. In this case, the fasteners are tightened until the bolt head falls below the surface of the wooden blank.

Painting
Staining is carried out in stages.The metal frame must be painted over before the strips are attached to it. This allows you to make the painting more complete and high quality. Wood components are also painted in advance, but can be re-painted after assembly. The color combination is selected in accordance with the stylistic characteristics of the room. In some cases, it may be advisable to cover the homemade chair with varnish, which will prevent damage to the wood.
For information on how to make a rocking chair out of metal with your own hands, see the next video.


The comment was sent successfully.